Welcome!
Thank
you
for
buying
this
multi-media
car
audio
system!
To
operate
the
system
correctly,
please
read
the
operational
manual
carefully
before
using
the
unit,
keep
these
instructions
and
retain
this
booklet
for
future
reference.
About
this
manual!
This
unit
features
a
number
of
sophisticated
functions
ensuring
superiors
operation.
All
the
functions
have
been
designed
for
the
easiest
possible
use
,but
many
are
not
self-explanatory,this
manual
will
help
you
understand
the
functions
and
operations
of
the
unit.
This
manual
mainly
explains
remote
control
operation.
However,
in
addition
to
those
functions
related
with
DVD/VCD/CD/MP3
operation
that
can
only
be
operated
by
the
remote
control
,there
are
also
functions
can
be
operated
by
the
buttons
provided
for
the
main
unit.
CONTENTS
Notes
on
Installation
"nnne
nnne
nennen
nnne
3
Precautions
Features
ананна
P
A
E
T
A
A
EE
5
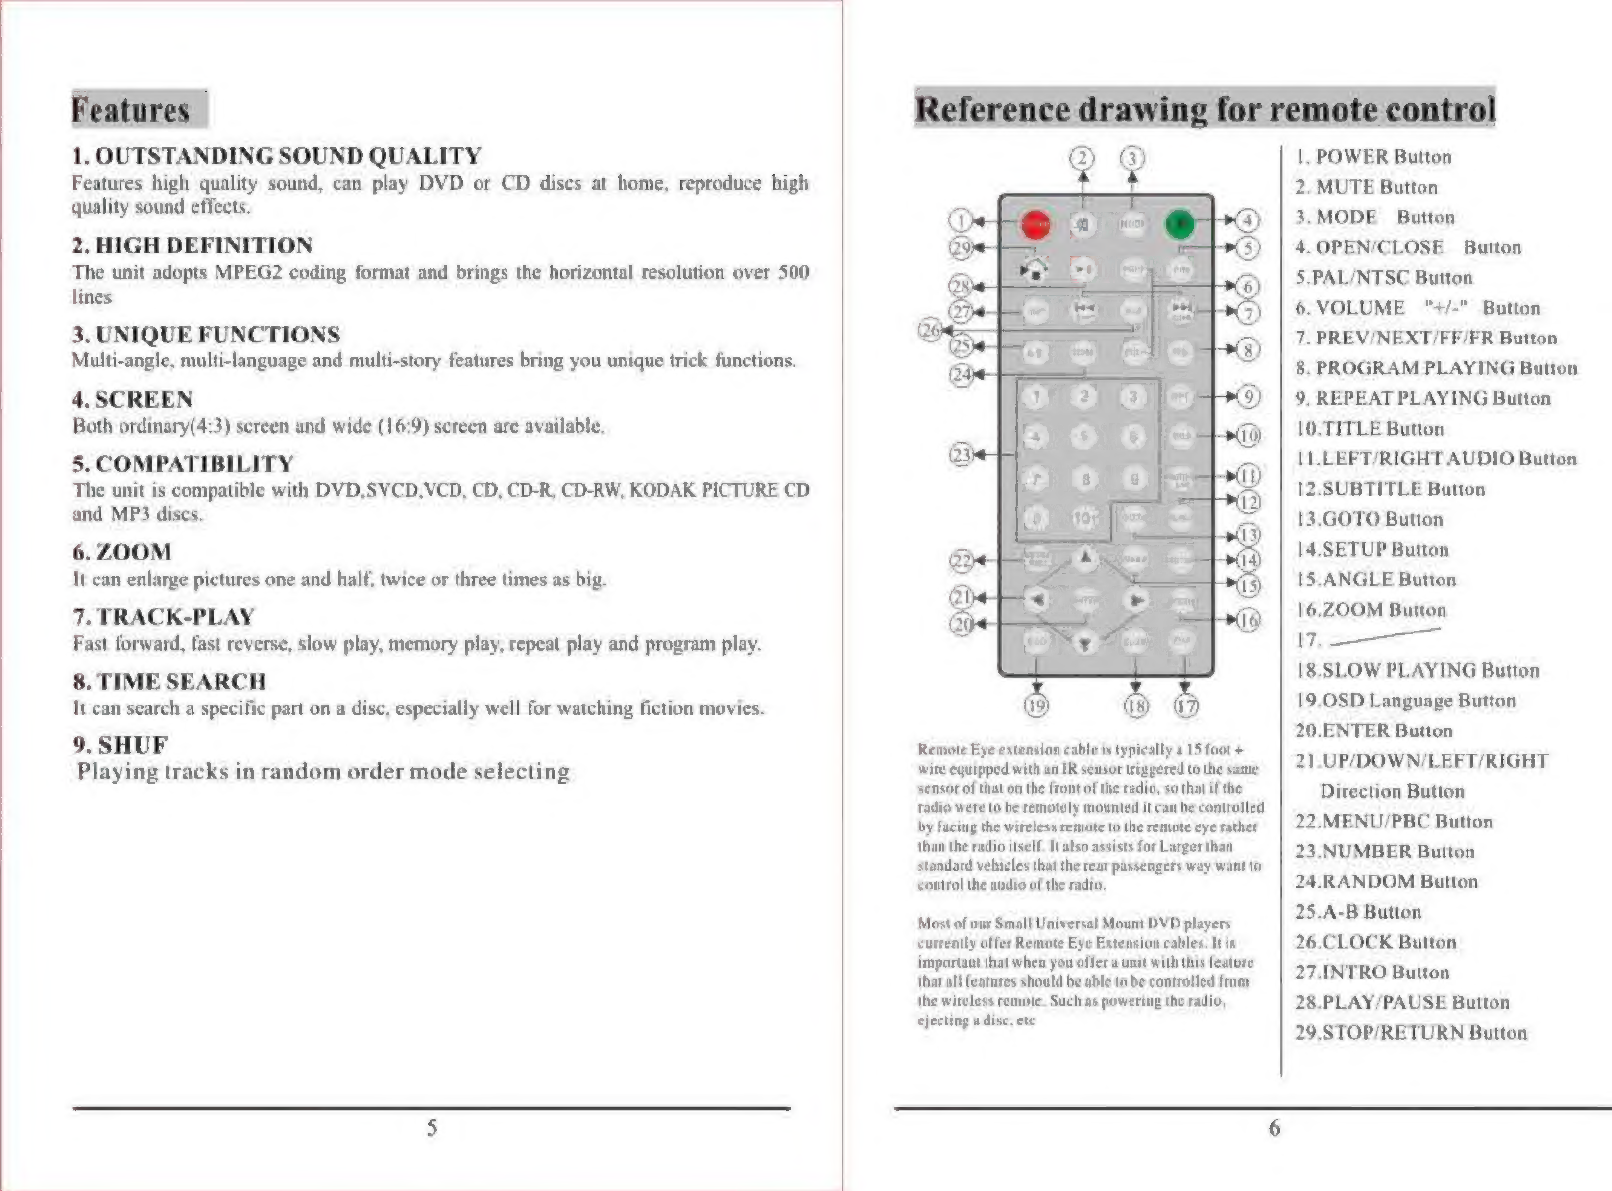
Reference
Drawing
For
Remote
Contro]
«ntn
nnn
6
Reference
Drawing
For
Front
Panel
„еен
7
Reference
Drawing
For
Layout
(Back
Side)
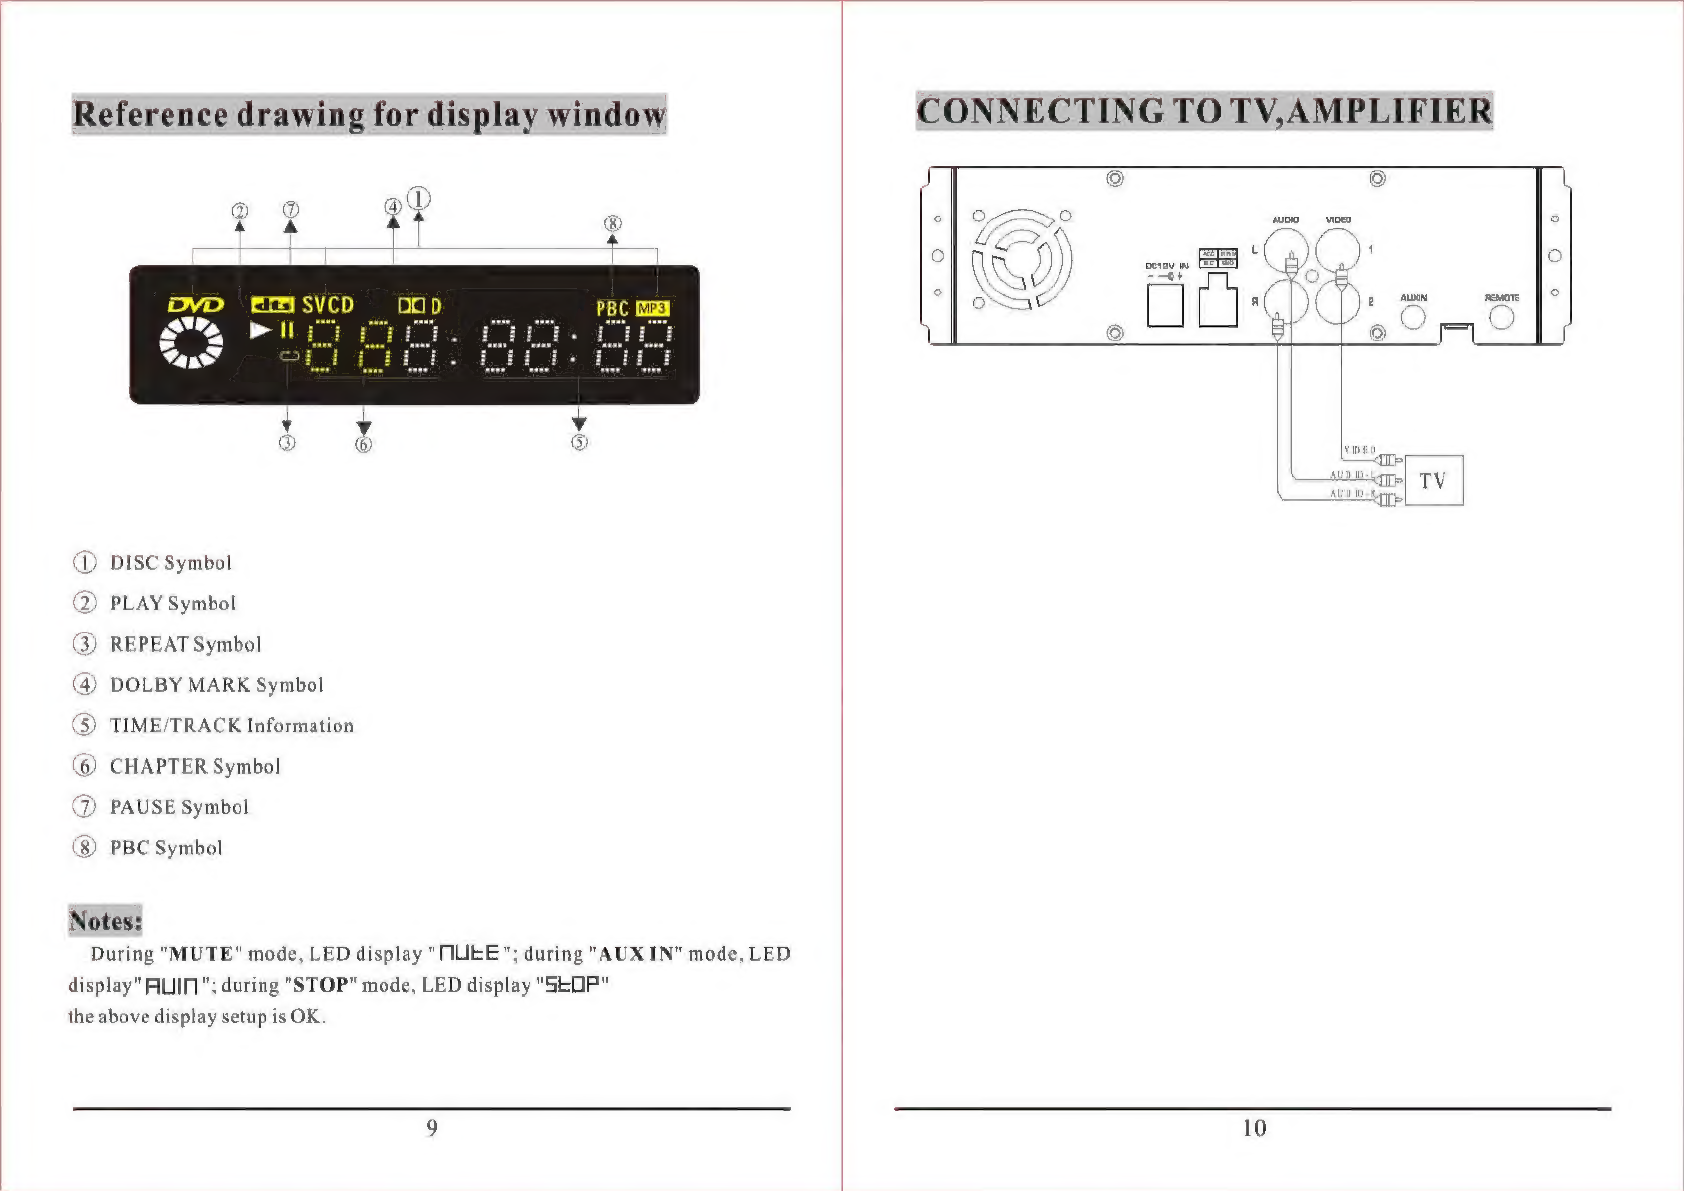
Reference
Drawing
For
Display
Window
О
«nnne
9
CODEC
TOOP
SUR
AGITUR
MOUSE
10
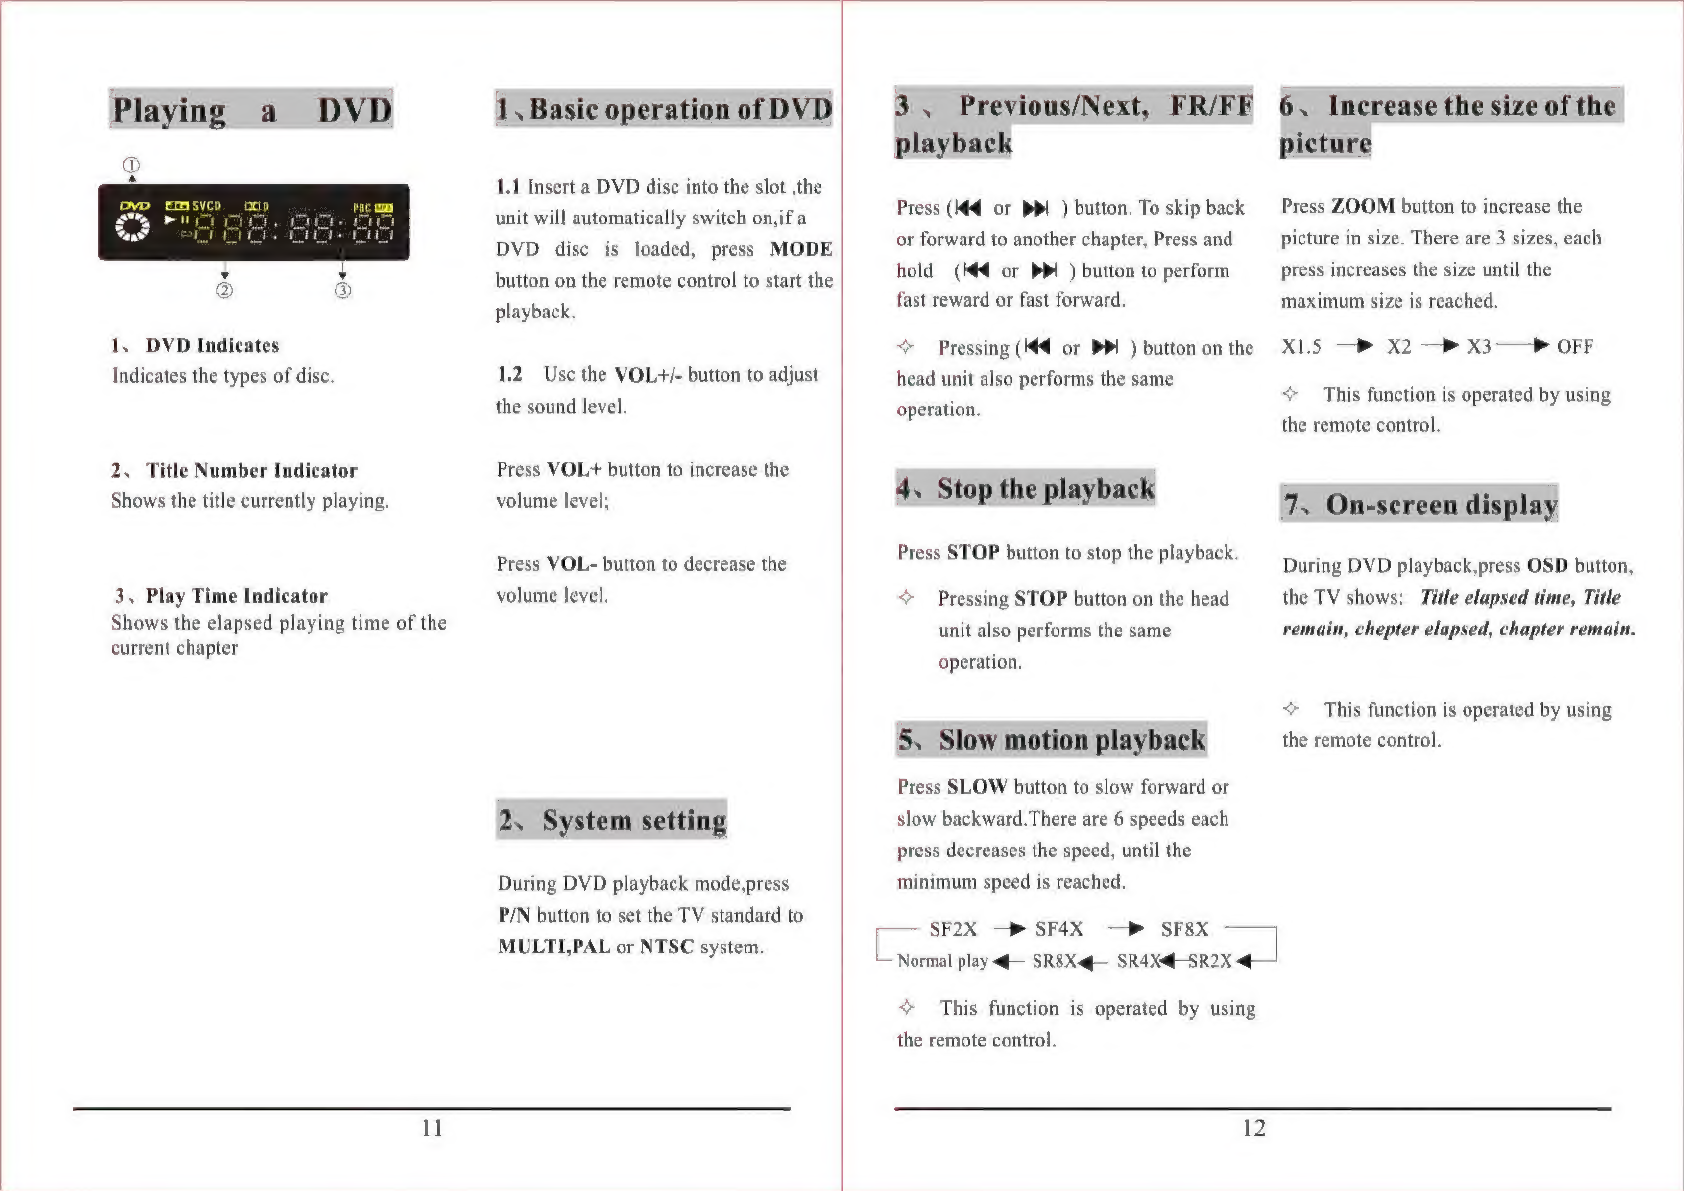
Playinga
DVD
о
eee
nennen
12.
Playing
a
МРЗ
"+19
Playing
a
УСЮ.
CD
smsonreensrennsennsssensssennsnnnnennussensseonssnansseonsennsssensennne
23
Installation
О
чечет
ынын
ннн
27
MAEEOHAUE
:s0insasseosearnasnconpsaczsenssnesnonegsononusonaennapaceansasntensiniinenceinnsspeine
28
Specification
e
———
29