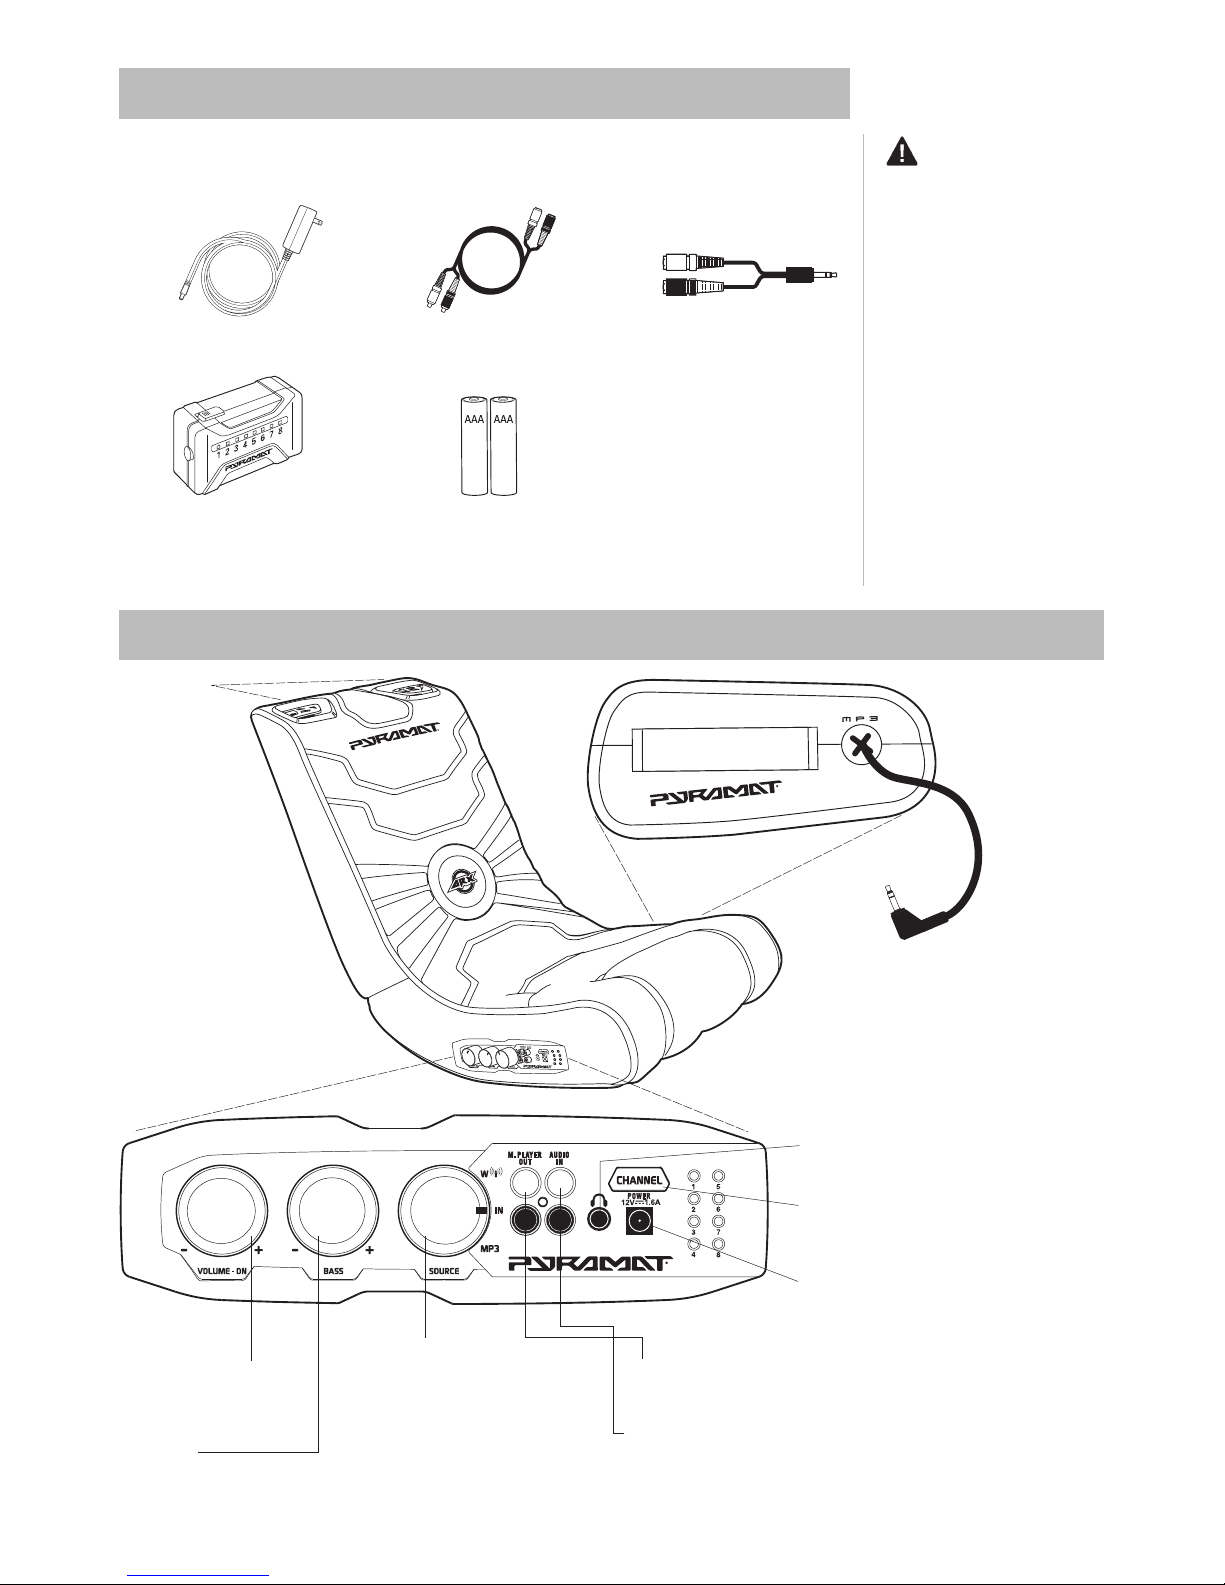
WIRELESS CONNECTION METHODS
5
Video Game Console Connection Cables
XBOX 360®, PLAYSTATION 2®, PLAYSTATION 3®, GAMECUBETM and others
There are five types of audio/video cables that come with video game consoles:
1. Standard AV/RCA Cable
(red, white–audio; yellow–video)
2. High Definition AV/RCA Cable
(red, white–audio; yellow, blue, red, green–video)
3. S-Video AV/RCA Cable
(red, white–audio; yellow, black–S-video)
4. Coaxial Cable
(single black cable)
5. HDMI Cable
(single cable)
Note: If you have a coaxial cable
or HDMI cable, you will also need
to purchase a male to male RCA
audio cable from the console
manufacturer or electronics retailer.
Yellow video cable
VIDEO
GAME
CONSOLE
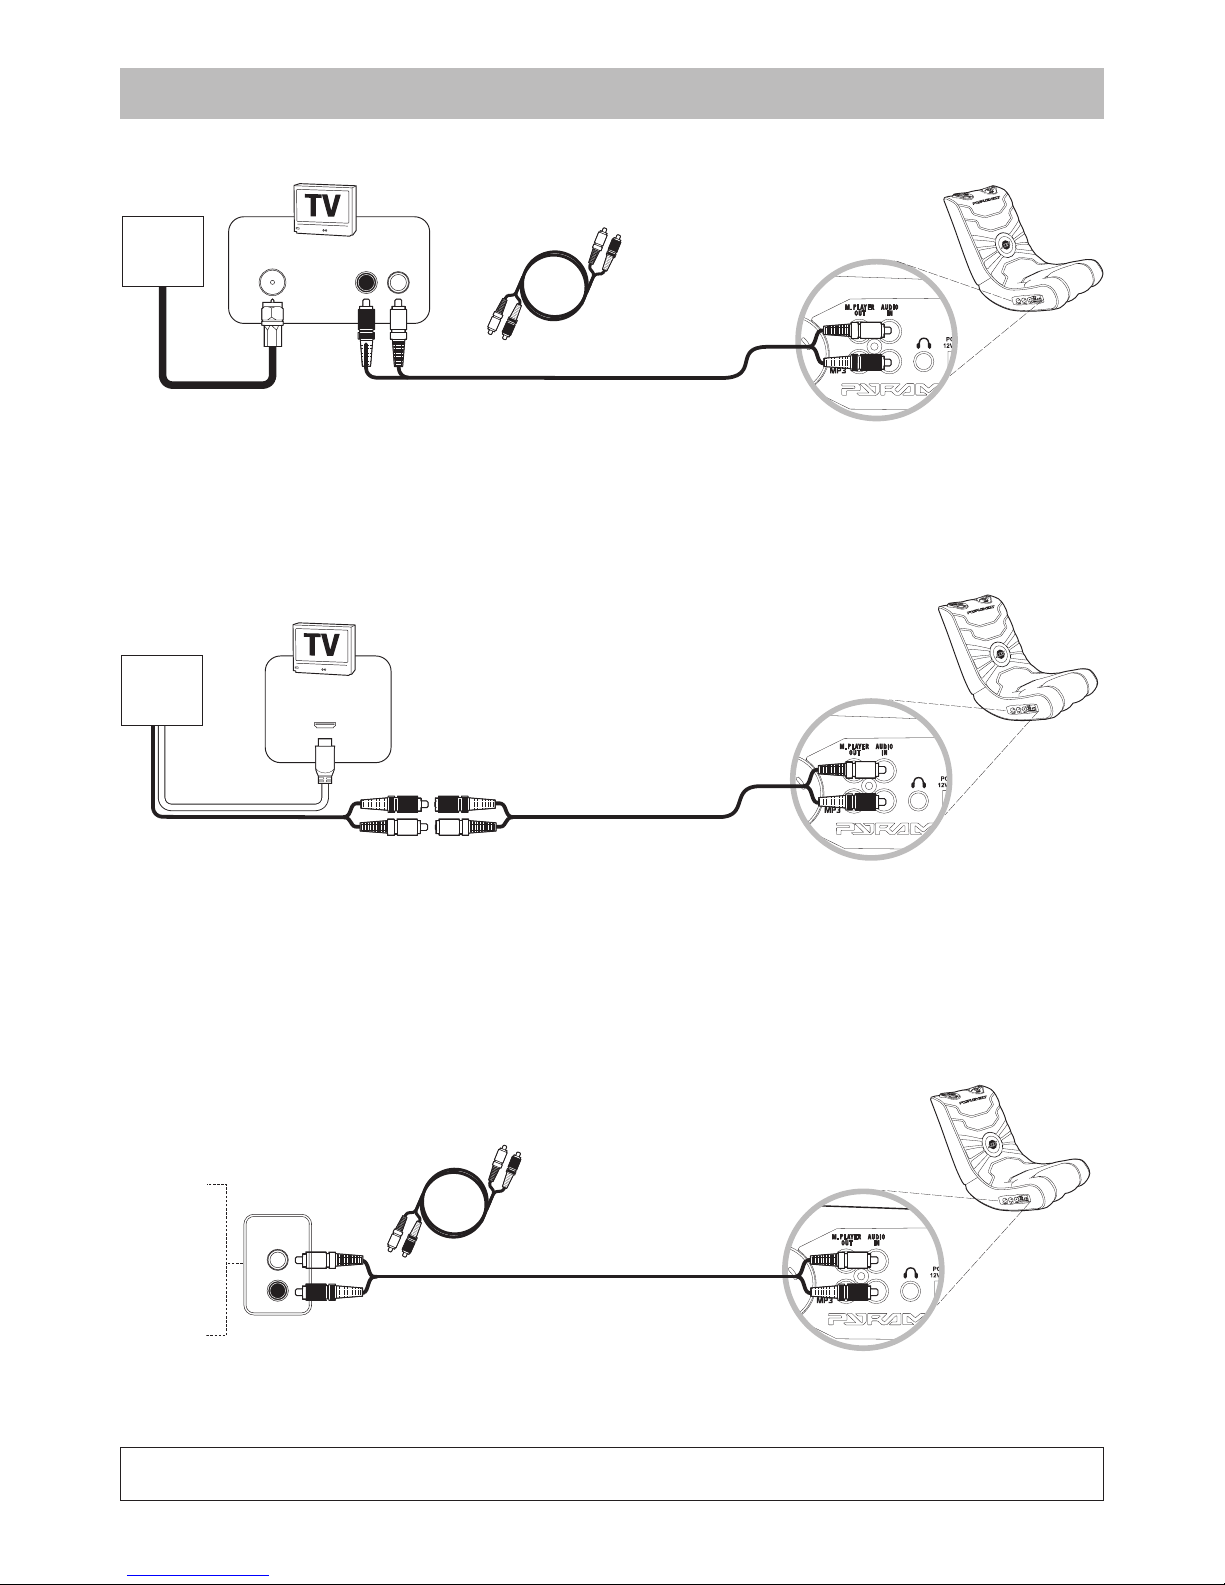
AV/RCA Cable Connection
For standard AV/RCA cable, high definition AV/RCA cable and S-Video AV/RCA cable.
2Connect the RCA audio cables
from the video game console to
the RCA to mini audio cable.
3Connect the 3.5mm mini cable to
the INPUT port on the transmitter.
1Follow the instructions from the
video game console’s manufacturer
to connect the video cable(s) from
your video game console to your
television.
Note: Depending on your
connection, there may be more than
one video cable from your video
game console.
VIDEO
INPUT
RCA to mini audio cable
VIDEO
GAME
CONSOLE
Coaxial cable
You will need
male to male RCA cables
(not included)
Coaxial Cable Connection
If you have a coaxial cable, you will also need to purchase a male to male RCA audio cable from an electronics retailer .
2Connect the male to male
RCA audio cable (not included)
to the AUDIO OUTPUT source on
the TV.
4Connect the 3.5mm mini cable
to the INPUT port on the
transmitter.
1Follow the instructions from the
video game console’s manufacturer to
connect the coaxial cable from your
video game console to your television.
3Connect the RCA audio cables
from the TV to the RCA to mini
audio cable.
COAXIAL CABLE
INPUT
AUDIO
OUTPUT
Note: If you do not have an
audio output on your TV you
will need to purchase an
AV/RCA cable from the video
game console manufacturer
to replace the coaxial cable.
RCA to mini audio cable