®
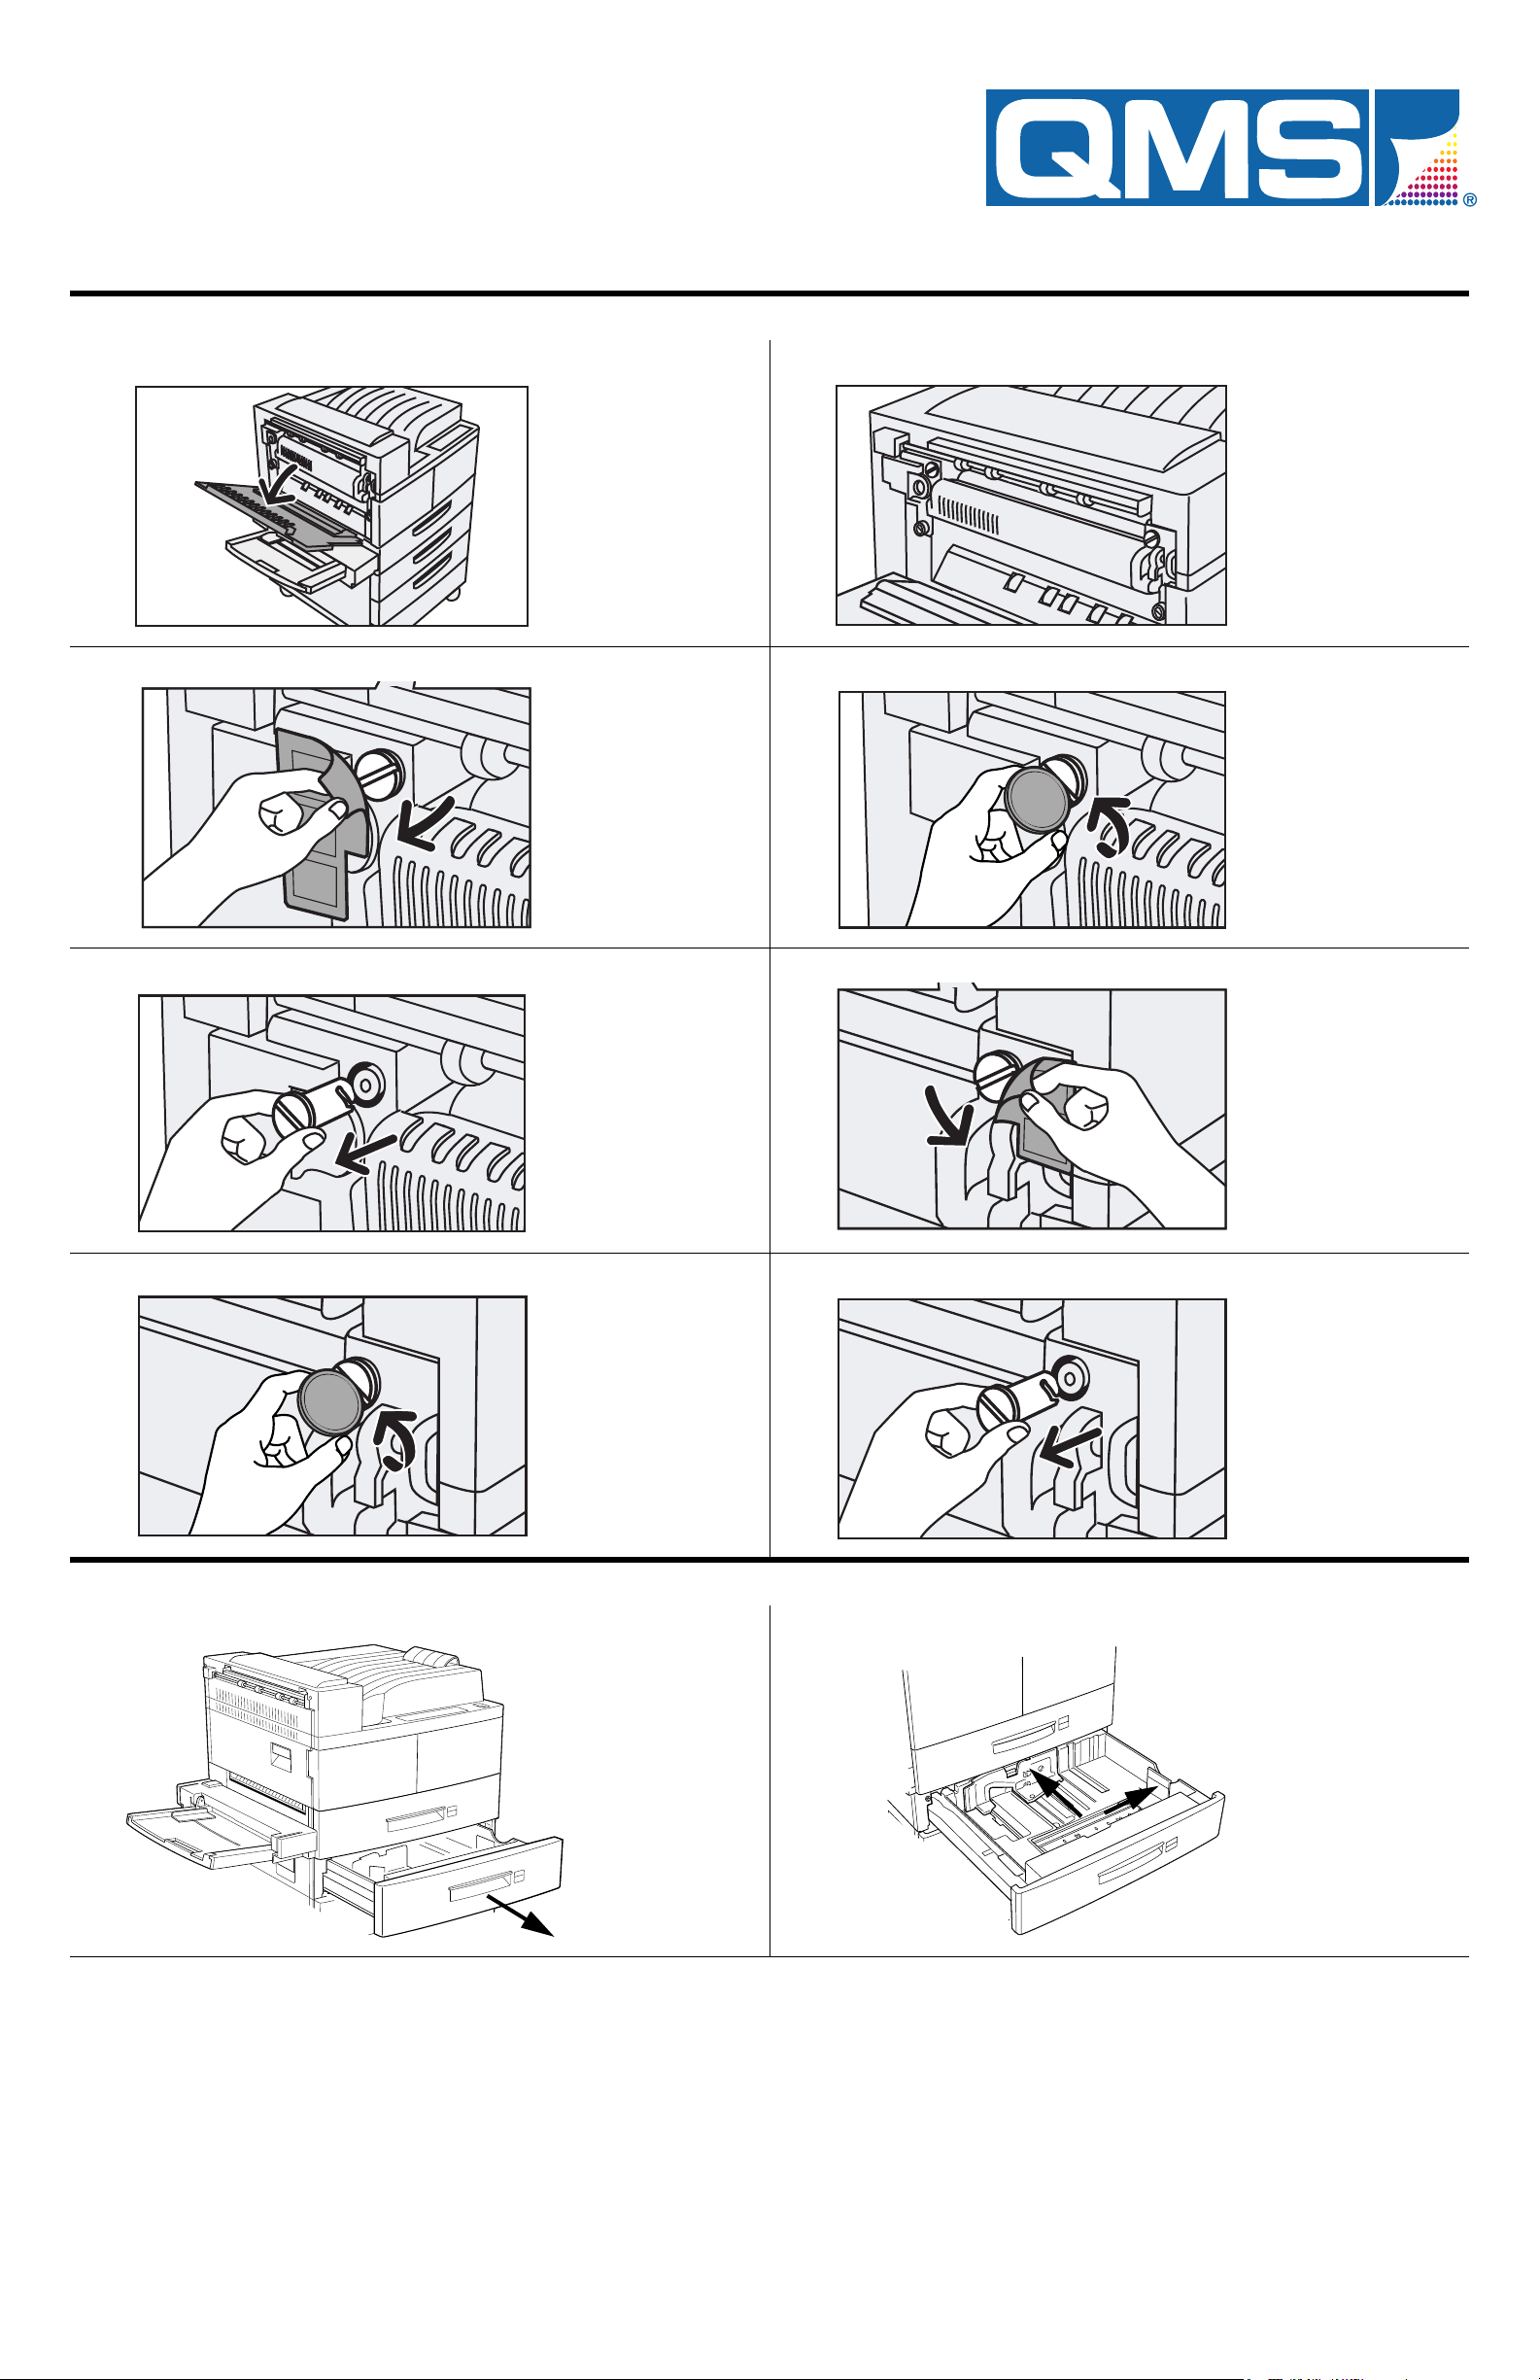
3Align the four
corners of the
paper and place
it in the tray. The
paper should fit
easily between
the guides.
Make sure the
paper is not bent
upward by the
guides and does
not exceed the
maximum limit
marks.
4Adjust the side
guide and the
length guide to
the edges of the
paper stack.
Insert the
correct paper
size label into
the slot on the
front of the tray,
then push the
tray back in until
it latches.
$
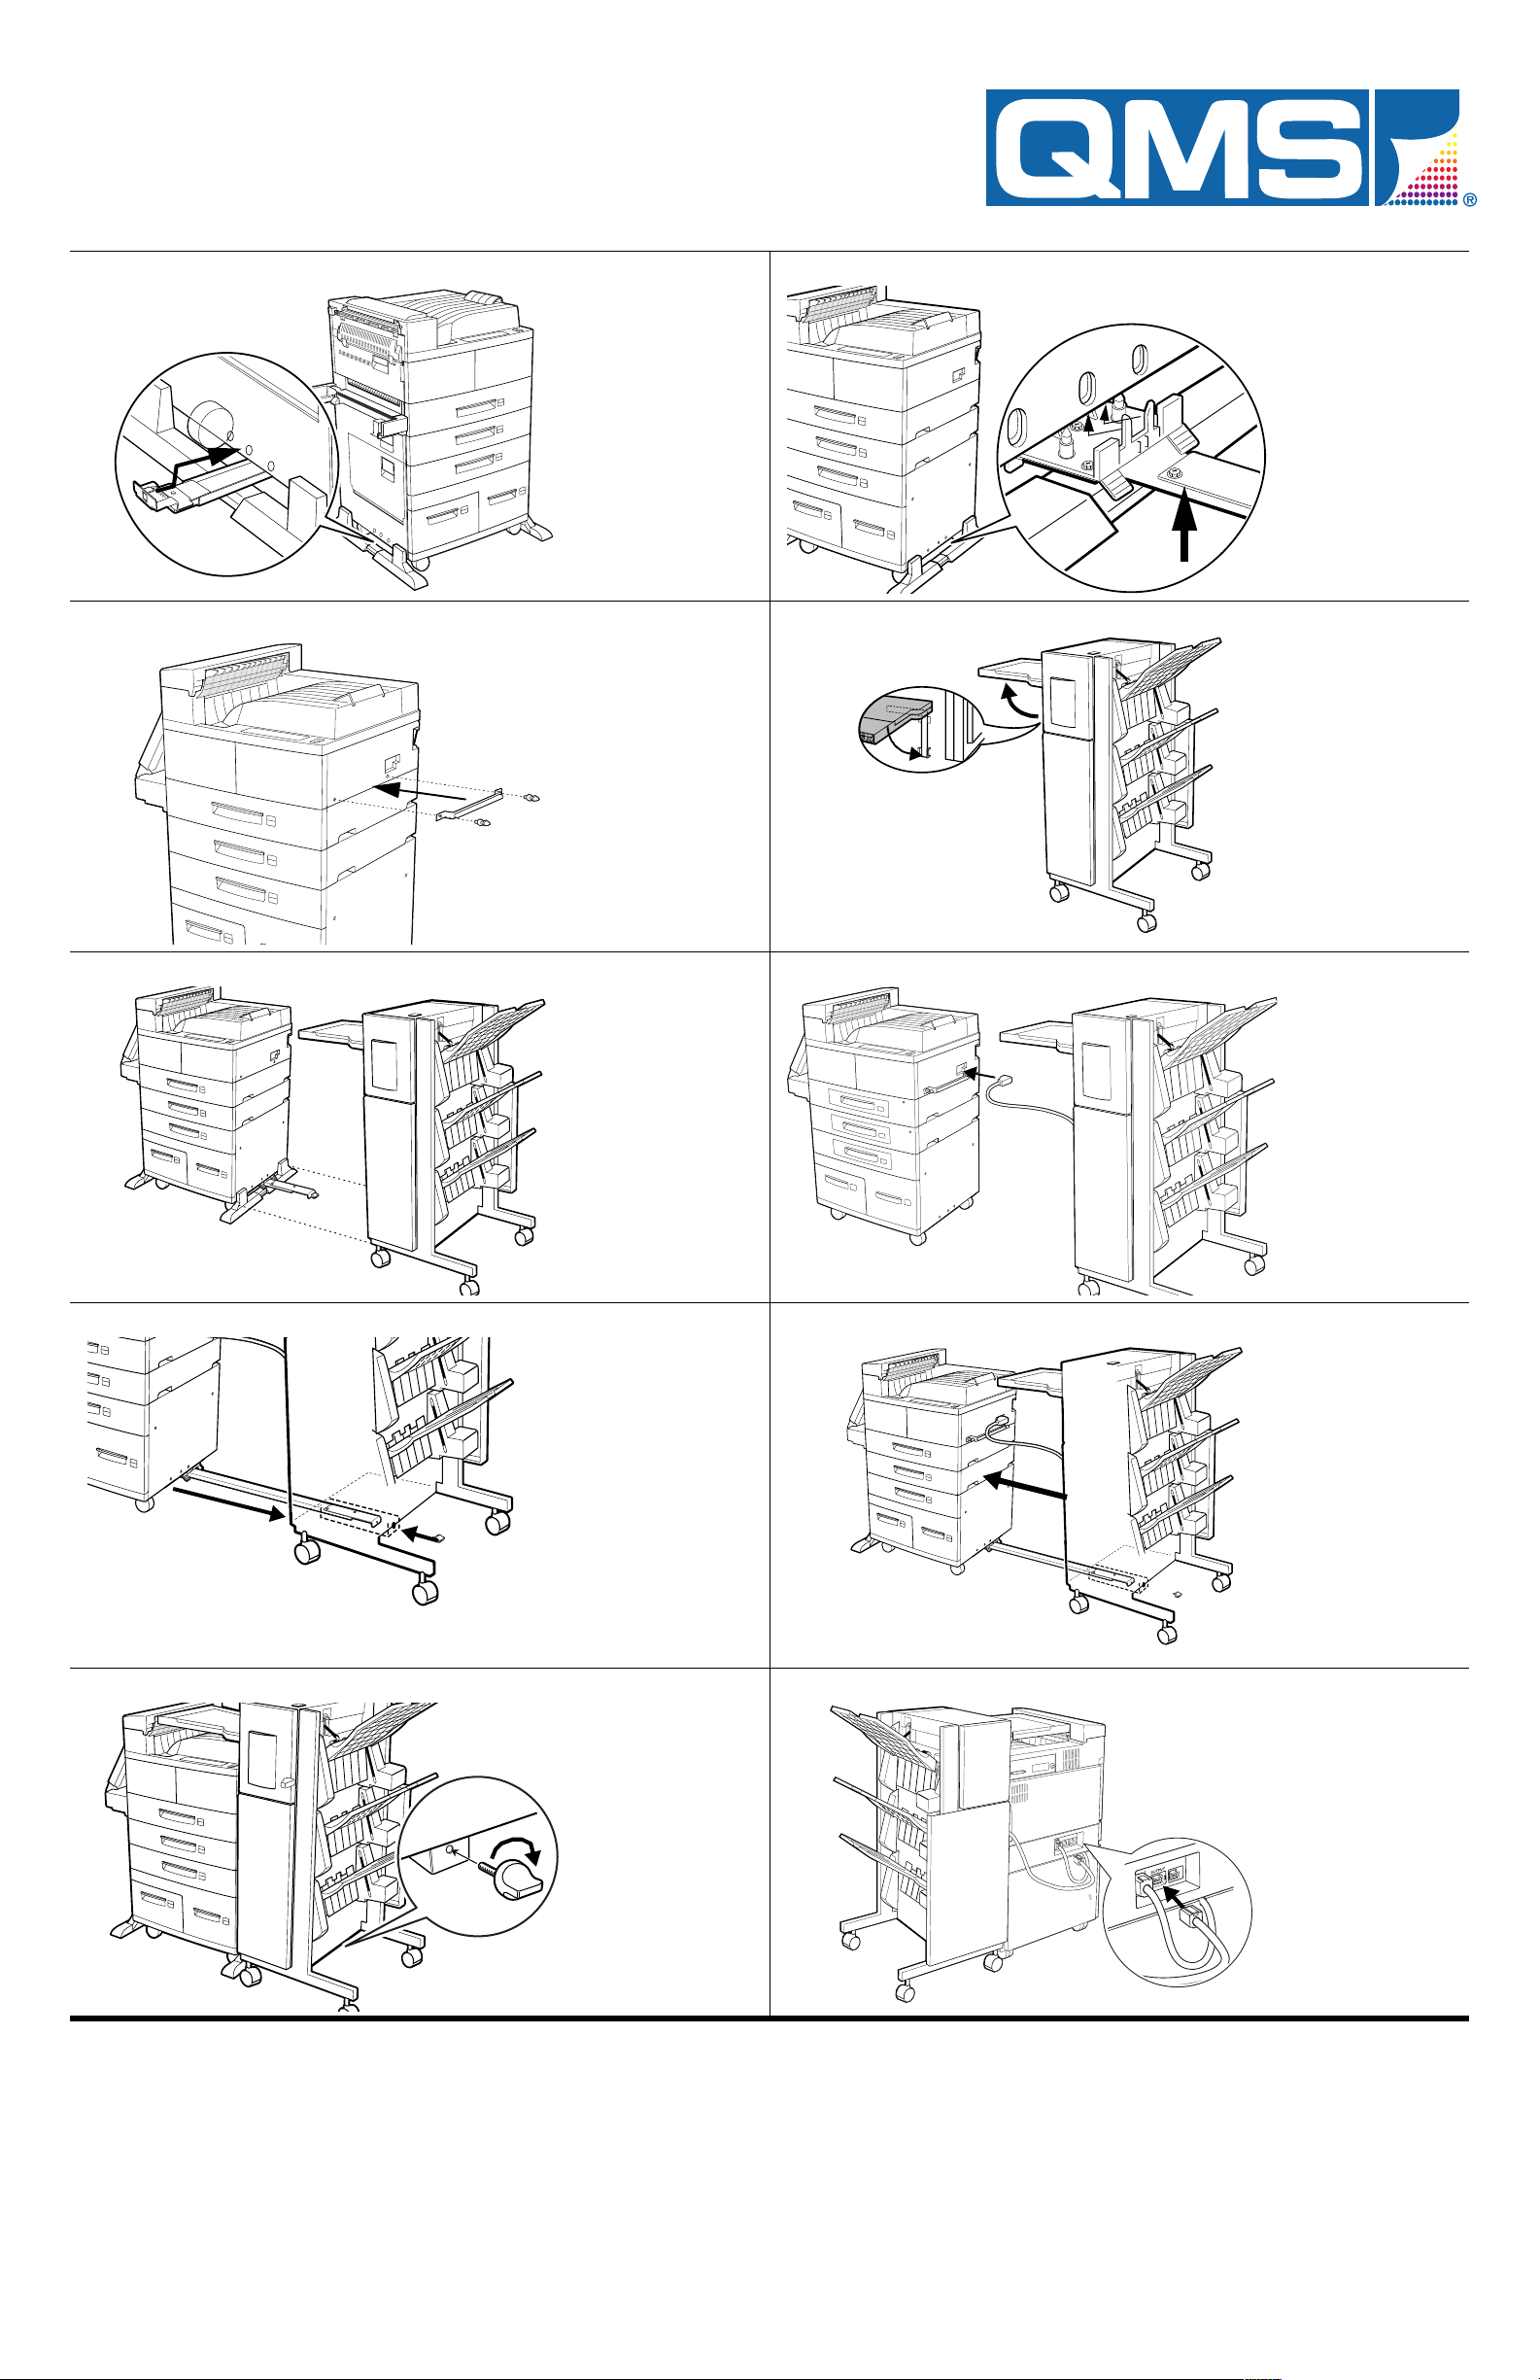
1Connect your
printer to the
appropriatehost
communications
cable.
2Connect the
power cable to
the printer and
then plug the
printer into the
appropriate
power supply.
Turn the printer
on.
!%
1See the
Getting
Started
manual
for instructions
on installing the
QMS printer
driver.
Use the on-line
help to configure
the driver for
printing.
2See the
Getting
Started
manual
for complete
instructions to
configure the
printer through
the front panel
menus.
!
Operate the printer within a temperature range
of 50°–90.5° F (10°–32.5° C) and a relative
humidity range of 20%–80%.
Install the printer on a hard, level surface
capable of supporting the 91 lb (41 kg) printer.
The printer must be placed within 1.5° of level.
Allow enough space around the printer to allow
adequate ventilation and easy servicing.
Use a properly grounded AC outlet with a line
voltage of 100 V, 120 V, or 220-240 V, ±10%.
Maximum electrical current required during
operation is 10 amps for a 100 V system, 8.3
amps for a 120 V system, and 4.5 amps for a
220-240 V system.
Recommended frequency is 50–60 Hz ±2 Hz
for a 100 V system, 60 Hz ±2 Hz for a 120 V
system, and 50 Hz ±2 Hz for a 220-240 V sys-
tem.
WARNING!
The printer weighs approximately
91 lbs (41 kg) without consumables. Do not
attempt to lift the printer by yourself.
ACHTUNG!
Der Drucker hat ein Gewicht von
ungefähr 41 kg. Bitte versuchen Sie niemals,
den Drucker alleine anzuheben oder zu
transportieren.
Administration
Idle
Operator
Installation*
Copies 001-999
Duplex Off, On,