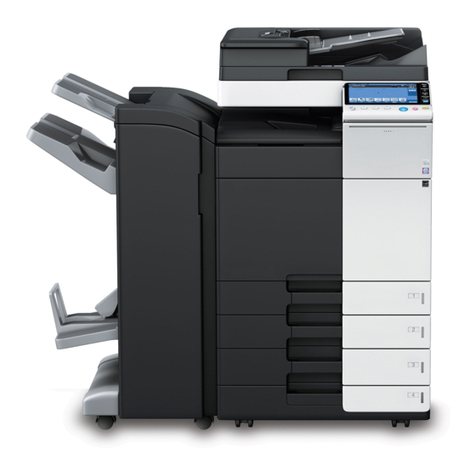
Ricoh Di-C1 User manual

Di-C1 Training
1
Slide 1
MODEL Di-C1 TRAINING
Machine Codes: D037/D038/D040/D041
COPIER ENGINE
INTRODUCTION
HOW TO USE THIS PRESENTATION
This TTP (Technical Training package) will help you train service technicians
on the model Di-C1/C1L.
You can use this guide in three ways:
As a check list to make sure you have covered all the important points
As a set of ordered notes taken from the service manual, operation manual,
and other sources. Sometimes, the ideas from other manuals have been
reworded or reorganized for clarity.
As a source of information that is not included in any of the other manuals.
This may include technical details of the machine’s hardware or software, or
background knowledge of technologies used in the machine. This information
can be taught to the trainees if you feel that they will benefit from it, but some
of it may be too technical for routine field use. This information may also help
you answer questions from the class.
Caution: Do NOT give copies of this TTP to anyone other than trainees,
technical training staff, technical support staff, and management personnel.
In particular, do not reveal this information to competitors.
Changed slides 30, 33, 41, 60, 83, 125, 127,
132, 173, 175, 178, 200, 201, 203, 204, 205,
206, 209, 214, 218, 228, 234, 235, 247, 348,
371, 373
1.117-11-2008
DescriptionVersion HistoryDate of change

Di-C1 Training
2
PREPARATION CHECK LIST
Provide the relevant manuals and any additional handouts you feel are
necessary. Special tools are listed in the Replacement and Adjustment
section of the service manual.
Description Quantity Remarks
Field Service Manual 1 per trainee Give copies to the trainees
Operation Manual 1 per trainee Give copies to the trainees
Training Schedule 1 per trainee Give copies to the trainees
Training machines 1 for every 3
trainees Have the trainees
completely install these
during class.
Special Tools 1 set per
machine As necessary
Computer 1 per student Used for testing the
printing and document
storage.
The operating system
should be one of the
following:
2000/XP/Vista/2003/2008
Network 1 The computers must
connect to the copier via a
TCP/IP network, or a
Wireless LAN network and
Wireless LAN board.

Di-C1 Training
3
Slide 3
Objectives
Install the machine and its peripherals in the
field.
Understand and perform routine maintenance.
Understand the PM table.
Understand the important SP codes.
Troubleshoot and repair this product in the field.
ORIENTATION
Provide the trainees with information about the training course procedures,
facilities, objectives and rules.
Introduction of instructors
Introduce yourself to the class, and any other instructors who will be taking
part. Tell them who to talk to if they have any problems.
Introduction of trainees
Distribute a list of those attending the course.
Try to generate a friendly and relaxed atmosphere, and encourage the class
to get to know each other.
If it will help, have the trainees introduce themselves (name, company, work
experience).
Explanation of curriculum
Pass out copies of the training schedule
Impress the importance of getting to the class on time
Go over the course objectives (key points listed on the slide).
Explanation of training center rules
Explain the general rules of your training center (smoking, breaks, use of
facilities, etc.)
Explain the tools and equipment available at the facility.
Impress on the trainees that they should not touch the machines until the
instructor says so, and that they are responsible for replacing tools and
keeping the classroom in order.

Di-C1 Training
4
Slide 4
Di-C1 TRAINING
COPIER ENGINE
COURSE OVERVIEW
The course is broken up into several modules. This section outlines these
modules.
The course covers the copier and the optional peripherals. Connectivity is not
covered in this course.

Di-C1 Training
5
Slide 5
Course Overview - 1
Product Outline
Specifications
Installation
Machine Overview
Scanner
Laser Exposure
PCDU
PRODUCT OUTLINE
The model will be introduced to the class.
The optional peripherals will be introduced to the class.
The product concept, sales points, and targets will be presented.
SPECIFICATIONS
The main specifications will be outlined. Significant items will be stressed.
INSTALLATION
The class will install their machines and the peripherals.
The class will learn how to access SP modes and user tools.
The class will study how to upgrade the firmware.
MACHINE OVERVIEW
The components will be discussed.
The paper feed path and copying process will be outlined.
The machine's organization and overall PCB structure will also be covered.
SCANNER
The scanner mechanism will be discussed.
LASER EXPOSURE
The laser diode circuits and laser optics will be described.
PCDU
This section explains the components of the PCDU.
All the image-creation processes around the drum, including development,
are covered in this section.

Di-C1 Training
6
Slide 6
Course Overview - 2
Process Control
Toner Supply
Transfer
Paper Feed
Fusing
Paper Exit
Duplex
PROCESS CONTROL
This section explains the basic points about how the machine controls the
copy process to compensate for changes in operating conditions.
Toner supply control, and toner near-end/end detection are covered in this
section.
TONER SUPPLY
The toner supply mechanism will be described.
Toner supply control, and near-end/end detection are covered in the process
control section.
TRANSFER
Image transfer, paper transfer, and paper separation will be described.
PAPER FEED
The paper feed mechanism for the main body will be described. The optional
tray units will be dealt with in later sections.
FUSING
Fusing will be described.
PAPER EXIT
The paper feed out mechanisms will be described.
DUPLEX
The duplex mechanisms will be described.
The duplex unit is a standard component of this model.

Di-C1 Training
7
Slide 7
Course Overview - 3
Options
ARDF (standard equipment for the H model [Di-
C1a/c])
Paper Tray Units (1-tray, 2-tray)
Shift Tray
One-bin Tray
Side Tray
Internal finisher
Maintenance
Troubleshooting
Fax Option
OPTIONS
The options listed above will be described in the indicated order.
MAINTENANCE
PM is described briefly.
TROUBLESHOOTING
Basic points concerning service codes, diagnostics, and other
troubleshooting tools will be covered.
FAX
Basic information about the fax unit will be explained.

Di-C1 Training
8
Slide 8
Di-C1 TRAINING
COPIER ENGINE
PRODUCT OUTLINE
The model will be introduced.
The optional peripherals will be introduced.
The product concept, sales points, and targets will be presented.

Di-C1 Training
9
Slide 9
INTRODUCTION
No additional notes

Di-C1 Training
10
Slide 10
How many models?
Four models:
Di-C1a, Di-C1La: 20 cpm
Di-C1c, Di-C1Lc: 25 cpm
Differences between the models:
Di-C1a/c (also known as the ‘H model’):
» WVGA display panel
» HDD built-in
Di-C1La/Lc (also known as the ‘L model’):
» 4-line LCD panel
» No HDD (no local storage, built-in or optional)
» No finisher or shift tray
» Fax option is different
– No optional SAF memory
– No IP Fax or Internet Fax
» TWAIN scanning only (no Scan-to e-mail or other connectivity
features)
» Fewer printer features
» The USA model of the Di-C1La (20 cpm model) has a built-in
fax unit.
H model: High-end model
L model: Light model
The Di-C1La/c do not have the following printer features:
¾Sample Print
¾Locked Print
¾Hold Print
¾Stored Print
¾Store and Print
¾Mail to Print
¾PDF Direct Print
¾1200 dpi Support
¾Mobile Driver
¾Bonjour (Rendezvous) Support
¾Wireless LAN Interface Option
Fax
¾The fax option for the Di-C1a/c is different from the fax option for the Di-
C1La/c.
¾The specifications are different. For details, see the Fax section of the
course.

Di-C1 Training
11
Slide 11
Appearance – Di-C1a/c
Internal
Finisher
ADF
Two-tray
Paper Tray Unit
Duplex Unit (Built-in)
Very compact
WVGA Display
Punch Unit
Here is a view of the machine with some optional peripherals installed.
There are other options, as we will see later.
ADF is standard equipment

Di-C1 Training
12
Slide 12
Appearance – Di-C1La/c
ADF
Two-tray
Paper Tray Unit
4-line LCD
The duplex unit is not visible in this photo.
ADF is standard equipment for Europe and North America; option for Asia
and China
The display is similar to the K-C3. The K-C3 is a target model for B-to-C
replacement.

Di-C1 Training
13
Slide 13
Product Positioning
TH-C1c
J-C2k
TH-C1b
R-C4c
R-C4b
AT-C1b
AT-C1a
R-C5c AT-C2b
AT-C2a
DI-C1c / C1Lc
DI-C1a / C1La
R-C5b
AT-C1k
PR-C1
PG-C1
K-C3cd
BW/FC
cpm
FY2005 FY2006 FY2007 FY2008
24/10 cpm
28/24 cpm
32/10 cpm
30 cpm
25 cpm
30/30 cpm
25/25 cpm
20 cpm
6/15 cpm
20/20 cpm
25 cpm
25 cpm
33 cpm 33/33 cpm
28/28 cpm
25/25 cpm
20/20 cpm
PG-C2
8/18 cpm
This chart shows the position of the Di-C1 in the product line-up.

Di-C1 Training
14
Slide 14
SALES POINTS
No additional notes

Di-C1 Training
15
Slide 15
Main Sales Points
High performance (close to black-and-white models)
Short Warm Up time: Less than 30 sec.
Short First Copy Output Time:
» Black-and-white 6.5 sec
» Full colour: 9.5 sec
Productivity
High speed colour output
» Di-C1a/C1La: 20 cpm, Di-C1c/C1Lc: 25 cpm
Internal 500-sheet finisher (Di-C1a/c only)
High Speed Scanning (from ADF): 41 pages/minute
(monochrome), 26 pages/minute (colour): A4 LEF, 200dpi
Thick paper (up to 256 g/m
2
) can be fed from the first tray or
bypass tray
Small footprint
587 mm x 655 mm (w x d)
Smallest in this range of the market
There are also a lot of connectivity features, which we will not explain in this
class. We will limit ourselves to the engine in this course.

Di-C1 Training
16
Slide 16
Display Panel
Colour Mode
Icon Check Modes
Job List Remaining Job Time
This is for the Di-C1a/c only.
The colour mode icon changes when you select Auto Colour Select, Full
Colour, or Black and White. Ask the class to try it on the machine, if you have
one set up already.
¾Other modes, such as two-colour mode, can also be shown as options
on the display by adjusting SP modes.
The Check Modes button is part of the LCD display.
The Job List button is a new feature.
You can also see an estimate of the remaining time for the job, at the bottom
of the screen. (Does not work for fax communication.)

Di-C1 Training
17
Slide 17
Animated Guidance
This is for the Di-C1a/c only.
For some functions, such as removing jams and replacing toner, an
animated guidance appears on the screen.

Di-C1 Training
18
Slide 18
Improved Operation Panel
Simplifies
the Display
Login/Logout,
for Authentication
Status Lamps
Can be seen from a distance
Larger LCD
Start Key
This is for the Di-C1a/c only.
This type of operation panel has been used for higher-end models for some
time now. But if you have not worked with this type of model, this panel may
be new for you.
The login/logout button makes authentication a bit easier.
The ‘simplified display’ button reduces the amount of information on the LCD
panel. Try it and see. The next slide gives an example.
The red and green lamps on the Start key show clearly when the machine
will or will not start.

Di-C1 Training
19
Slide 19
Display
The simplified display appears when you push the
Simplified Display button.
Normal Display Simplified Display
This is for the Di-C1a/c only.

Di-C1 Training
20
Slide 20
Easy Jam Removal
Simple paper path
The cover can be opened without paper falling off the bypass
tray.
All jams can be removed from the right side of the machine.
No additional notes
This manual suits for next models
5
Table of contents
Other Ricoh Copier manuals

Ricoh
Ricoh Cor-C1 Series Installation guide

Ricoh
Ricoh Pro 8100S User manual

Ricoh
Ricoh PE-P1 User manual

Ricoh
Ricoh FW 810 User manual

Ricoh
Ricoh A219 User manual

Ricoh
Ricoh PS430 User manual

Ricoh
Ricoh Aficio 401 User manual

Ricoh
Ricoh Aficio DSm616 User manual

Ricoh
Ricoh Aficio MP C3000SPF Service manual

Ricoh
Ricoh MP C401 User manual