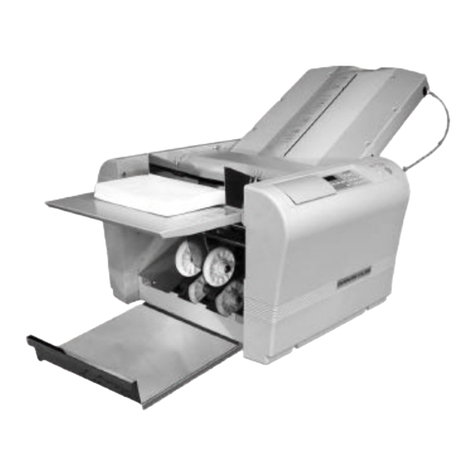
quadient DS-65 User manual

Unpacking and installation English
Déballer et installer Français
Desembalar y instalar Español
Spacchettare e installare Italiano
Auspacken und installieren Deutsch
Uitpakken en installeren Nederlands

Table of Contents
Before you Start ............................................................................................11
Before You Start...............................................................................................2
Install the Feeders ........................................................................................42
Install the Document Feeders..........................................................................4
Install the (optional) BRE Feeder.....................................................................6
Connect the System to Mains Power Supply and Power Up ....................73
Connect to the Power Supply...........................................................................7
Power Up..........................................................................................................8
Install the Brush ...........................................................................................94
Place the Brush................................................................................................9
Filling the Sealing Liquid Bottle ................................................................115
Filling the Sealing Liquid Bottle......................................................................11
Set Language andTime ..............................................................................146
Setting the Language, Date and Time............................................................14
Setting Online Services (option) ...............................................................157
Online Services Introduction (OLS)...............................................................15
Setting up OLS with a LAN connection..........................................................15
Setting up OLS with an analogue modem.....................................................28
Using OLS......................................................................................................34
Reference information....................................................................................36
Terminology....................................................................................................38
Test the System with the UserTraining Package .....................................398
Using the User Training Package...................................................................39
| Page 1 | TOC | okt-08-2012 08:59 |

| Page 2 | TOC | okt-08-2012 08:59 |
Before you Start1
Ensure you have read and fully understood the safety requirements
in the user guide that is delivered with your system.
After installation of your system make sure you keep the installation
guide near your system.You'll need this information when you want
to move the system or change the system network settings.
1
| Page 1 | okt-08-2012 08:59 |
1
English

BeforeYou Start
Please ensure that your Document System is unpacked and installed on a stable surface.
The following items are delivered with your system:
• Internet (LAN) cable (1, optional), Power cable (2), Brushes (3)
• User Guide, this Installation Guide and the User Training Package (4)
• A bottle with sealing liquid (5)
• Document feeder box (6)
• Document (enclosure) feeder box (optional)
• BRE feeder box (optional)
• Reading kit box (optional)
1. Ensure that all of the listed parts are available. If you find that an item is missing then
contact your service organisation.
2. The power connection must be easily accessible, preferably close to the system. For
safety reasons, it is essential that the system is connected to a socket outlet that has
a protective earth connection.
2
| Page 2 | okt-08-2012 08:59 |
1
English

3. Remove the cardboard from the exit of the system.
If all items are delivered and the machine is placed into the correct position, then continue
with the installation instructions.
1
English
3
| Page 3 | okt-08-2012 08:59 |

Install the Feeders2
Install the Document Feeders
The system is delivered with at least one document feeder. Install the feeders as follows:
1. Unpack the document feeder.
2. Slide the main document feeder (you can recognize the feeder by the address carrier
symbol) into the top feeder slot. Push the feeder until you hear a click or feel that the
feeder is securely installed.
3. If you also have the optional doucment (enclosure) feeder, then remove the cover
plate from the system (see diagram below).
4
| Page 4 | okt-08-2012 08:59 |
2
English

4. Slide the optional (enclosure) feeder into the bottom feeder slot (you can recognize
the feeder by the enclosure symbol).Push the feeder until you hear a click or feel that
the feeder is securely installed.
The document feeders are now ready to use. 2
English
5
| Page 5 | okt-08-2012 08:59 |

Install the (optional) BRE Feeder
The BRE feeder is an option for the DS-65.To install the BRE feeder proceed as follows:
1. Unpack the BRE feeder. Follow the Unpacking Instruction delivered with the BRE
feeder box.
2. To place the BRE feeder you have to remove the cover plate from the system.Push
the pins and pull the cover plate from the system (see figure).
3. Slide the BRE feeder into the system. Ensure that the slide guides Afrom the BRE
feeder slide into the system guides Band C. Push down until you feel that the BRE
feeder is securely installed.
The BRE feeder is now ready to use.Next time you start the system the following message
will appear: Configuration Changed. Press [OK] and continue.
6
| Page 6 | okt-08-2012 08:59 |
2
English

Connect the System to Mains
Power Supply and Power Up
3
Connect to the Power Supply
1. Ensure that the local power voltage is suitable for this system.Refer to the serial label
inside the system, see figure.
2. The power connection must be easily accessible, preferably close to the system.
For safety reasons, it is essential that the system is connected to
a socket outlet that has a protective earth connection.
7
| Page 7 | okt-08-2012 08:59 |
3
English

3. Connect the power cable to the system (A) and to the mains power supply.
Power Up
Make sure the system is connected to the power supply.
1. Press the On/Off button next to the display.
The touch screen shows the Home Menu.
8
| Page 8 | okt-08-2012 08:59 |
3
English

Install the Brush4
Place the Brush
The brush is used for sealing the envelopes.To install the brush proceed as follows:
1. From the Settings Menu select [Supervisor], select [Maintenance], select [Replace
brush].
2. Press [Open], the brush cover opens.
3. Open the system.
4. Moisten the new brush with running tap water.
9
| Page 9 | okt-08-2012 08:59 |
4
English

5. Place the brush in the system.
a. Lift the combiroller A.
b. Lift the pressplate B and keep it in the upright position with your hands.
c. Press the brush into the brush holder C. Some force needs to be applied.
6. In the replace brush menu press [Close], the brush cover closes.
7. Place the sealing liquid bottle and close the system.
10
| Page 10 | okt-08-2012 08:59 |
4
English

Filling the Sealing Liquid
Bottle
5
Filling the Sealing Liquid Bottle
The system uses sealing liquid for sealing envelopes. If the system is out of sealing liquid,
the mailing process continues but the envelopes will not be sealed properly.The sealing
liquid level detection system will warn you when your sealing liquid bottle is almost empty.
Fill the sealing liquid bottle as follows:
1. Push A to open the system.
11
| Page 11 | okt-08-2012 08:59 |
5
English

2. Remove the sealing liquid bottle.
3. Place the bottle on its bottom and turn the cap (bayonet thread) to open.
4. Fill the bottle with sealing liquid up to the filling level indicator and close it.
Fill the sealing liquid bottle with the sealing product that is
recommended by your dealer.Any other product or water can cause
problems with the functioning of your system.
12
| Page 12 | okt-08-2012 08:59 |
5
English

5. Place the bottle in the system. Ensure that bottle is placed correctly.
6. Close the system.
5
English
13
| Page 13 | okt-08-2012 08:59 |

Set Language and Time6
Setting the Language, Date andTime
To set the language, date and time:
1. Press the icon in the home menu to open the Settings Menu.
2. Press [Localisation] to change language settings.
3. Press [Supervisor], [Date andTime Settings], to change time settings.
14
| Page 14 | okt-08-2012 08:59 |
6
English

Setting Online Services (op-
tion)
7
Online Services Introduction (OLS)
Online Services (optionally available) enables the document system to connect to a central
server.You can use Online Services for:
• Receiving software updates
• Online diagnose of errors and system problems
• Receiving messages on new options, etc.
It is always the system that initiates the connection.It is not possible
to make a connection from outside to the system.
Setting up OLS with a LAN connection
Information from IT department
To connect OLS to a LAN, you need information from your IT department.
1. Ask your IT department if the LAN connection supports DHCP.
Depending on DHCP support, ask for the following information:
DHCP not supportedDHCP supported
Does the DHCP server provide DNS
settings? - IP address
- Subnet mask
- Default gateway IP address
- Preferred DNS IP address - Preferred DNS IP address
- Alternate DNS IP address (if
available) - Alternate DNS IP address
2. Ask your IT department if a proxy server is required.
If a proxy server is required, ask for the following information:
- Proxy URI
- Proxy port
In case a log in is required, ask for the login name and password. 15
| Page 15 | okt-08-2012 08:59 |
7
English

If your IT department wants a MAC address for your system's LAN port, go to the Settings
Menu , [Supervisor], [Communication settings], [LAN Settings].This menu shows
the MAC address.
Configuring the LAN connection
The steps to configure the LAN connection depend on your IT settings:
• Does the LAN support DHCP?
• Is a proxy server required to access the internet?
Configuring LAN where DHCP=Yes and Proxy=No
If DHCP is supported and a proxy server is not required, connect the system's OLS as
follows to a LAN:
1. Inthe Settings Menu,press[Supervisor], [System Configuration], [Communication
Settings].
2. Press [Settings] in the LAN area.
16
| Page 16 | okt-08-2012 08:59 |
7
English

3. Check the boxes as indicated in the figure (Automatically obtain IP address and DNS
auto).
In the rare situation that the DHCP server does not provide DNS
settings, do not check the DNS auto box and press [>].In the DNS
settings menu you can enter the preferred DNS IP address and
Alternate DNS IP address manually. Press [OK] to save these
settings.
4. Press [OK] to accept the settings.
5. IntheCommunicationSettingsMenu,press[OK] tosettheOnlineservice connection
type.
6. Incase Online serviceconnectionisnotsetto LAN, press the [Change] button,select
LAN and press [OK].
Now, you are ready to connect the LAN cable (see Connecting the system to the LAN on
page 24).
7
English
17
| Page 17 | okt-08-2012 08:59 |
Table of contents