Quatro PowerStation PS6 Series Manual

QUATRO
Air Technologies Inc.
---------------------------------------------------------
Engineers Of Clean Air
--------------------------------------------------------
30 Hymus Boulevard, Montreal, Quebec, H9R 1C9 Tel.: (514) 630-4444 Fax: (514) 630-4454 website: www.quatroair.com [email protected]
Operations & Maintenance Manual
PowerStation, PS6 Series
INSTALLATION, FREE-STANDING MODEL
The unit is shipped in the upside-down position, casters are factory installed, 2 models available,
All items below are shipped in a separate box:
Model Ships with:
PS625-2370-0
(2) F022 HEPA filters, (6) AG259 YELLOW filter bags, (4) Galv Filter Separators,
O&M Manual, Hose and fittings are added separately depending on application.
PS625-23AZ6GH
(2) F022 HEPA filters, (6) AG149 WHITE filter bags, (2) Galv Filter Separators, O&M
Manual, (2)inlet plates(3x1.5”dia),50ft 1.5”dia suction hose, 240v PowerCord(#E302),
Foot-pedal (AA175),
(6) Rubber hose fittings, (6) 2”wide x ½”thick gaskets for rubber hose fittings:
Connect to 1.5” dia: use hose directly
Connect to 2” dia: use Rubber Hose fittings to connect
Connect to 2.5” or 3”dia: use ½” thick gaskets around Rubber hose Fittigns to make
up the dimension
Your option to install unit on (6) stationery rubber feet or (4) mobile casters (install 2
lockable casters in front)
1) Install Rubber feet or casters
2) Open filter door, remove plastic around HEPA filter, install HEPA filter, Grating and filter bags
3) Plug Power Cord to a grounded 240-volt wall outlet
4) Connect to individual workstations
SYSTEM IS MORE EFFICIENT WHEN CONNECTING EACH WORKSTATION INDIVIDUALLY
START-UP
1) Plug the unit into a 220-240v wall outlet with the cord provided (socket is on side of unit)
2) After 10seconds, switch ON using RED POWER button on control panel to ensure unit STARTS
“System ON” LED illuminates, indicates unit is operating
2) Press POWER button again to switch unit OFF
3) You are now ready to operate
4) Install Foot-Pedal (#AA175) into the db9 (9-pin socket on side of unit) to start/stop unit remotely
If: “System ON” LED is OFF (indicates unit NOT operating)
If: “Remote/Standby” LED flashes (indicating unit is in WAITING MODE)
PS6 is shipped on a
pallet, in an Upside-
Down Configuration
Accessories shown
on top are shipped in
a box, placed on top
of the unit

QUATRO
Air Technologies Inc.
----------------------------------------------------------------
Engineers Of Clean Air
----------------------------------------------------------------
30 Hymus Boulevard, Montreal, Quebec, H9R 1C9 Tel.: (514) 630-4444 Fax: (514) 630-4454 website: www.quatroair.com [email protected]
OPTIONAL ON-OFF
Unit can be switch ON-OFF at a 2nd location. To do this, you can purchase:
A- db9 Cable Signal Splitter (#AE686)
B- second Foot-pedal (#AA175) or Hand-Switch (#AA375)
This will split your Foot-pedal/Hand-Switch signal into 2 inputs. To extend the length of your foot-pedal
or Hand-Switch cable, you can purchase Male-Female DB9 cable at your local electronics store.
OPTIONAL ASV, Auto-Start Valve CONTROLS
ASVs are Quick & Easy Remote Start-Stop Valves that reduce Dust Collector power consumption.
ASVs allow more suction to the active workstations by diverting air from the idle ones.
Principle of Operation:
1. START-STOP dust collector when you OPEN-CLOSE valve
2. CLOSE valve when not using workstation; OPEN valve when using dust collector
3. Install as many ASVs as you like
Dust collector STARTS automatically if AT LEAST ONE ASV is OPEN
Dust Collector STOPS automatically if ALL ASVs are CLOSED
ASV Part Numbers:
Model Description, when using: Front ASV dia.
Rear ASV dia.
AA444-A31 When connecting 1.5”dia. hose to a 3”dia inlet 3”dia 1.5”dia
AA444-A21 When connecting 1.5”dia. hose to 2” dia tubes 2”dia 1.5”dia
AA444-A11 When connecting 1.5”dia. hose to 1.5” dia inlets 1.5”dia 1.5”dia
Other diameters also available

QUATRO
Air Technologies Inc.
----------------------------------------------------------------
Engineers Of Clean Air
----------------------------------------------------------------
30 Hymus Boulevard, Montreal, Quebec, H9R 1C9 Tel.: (514) 630-4444 Fax: (514) 630-4454 website: www.quatroair.com [email protected]
SAFETY PRECAUTIONS
Carefully read instructions in this manual before operation (keep manual as it contains information for proper operation and maintenance). Keep all fastening
hardware tight to ensure that the unit is in safe working condition. Familiarise yourself with the way in which the special filter is removed, installed, and serviced.
Filter must be in place whenever this machine is in operation. Use only on grounded electrical circuit; do not use two-wire electrical prong adapters to defeat the
three-pronged plug on the end of the cord. When servicing motor, be careful when touching exterior of motor when it is turned off; it may be hot enough to be
painful or cause injury. Do not substitute any other filter for the one supplied, as it will alter the design characteristics. UNPLUG UNIT FROM ITS
POWER SUPPLY PRIOR TO SERVICING UNIT!
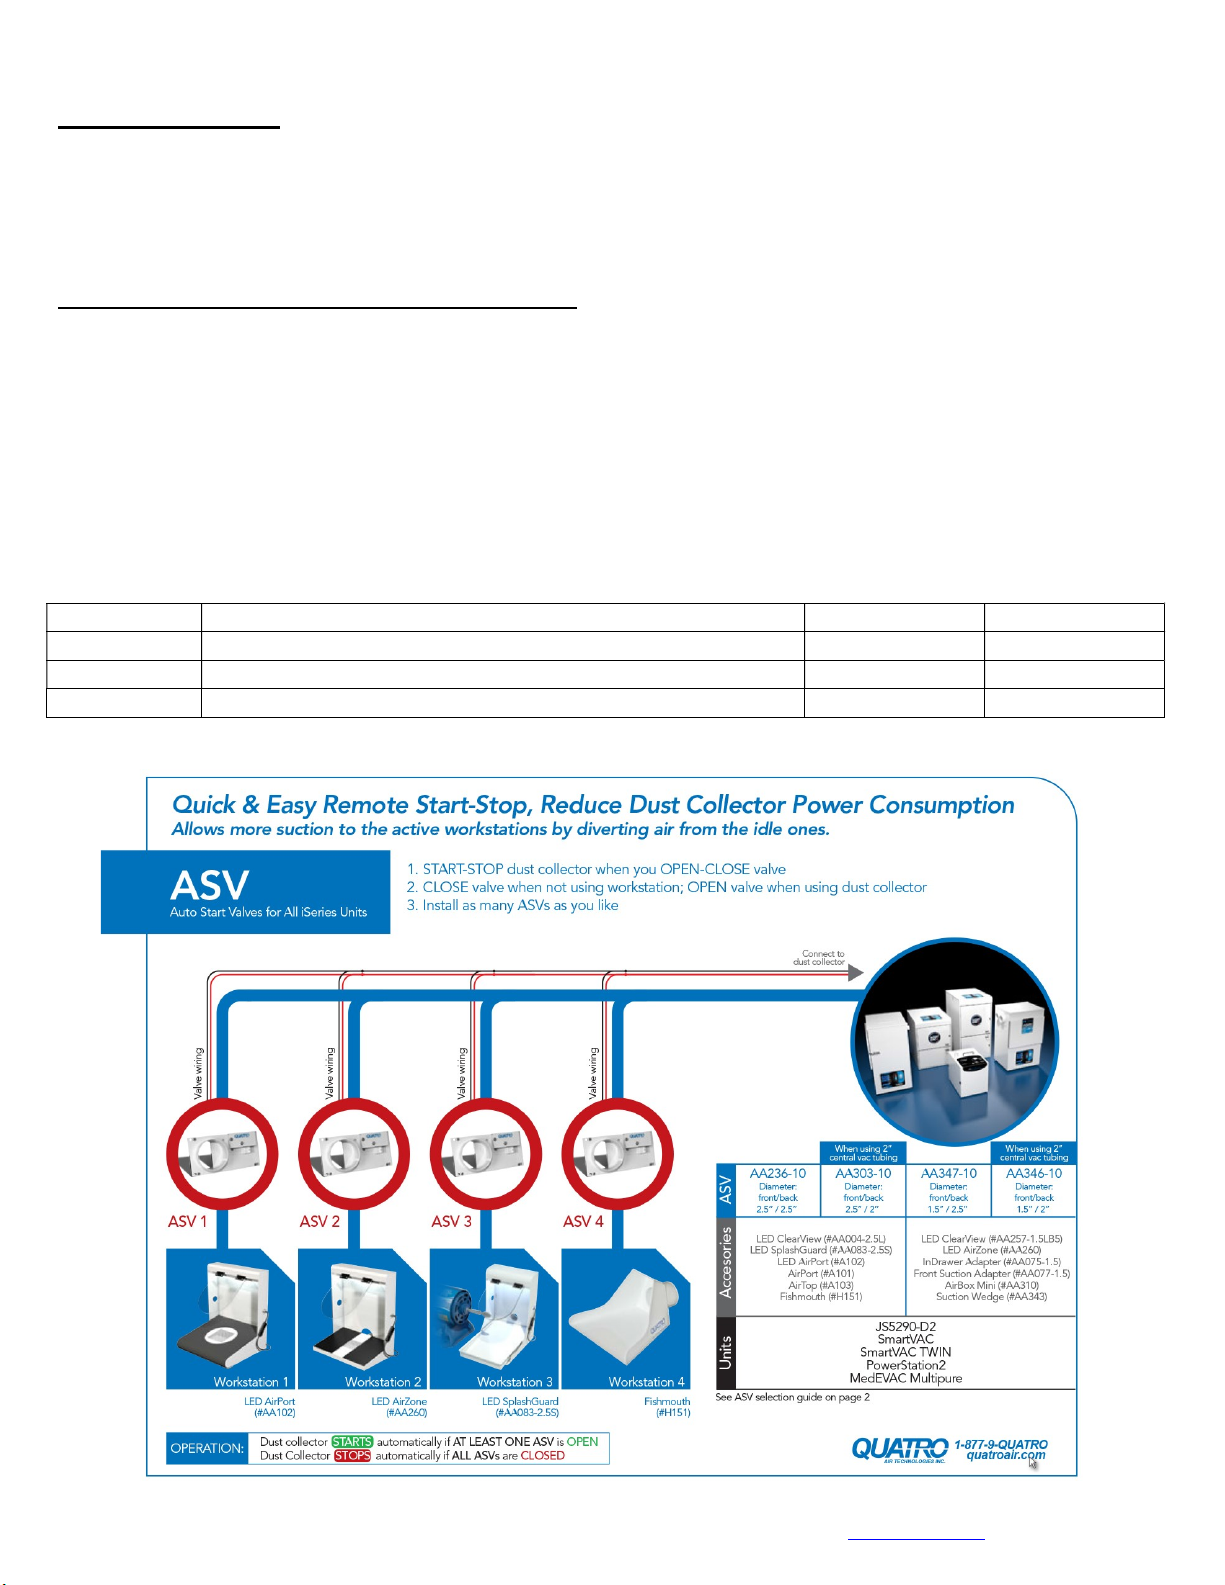
Ensuring Proper Grounding of ABS/PVC Fittings and Tubing for a Dust Collection System.
For dust collection systems, galvanized metal pipe and fittings are best, but for most typical applications, fittings and dust collection tubing made of plastic (ABS
or PVC) are sufficient, provided they are properly grounded to dissipate static electrical charges. Dust and air in the right proportions can be an explosive
mixture, and a build up of static electricity can provide the spark to ignite it.
To safely collect and bleed off the static charge, bare copper wire (not insulated) should be run along the inside of the duct-work and be attached to grounding
screws or a bare metal surface on both the dust collector and the unit that it is connected to (if it is connected to a unit). The power cords of both machines must
be terminated in a grounded three-prong plug to complete the connection to the ground. Wires over the irregularities of fittings, especially at “Y”s or “T”s could
form traps for particles. Therefore, bypass the fittings by running the wires to the outside through small holes. Seal the holes with silicone caulking compound
and join the wires by twisting them together and securing them with a wire nut. As charges can also collect on the outside surface, we recommend wrapping
bare copper wire in a spiral around the outside of the ductwork, securing it with electrical tape and connecting it to the ground system by means of wire nuts. If
you have any difficulty securing the hose clamp to the hose and fittings, try wrapping the joints with duct tape first to provide a good gripping surface. If you are
still having difficulty in obtaining a safe electrical ground, we recommend the services of a good electrician.
UNIT INSPECTION
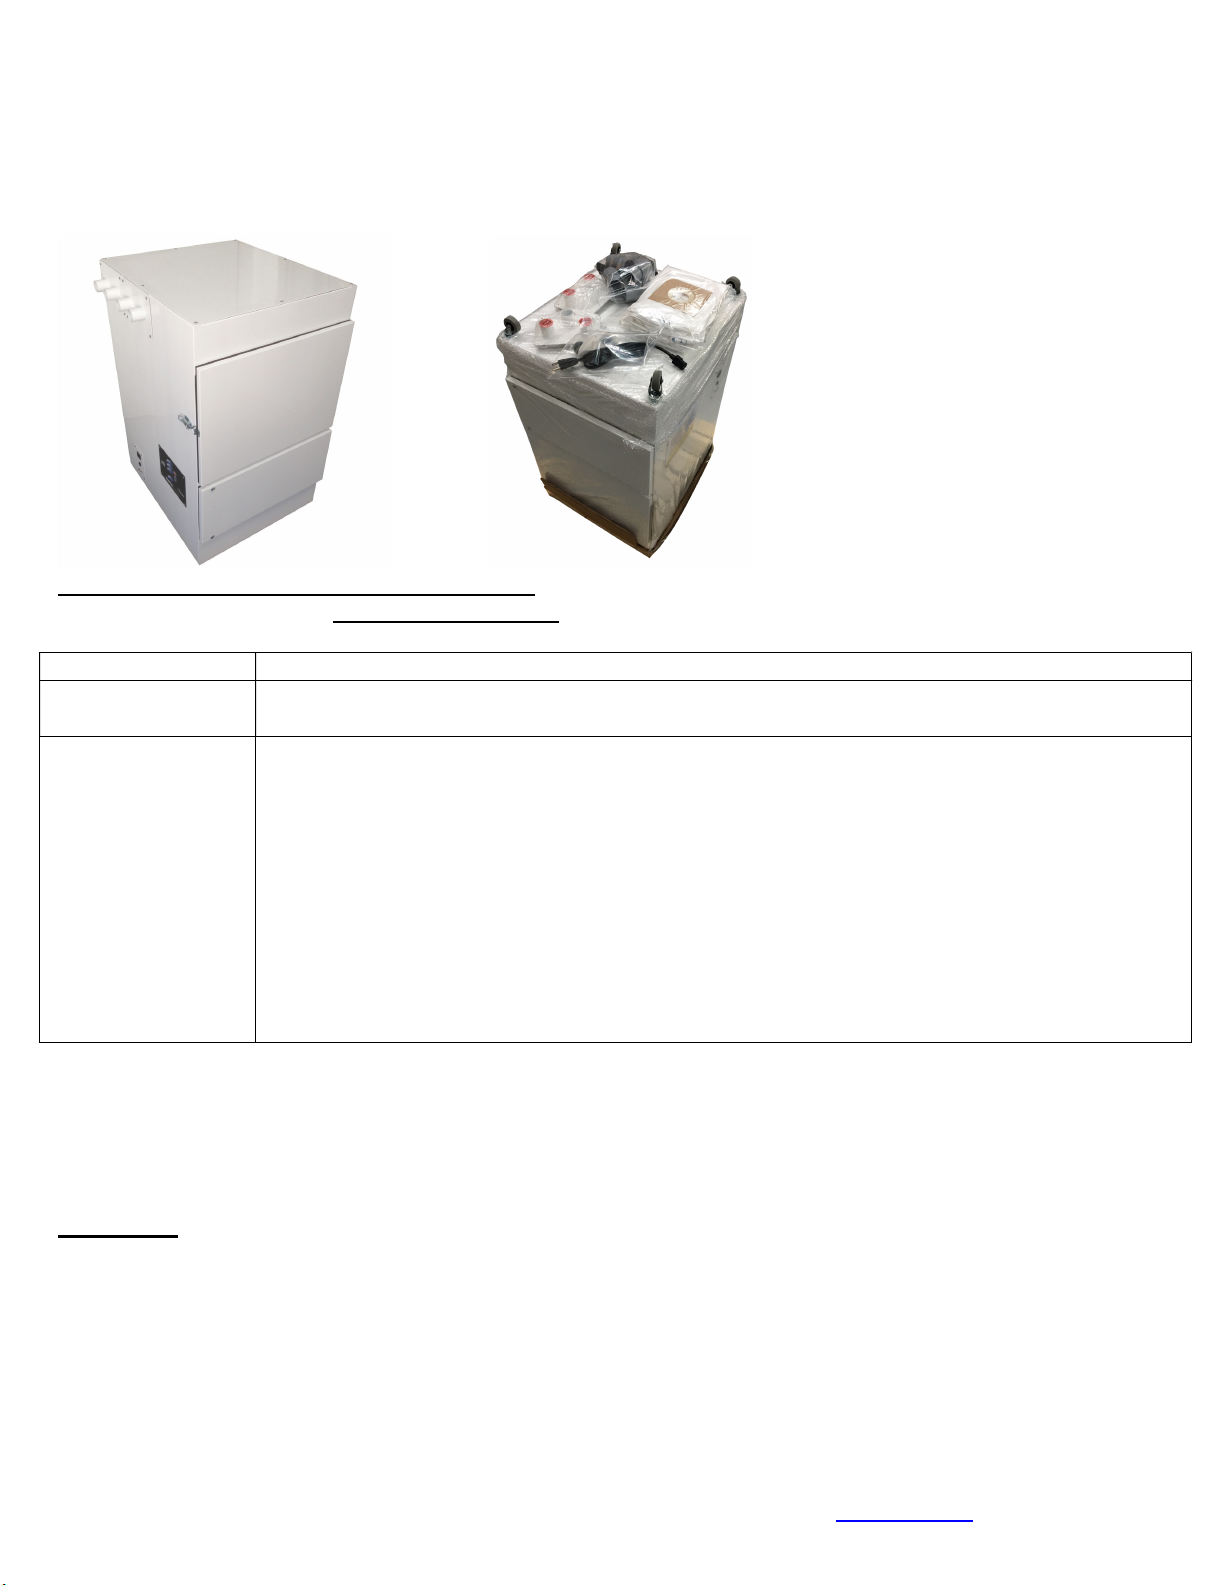
Upon receipt, inspect unit for either visible or concealed damage. Damage should be immediately reported to the transport company.
If you suspect concealed damages inside the box indicate so on the transport companies’ shipping documents.
Single box, c/w all components required either on or inside the unit:
PRE START-UP CHECKLIST
a) Check that all internal components are present and are adequately supported;
b) Check that labels and serial numbers are present for future identification;
c) Verify power supply compatibility with equipment (120-volt/1 phase/60hz). Check that the unit is plugged into a grounded receptacle;
d) Ensure that rubber grommets are tight and secure prior to placing unit on the floor.
WARNING: DO NOT OPERATE UNIT UNLESS FILTER IS IN PLACE, AS MOTOR MAY BURN-OUT.
Dirty Air Inlet collars are to be installed on the BACK side of unit.
PRINCIPLE OF OPERATION
A four step AUTOMATIC method of operation:
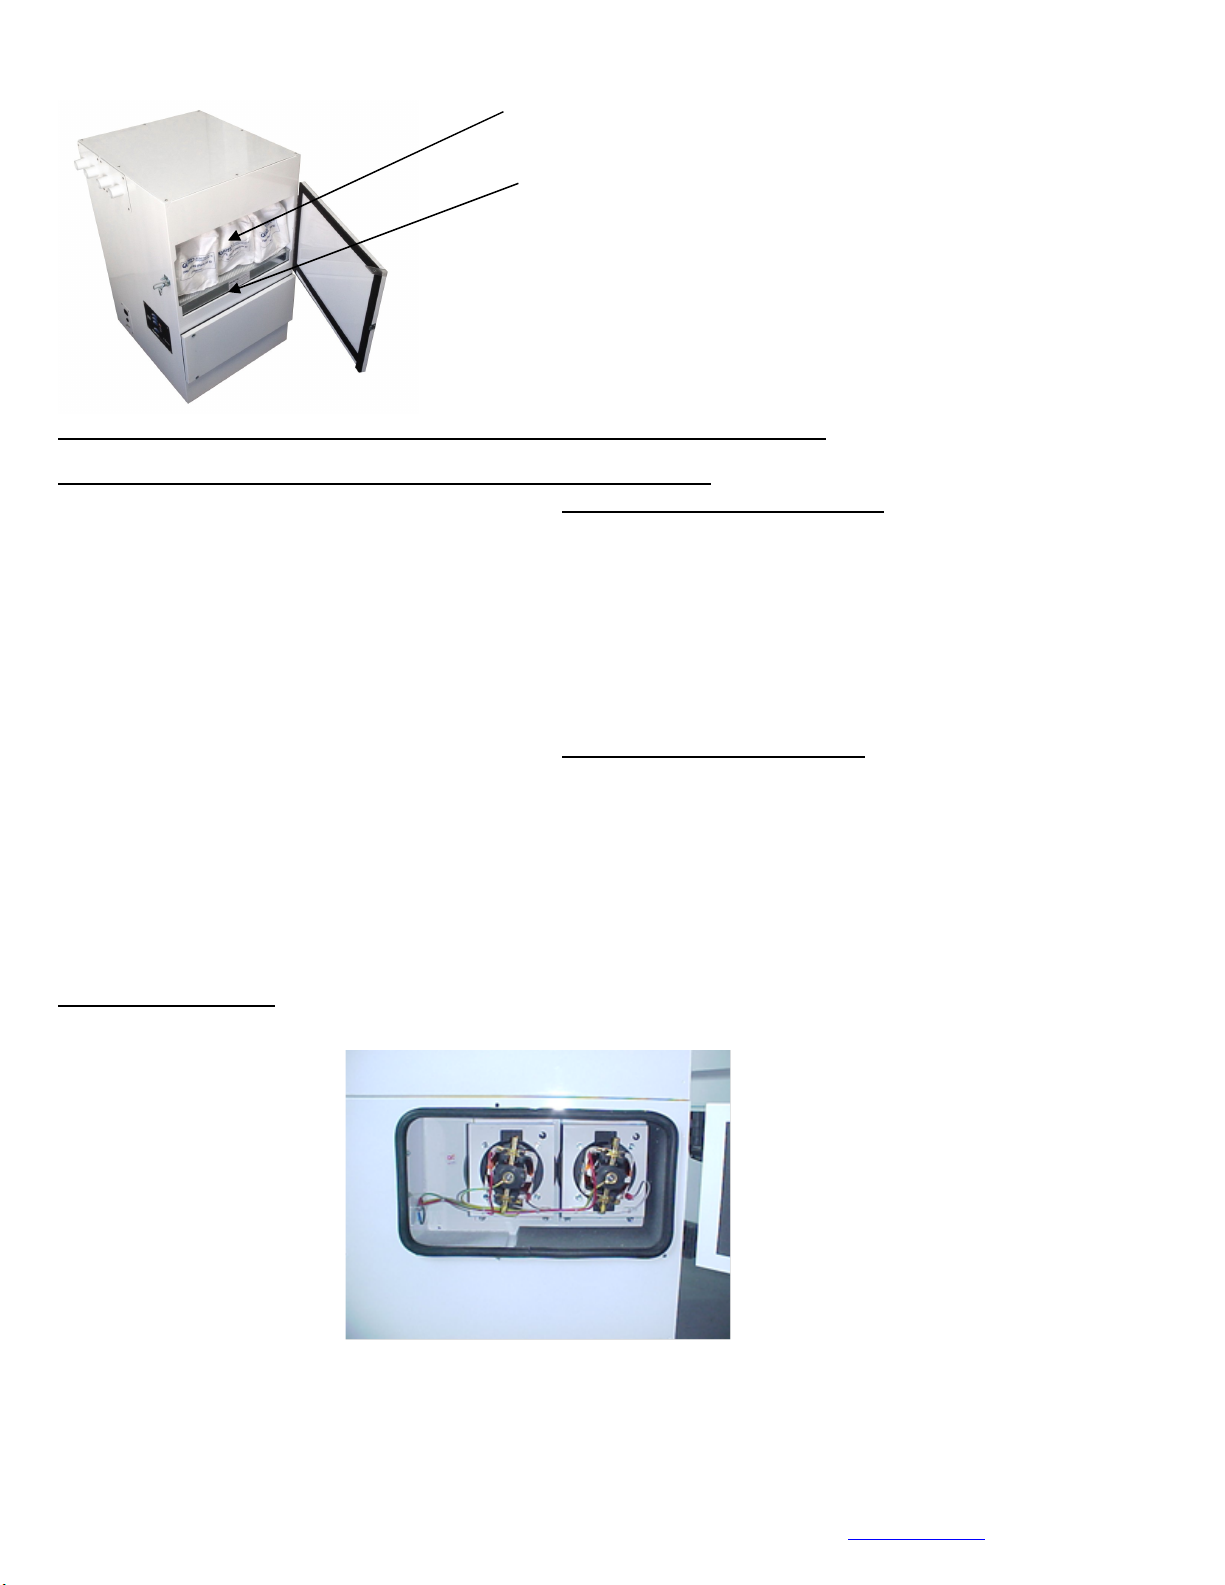
a) Filter bags capture all heavy / larger particles; b) HEPA Filter captures and holds fine, lighter dust particles; c) odor filters (Model dependant) capture
applicable odors d) heavy duty blower section to overcome static pressure across the hose and filter.
UP/DOWN Arrows on control panel allow you increase and decrease speed in 9 increments.
AUTOMATIC (Remote) OPERATION
When power cord is plugged in and POWER button is pressed, unit will BEEP once, ALL lights will illuminate (unit is operational), unit will start
TEMP MODE FEATURE: While unit is in STANDBY MODE (Remote/Standby Led is flashing), Press POWER button to start motor, and press again to shut
motor OFF (this overrides the Remote Signal you are receiving from your hand-switch or foot-pedal)
Unplugging the power cord will automatically deactivate Remote Sensing Feature.
EQUIPMENT MAINTENANCE PROCEDURES
Proper maintenance is critical to extend the life of the filtration system. The information presented below outlines basic maintenance procedures to ensure the
unit will provide trouble-free operation for years to come. The unit is designed to allow quick access to the Filter section for easy filter replacement.
FILTER REPLACEMENT
Filter requires replacement if appropriate LED on control panel illuminates (and beeper sounds for 2 seconds every 4 hours).
Filter replacement is ALSO required if you notice the following:
a) If you are losing suction capacity, after filter has been used…..FILTER IS CLOGGED;
b) If dust is coming through the filter and dust is present in the motor section even though filter is seated properly……..FILTER IS PUNCTURED;
c) Gasket on BASE of HEPA Filter is even slightly worn, GASKET NEEDS TO BE IN GOOD CONDITION TO ENSURE DUST DOES NOT GET THROUGH
ANNUAL GENERAL INSPECTION
Sealing integrity is essential. Every 12 months, verify all gaskets are in proper condition. Should the door gaskets adhere slightly to the unit when opening a
door, lubricate its surface with a transparent grease or petroleum jelly. Should unit be moved on occasion, ensure that rubber grommets are tightly fastened.
Disconnect the unit by unplugging the power cord from the wall, and access the fan section. Verify that the acoustic insulation is well
fastened to the walls. In the event of a problem, call your authorised distributor for spare parts and replace immediately.

QUATRO
Air Technologies Inc.
----------------------------------------------------------------
Engineers Of Clean Air
----------------------------------------------------------------
30 Hymus Boulevard, Montreal, Quebec, H9R 1C9 Tel.: (514) 630-4444 Fax: (514) 630-4454 website: www.quatroair.com [email protected]
WARNING: DO NOT OPERATE UNIT UNLESS ALL FILTERS ARE IN PLACE.
RESETTING MICROPROCESSOR AFTER FILTER(S) HAVE BEEN REPLACED
Resetting Microprocessor After FILTER Replacement , WHILE “Service Filters” Led is SOLID
1- Ensure motor access door is closed
2- Plug power back to the unit
3- When you Press “POWER”, MOTOR WILL START, “Service FILTER(s)” Led stays SOLID
4- While motor is operating, press & hold SPEED UP & DN simultaneously until unit BEEPS
(hold for 10+ seconds, when beeping continuously, release)
5- In this condition, “System ON” Led is FLASHING, “Service Filters” led is SOLID
6- Press SPEED DN until “Service Filters” Led is FLASHING and system is BEEPING continuously
7- Press & HOLD POWER button while “Service Filters” is FLASHING & BEEPING continuously
Release, when it stops BEEPING
8- Led will be OFF and unit will be ready to operate again
Resetting Microprocessor After Filter Replacement, WHILE “Service Filters” Led is OFF
1- Ensure motor access door is closed
2- Plug power back to the unit
3- When you Press “POWER”, MOTOR WILL START
4- While motor is operating, press & hold SPEED UP & DN simultaneously until unit BEEPS
(hold for 10+ seconds, when beeping continuously, release)
5- In this condition, “System ON” Led is FLASHING
6- Press SPEED DN until “Service Filters” Led is FLASHING
7- Press & HOLD POWER button while “Service Filters” is FLASHING
Release, when it stops BEEPING
8- Led will be OFF and unit will be ready to operate again
BLOWER MAINTENANCE
The system includes (2) Brushless hi Vacuum motors, designed to operate for approximately 20000 operating hours.
Motors are located behind the hinged lower door on the side of the unit when facing the control panel & filter access door.
View of motors once lower door is opened.
Filter Bags (6 required)
AG
149, kit of 6 WHITE bags
or
A
G259-06, kit of 6 YELLOW bags
HEPA Filter 2 X (F022)
located at bottom below the filters, behind front access door
(remove plastic around HEPA filter before starting unit)

QUATRO
Air Technologies Inc.
----------------------------------------------------------------
Engineers Of Clean Air
----------------------------------------------------------------
30 Hymus Boulevard, Montreal, Quebec, H9R 1C9 Tel.: (514) 630-4444 Fax: (514) 630-4454 website: www.quatroair.com [email protected]
RESETTING MICROPROCESSOR CONTROLLER AFTER REPLACING MOTORS
Resetting Microprocessor After Motor Replacement WHILE “Service Motor(s)” Led is SOLID
1- Ensure motor access door is closed
2- Plug power back to the unit
3- When you Press “POWER”, MOTOR WILL START, “Service Motor(s)” Led stays SOLID
4- While motor is operating, press & hold SPEED UP & DN simultaneously until unit BEEPS
(hold for 10+ seconds, when beeping continuously, release)
5- In this condition, “System ON” Led is FLASHING, “Service Motor(s)” led is SOLID
6- Press SPEED DN (once) until “Service Motor(s)” Led is FLASHING and system is BEEPING continuously
7- Press & HOLD POWER button while “Service Motor(s)” is FLASHING & BEEPING continuously
Release, when it stops BEEPING, and motor operates in LOW speed
8- Operate unit at LOW SPEED for 10-15 minutes to break-in new brushes (to prolong brush life)
Resetting Microprocessor After Motor Replacement, WHILE “Service Motor(s) Led is OFF
1- Ensure motor access door is closed
2- Plug power back to the unit
3- When you Press “POWER”, MOTOR WILL START
4- While motor is operating, press & hold SPEED UP & DN simultaneously until unit BEEPS
(hold for 10+ seconds, when beeping continuously, release)
5- In this condition, “System ON” Led is FLASHING
6- Press SPEED DN (once) until “Service Motor(s)” Led is FLASHING
7- Press & HOLD POWER button while “Service Motor(s)” is FLASHING
Release, when it stops BEEPING, and motor operates in LOW speed
8- Operate unit at LOW SPEED for 10-15 minutes to break-in new brushes (to prolong brush life)
Unplug POWER cord from unit, Replace motor(s) as per instructions above, close motor access door.
MOTOR WILL DEFAULT TO LOWEST SPEED AFTER A RESET. YOU WILL PROLONG MOTOR BRUSH LIFE IF YOU BREAK THEM IN, SO IT IS ADVISED TO LET MOTOR
OPERATE AT LOWEST SPEED FOR 15 MINUTES
TROUBLESHOOTING, MECHANICAL GUIDE
Symptoms
Possible Cause
Suggested Solution
Unit will not start
Faulty power supply
Circuit breaker popped
Motor burnt
Brushes worn
Check breaker box
RESET circuit breaker on unit panel
Replace motor (PN: AB001)
Replace Brushes (PN: AB112)
Excessive noise Turbine impeller contacting housing Replace motor (PN: AB001)
Insufficient airflow Obstruction in system
Clogged filter
Remove obstruction
Replace filter
Motor shuts off
Input amperage too high
Graphite crystal rods are consumed
Motor is burnt
Ensure filter is in place, reset circuit breaker
Replace rods (PN: AG112, 2/pkg)
Replace motor (PN: AB001)
Excessive airflow Filter not in place Install filter
Suction varies from workstation to workstation Hose lengths between stations vary Adjust damper or blast gate at each station equalizing suction
WARRANTY
QUATRO Air Technologies (QUATRO) warrants its equipment to be free from defect in material and workmanship under
normal use and service for a period of one year from date of shipment. QUATRO's obligation under this warranty shall be
limited to replacing any parts, thereof, which shall be demonstrated to have been defective. This is expressly in lieu of all
other warranties, express or implied, including the warranties of merchantability and fitness.
QUATRO claims no warranty as to merchantability or as to the fitness of the merchandise for any particular use and shall not
be liable for any loss or damage. No person, firm or corporation is authorised to assume for QUATRO any other liability in
connection with the sale of these goods. Equipment, parts and material manufactured by others and incorporated in
QUATRO's equipment are warranted by QUATRO only to the extent of the original manufacturer's liability to QUATRO.
Conditions and Limitations: This warranty does not cover abuse, misuse, maintenance negligence, improper assembly,
acts of vandalism, acts of God, fear wear, modifications of the equipment or installation of a part not recommended by
QUATRO, as well as operation of the equipment at voltages other than those specified by QUATRO.
REPLACEMENT PARTS LIST
PowerStation 6
Description PS625-23A6GH
HEPA Filters (2 required) F022
WHITE Filter Bags (6 required) AG149 (pak of 6)
YELLOW Filter Bags (6 required) AG259-06 (pak of 6) or AG259-12 (pak of 12)
Blower Turbine Assy 230V (2 required) (2) AB045-25

QUATRO
Air Technologies Inc.
----------------------------------------------------------------
Engineers Of Clean Air
----------------------------------------------------------------
30 Hymus Boulevard, Montreal, Quebec, H9R 1C9 Tel.: (514) 630-4444 Fax: (514) 630-4454 website: www.quatroair.com [email protected]
LED Diagnostics Table, R18
Light
(LED)
Status
Audible
Alert
Condition Description/Action
System
SOLID
Unit is ON
LED 1
(L1)
Flashing
Slowly
AUDIBLE ALERT
MUTED
Alarm Condition MUTED, See L2, L3 Or L4 for specific alarm condition
Service
Motors
LED 2
(L2)
SOLID
Beep
Every
4 Hrs
Motor(s) Will Soon
Need Service
“Quick Change” Brush Motors WILL SOON Require Brush Replacement
INFINITY motor Brush WILL SOON Require Complete Replacement
Brushless Motors Are Almost At The End Of The Predicted Service Life
RESET ALERT After Service!!
See “Motor Service & Replacement” Section For More Motor Info & Reset Alert
Instructions
SOLID
Beep
Every
15 Min
Motor(s) Service
Becoming Urgent
“Quick Change” Brush Motors ONLY: Replace Brushes ASAP And RESET
ALERT, See “Motor Service & Replacement” Section For More Info & Reset
Alert Instructions
SOLID
Beep
Every 5
Min
Motor(s) Service
Required
IMMEDIATELY
“Quick Change” Brush Motors ONLY: Replace Brushes IMMEDIATELY And
RESET ALERT
See “Motor Service & Replacement” Section For More Info & Reset Alert
Instructions
SOLID
Motor Alarm Muted
L1 Flashing Slowly
Replace Brushes OR Motor(s) ASAP And RESET ALERT
Alarm Mute Details On Previous Page
See “Motor Service & Replacement” Section For More Motor Info & Reset Alert
Instructions
Service
Filter(s)
LED 3
Flashing
Slowly
*Filter Pressure High Prepare To Replace/Service Filters
See “Filter Service & Replacement” Section For More Info & Filter
Service/Replacement Instructions
(L3) Flashing
Slowly
Beep
Every
Hour
*Filter Pressure Near
Critical, Service
Becoming Urgent
Replace Filters. See Filter Service/Replacement For More Info.
Continued Operation May Result In Unit Shutdown.
High Pressure Causes Excess Motor Heat & Accelerates Brush Wear.
Flashing
Slowly
Beep
Every
Second
*Critical Pressure Unit Has Shutdown To Prevent Damage From Excess Pressure
Verify Blockage – Remove Blockage
Verify All Filters – Clean/Replace Filters Accordingly
See “Filter Service & Replacement” Section For More Info
SOLID
Beep
Every
Hour
Filter(s) Service Life
Expired
Replace Filter(s) ASAP And RESET ALERT
See “Filter Service & Replacement” Section For More Info & Reset Alert
Instructions
SOLID
Filter Alarm Muted
L1 Flashing Slowly
Replace Filter(s) ASAP And RESET ALERT
Alarm Mute Details On Previous Page
See “Filter Service & Replacement” Section For More Info & Reset Alert
Instructions
Remote
Standby
SOLID
Receiving Remote
Signal
Remote Switch Closed (On) OR Receiving Remote Signal From Another Piece
Of Equipment
LED 5
(L5)
Fading
IN-OUT
Shutdown Delay Quatro System Continues To Run For A Short Period To Remove All Debris
From Work Area
Flashing
Slowly
Unit Is In Standby Waiting For Remote Switch To Close (Turn On) OR To Receiving Remote
Signal From Another Piece Of Equipment
ALL
LEDS
Flashing
Slowly
Beep
Every
Second
* Low System Pressure Abnormally Low Pressure, Unit will BEEP & Shutdown In 5 Seconds
Unit Will Continue To Shutdown Unit Until The Issue Is Addressed
-Motor(s) Not Operating Due To Service Required Or Failure
Service (Change Brushes) Or Replace Motor(s) & RESET ALERT Alert
See “Motor Service & Replacement” Section For More Motor Info & Reset Alert
Instructions
-Motors Not Operating Due To Excess Heat.
Check For Line Blockage, Service/Replace Filters. Let Motor(s) Cool For
30Min.
See “Filter Service & Replacement” Section For More Info & Reset Alert
instructions, -Access Door(s) Open. Close All Access Doors
-Filters Not Or Improperly Installed. Verify Filters
This manual suits for next models
2
Table of contents
Other Quatro Vacuum Cleaner manuals