Quest Leisure Products Screen House Mini Installation guide

Screen House Mini
• Full item instructions and extended details •

Page: 2
Screen House Mini instructions
General Use
Failure to follow the general use instructions below could lead to damage to the screen house or injury
to your person. Always read and follow these instructions when using the product.
• The screen house is an external product and designed to be used outside.
• Due to the changeable weather conditions it is recommended that you always use all of the storm
straps and pegging points in order to secure your screen house.
• It is also recommended that the screen house not be left unattended. Due to the nature of outdoor
products along with the changeable weather conditions and diering ground conditions, many
unexpected circumstances can occur. If the screen house is left unattended it could impact the
performance of the screen house.
• If the screen house is going to be left unattended for an extended period of time (longer than a
couple of days), we recommend to take the screen house down.
• Do not leave outside in severe weather conditions.
• Please retain all information for further reference
Thank you
for purchasing this product. At Quest we take every care to ensure that the product fulls
your expectations. We hope you enjoy using this product
Quest manual download site
The quest manual download site can be found at the url below or the QR code
to the left
http://www.questleisure.com/manuals.

Page: 3
Screen House Mini instructions
• The screen house frame is made to be easily erected, but take care when erecting and taking down
the screen house. Always ensure that nothing is twisted or caught in the frame.
• NEVER force the frame, it will open or close without the need for undue force. Applying undue force
could damage the frame and would invalidate your warranty.
• Although extremely easy we recommend that you put this screen house up and down a few times
at home or in an area such as a basement or garage before putting it up outside. This allows you to
get used to the process before putting it up in an area that could be exposed to wind and rain.
• The screen house can be put up by one person, but it is easier to erect with two people.
• We recommend that you always peg the screen house down with both the screen house pegging
points and the included storm straps.
• Always use the included the storm straps, but DO NOT over tighten them. The strap should be tight
enough to hold the sidewall in place, it should not pull the sidewall towards the ground. Otherwise
this could lead to the roof folding in during use.
Read Before Use
Extra information to ensure the safe and successful use of your screen house

Page: 4
Screen House Mini instructions
Screen House 4 mini
Roof Frame Diagram
Code: A5503 • Diagram Version 1
100cm
Roof poles
11mm diameter
Solid Fibreglass
Pole end caps
(hub end)
Pole end caps
(sleeve end)
Roof hub
2 Pieces
(top and bottom)
Screen House 4 Mini
Side Frame Diagram
Code: A5503 • Diagram Version 1
95cm
Roof poles
11mm diameter
Solid Fibreglass
Pole end caps
(hub end)
Pole end caps
(sleeve end)
Roof hub
2 Pieces
(top and bottom)
Frame Diagrams
Frame diagrams for all screen house models

Page: 5
Screen House Mini instructions
• Fading : With all polyester materials used outdoors some fading or colour changing will occur.
This will change depending upon how often you use it, how long it is up when you use it, what the
weather is like when you use it and other external influences such as shade etc. This fading only
affects the look of the material and does not affect the performance of the screen house. It is a
natural process and cannot be avoided. Fading can be improved by using a proofing spray as
listed in the maintenance section below.
• Colour changing : Similar to fading, all polyester materials used outdoors may be affected by
colour changing. This is down to the amount of sun they receive whilst out, the atmospheric
conditions at the time and other external factors. Colour changing is only cosmetic and does not
affect the performance of your screen house.
• U.V. Degradation : Over time all polyester materials will break down and become brittle. This is
down to the effect the sun has on the material. Your screen house is protected against this with
its advanced U.V. coating, but this protection does break down over time. The time it takes will
completely depend upon the weather conditions when used, such as the suns heat, cloud cover,
shade and others. This is a natural process that cannot be stopped, but you can protect against it
by regular cleaning and re-proofing (listed in the care and cleaning instructions).
• Condensation : Condensation is a natural process where moisture from the ground is drawn
up and collects on the roof or sides or your screen house. Whilst this is keep to a very minimum
thanks to the mesh side on your screen house, you may still get some on roof during certain
conditions.
Wear , Tear and Usage
The screen house is used outdoors and thus will be subject to standard wear and tear
caused by the weather and other external inuences. This section lists some, but not all of
the standard wear and tear you may get with your screen house.

Page: 6
Screen House Mini instructions
Folding and Unfolding
Details on how to use your product.
Erecting your Screen House
• Remove the screen house from the carry bag and place onto the ground.
• Hold the roof hub in your hand and raise up. The frame will start to unfold and you should have the
black oor on the ground. You can then place the roof hub on the ground.
• IMPORTANT before proceeding, esnure that the black oor is on the ground and that the frame is not
tangled with any of the fabric.
• Start next to any side and pull the side centre hub towards you using the webbing strap. This will pop
the side out towards you.
• Repeat this with each side and the screen house will stand up, with the roof pointing down.
• To pup the roof, simply push the centre hub up. You can do this by either going inside the screen
house and pushing up, or by pulling the roof up by the loop on the top, or by pushing one of the roof
beams up. The Screen House is now erected, but we always recommend pegging it down.
• Peg each corner of the screen house inside using the pegging eyelets and pegs that are included in
the screen house (you can use your own pegs if you prefer).
• Once all the corners have been pegged, attach the storm straps (if not already attached) to the
screen house via the stainless steel loop in the centre of the sidewall. Peg the other end of the storm
strap into the ground and then tighten the strap.
• DO NOT over tighten the strap. The strap should be tight enough to hold the sidewall in place, it
should not pull the sidewall towards the ground. If they are over tightened they can lead the roof to
pop down when in use.
Taking your Screen House down
• The screen house should not be taken down in high winds as it could cause damage when the storm
straps and pegs are removed. If you are taking it down in high winds you must take extra care and
always have more than one person present to help secure the screen house once the straps and pegs
have been removed.
• Slacken the storm straps and remove the pegs from the ground, then remove all pegs from the corners
•
• Next pop the roof down, bt pushing on one of the roof poles and the roof will pop down instantly.
• Walk outside of the screen house and push the centre of the sidewall in until it springs in and collapses.
You may nd it easier to hold the top left corner with one hand and push the centre in with the other.
• Repeat on every side until the entire screen house has collapsed.
• Once the screen house is laying on the ground, roll the screen house up.
• ENSURE that the frame is not twisted when doing this as failure to do so could cause damage to the
product.
• Carefully place the screen house into the carry bag.

Page: 7
Screen House Mini instructions
Folding and Unfolding
Details on how to use your product.

Page: 8
Screen House Mini instructions
Storage , Care and Cleaning
Details on how to look after your product.
Storage
To help keep your product looking newer for longer and prolong the life and use of the product, we
recommend that the product is covered when not in use. The screen house should never be put away
wet. If it is put away wet, then it should be taken out and dried before being stored away after use.
Failure to do so can cause mould growth and potential damage to your screen house.
If the product is not going to be used for an extended period (such as a winter period) we
recommend that it is carefully folded away and stored in a clean, dry and free from damp location.
Care and Cleaning Instructions
Never use and harsh or abrasive cleaners or brushes when cleaning this product as the frame and
fabric may be damaged when doing so. Never fold and put the product away when wet as this can
trap water in the product, which can lead to mould and mildew build up.
IMPORTANT: If you have used any type of cleaner other than warm soapy water you may have
damaged the U.V. coating, so we recommend reproofing the screen house as if the coating has been
damaged it would lead to premature aging of the product. We recommend you use a dedicated
re-proofing spray.
• Fabric : We recommend using a dedicated awning or tent cleaner for the fabric, if one is not
available simply warm soapy water. After it has been cleaned, rinse with clean water to make sure
there's no soap or cleaner left inside the fabric. Once rinsed allow the product to dry naturally
before folding away and storing.
• Frame : First allow any dirt to dry and brush with a soft brush to remove loose dirt. Once this is
done wipe the frame down with warm soapy water and a soft cloth. Once cleaned allow to dry
naturally before storing away.
• Bolts : There are small bolts on the screen house frame mechanism. These may become loose after
multiple uses, so just check that these are not loose, but never overtighten them as this could lead
to damage and may invalidate your warranty.

Page: 9
Screen House Mini instructions
Warranty : 12 Months (1 Year) warranty.
Warranty Claim
• In the unlikely event of a warranty claim, you must contact your retailer.
• If you have not registered your product, rst ll out the registration form overleaf and take this with
you when you go to your retailer.
• Take the product to your retailer that you purchased it from along with your proof of purchase and
explain the issue with the retailer.
• The retailer will then check the product and get in touch with the wholesaler or manufacturer.
• The retailer will keep you informed of the progress of the claim.
• The wholesaler or manufacturer will not (unless under special circumstances) get in touch with you
as all information will be passed back directly to the retailer.
Warranty Information
• This product comes with a full 12 month manufacturers defect warranty and covers any manufacturers
defects for one (1) year from the date of the original purchase. It does not cover any damage occurred
though:
• The product falling, being dropped, scratched or damaged in any way.
• The product has been technically changed by the owner or another third party
• Improper use of the product.
• Normal wear and tear - which includes (but is not limited to): colour fading, wearing, stretching.
• Weather damage - which includes (but is not limited to) U.V. degradation and colour changing.
• The aected part will be replaced or repaired (manufacturers option) if they are found to be defective
within the one (1) year time frame.
• The warranty will be void if the product has been subject to neglect, misuse, improper installation,
misapplication, alteration or accident including, but not limited to, improper installation, maintenance
or use of unauthorised parts or attachments.
• Damage caused by not following the instruction manual in full will invalidate the warranty, if this
results in consequential damages, Quest will not be liable for these damages or any costs incurred
due to these damages.
• Quest will not be liable for material damage or personal injury caused by improper use or if the
safety instructions are not properly executed in full.
• All claims must be made though the retailer you purchased the product from and not direct with the
wholesaler or manufacturer.
• Warranty claims cannot be honoured without an original dated receipt and or proof of purchase.
• By executing repairs the original warranty period of one (1) year will not be extended, nor the right to
a complied new warranty. This warranty is only legal on European soil.
• This warranty does not overrule the European directive 2011/83/EU.
• This product may not be amended or changed.
Warranty
Details on the warranty that comes with your product.
Page: 10
Screen House Mini instructions
Model
Your
Name
Purchase
Date
Your
Email
Retailers
Name
Your
Address
Retailers
Address
Additional
Information
Registration
You can register your Screen House online at https://www.questleisure.com/register or ll
out the form below and send it into Quest :

Page: 11
Screen House Mini instructions
Single person pitch and in less than 60 seconds
We have designed and built the Screen House to be erected by a single person. Everything about it, is catered to
ensure that it can be done by one person. We test the Screen House ourselves to ensure that it can be erected by a
single person. We even use our own office staff and members of the general public to test it as well. On top of this we
time it ourselves and have proven time and time again that it can be erected by a single person in under one minute,
so we give it both the single person pitch and 60 seconds to erect logos.
Quest Tec210 fabric
This is a modern, middleweight performance fabric. It is stronger and will last longer than its cheaper rivals. It has
a high performance U.V. coating giving it the 50+ rating. It is also fully waterproof, whilst keeping the weight down
making it easier to use. • Fabric Density: 210D • Waterproof rating : 2,000mm Hydrostatic Head.
U.V. 50 Plus
The Screen House has a U.V. rating of 50+, the highest available. This gives you excellent protection from the sun,
especially important when the screen house is being used as a shelter for the younger ones.
Premium Hub System
We are on our 5th generation of premium hub system. This is the centre of the Screen House frame system and
its single most important part. Our premium hub is simply stronger and more reliable than anyone else’s. It is also
repairable if anything should happen to it, ensuring piece of mind for years to come.
The best example of just how well made our screen houses are is that we use our screen house demonstrator for at
least two years. During those two years it is goes though approximately 15 years worth of usage as it goes up, down,
up down all day long during shows and more. At the end of those two years they are still working fine and replaced
only as logos and features are added.
NO Chill Pro Mesh
The screen house uses our No-chill PRO premium mesh. This mesh not only allows great views, but stops the wind
chill factor allowing it to feel cooler in the sun than standard fabrics, but also warmer in the wind than its cheaper
rivals. It is also stronger, lasts longer and is less prone to snags and marks than the others.
Screen HousesScreen Houses
The original one person, one minute shelter, and still the best.
We have been producing the Screen House for over 6 years, longer than any others. In
that time we have been improving the Screen House all the time and it means that it is
the best, quickest, strongest and longer lasting than its rivals. Some of the innovation and
changes cannot simply be seen, but together make our screen house perform better and
last longer than the others..
No-Chill PRO
Premium quality mesh
Great views, no wind chill
U.V. 50+
Protection from the Sun
Single
Person Pitch
So easy, it only takes
one to pitch
Premium Hub
System
60 Seconds
To Erect

Page: 12
Screen House Mini instructions
Cat No 120053 Screen House 4
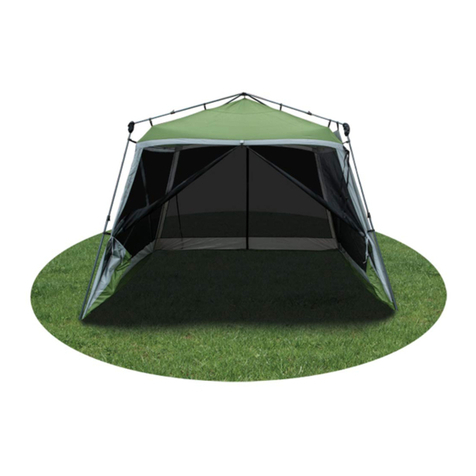
The original Screen House 6. Called a 4 as it has 6 sides, this can easily be erected by a single person in
under a minute. Full mesh sides built in to stop insects and combat wind chill, but allow air flow. Cooler
in the sun and warmer in the wind, its the perfect quick up shelter.
The premium build quality and premium features elevates this from its rivals The hub system is extremely
durable, the fabric is UV coated to help protect you and the screen hose from the suns rays and the
frame is made from solid fibreglass to give it a premium feel and performance.
For a full list and details visit : www.questleisure.com

Page: 13
Screen House Mini instructions
Cat No 120051 Screen House 6
The original Screen House 6. It is the larger cousin of the Screen House 4 and has 6 sides, but can still
easily be erected by a single person in under a minute. Full mesh sides built in to stop insects and
combat wind chill, but allow air flow. Cooler in the sun and warmer in the wind, its the perfect quick up
shelter.
The premium build quality and premium features elevates this from its rivals The hub system is extremely
durable, the fabric is UV coated to help protect you and the screen hose from the suns rays and the
frame is made from solid fibreglass to give it a premium feel and performance.
For a full list and details visit : www.questleisure.com

Page: 14
Screen House Mini instructions
Cat No A3000 Screen House 4 Pro
Based on the Screen House 4, the PRO version takes it two steps further. Firstly it has all the same
features as the Screen House 4 and is just as easy to erect, but then it adds :
• Zipped in full sides. These zip down and cover the built in mesh sides with a complete fabric side. The
sides also have windows on each side with an external blind.
• Accessory Zip. The pro model has an accessory zip around the front door allowing you to add various
accessories onto your screen house.
For a full list and details visit : www.questleisure.com

Page: 15
Screen House Mini instructions
Cat No A3005 Screen House 6 Pro
Based on the Screen House 6, the PRO version takes it three steps further. Firstly it has all the same
features as the Screen House 6 and is just as easy to erect, but then it adds :
• Additional Door. The pro version of the screen house 6 has two doors, allowing you two ways in or out.
Zipped in full sides. These zip down and cover the built in mesh sides with a complete fabric side. The
sides also have windows on each side with an external blind.
• Accessory Zip. The pro model has an accessory zip around the front door allowing you to add various
accessories onto your screen house, or even zip up to five of them together
For a full list and details visit : www.questleisure.com

Page: 16
Screen House Mini instructions
Cat No A5503 Screen House Mini
The screen house mini, is as its names implies a mini version of the screen house. Using the same
premium hub system and a smaller frame it is still extremely easy to use and pitch, it can easily be
erected by a single person in under a minute. The smaller size of the mini also means a smaller and
lighter pack size, but when pitched the mini is 140cm high, so easily high enough to sit under. Vents
around the bottom of the unit allow air flow and the windows in the top allow extra visibility , or can be
closed with the external blinds when not required. Complete with a built in PE floor that can be toggled
up to create a half door at the front.
Perfect for the beach, festivals, parties at the park, fishing and more.
For a full list and details visit : www.questleisure.com

Page: 17
Screen House Mini instructions
For a full list and details visit : www.questleisure.com
Cat No 120010 Instant Utility , Toilet and Shower
Whilst not strictly a screen house the instant utility is another extremely easy unit to pitch. This uses the
excellent zero tension frame, which again means there is nothing to put together, nothing to inflate and
nothing to tension. You simply take it out of the bag, unfold the frame and extend the legs and you are
ready to go.
The unit comes with a shower shelf so it can be used as a shower unit if required and the floor can be
toggled out of the way, which is an excellent idea if its being used as a shower or toilet.
Quick and easy to use, it is an excellent piece of kit to have at hand for that extra little space when
required.

Page: 18
Screen House Mini instructions
For a full list and details visit : www.questleisure.com
Cat No 120054G (Screen House 4) : 120052G (Screen House 6) Side Walls
Adds privacy and extra protection to your Screen House (4 and 6 only). They simply clip into each corner
and velcro in place. Sold in pairs, so you can just cover a couple of sides, or every side if you wish, they
can be placed over the doorway as well if required.
They can even be used in conjunction with the optional canopy pole kit to create a sun canopy area to
the side of the screen house if required.
Accessories
A few little extras to add to your product.

Page: 19
Screen House Mini instructions
For a full list and details visit : www.questleisure.com
Cat No A5504 Screen House Pro Canopy
This is an accessory for your screen house pro (fits both 4 and 6). It is a large canopy that simply zips
onto the front of your screen house and gives you a large covered area to the front of your screen
house..
It uses one pole at the front and comes complete with webbing straps and pegs to ensure a secure pitch.
Accessories
A few little extras to add to your product.

Page: 20
Screen House Mini instructions
For a full list and details visit : www.questleisure.com
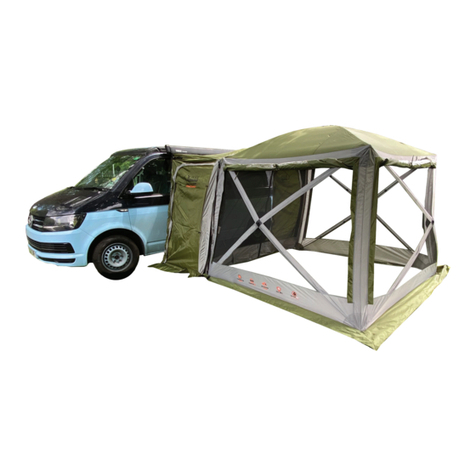
Cat No A5505 Screen House Pro 4 Vehicle Connector
This is an accessory for your the Screen House 4 Pro. Again this simply zips onto the front of your Screen
House 4 pro and allows you to connect your screen house 4 pro to your vehicle.
Doors to the left and right allow access in and out from either side and the connector comes with a roof
pole to give water run off in the roof and double beading (both 4 and 6mm) to allow direct fitting to
canopies, or awning channel.
It can be connected to vehicles, or canopies between 180 and 210cm in height. As it zips on and off it
does not need a drive away kit when used on a motor home or camper.
Accessories
A few little extras to add to your product.
This manual suits for next models
2
Table of contents
Other Quest Leisure Products Tent manuals

Quest Leisure Products
Quest Leisure Products Screen Shelter User manual

Quest Leisure Products
Quest Leisure Products Falcon Air Porch Awnings User manual

Quest Leisure Products
Quest Leisure Products Nest Shelter User manual

Quest Leisure Products
Quest Leisure Products Pop Up Inner User manual

Quest Leisure Products
Quest Leisure Products Screen House A5505 User manual

Quest Leisure Products
Quest Leisure Products Falcon Air User manual