QVC PT1176 User manual

DVD Recorder
MODEL:PT1176
External storage→DVD
AV IN→External storage
DVD →External storage
Video Play
Setting

Safety Rules
Warning
To reduce the risks of fire or
electric shock, protect the
equipment from rain or damp. To
avoid fire or electric shock, do
not place the containers like vase
containing liquid on the equipment.
Do not install the equipment
within the small spaces like
bookcase or thelike.
Notices: the use of the product
with the optical devices may
increase the risk of eye injuries.
As the laser beam of the multi-
functional DVD recorder does harm
to the eyes, any attempt to remove
the casing is not allowed. And
this must be done by the
professionals.
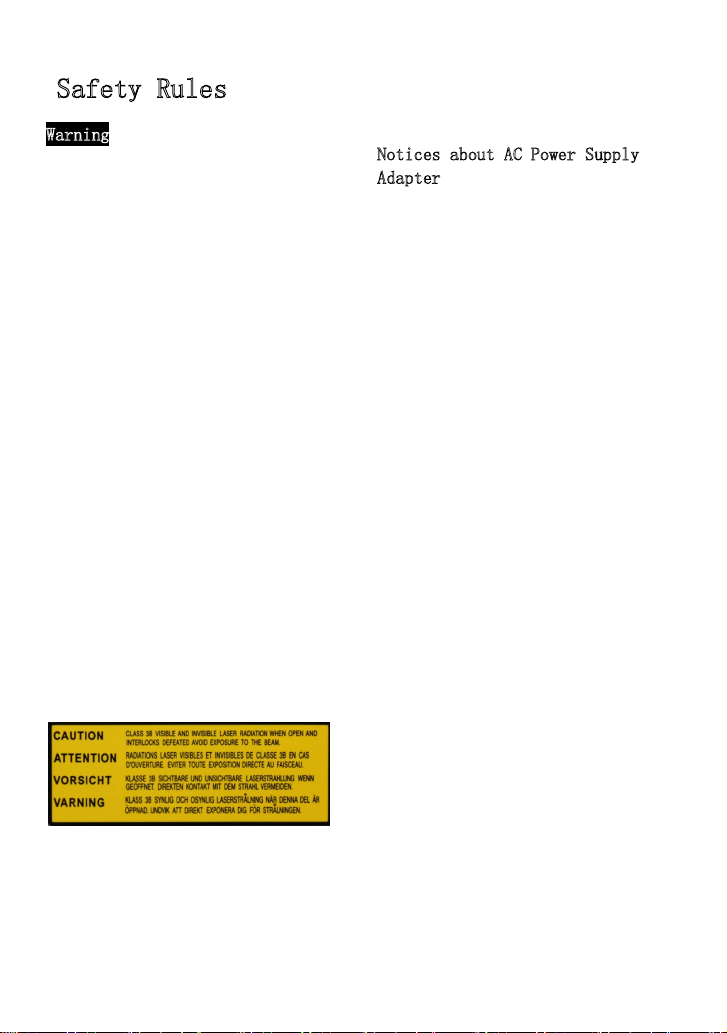
The equipment is a class-1 laser
product, and the sign is on the
casing of the optical disc drive
of the product.
And the sign is also on the laser
shield within the package.
Notices about AC Power Supply
Adapter
•Make sure that the power supply
socket is installed near the
equipment and easy to be pushed and
pulled.
•Be sure to use the AC power supply
adapter andpower line supplied.
•Do not use any other AC power
supply adapter, or else the failures
mayresult.
•Connect the AC power supply
adapter to the power supply socket
that is easy to be pushed and pulled.
•Do not touch the AC power supply
adapter with wet hands.
•If you find something wrong with
the AC power supply adapter, please
immediately disconnect it from the
power supply socket.
•Even if the power supply of the
equipment itself is off, it remains
connectedto the AC power supply, if
it is connected to the power supply
socket.
The nameplate is on the bottom of
theequipment.
Model:
Name: DVD recorder

❑
The warranty is valid only when the accessories supplied are used in
the designated or suggested system environment as per the document, and
it only applies to the DVDirect. Our customer service and user supply
apply only when these conditions for warranty are met.
❑
Please note that our company disclaims any liability for the cases as
follows: failures of computer or other devices, incompatibility with
special hardware, operating problems caused by improper software
application, data loss, accidental or unexpected damages to the optical
disc or others arising from the use of the product.
❑
The guaranty of the product and user supply are valid only in the
nations or sales regions as specified in the warranty card.
❑
The specification is subject to changes with improvement of the
product, without prior notice
.
Copyright
The TV programs, films, videos, CDs and other materials are under
copyright protection. Recording of these materials in question without
approval is in violation of the copyright law. Furthermore, the use of the
product with the CATV transmission devices shall be approved by the CATV
transmitter and / or the program owner.

Table of Contents
Safety Rules
............................................. 2
Introduction ............................................. 4
I. External storage→DVD ................................. 6
1. AV in onto DVD ROM ................................ 6
2. USB onto DVD-ROM .................................. 9
3. Memory Card onto DVD-ROM ......................... 12
II. AV IN→External storage ............................. 14
1. AV IN onto USB ................................... 14
2. AV IN onto Memory Card ........................... 16
III. DVD →External storage ............................. 19
1. DVD onto USB ..................................... 19
2. DVD onto SD ...................................... 21
IV. Video Play .......................................... 24
1. Video play ....................................... 24
2. Operations during playing ........................ 25
V. Setting Menu
......................................... 26
5.1 Change CD settings on the setting menu .......... 26
5.2 Recording quality ................................. 26
5.3 Auto stop timer ................................... 27
5.4 Auto chapter .................................... 28
5.5 CD erase ........................................ 28
5.6 Language ........................................ 30
5.7 Recovery of factory setup ....................... 30
VI. HDMI for Connecting to Video Equipment
.............. 31
VII. Troubleshooting
....................................
VIII. Parameter List
....................................
33
32

Introduction
Media Play Formats Supported
Local full HD 1080P (1920*1080) play
AVI /MKV /TS /M2TS /MPG /MOV /VOB /WMV /RM /RMVB/ FLV
Graphic browse formats supported
JPG, JPEG, BMP, PNG, etc
Audio formats supported
MP3/ OGG/ WMA/ AAC/ FLAC, etc
DVD+R /DVD-RW /DVD+RW/DVD-R discs
External AV signals recorded onto DVD discs
USB and CARD video/ audio files recorded onto DVD discs
External AV signals recorded onto USB
External AV signals recorded onto CARD
DVD signals recorded onto USB
DVD signals recorded onto CARD

S
Note: recorded disc formats are MP4 formats,which can not
play by common DVD,but can play by Blu-ray DVD.
tart
Start: Connect (5V – 3.0A), and press the POWER button for 3 seconds.
Stand-by: press Power button to turn off the screen, and press it
again to turn on the screen.
Shut Down
Shut down: press the POWER button for 3 seconds to shut down the
equipment.
Caution: Don not remove the power supply before shutting down the DVD
recorder.
I. External storage→DVD
1. AV in onto DVD ROM
1.1 Enter the main menu, and choose “External storage →DVD” by
operating the keyboard.
1.2 Press Enter button. The options of AV in / USB/ Memory Card
appears.

1.3 Place a blank media disc into the DVD drive. Then connect
Yellow for video input, White for left channel and Red for
right channel.
Choose AV in, and press Enter. The display screen of the unit
allows the users to browse their favorite videos
synchronously, and provides the related signals such as
“video→DVD”, “recording quality” and “remaining”.
Press Return to go back to MENU, and then press REC.
1.4 Press REC for recording.

(Note: if “no storage” appears on the display screen, please
press RETURN to exit, and insert a correct disc. Wait 10-15
seconds to allow the unit to read the disc, and resume
recording. Adjust the quality of resource to desire quality
1.5 Press STOP to end recording, and “Burning” appears to
indicate burning.
Note: While burning, the user should not operate any button on
the panel.
1.6 Wait the disc is ejected automatically when burning is
complete. Press RETURN to exit the current menu, and go back
to main menu by repeated pressing the return button.

(Note: make sure that the AV signal source is connected before
recording. If not, “av is not ready” will appear. Do not
disconnect the signal source while the recording is being
processed.)
2. USB onto DVD-ROM
2.1 Read the disc correctly, and then connect USB. Enter the
main menu, and choose “External storage→DVD” by using the
keyboard.
2.2 Press ENTER. AV in/USB/ Memory Card appears.

2.3 Select input“USB”, and the tips appear: “Copy files from
USB to DVD”“Press REC to start recording”。
2.4 Press REC to start recording, and the message “Burn files”
appears.

2.5 The message “Burning finished ,please press return”
appears, and the CD is ejected automatically. Press RETURN
to exit the current menu, and go back to the main menu by
repeating pressing the button.
2.6 Connect USB after start. If USB is not connected, the tip
“USB is not ready” appears. If USB capacity is bigger than
that of disc, the massage “not enough space in DVD”
appears.

3. Memory Card onto DVD-ROM
3.1 Read the disc correctly, and insert CARD. Enter the main
menu, and choose “External storage →DVD” by using the
keyboard.
3.2 Press ENTER. Menu “AV in/USB/ Memory Card” shows itself.

3.3 Select input“Memory Card ”, and press ENTER to go to the
relevant tip interface “Copy files from Card to DVD”
“Press REC to start recording”.
3.4 Press REC to start recording, and the message “Burn files”
appears.

3.5 The message “Burning finished ,please press return”
appears, the Disc will be ejected automatically when the
Burning is finished. Press RETURN to exit the current menu,
return to main menu by repeatedly pressing the RETURN button.
(Note: Insert CARD after start. If Memory Card is not connected,
the tip “CARD is not ready” appears. If CARD capacity
is bigger than that of DVD-ROM, the tip “not enough
space in DVD” appears.)
II. AV IN→External storage
1. AV IN onto USB
1.1 Enter the main menu, and choose“AV IN→External storage”.

1.2 Select output “USB”. The screen shows the menu of AV
synchronization, and the relevant message menu appears:
“Video →USB”, “recording quality” and “remaining”.
Press RETURN to go back to MENU.
1.3 Press REC to start recording.

1.4 Press STOP to end operation. The message “Burning
finished”, Press RETURN to exit the current menu, return to
main menu by repeatedly pressing the RETURN button.
(Note: the name of the path of the program recorded created on
the UBS is “MT-ROOT/ Record”. The remaining time is
detected, and the burning is started automatically.)
2. AV IN onto Memory Card
2.1 Enter the main menu, and choose “AV IN→External storage”.

2.2 Select output: “Memory Card”, and press ENTER.
2.3 The screen shows the menu of AV synchronization, and the
relevant message menu appears: “Video →SD”, “recording
quality” and “remaining”. Press RETURN to go back to MENU,
and press REC to start recording.

2.4 Press REC to start recording.
2.5 Press STOP to end operation. The message “Burning finished,
Press RETURN to exit the current menu, return to main menu
by repeatedly pressing the RETURN button.

(Note: the name of the path of the program recorded created on
the UBS is “MT-ROOT/ Record”. The remaining time is
detected, and the burning is started automatically.)
III. DVD →External storage
1. DVD onto USB
1.1 Enter the main menu, and choose “DVD→External storage”
1.2 Choose “USB”, and press ENTER.

1.3 The interface shows “CD→USB”“ copy all files from DVD- ROM
to the storage” and “Press REC to start recording”. Press
RETURN to exit the current menu, and press REC to start
recording.
1.4 Enter REC. The tip “COPY FILES TO NEW DIRECTORY ”
Table of contents