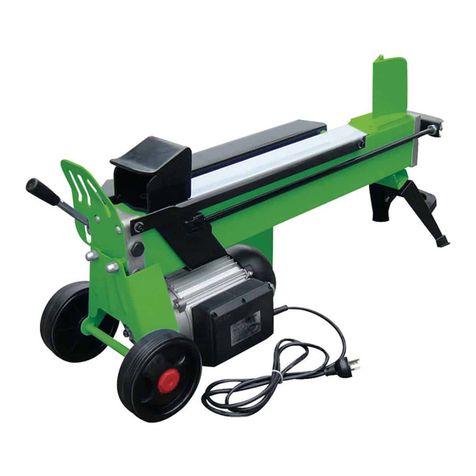
Racing RACFBE65T User manual

ORIGINAL INSTRUCTIONS=>EN
ELECTRIC LOG SPLITTER
RACFBE65T
USER GUIDE
CAUTION: Read the instructions before using the machine!

CONTENTS
1. SAFETY INSTRUCTIONS.......................................................................3
2. YOUR PRODUCT....................................................................................6
3. UNPACKING..........................................................................................10
4. ASSEMBLY............................................................................................11
5. OPERATION...........................................................................................11
6. CLEANING MAINTENANCE AND STORAGE.....................................13
7. TRANSPORT..........................................................................................14
8. DISPOSAL AND RECYCLING...............................................................14
9. TROUBLESHOOTING............................................................................14
10. DECLARATION OF CONFORMITY.....................................................15
11. WARRANTY..........................................................................................16
12. PRODUCT FAILURE.............................................................................17
13. WARRANTY EXCLUSIONS..................................................................18
2

1. SAFETY INSTRUCTIONS
Keep these instructions for future reference
1) The log splitter must always be used by one operator only.
2) Nobody must be allowed to use the log splitter unless they have read the instruction manual
and have been instructed in the regulations to follow for correct and safe use.
Operators must receive necessary training and instructions.
3) The machine must be used by adults only. Use of the log splitter by apprentices of not less
than 16 years of age must be supervised by an adult authorized to use the machine.
4) Never wear loose, unbuttoned clothing which may become trapped in moving parts.
5) Check that the logs to be split are free from nails or wire, which may fly up or damage the
machine, branches must be cut off flush with the trunk.
6) Never try to split logs larger than those indicated in the technical specifications. This could be
dangerous and may damage the machine.
7) Break wood in the direction of the grain, do not place wood across the log splitter and leave it
in that position for splitting; it may be dangerous and may seriously damage the machine.
8) Never attempt to cut two logs at once, one may fly up and hit you.
9) If the log moves away from the blade, retract the blade and turn the log through 900.
10)Do not attempt to load the log in the log splitter while the blade is in motion, you could get
trapped and injured.
11)Keep your hands well away from any splits and cracks which open in the log; these may close
suddenly and crush or amputate your fingers.
12)Never force the log splitter for more than 5 seconds keeping the cylinder under pressure in the
attempt to split excessively hard wood. After this time interval, the oil under pressure is
overheated and the machine could be damaged. It is thus better to stop and rotate the log by
900to see whether it can be split in a different position. In any case, if you are not able to split
the log, this means that its hardness exceeds the capacity of the machine and thus that log
should be discarded so as not to damage the lop splitter.
13)Do not force the blade by pushing the log on the upper part, as this can cause the blade to
break or damage the body of the machine. Always set the log on the guides.
14)Never leave the machine unattended while it is running. If you leave the machine, even for a
short time, remove the power supply or any possible cause of accidental start-up.
15)The log splitter must never be used by an operator who is under the influence of alcohol, drugs,
medicines, or who is tired. A clear mind is essential for safety.
16)Never request the assistance of another person to help you remove a jammed log.
17)Do not use machines with electric motor if natural gas, petrol fumes or other inflammable
vapors are present.
18)Check that the electric circuit is adequately protected and that it corresponds with the power,
voltage and frequency of the motor, check that there is a ground connection, and a regulation
differential switch upstream.
19)Check on the functioning of the machine.
20)Never open the switch box on the motor. Should this be necessary, contact a qualified
electrician.
21)Make sure that the machine and the cable never come in contact with water.
22)Treat the power cable with care, do not attempt to move the machine by pulling the cable, do
not yank the cable to unplug it; keep the cable away from excessive heat, oil and sharp objects.
23)Never leave the machine unattended with the power supply “on”, also disconnect the power
cable when not in use, when carrying out maintenance work, when changing attachment or
moving the machine.
24)Before starting work, hydraulic pipes and hoses shall be inspected and the stopping devices
shall be tested.
25)Stop the machine before cleaning or making adjustments.
26)The hazards may arise from particular characteristics of wood when being split (e.g. knots, logs
of irregular shape etc.).
27)Operator must receive necessary training and instruction from a qualified person before
3
handling the tool.
28)Use the tool only for the intended use. Misuse (such using material other than log) can damage
the tool and cause accidents and injuries.
29)The splitting operation of the machine is designed to be activated by one person. While there is
the possibility that additional operators could be working with the machine (e.g. for loading and
unloading), only one operator should activate splitting operations;
30)The machine shall not be used by children
31)Wear suitable personal protective equipment (PPE), including safety footwear close fitting
clothing and suitable work gloves, eye protection and hearing protection.
32)Tests of the machine's safety devices before use the tool. If safety devices do not work
properly, do no use the tool and bring it to a qualified technician for inspection and reparation.
33)The working area shall be free from obstructions; before installation and operation, clear the
working area. Keep the working area free from obstructions, e.g. logs, split wood, etc.
34)Do not reach into the splitting zone.
ELECTRICAL SAFETY
WARNING! Always check that the power supply corresponds to the voltage on the rating plate.
WARNING! Connect the main leads to a standard 230V±10% (50Hz±1Hz) electrical supply
which has protection devices of under-voltage, over-voltage, over-current as well as a
residual current device (RCD) which maximum residual current rated at 30mA.
Replacing cables or plugs
If the supply cord is damaged, it must be replaced by the manufacturer, its service agent or
similarly qualified persons in order to avoid a hazard.
Immediately throw away old cables or plugs when they have been replaced by new ones. It is
dangerous to insert the plug of a loose cable in the wall outlet.
Using extension cables
1) As a supply for this machine always use an unloaded line and/or extension with conductor of at
least 2.5mm2and protected with a 20A fuse. Be sure that this extension cable is no longer than
10 meters. Excessively long cables or inadequate section can cause voltage drops that prevent
motor from developing its full power.
2) Only connect your machine and/or extension cable to earthed electricity mains.
Grounding
In the event of an electrical short circuit, grounding reduces the risk of electric shock. Use switch
socket with grounding please.
INTENDED USE
This log splitter is only intended to be used to split logs! Serious injury may occur if this log splitter
is used for any other purpose.
RESIDUAL RISKS
The machine is built according to the current state of technology and generally recognized safety
standards. However, individual residual risks may occur when working with the machine.
Risk of injury to fingers and hands from the cleaver, in the event of improper guidance or support
of the wood.
Risk of injury from the ejection of the work piece, in the event of inappropriate support or guide.
Exposure to electric current, when using inappropriate electric connecting cables.
Furthermore, unapparent risks may remain, despite of all the measures taken.
Residual risks can be minimized, if the safety instructions, the proper use and the
operating instructions are observed.
TRANSPORT INSTRUCTIONS
4

Transport by hand, Fig. 2, 3
To transport the log splitter, completely retract the cleaver blade
1. Slightly incline the splitter on the cleaver column, using the handle until the machine tilts on to
the wheels and thus can be moved.
Transport by crane:
Never lift by the cleaver blade!
Storage conditions:
Observe the following conditions during storage:
Dry, indoor location. Max.Humidity 80 %
Temperature range - 20 °C to +60 °C
Only operate the machine under the following ambient conditions:
minimum maximum recommended
Temperature 5 C° 40 C° 16 C°
Humidity 95 % 70 %
SYMBOLS
Please read the manual before start-up
Use safety goggles
Wear work gloves
Wear safety footwear
Do not remove or modify protection and safety devices.
Do not spill hydraulic oil on the floor
Dispose of waste oil correctly (waste oil collection point on site). Do not dump waste oil
in the ground or mix it with waste.
Do not use the unit in wet conditions
High-voltage, danger to life!
Do not reach into the rift area!
Risk of injury! Risk of cutting and crushing!
Do not reach into the machine without any protection!
Caution! Switch off the engine before repair, maintenance and cleaning. Unplug the
mains plug.
Only the operator is allowed in the work area of the machine. Keep other people and
animals (minimum distance 5 m) at a distance.
5

Caution! Moving parts!
Attention!
In this operating manual, we have used this sign to mark all sections that concern
your safety.
2. YOUR PRODUCT
2.1 PRODUCT DESCRIPION
1. Control handle
(hydraulic)
2. Guard
3. Tray table
4. Transport handle
5. Foot
6. Control button (electric
motor)
7. Transport wheels
2.2 SCOPE OF DELIVERY
A. Log splitter
B. Lower cover (large)
C. Lower cover (small)
D. Side cover (large)
E. Side flap
F. Side cover (small)
G. Rear side cover
H. Upper flap
I. Upper cover
J. Corner connection
K. Enclosed accessories
bag a. Hexagon screw M6 x
16 mm + washers (2x)
b. Cylindrical screw M6 x 20
mm + washers and
hexagonal nuts (2x)
c. Safety ring (2x)
d. Wheel cap
e. Cylindrical screw M4 x 12
mm (17x)
f. Hexagon screw M8 x 20
mm (1x)
g. Hexagon nut (M4) (17x)
1
6

7

8

9

2.3 TECHNICAL DATA
Dimensions L x W x H
1100 x 380 x 640 mm
Wood ømin. - max.
50 - 250 mm
Wood length min.- max.
150 - 520 mm
Weight approx.
55.4 kg
Motor
230 V~ 50 Hz
Input power
2300 W
Rating
S3 50%
Splitting Power
max. 6.5 t
Cylinder rise
400 mm
Cylinder speed (fast fwd.)
35 mm/sec
Cylinder speed (return)
50 mm/sec
Hydraulic fluid capacity
2,8 l
Operating pressure
240 bar
Motor speed
2800/min
Noise
m Warning: Noise can have serious effects on your health. If the machine noise exceeds 85 dB
(A), please wear suitable hearing protection.
Characteristic noise emission values
sound power level LWA 91 dB (A)
Emission sound pressure level by ear LpA 75 dB (A)
uncertainly KpA 1,5 dB (A)
*S3, periodic intermittent operation without influence of the starting process on the motor heating.
Identical duty cycles with a period at load followed by a period at no load. Running time 10
minutes; duty cycle is 50% of the running time.
Pressure:
The performance level of the built-in hydraulic pump can reach a short-term pressure level for a
splitting force of up to 6.5 tons. In the basic setting, hydraulic splitters are set at the factory to an
approx. 10% lower output level. For safety reasons, the basic settings must not be changed by the
user. Please note that external circumstances such as operating and ambient temperature, air
pressure and moisture affect the viscosity of the hydraulic oil. In addition, manufacturing
tolerances and maintenance errors can affect the reachable pressure level.
3. UNPACKING
Open the packaging and remove the device carefully.
Remove the packaging material as well as the packaging and transport bracing (if available).
Check that the delivery is complete.
Check the device and accessory parts for transport damage.
In case of complaints the dealer must be informed immediately. Subsequent complaints will not be
accepted.
If possible, store the packaging until the warranty period has expired.
Read the operating manual to make yourself familiar with the device prior to using it.
Only use original parts for accessories as well as for wearing and spare parts. Spare parts are
available from your specialized dealer.
Specify our part numbers as well as the type and year of construction of the device in your orders.
ATTENTION!
The device and packaging materials are not toys! Children must not be allowed to play with
plastic bags, film and small parts! There is a risk of swallowing and suffocation!
10

4. ASSEMBLY
At least two people are required to install the device.
4.1 Fitting the machine foot (fig. 2)
Mount the machine foot (5) using two hexagon screws (b) and washers on the holes provided.
4.2 Fitting the handle (fig. 2)
Mount the handle (4) using two Allen screws (b), two washers and two thin nuts on the holes
provided on the machine foot.
4.3 Fitting the wheels (fig. 3)
Fit the wheels (7) on the axles.
Secure the wheels (7) using the provided locking rings (c).
Fit the wheel caps (d) on the wheels.
4.4 Installing the protective guard (Fig. 4 - 8)
Mount the lower cover (B) to the right side of the machine using four Allen screws (e). (fig. 4)
Mount the lower cover (C) to the left side of the machine using three Allen screws (e) (fig. 4)
Fit the side cover (D) into the lower cover (B) and secure it with five Allen screws (e) and five
hexagon nuts (g). (fig. 5)
Fit the side cover (F) into the lower cover (C) and secure it with three Allen screws (e) and three
hexagon nuts (g). (fig. 5)
Connect the holders of the side flaps (E) with the hinges of the side cover (D) and (F). (fig. 5)
Fit the rear side cover (D) into the lower cover (B) and into the side cover (D) and secure it with
two Allen screws (e) and two hexagon nuts (g). (fig. 6)
Secure the rear side cover (G) with the hexagon screw (f). To do this, you have to move the
control handle (1) away to facilitate access for the hexagon screw (f). (fig. 7)
Connect the holders of the upper flap (H) to the hinge of the upper cover (I)
Clip the cover (I) into the side covers. (fig. 7)
Attach the flaps (J) to the hinge of the side covers (E).
Now clip the flaps (J) together with the flap (H). (fig. 8)
4.5 Fitting the tray table (fig. 9)
Push the tray table (3) into the holder provided.
IMPORTANT! You must fully assemble the appliance before using it for the first time!
5. OPERATION
Before start-up, place the splitter on a stable, level and flat workbench so that the control button
sits at a height of 72 - 85 cm.
Make sure the machine is completely and expertly assembled. Check before every use:
the connection cables for any defective spots (cracks, cuts etc.).
the machine for any possible damage.
the firm seat of all bolts.
the hydraulic system for leakage.
the oil level and
the safety devices
5.1 Checking the oil level (Fig. 10)
The hydraulic unit is a closed system with oil tank, oil pump and control valve. Check the oil level
regularly before every use. Too low an oil level can damage the oil pump. The correct oil level is
approx. 10 to 20 mm below the oil tank surface.
If the oil level is at the lower notch, then the oil level is at a minimum. Should this be the case, oil
11

must be immediately added. The upper notch indicates the maximum oil level. The machine must
be on level ground. Screw in the oil dipstick fully, to measure the oil level.
5.2 Ventilation screw
Before operating your machine, the bleed screw should be loosened by some rotations until air
can go in and out of the oil tank smoothly. Failed to loosen the bleed screw will keep the sealed air
in hydraulic system being compressed after being decompressed. Such continuous
compression/decompression will blow out the seals of the hydraulic system and cause permanent
damage to your machine.
Before moving your machine, make sure the bleed screw is tightened to avoid oil leaking from this
point.
5.3 Splitting logs
Only split logs that have been sawn off straight. To do this, proceed as follows:
1) Place the log plain onto the work table.
2) Your machine is equipped with Two-hands Control System that requires to be operated by both
hands of the user –left hand controls the control lever (1) while right hand controls the push
button switch (6).
3) Simultaneously push button switch (6) to start the splitting action.
The log splitter will freeze upon absence of either hand.
Never force your machine for more than 5 seconds by keeping pressure on it to split excessively
hard wood.
After this time interval, the oil under pressure will be overheated and the machine could be
damaged. For such extremely hard log, rotate it by 90°to see whether it can be split in a different
direction. In any case, if you are not able to split the log, this means that its hardness exceeds the
capacity of the machine and thus should be discarded to protect the log splitter.
5.4 Wrongly placed log
Always set logs firmly on the log retaining plates and work table. Make sure logs will not twist, rock
or slip while being split. Do not force the blade by splitting logs on the upper part. This will break
the blade or damage the machine.
Do not attempt to split 2 pieces of logs at the same time. One of them may fly up and hit you.
5.5 Jammed log
Do not try to knock the jammed log off. Knocking about will damage the machine or may launch
the log and cause accident.
1. Release both controls.
2. After the log pusher moves back and completely stops at its starting position, insert a
wedge wood under the jammed log.
3. Start the log splitter to push the wedge wood under the jammed one.
4. Repeat above procedure with sharper slope wedge woods until the log is completely freed.
12

6. CLEANING, MAINTENANCE AND STORAGE
6.1 CLEANING
Attention!
Pull out the power plug before carrying out any cleaning work on the equipment.
We recommend that you clean the equipment immediately after you use it.
Clean the equipment regularly with a damp cloth and some soft soap. Do not use cleaning agents
or solvents; these may be aggressive to the plastic parts in the equipment. Ensure that no water
can get into the interior of the equipment
6.2 Maintenance
Attention!
Pull out the power plug before carrying out any maintenance work on the equipment.
We recommend:
The splitting wedge is a wearing part that needs to be sharpened or replaced after wear.
The combined gripping and controlling device must remain smooth running. Lubricate with
a few drops of oil when necessary.
Keep splitting wedge drive clean of dirt, wood shavings, bark, etc.
Lubricate slide rails with grease.
When must the oil be changed?
Change the oil after 150 working hours.
Oil change (fig. 11)
1) Move the log splitter into the start position and pull out the mains plug.
2) Remove the tray table beforehand.
3) Undo the oil drain screw with dipstick (K) and put it to one side.
4) Turn the log splitter on the support leg side as shown in fig. 11 over a 4,5 liter capacity
container to drain the hydraulic oil off. Recycle carefully! Dispose of the waste oil in an
environmentally friendly manner!
5) Turn your machine on the motor side as shown in Fig. 10 to refill about 4,2 l fresh oil.
6) Clean the oil drain screw with dipstick (K) and screw it back in to the machine that is still in
a vertical position. Unscrew it again; there should be an oil film between the notch.
7) Now screw the oil drain screw with dipstick back in tightly. Afterwards start splitting without
actually splitting log several times.
8) Check the oil level one last time and top up with a little oil if required.
Dispose of the used oil in a correct manner at a public collection facility. It is prohibited to
drop old oil on the ground or to mix it with waste.
We recommend oil from the HLP 32 range.
Connections and repairs
Connections and repairs of electrical equipment may only be carried out by an electrician.
Please provide the following information in the event of any enquiries:
Type of current for the motor
Machine data - type plate
Service information
Please note that the following parts of this product are subject to normal or natural wear and that
the following parts are therefore also required for use as consumables.
Wear parts*: splitting wedge guides, hydraulic oil, splitting wedge
* Not necessarily included in the scope of delivery!
6.3 Storage
Store the device and its accessories in a dark, dry and frost-proof place that is inaccessible to
children. The optimum storage temperature is between 5 and 30˚C. Cover the electrical tool in
order to protect it from dust and moisture.Store the operating manual with the electrical tool.
13

7. TRANSPORT
The log splitter is equipped with two wheels for easy transport.
Remove the tray table beforehand. (see 9.5)
The machine can be transported on the wheels at an angle. Use the transport handle, lift and pull
or push.
8. DISPOSAL AND RECYCLING
The equipment is supplied in packaging to prevent it from being damaged in transit. The raw
materials in this packaging can be reused or recycled. The equipment and its accessories are
made of various types of material, such as metal and plastic.
Defective components must be disposed of as special waste. Ask your dealer or your local council.
Old devices must not be disposed of with household waste!
This symbol indicates that this product must not be disposed of together with domestic
waste in compliance with the Directive (2012/19/EU) pertaining to waste electrical and electronic
equipment (WEEE). This product must be disposed of at a designated collection point. This can
occur, for example, by handing it in at an authorised collecting point for the recycling of waste
electrical and electronic equipment. Improper handling of waste equipment may have negative
consequences for the environment and human health due to potentially hazardous substances
that are often contained in electrical and electronic equipment.
By properly disposing of this product, you are also contributing to the effective use of natural
resources. You can obtain information on collection points for waste equipment from your
municipal administration, public waste disposal authority, an authorised body for the disposal of
waste electrical and electronic equipment or your waste disposal company.
9. TROUBLESHOOTING
The table below contains a list of error symptoms and explains what you can do to solve the
problem if your tool fails to work properly. If the problem persists after working through the list,
please contact your nearest service workshop.
Problem
Possible Cause
Remedy
Motor stops starting
Overload protection device disengaged
to protect the log splitter from being
damaged
Contact a qualified Electrician.
Fails to split logs
Log is improperly positioned
Refer to ”operation” section to
perfect log loading
Size of log exceeds the capacity of the
machine
Reduce log size before operating
Wedge cutting edge is blunt
Sharpen cutting edge
Oil leaks
Locate leak(s) and contact your
dealer
Log pusher moves
jerkily, taking unfamiliar
noise or vibrating a lot
Lack of hydraulic oil and excessive air
in the hydraulic system
Check oil level for possible
refilling. Contact your dealer
Oil leaks around the
cylinder ram or from
other points
Air sealed in hydraulic system while
operating
Loosen bleed screw by some
rotations before operating the log
splitter
Bleed screw is not tightened before
moving the log splitter
Tighten bleed screw up before
moving the log splitter
Oil drain screw loose
Tighten the oil drain screw firmly
Hydraulic control valve assembly and/or
seal worn
Contact your dealer
14

10. DECLARATION OF CONFORMITY
BUILDER SAS
32, rue Aristide Bergès -Z1 31270 Cugnaux - France
Tel. +33 (0) 5.34.502.502 Fax: +33 (0) 5.34.502.503
Declares that the machine named below
Electric log splitter
RACFBE65T
Serial number: 20220603051-20220603797
Complies with the following European Directives:
Machinery Directive 2006/42/EC
EMC Directive 2014/30/EU
Applicable harmonized standards:
EN 609-1:2017; EN 60204-1:2018
EN 55014-1:2017; EN 55014-1:2006/A2:2011;
EN 55014-2:2015; EN 55014-2:1997/A2:2008;
EN61000-3-2:2014;
EN IEC 61000-3-2:2019; EN 61000-3-11:2000;
EN IEC 61000-3-11:2019;
Cugnaux, 17/02/2022
Philippe MARIE / CEO
Responsible of technical file: M. Olivier Patriarca
15

11. WARRANTY
The manufacturer guarantees the product against defects in material and workmanship for a period of 2
years from the date of the original purchase. The warranty only applies if the product is for household use.
The warranty does not cover breakdowns due to normal wear and tear.
The manufacturer agrees to replace parts identified as defective by the designated distributor. The
manufacturer does not accept responsibility for the replacement of the machine, in whole or in part, and/or
ensuing damage.
The warranty does not cover breakdowns due to:
insufficient maintenance.
abnormal assembly, adjustment or operations of the product.
parts subject to normal wear and tear.
The warranty does not extend to:
shipping and packaging costs.
using the tool for a purpose other than that for which it was designed.
the use and maintenance of the machine done in a manner not described in the user manual.
Due to our policy of continuous product improvement, we reserve the right to alter or change specifications
without notice. Consequently, the product may be different from the information contained therein, but a
modification will be undertaken without notice if it is recognized as an improvement of the preceding
characteristic. READ THE MANUAL CAREFULLY BEFORE USING THE MACHINE.
When ordering spare parts, please indicate the part number or code, you can find this in the spare parts list
in this manual. Keep the purchase receipt; without it, the warranty is invalid. To help you with your product,
we invite you to contact us by phone or via our website:
+33 (0)9.70.75.30.30
https://services.swap-europe.com/contact
You must create a "ticket" via the web platform.
Register or create your account.
Indicate the reference of the tool.
Choose the subject of your request.
Describe your problem.
Attach these files: invoice or sales
receipt, photo of the identification plate (serial
number), photo of the part you need (for
example: pins on the transformer plug which
are broken).
16

12. PRODUCT FAILURE
WHAT TO DO IF MY MACHINE BREAKS DOWN?
If you bought your product in a store:
•Empty the fuel tank if your product has one.
•Make sure that your machine is complete with all accessories supplied, and clean! If this is not the
case, the repairer will refuse the machine.
•Go to the store with the complete machine and with the receipt or invoice.
If you bought your product on a website:
•Empty the fuel tank if your product has one.
•Make sure that your machine is complete with all accessories supplied, and clean! If this is not the
case, the repairer will refuse the machine.
•Create a SWAP-Europe service ticket on the site: https://services.swap-europe.com When making
the request on SWAP-Europe, you must attach the invoice and the photo of the nameplate (serial number).
Contact the repair station to make sure it is available before dropping off the machine.
Go to the repair station with the complete machine packed, accompanied by the purchase invoice and the
station support sheet downloadable after the service request is completed on the SWAP-Europe site
For machines with engine failure from manufacturers BRIGGS & STRATTON, HONDA and RATO, please
refer to the following instructions.
Repairs will be done by approved engine manufacturers of these manufacturers, see their site:
•http://www.briggsandstratton.com/eu/fr
•http://www.honda-engines-eu.com/fr/service-network-
page;jsessionid=5EE8456CF39CD572AA2AEEDFD290CDAE
•https://www.rato-europe.com/it/service-network
Please keep your original packaging to allow for after-sales service returns or pack your machine
with a similar cardboard box of the same dimensions.
For any question concerning our after-sales service you can make a request on our website
https://services.swap-europe.com
Our hotline remains available at +33 (9) 70 75 30 30.
17

13. WARRANTY EXCLUSIONS
THE WARRANTY DOES NOT COVER:
•Start-up and setting up of the product.
•Damage resulting from normal wear and tear of the product.
•Damage resulting from improper use of the product.
•Damage resulting from assembly or start-up not in accordance with the user manual.
•Breakdowns related to carburetion beyond 90 days and fouling of carburettors.
•Periodic and standard maintenance events.
•Actions of modification and dismantling that directly void the warranty.
•Products whose original authentication marking (brand, serial number) has been degraded, altered
or withdrawn.
•Replacement of consumables.
•The use of non-original parts.
•Breakage of parts following impacts or projections.
•Accessories breakdowns.
•Defects and their consequences linked to any external cause.
•Loss of components and loss due to insufficient screwing.
•Cutting components and any damage related to the loosening of parts.
•Overload or overheating.
•Poor power supply quality: faulty voltage, voltage error, etc.
•Damages resulting from the deprivation of enjoyment of the product during the time necessary for
repairs and more generally the costs related to the immobilization of the product.
•The costs of a second opinion established by a third party following an estimate by a SWAP-Europe
repair station
•The use of a product which would show a defect or a breakage which was not the subject of an
immediate report and/or repair with the services of SWAP-Europe.
•Deterioration linked to transport and storage*.
•Launchers beyond 90 days.
•Oil, petrol, grease.
•Damages related to the use of non-compliant fuels or lubricants.
* In accordance with transport legislation, damage related to transport must be declared to carriers within
48 hours maximum after observation by registered letter with acknowledgement of receipt.
This document is a supplement to your notice, a non-exhaustive list.
Attention: all orders must be checked in the presence of the delivery person. In case of refusal by the
delivery person, it you must simply refuse the delivery and notify your refusal.
Reminder: the reserves do not exclude the notification by registered letter with acknowledgement within 72
hours.
Information:
Thermal devices must be wintered each season (service available on the SWAP-Europe site). Batteries
must be charged before being stored.
18

BUILDER SAS
32, rue Aristide Bergès - ZI 31270 Cugnaux –France
Made in PRC 2022
Table of contents
Popular Log Splitter manuals by other brands

King Canada
King Canada POWERFORCE KCG-22LS instruction manual

MTD
MTD 242-642A owner's manual

Sami autochopper
Sami autochopper S110-TC440 Service manual

Champion Power Equipment
Champion Power Equipment 100330-1 Operator's manual

Swisher
Swisher LS87528HP owner's manual

Scheppach
Scheppach HL1500TWIN Translation from the original instruction manual

Greyhound
Greyhound 65075 Set-up & operating manual

Craftsman
Craftsman 247.77641 Operator's manual

Gude
Gude DHH 1250/12 T Translation of original operating instructions

Iron & Oak
Iron & Oak BH2W2016GX owner's manual

Champion Power Equipment
Champion Power Equipment 92221 Owner's manual & operating instructions

MTD
MTD 243-635-000 owner's guide