RADLEY 5125-015 User manual


1
PRODUCT SPECIFICATIONS
Voltage
No load
Ampere
Clearing width
Bag capacity
Weight
15 Amp Lawn Mower
Owner's Manual
120 V~ 60 Hz
3200 RPM
15 A
15-¾" /40cm
45L (12 gallons)
28.7 Lbs /13kg
15 AMP LAWN MOWER
Need Assistance?
Call us on our toll free customer support line:
1-866-349-8665 (Monday through Friday 9am – 5pm Eastern Standard Time)
Technical questions
Replacement parts
Parts missing from package

2
5125-015
Product specifications
Table of contents
General safety warnings
Electrical safety
Lawn mower safety
Extension cord safety
Symbols
Know your electric lawn mower
Assembly
Operation
Maintenance
Exploded view
Parts list
Warranty
………….……………………………………………………………1
………….……………………………………………………………2
……….……………………………………………………………3
……………………………………………………………………3-4
……….……………………………………………………………4-6
……….……………………………………………………………7-8
…….……………………………………………………………9-10
…………………………………………………………11
….……………………………………………………………12-13
….……………………………………………………………14-16
.….……………………………………………………………17-19
……….……………………………………………………………20
….……………………………………………………………21-24
…….………………………………………………………………25
TABLE OF CONTENTS

3
SAVE THESE INSTRUCTIONS FOR REFERENCE
15 Amp Lawn Mower
Owner's Manual
IMPORTANT SAFETY INSTRUCTIONS
Read and understand all safety and operational instructions. Failure to follow the
safety rules listed below and other basic safety precautions may result in serious
personal injury. Keep this manual, sales receipts and applicable warranty forms
for future reference.
GENERAL SAFETY WARNINGS
WARNING: Before using this tool or any of its accessories, read this manual
and follow all safety rules and operating instructions. The important precautions,
safeguards and instructions appearing in this manual are not meant to cover all
possible situations. It must be understood that common sense and caution are
factors which cannot be built into the product.
EYE, EAR & LUNG PROTECTION
WARNING: Use hearing protection, particularly during extended periods of
operation of the tool, or if the operation is noisy.
Lead from lead-based paints.
Crystalline silica from bricks, cement, and other masonry products. Arsenic and
chromium from chemically treated lumber.
The level of risk from exposure to these chemicals varies, according to how often
this type of work is performed. In order to reduce exposure to these chemicals,
work in a well- ventilated area, and use approved safety equipment, such as a
dust mask that is specifically designed to filter out microscopic particles.
ELECTRICAL SAFETY
WARNING: To avoid electrical hazards, fire hazards or damage to the tool,
use proper circuit protection.
WEAR A DUST MASK THAT IS DESIGNED TO BE USED WHEN
OPERATING A GARDON TOOL IN A DUSTY ENVIRONMENT.
WARNING: Dust that is created by power sanding, sawing, grinding, drilling,
and other construction activities may contain chemicals that are known to cause
cancer, birth defects, or other genetic abnormalities. These chemicals include:

4
5125-015
READ ALL INSTRUCTIONS BEFORE USING THIS ELECTRIC LAWN MOWER
LAWN MOWER SAFETY
WARNING: Read all safety warnings and instructions. Failure to follow the
warnings and instructions may result in electric shock, fire and/or serious injury.
Save all warnings and instructions for future reference.
This tool is wired at the factory for 120V AC operation. It must be connected to a
120V AC, 15 AMP circuit that is protected by a time-delayed fuse or circuit breaker.
To avoid shock or fire, replace power cord immediately if it is worn, cut or
damaged in any way.
This product is not intended for use by persons (including children) with
reduced physical, sensory or mental capabilities, or lack of experience and
knowledge, unless they have been given supervision or instruction concerning
use of the product by a person responsible for their safety.
Children should be supervised to ensure that they do not play with the
product. Cleaning and user maintenance shall not be made by children
without supervision.
SAFETY WARNINGS
1.
2.
Read the instructions carefully. Be familiar with the controls and the proper
use of the product.
Never allow children or people unfamiliar with these instructions to use the
product. Local regulations can restrict the age of the operator.
Never mow while people, especially children, or pets are nearby.
Keep in mind that the operator or user is responsible for accidents or
hazards occurring to other people or their property.
SAFETY WARNINGS FOR ELECTRIC LAWN MOWER OPERATION
1.
2.
3.
4.
While mowing, always wear substantial footwear and long trousers. Do not
operate the product when barefoot or wearing open sandals. Avoid wearing
clothing that is loose fitting or that has hanging cords or ties.
Thoroughly inspect the area where the product is to be used and remove all
objects which can be thrown by the product.
Before using, always visually inspect to see that the blade, cutting blade
bolts and blade assembly are not worn or damaged. Replace worn or
damaged blade and bolts in sets to preserve balance. Replace damaged or
unreadable labels.
PREPARATION
1.
2.
3.

SAVE THESE INSTRUCTIONS FOR REFERENCE
5
15 Amp Lawn Mower
Owner's Manual
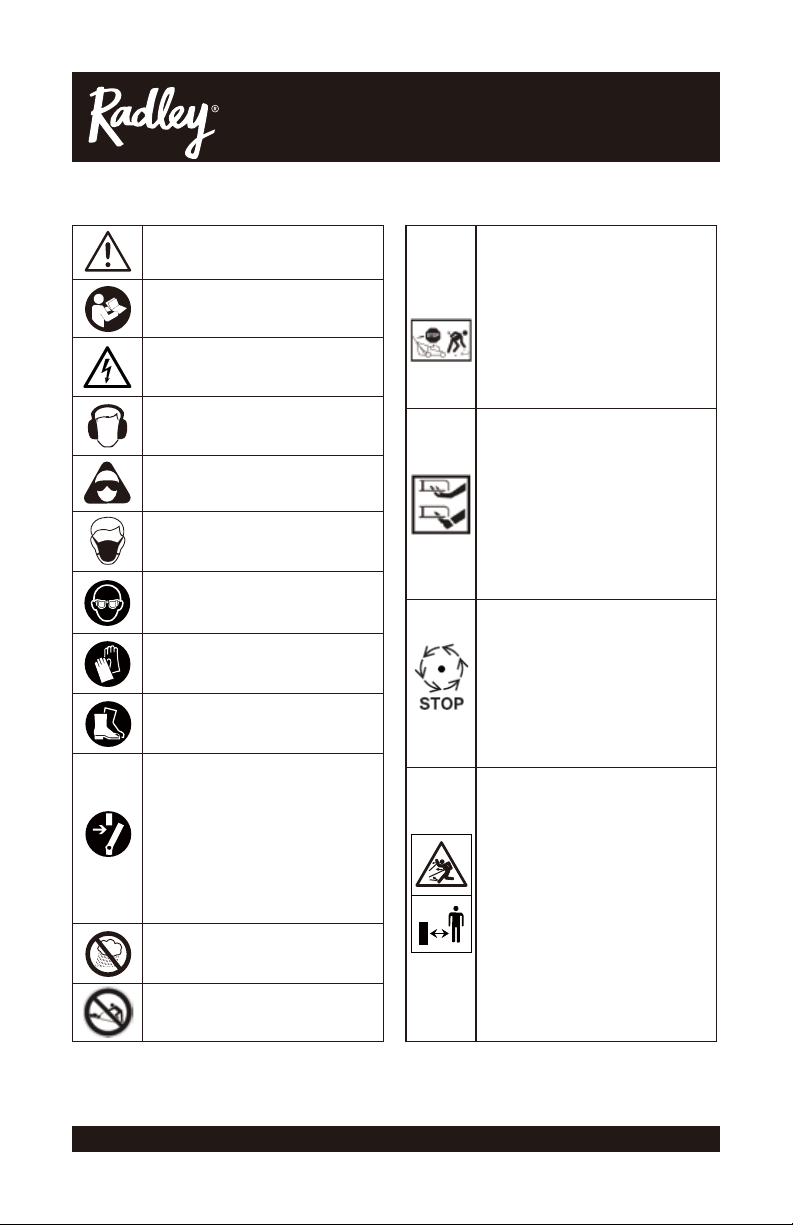
Operate the product in daylight or in good artificial light.
When using the electric lawn mower, you must respect local laws and
regulations regarding noise control and environmental protection. To avoid
noise disturbance, you should carefully decide upon an appropriate
operation time and consider the surrounding conditions.
Avoid operating the product in wet grass, where feasible.
Always be sure of your footing on slopes.
Walk, never run.
Mow across the face of slopes, never up and down.
Exercise extreme caution when changing direction on slopes.
Do not mow excessively steep slopes.
Use extreme caution when reversing or pulling the product towards you.
Stop the cutting device(s) if the product has to be tilted for transportation
when crossing surfaces other than grass, and when transporting the product
to and from the area to be mowed.
Never operate the product with defective guards, or without safety devices,
for example deflectors and/or grass catchers, in place.
Start the product or switch on the product carefully according to instruc-
tions and with feet well away from the cutting device(s).
Do not tilt the product when switching on the motor, except if the product
has to be tilted for starting. In this case, do not tilt it more than absolutely
necessary and lift only the part, which is away from the operator.
Do not start the product when standing in front of the discharge chute.
Do not put hands or feet near or under rotating parts. Keep clear of the
discharge opening at all times.
Stop the machine, and remove the disabling device. Make sure that all
moving parts have come to a complete stop:
- Whenever you leave the product.
- Before clearing blockages or unclogging chute.
- Before checking, cleaning or working on the product,
- After striking a foreign object. Inspect the machine for damage and make
repairs before restarting and operating the product;
if the product starts to vibrate abnormally (check immediately).
- Inspect for damage.
- Replace or repair any damaged parts.
- Check for and tighten any loose parts.
OPERATION
1.
2.
3.
4.
5.
6.
7.
8.
9.
10.
11.
12.
13.
14.
15.
16.

6
5125-015
READ ALL INSTRUCTIONS BEFORE USING THIS ELECTRIC LAWN MOWER
Keep all nuts, bolts and screws tight to be sure the product is in safe working
condition.
Check the grass catcher frequently for wear or deterioration.
Be careful during adjustment of the product to prevent entrapment of the
fingers between moving blades and fixed parts of the product.
MAINTENANCE AND STORAGE
1.
2.
3.
Allow the product to cool before storing in any enclosure.
When servicing the blades be aware that, even though the power source is
switched off, the blades can still be moved.
Replace worn or damaged parts for safety. Use only genuine replacement
parts and accessories.
Wear strong work gloves when removing and reassembling the cutting
device.
4.
5.
6.
7.

SAVE THESE INSTRUCTIONS FOR REFERENCE
7
15 Amp Lawn Mower
Owner's Manual
WARNING: Keep the extension cord clear of the working area. Position the
cord so it will not get caught on the workpiece, tools or any other obstructions while
you are working with the power tool.
Make sure any extension cord used with this tool is in good condition. When using
an extension cord, be sure to use one of heavy enough gauge to carry the current
the tool will draw. An undersized cord will cause a drop in line voltage resulting in
loss of power and overheating.
The table below shows the correct size to use according to cord length and nameplate
ampere rating. If in doubt, use the next heavier gauge. The smaller the gauge
number the heavier the cord.
Be sure your extension cord is properly wired and in good condition. Always replace
a damaged extension cord or have it repaired by a qualified electrician before using
it. Protect your extension cord from sharp objects, excessive heat and damp or wet
areas.
Use a separate electrical circuit for your power tools. This circuit must not be less
than 14 gauge wire and should be protected with either a 15 AMP time delayed fuse
or circuit breaker. Before connecting the power tool to the power source, make sure
the switch is in the OFF position and the power source is the same as indicated on
the nameplate. Running at lower voltage will damage the motor.
MINIMUM GAUGE (AWG) OUTDOOR GRADE EXTENSION CORDS (120V USE ONLY)
Amperage rating
Not more than 25' /7.5 m 50' /15 m 100' /30 m 150'/45 mMore than
618 16 16 140
10 18 16 14 126
12 16 16 14 1210
16 14 1212
Total length
Not Applicable
EXTENSION CORD SAFETY
To reduce the risk of disconnection of lawn mower from the extension cord during
operating: Make a knot as shown in Fig. 1;
Use one of the plug-receptacle retaining straps or connectors described in this
guide.

8
5125-015
READ ALL INSTRUCTIONS BEFORE USING THIS ELECTRIC LAWN MOWER
Avoid unintentional starting – Turn off the power switch and disconnect the power
cable before making any adjustments to the unit and before inspecting, servicing,
changing accessories or cleaning the lawn mower.
Handle cord carefully – Never pull electric lawn mower by cord or yank it to discon-
nect from power source. Keep cord away from heat, oil, and sharp edges.
Don’t force electric lawn mower– It will do the job better and with less likelihood of
a risk of injury at the rate for which it was designed.
Fig. 1
(A)Tie cord as shown
Cord set Appliance
cord
(B)Connect plug and receptacle
Don’t Overreach – Keep proper footing and balance at all times.
Stay Alert – Watch what you are doing. Use common sense. Do not operate tool
when you are tired or under the influence of alcohol, drugs or medications that
cause drowsiness.
Disconnect electric lawn mower – Disconnect the electric lawn mower from the
power supply when not in use, before servicing, when changing accessories.
Keep guards in place and in working order.
Keep hands and feet away from mowing area.

SYMBOLS
Read the operator’s manual
Warning! Danger. Inspect the area where the
product is to be used and
remove all objects which
can be thrown by the
product.
If objects are hidden while
operating stop the product
and remove the object.
Cutting device continues
to rotate after the product
is switched off. Wait until
all machine components
have completely stopped
before touching the
product.
Objects thrown by the
product could hit the user
or other bystanders.
Always ensure that other
people and pets remain at
a safe distance from the
product when it is in
operation. In general,
children must not come
near the area where the
product is.
Keep hands and feet away
from sharp rotating parts –
danger of injury! When
cleaning, repairing, or
inspecting, make certain
the cutting device and all
mowing parts have
stopped.
Wear hearing protection.
WARNING! Beware of
electric shocks.
Wear CSA Approved Eye
Protection.
Switch the product off and
remove the battery pack
to disconnect from the
power supply before
assembly, cleaning,
adjustments, maintenance,
storage and transportation.
Wear a face mask.
Wear protective helmet
and eye protection.
Wear protective gloves.
Wear protective footwear.
Do not expose the product
to rain or wet conditions.
Mow across the face of
slopes, never up and down.
9
15 Amp Lawn Mower
Owner's Manual

10
5125-015
This symbol designates that this tool is listed with Canadian and U.S.
requirements by cSGSus Testing Laboratories, Inc.
UL1447, CSA C22.2 No.147
GY5220
Before any work on the
machine itself, pull the
power plug from the outlet.
Beware of sharp blades.
Blades continue to rotate
after the motor is switched
off - Remove disabling
device before
maintenance.
Protection class II (Double
insulation).
Guaranteed sound power
level value in dB.
GO – grass catcher ready
for grass collection STOP
- grass catcher full,
empty it.
Remove plug from the
power source immediately
if the power cord is
damaged or cut.
The product complies
with the applicable
Canadian and U.S. direc-
tives and an evaluation
method of conformity for
these directives was done.

11
15 Amp Lawn Mower
Owner's Manual
KNOW YOUR ELECTRIC LAWN MOWER
Quick release
lever
Upper
handlebar
Control
cord
Start lever
Foam grip
Push rod
Height adjustment
lever
Front wheel
Grass catcher
Cover
Rear wheel
Safety
lock-off
switch
Power cord
with plug

5125-015
12
UNPACKING
ASSEMBLY
WARNING: The product must be fully assembled before operation! Do
not use a product that is only partly assembled or assembled with
damaged parts!
Follow the assembly instructions step-by-step and use the pictures
provided as a visual guide to easily assemble the product!
Do not connect the product to a power source before it is completely
assembled!
NOTE: Take care of small parts that are removed during assembly or when
making adjustments. Keep them secure to avoid loss.
Unpack all parts and lay them on a flat, stable surface.
Remove all packing materials and shipping devices if applicable.
Make sure the contents are complete and free of any damage. If you find
that parts are missing or show damage do not use the product but contact
Customer Service @ 1-866-349-8665. Using an incomplete or damaged
product represents a hazard to people and property.
Ensure that you have all the accessories and tools needed for assembly and
operation. This also includes suitable personal protective equipment.
1.
2.
3.
4.
LOWER HANDLE BARS
Align and pass the mounting hole of the lower handlebar through the bolt of
handle support (Fig. 1).
Attach the washer to the bolt and secure the lower handlebar by turning the
lever (1) up for tightening.
Make sure that the control cord runs up the upper side of the lower
handlebar (right) .
1.
2.
3.
FIG.1
1

13
15 Amp Lawn Mower
Owner's Manual
UPPER HANDLEBARS
Align the upper handlebar to the lower handlebar and ensure the foam
handle is pointed up when viewed from behind.
Pass the bolts through the mounting holes of handles (Fig. 2).
Attach the washer to the bolt and secure the upper handlebar by turning the
lever up for tightening (Fig.2).
Secure the control cord with two wire clips (Fig. 3).
1.
2.
3.
4.
GRASS CATCHER/MULCHING OPTION
Align and insert the carry handle to the slots of top frame of grass catcher until
both ends "click" into place (Fig. 4). then use screw to fix handle both sides.
The grass catcher is ready for use.
1.
2.
If you choose the mulcher function, then ensure the plate is inserted over the grass
shute, Do not install the grass catcher. Remove plate to use the grass catcher.
Open the deflector guard, hold it in position ; Insert the grass catcher (Fig.5).
Align and hook the grass catcher into the attachment slots of rear discharge chute.
3.
4.
5.
WARNING: Do not attempt to use the product without the grass catcher
attached or the mulching plate installed. Danger of flying objects! The
motor must be switched off and the blade must have stopped rotating
before you remove the grass catcher. The grass catcher must be fully
assembled with the top part, bottom part and collection tongue all in
position before first use.
FIG.2 FIG.3
FIG.5
FIG.4

5125-015
14
CUTTING HEIGHT ADJUSTMENT
OPERATION
Press the lever towards the rear wheel (Fig. 6).
Move forward or backward to adjust the cutting height.
Release the lever and ensure it's engaged in the slot properly.
1.
2.
3.
WARNING: Switch the product off and wait until the blade has come to
a complete stop before adjusting the cutting height!
Adjust the cutting height according to the needs of your lawn. The cutting height
depends on the kind of lawn and its actual height. When mowing high grass, start
with the maximum cutting height and make a second cut with a lower cutting
height.
GRASS CATCHER
Always carry the grass catcher by its carry handle.
WARNING: Do not attempt to use the product without the grass catcher
attached when collecting grass – danger of flying objects!
Switch the motor off and wait that the blade had come to a complete
stop before removing the grass catcher!
INDICATOR
The grass catcher is equipped with a full bag indicator that indicates the filling
progress during operation.
WARNING: Ensure that the lever engages in the slot after each
adjustment.
NOTE: There are 6 cutting height levels available. The adjustable heights are
1" (25mm) to 3" (75mm).
FIG.6 FIG.7

15
15 Amp Lawn Mower
Owner's Manual
When the hatch is open the grass catcher has sufficient volume left to collect
grass (Fig. 7).
When the hatch is closed, the grass catcher is full and must be emptied (Fig.
7).
1.
2.
Release the start lever ensuring that the motor has stopped and the blade has
stopped rotating.
Lift the deflector guard and lift the grass catcher off the hooks.
Remove the grass clippings from the rear discharge chute into the grass
catcher. Use a proper tool such as a brush.
Remove the grass catcher by its carry handle .
Empty the grass clippings onto a compost heap.
Re-fit the grass catcher to the product.
1.
2.
3.
4.
5.
6.
WARNING: Never use your hands or feet to remove grass
clippings from the rear discharge chute !
WARNING: In some countries regulations define at what time of the day
and on what special days products are allowed to be used and what
restrictions apply! Ask your community for detailed information and observe
the regulations in order to preserve a peaceful neighbourhood and avoid
committing administrative offences!
EMPTYING THE GRASS CATCHER
Empty the grass catcher frequently during use. Do not wait until it is
completely full. We recommend emptying it when it is half full.
NOTE: A full grass catcher will reduce the performance of this product.
Check the product, as well as accessories for damage before each use. Do not
use the product if it is damaged or shows wear.
Double check that accessories or blade are properly fixed.
Always push the product by its handle. Keep the handle dry and free from
lubricant to ensure safe support.
Switch the product off immediately if you are disturbed while working by
other people entering the working area. Always let the product come to
complete stop before leaving it unattended.
Do not overwork yourself. Take regular breaks to ensure you can concentrate
on the work and have full control over the product.
1.
2.
3.
4.
5.
GENERAL OPERATION

WARNING: If the product strikes a foreign object stop immediately! Let
the product cool down and thoroughly inspect the product for damage!
Have any damage repaired before restarting!
5125-015
16
STARTING/STOPPING
Plug in power
Stand behind the grip handle .
While holding the safety lock-off switch pressed, pull the start lever towards
the handle.
After the mower starts, release the safety lock-off switch.
Release the start lever to stop the mower.
1.
2.
3.
4.
5.
AFTER USE
Switch the product off.
Check, clean and store the product as described below.
1.
2.
MOWING
Make sure that the lawn is clear of stones, sticks, wire or other objects that
could damage the product or its product.
Do not cut wet grass because it tends to stick to the underbody of the product,
preventing the proper discharge of grass clippings, and it could also cause
you to slip and fall.
Never cut off more than one-third of the total length of the grass for a healthy
lawn. In the autumn, lawns should only be cut as long as there is growth.
Slowly push the product forward.
Mow in slight overlapping rows. The most effective pattern
for mowing lawns is straight lines along one of the sides.
This will keep the rows even and ensures that all the
lawn is cut without missing any spots.
Circle around flower beds. When reaching a flower bed in
the middle of the lawn, cut a row or two around the circumference of the bed.
Pay special attention when changing direction.
Empty the grass catcher regularly.
1.
2.
3.
4.
5.
6.
7.
8.

MAINTENANCE
WARNING: Always switch the product and let the product cool down
before performing inspection, maintenance and cleaning work!
WARNING: Wear safety gloves when working on the blade and close to
it! Use proper tools to remove debris, e. g. a wooden stick! Never use
your bare hands!
Always use original spare parts for replacement. Do not attach any other
type of blade! The replacement of the blade should be done by a
qualified specialist!
WARNING: Only perform repairs and maintenance work according to
these instructions! All further works must be performed by a qualified
specialist!
NOTE: Only perform repairs and maintenance work according to these instruc-
tions! All further works must be performed by a qualified specialist!
17
15 Amp Lawn Mower
Owner's Manual
GENERAL CLEANING
Clean the product with a dry cloth. Use a brush for areas that are hard to
reach.
Remove stubborn dust with high pressure air (43 PSI).
1.
2.
Keep the underbody and cutting device clean and free of debris. Remove
clippings from the rear discharge chute .
Check all fasteners, such as nuts and bolts, periodically for tightness before
operation. After prolonged use, especially in sandy soil conditions, the
cutting device will become worn and lose some of the original shape. The
cutting efficiency will be reduced and the blade should be replaced.
1.
2.
Check for any damage and wear. Repair damages in accordance with this
instruction manual or take it to an authorised service centre before using the
product again.
3.
Keep the product clean. Remove debris after each use and before storage.
Regular and proper cleaning will help ensure safe use and prolong the life of
the product.
Inspect the product before each use for worn and damaged parts. Do not
operate it if you find broken and worn parts.
1.
2.
3.

DANGER: If the blade is not torqued properly, it could become loose and
be thrown from the product and seriously hurt or kill the operator or
bystanders.
Note: Replace this cutting device after 50 hours mowing or 2 years whichever is
sooner regardless of condition. If the cutting device is cracked or damaged, you
must immediately replace it with a new one.
GRASS CATCHER
Inspect the grass catcher before each use. Do not use it if you find any
damage.
Clean the grass catcher after operation using water and mild soap.
Let the grass catcher dry thoroughly before storing to avoid mildew.
1.
2.
3.
Keep the blade sharp to ensure a good cutting performance. Replace a worn
or damaged blade with a new one of the same type or have it sharpened by a
qualified specialist.
Loosen the hex bolt counterclockwise using the supplied hex wrench and
remove it together with the washer and the blade (Fig. 8).
Replace the blade with a new one of the same type. Check the status of the
flange onto the blade holder, then attach the blade properly, and fix it with
the washer and the hex bolt . Tighten the hex bolt clockwise with 33-44
Ft./Lbs. to ensure safe operation of your product.
3.
4.
5.
Lubricate the blade after each use to prolong the life span of blade and
product. Apply light machine oil along the edge of the blade .
6.
5125-015
18
FIG.8

WARNING: Do not use the product with a defective or a loose control
cord!
Check the control cord before each use.
CONTROL CORD
STORAGE
Turn off the power and unplug the power cord.
Clean the product as described above.
Store the product and its accessories in a dry, frost-free place.
Always store the product in a place that is inaccessible to children. The ideal
storage temperature is between 50˚F/10˚C & 86˚F/30˚C.
We recommend using the original package for storage or covering the
product with a suitable cloth or enclosure to protect it against dust.
1.
2.
3.
4.
5.
TRANSPORTATION
Switch the product off, and remove the power plug before transporting it
anywhere.
Always transport the product by its transport handle .
Protect the product from any heavy impact or strong vibrations which may
occur during transportation in vehicles.
Secure the product to prevent it from slipping or falling over, damage and
injury.
1.
2.
3.
4.
19
15 Amp Lawn Mower
Owner's Manual
Table of contents
Other RADLEY Lawn Mower manuals
Popular Lawn Mower manuals by other brands

AIEMERY
AIEMERY EFD manual

Scag Power Equipment
Scag Power Equipment FREEDOM Z SFZ48-19KA Illustrated parts list

Toro
Toro Groundsmaster 3280-D Service manual

Scag Power Equipment
Scag Power Equipment TURF TIGER STT61V-29KB-DF Operator's manual

Toro
Toro Z-Master Compact Series Operator's manual

Yard-Man
Yard-Man 559 Operator's manual