Rain Bird RMX-1R User manual

© 2000 Rain Bird Sprinkler Mfg. Corp. 3/00
Contents
FEATURES AND BENEFITS .......................................... 2
COMPONENTS OF THE RMX-1R RECEIVER ................ 4
INSTALLATION ............................................................ 6
REGISTERING TRANSMITTERS ................................. 13
CHECK RECEIVERS MEMORY ................................ 14
ERASE RECEIVERS MEMORY .................................. 15
RMX-1R Multi-Function Remote
Control Receiver (with STX Security)
RMX-1Rsande.p65 3/7/00, 10:01 AM1

Page 2 RMX-1R Receiver
FEATURES AND BENEFITS
Description
The Rain Bird RMX-1R Multi-Function Remote Control
Receiver is a two-channel radio-frequency (RF) receiver
that lets you send remote commands to Rain Bird
remote-ready irrigation controllers.
This function can be useful when you are:
installing and debugging an irrigation system
winterizing an irrigation system
spot-watering
performing routine maintenance.
This manual describes how to install, test, and
troubleshoot the RMX-1R Receiver. The RMX-1R
receiver works with either the One-Button Transmitter
(RM-1T) or the Keypad Transmitter (RMX-1T).
Instructions for using these transmitters are contained
in the manual that accompanies each transmitter.
RMX-1Rsande.p65 3/7/00, 10:01 AM2

RMX-1R Receiver Page 3
System Components
To run the Rain Bird RMX-1R Multi-Function Remote
System, you need four major components, as shown in
the illustration:
➊a receiver
➋a transmitter
➌dual antennae
➍a connection to a Rain Bird remote-
ready controller.
NOTE: All Rain Bird remote-ready
controllers have a radio antenna icon
on the face plate (see illustration).
Tools Required
To install and use the RMX-1R receiver,
you will need the following:
small Phillips-head screwdriver
pencil
fasteners, drill bit, and / or screwdriver appropriate for
the surface where you are mounting the receiver.
Look for this
icon on remote-
ready Rain Bird
controllers
RMX-1Rsande.p65 3/7/00, 10:01 AM3

Page 4 RMX-1R Receiver
➋
➌
COMPONENTS OF THE RMX-1R RECEIVER
The cover of the receiver is secured to the body with a
screw ( ➊ ).
Internal Components
Important internal components of the receiver are the
LED indicator ( ➋) and the Channel 1 button ( ➌).
The LED indicator lights when the unit detects RF
signals from either a Rain Bird transmitter or other RF
sources. The LED also provides information about the
number of transmitters registered in the receiver.
NOTE: The system uses the proprietary STX
communication protocol, which prevents the receiver
from responding to random RF signals. For example, a
neighbors garage door opener will not start the
sprinklers.
The Channel 1 button is used to register transmitters in
the receiver. Registering a transmitter allows the
transmitter to be used with the receiver.
RMX-1Rsande.p65 3/7/00, 10:01 AM4

RMX-1R Receiver Page 5
Each transmitter can be registered in multiple receivers,
and multiple transmitters can be registered in the same
receiver. An RMX-1R Receiver can work with up to 16
transmitters.
Mounting Bracket
The mounting bracket attaches to a wall or post,
providing a convenient docking station for the
receiver. The mounting bracket offers a variety of
installation options:
When mounting the RMX-1R on a flat surface, use
holes 4, 5, and 7.
If you need to mount the RMX-1R on a narrow post
or exposed wall stud, use holes 6 and 7.
Use holes 8 and 9 for permanent mounting. You can
drive two screws through the rear of the receiver
cabinet and through the mounting bracket.
RMX-1Rsande.p65 3/7/00, 10:01 AM5

Page 6 RMX-1R Receiver
Antennae
Dual 9-inch (23 cm) wire whip antennae ( ➊) come
with the RMX-1R Receiver. An optional remote antenna
(RM-1E) may be purchased separately to improve
operating range.
Controller Connection
The controller cable connection ( ➋) links the receiver
to the controller.
INSTALLATION
Decide on Location for Receiver
You may install the RMX-1R Receiver either indoors or
outdoors. Indoor installation provides better security for
the receiver, while outdoor installation typically results in
better reception.
Regardless of the installation you choose:
Keep the receiver and antenna away from RF sources
such as motors, fans, and other devices that may
cause interference.
RMX-1Rsande.p65 3/7/00, 10:01 AM6

RMX-1R Receiver Page 7
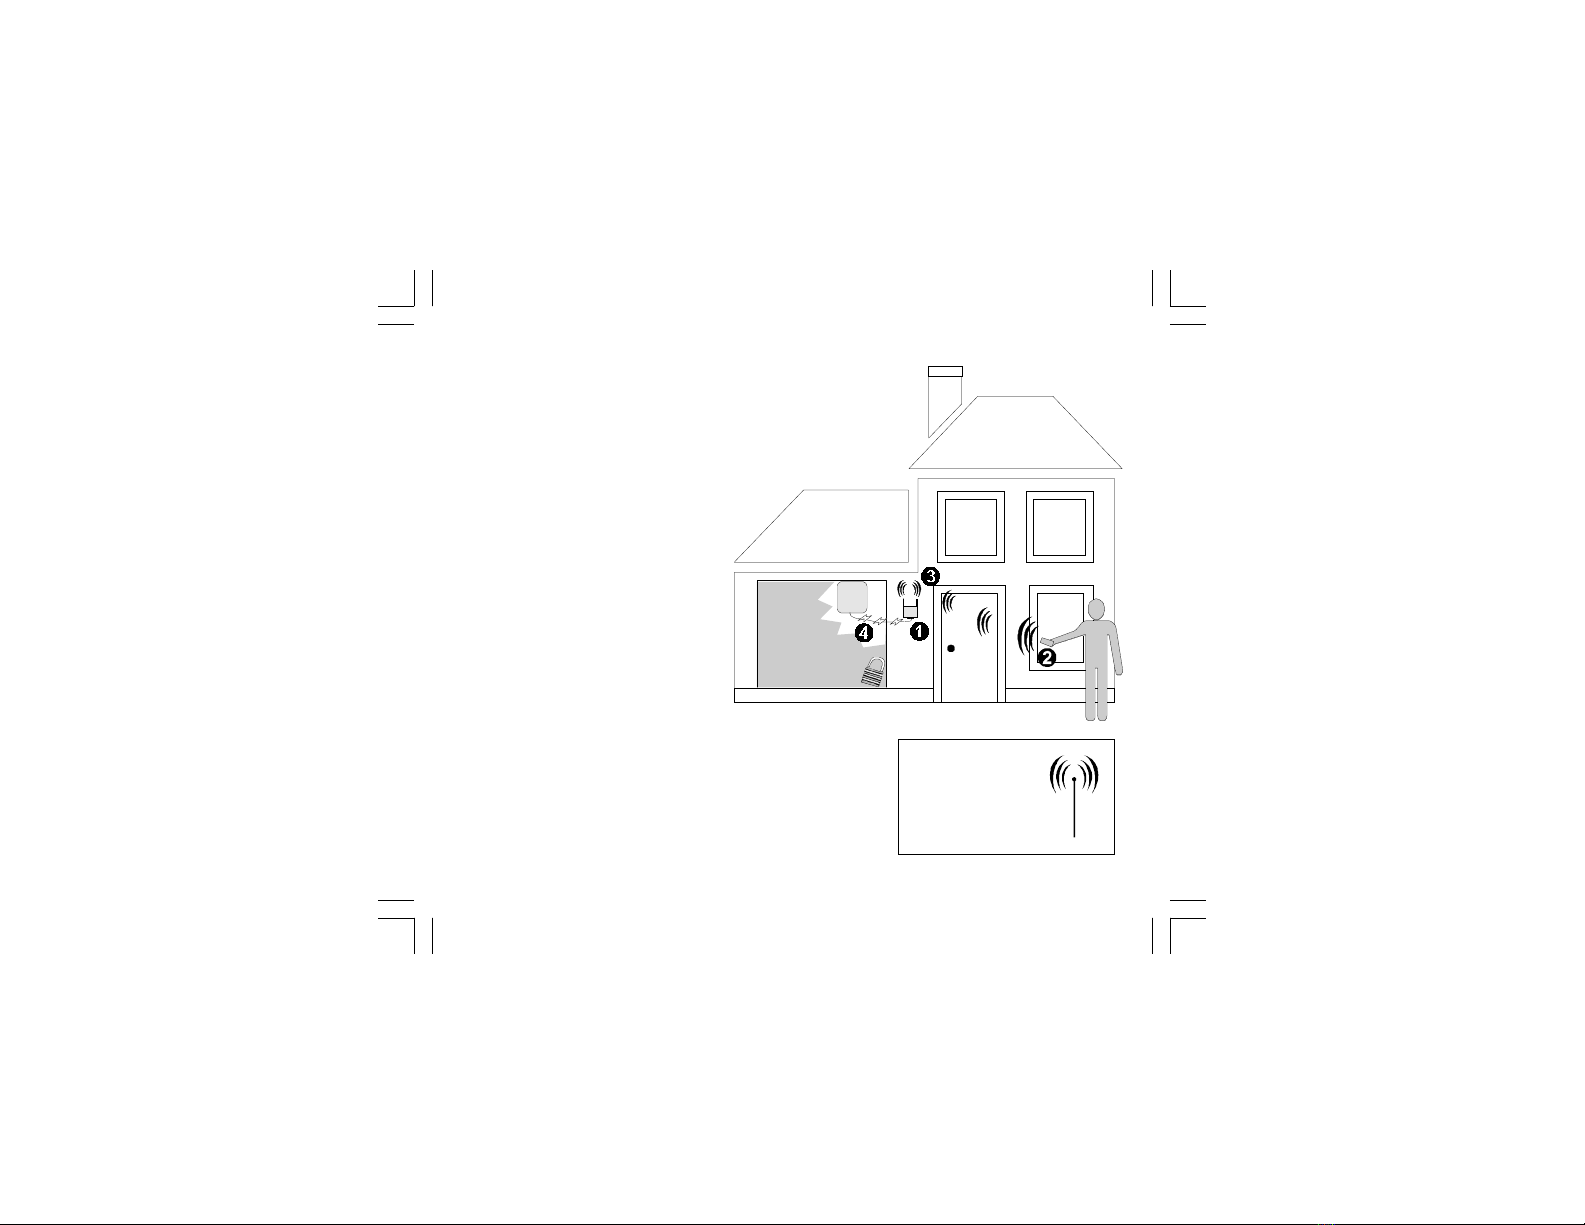
Wallboard &
wood studs
90% - 100% 65% - 95% 10% - 70%
Light concrete
or brick
Steel-reinforced
concrete or metal
lath & plaster
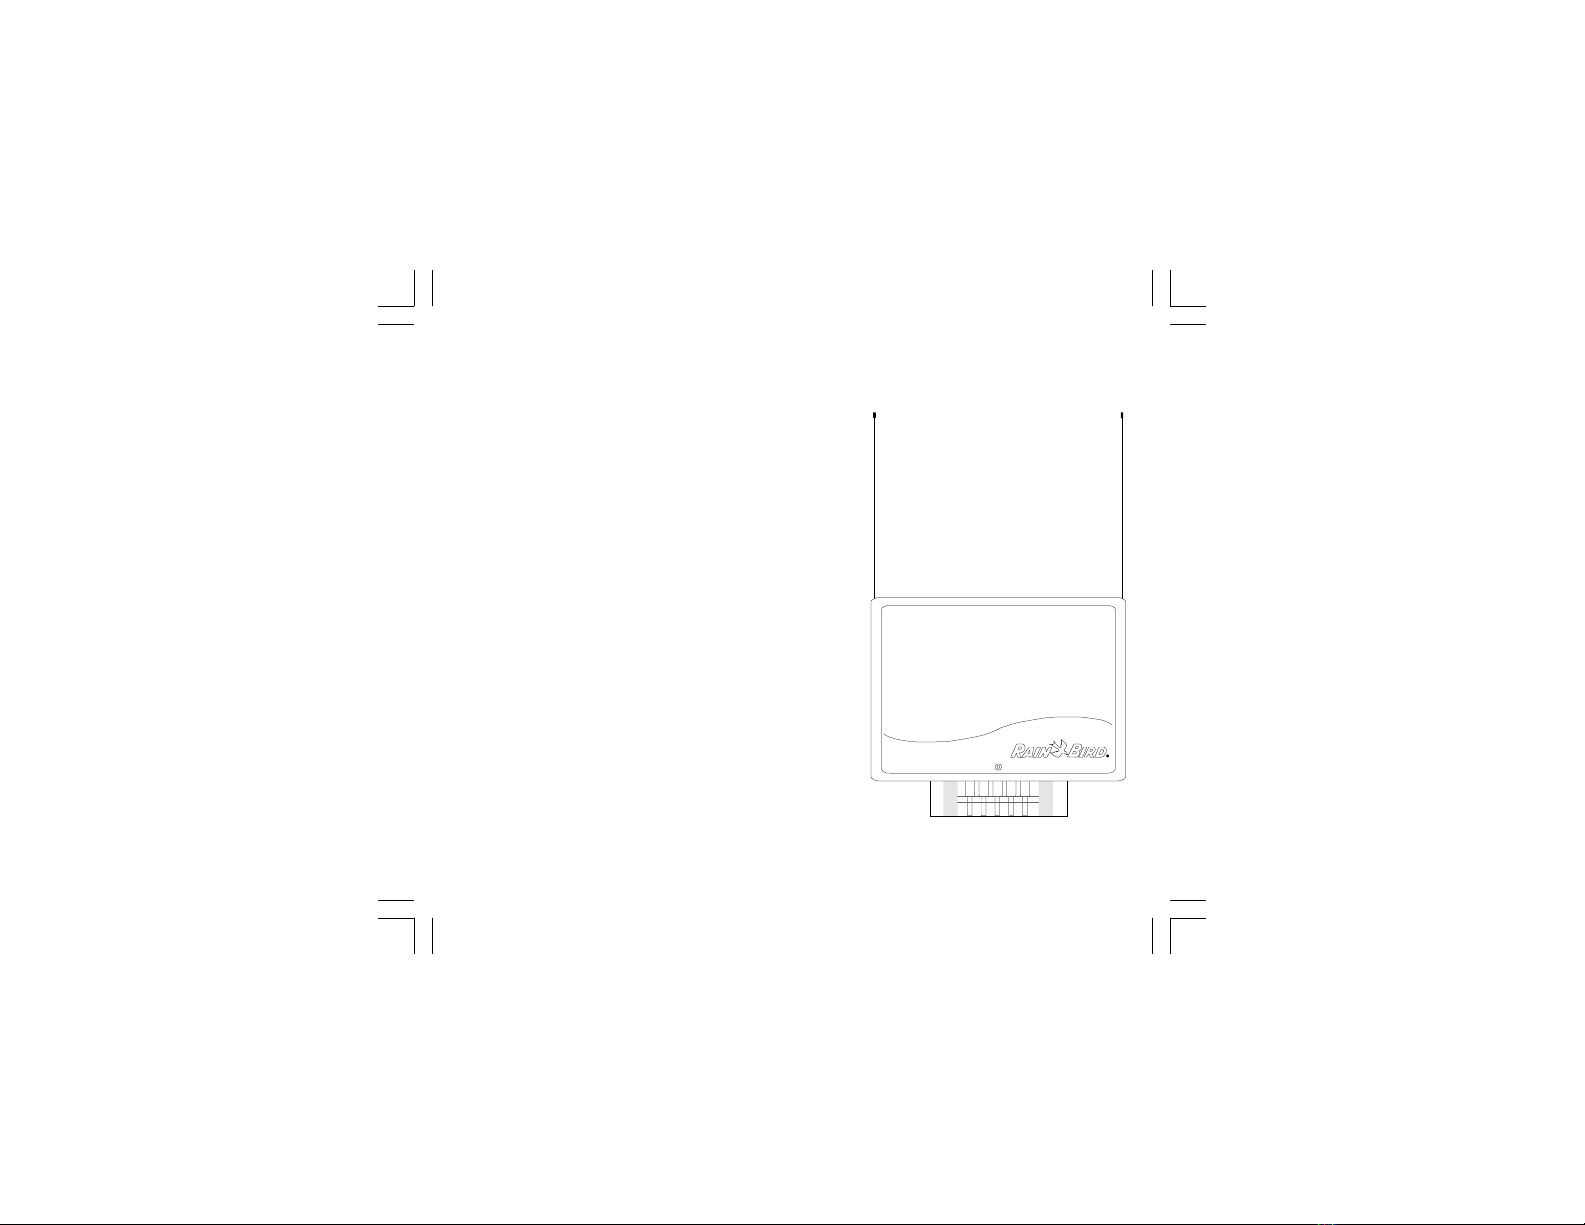
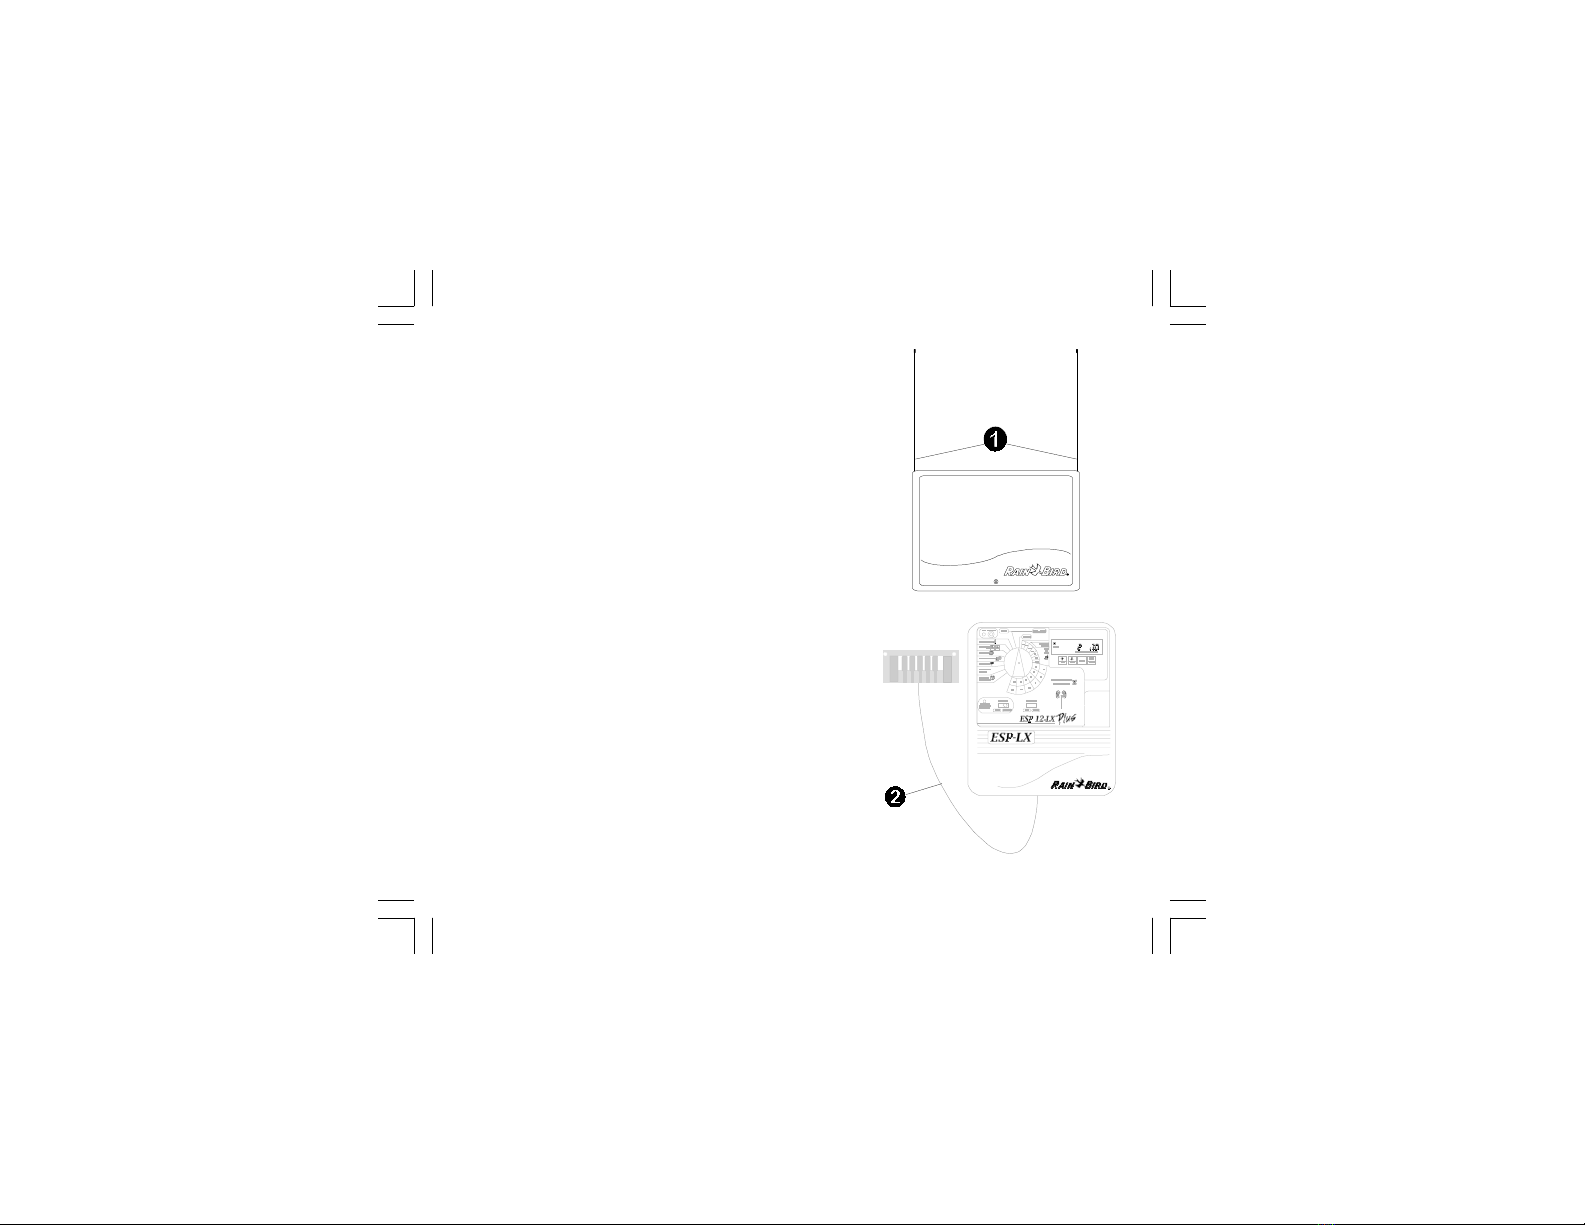
•When using the dual local whip antennae, DO NOT
install the receiver near metal objects, which can
shield the signal and decrease radio range.
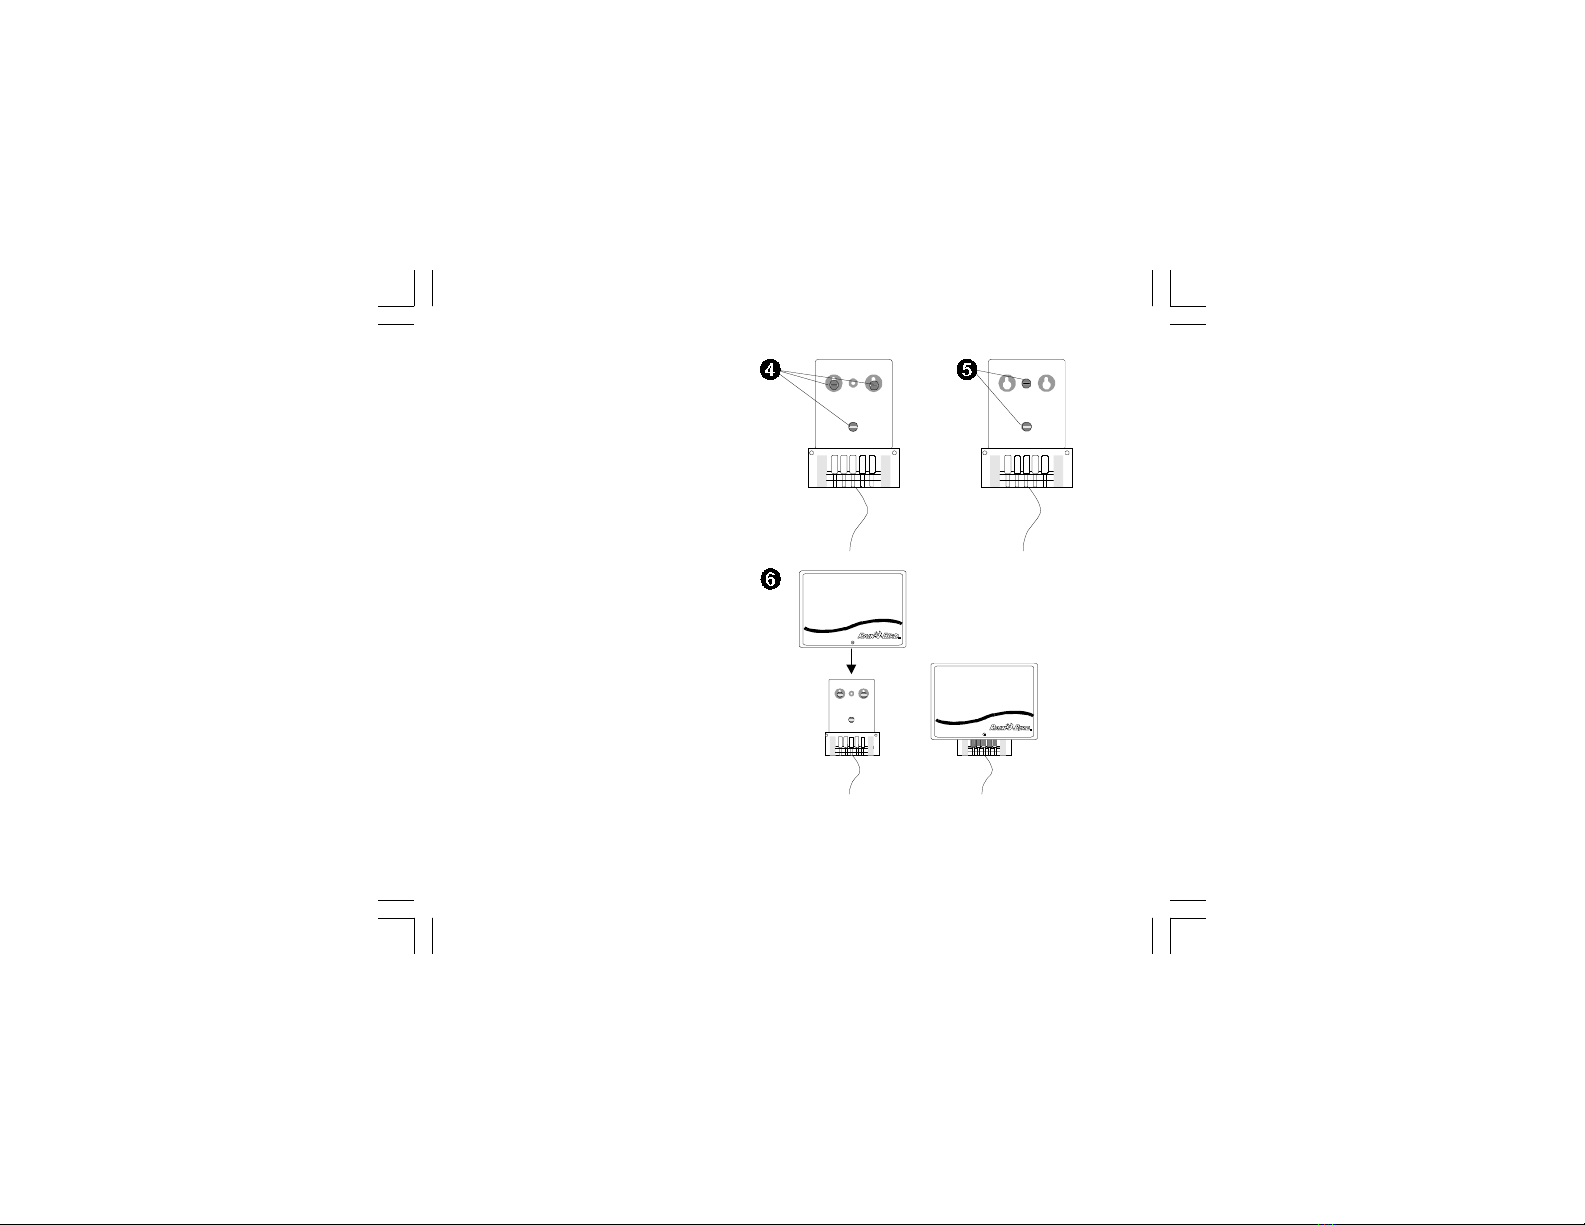
•DO NOT splice additional wire into the line. Wire
splices add noise to the line.
•Construction materials such as concrete, brick,
steel reinforcements, and plaster can decrease the
radio range.
•Place the RMX-1R as high above ground level as
possible.
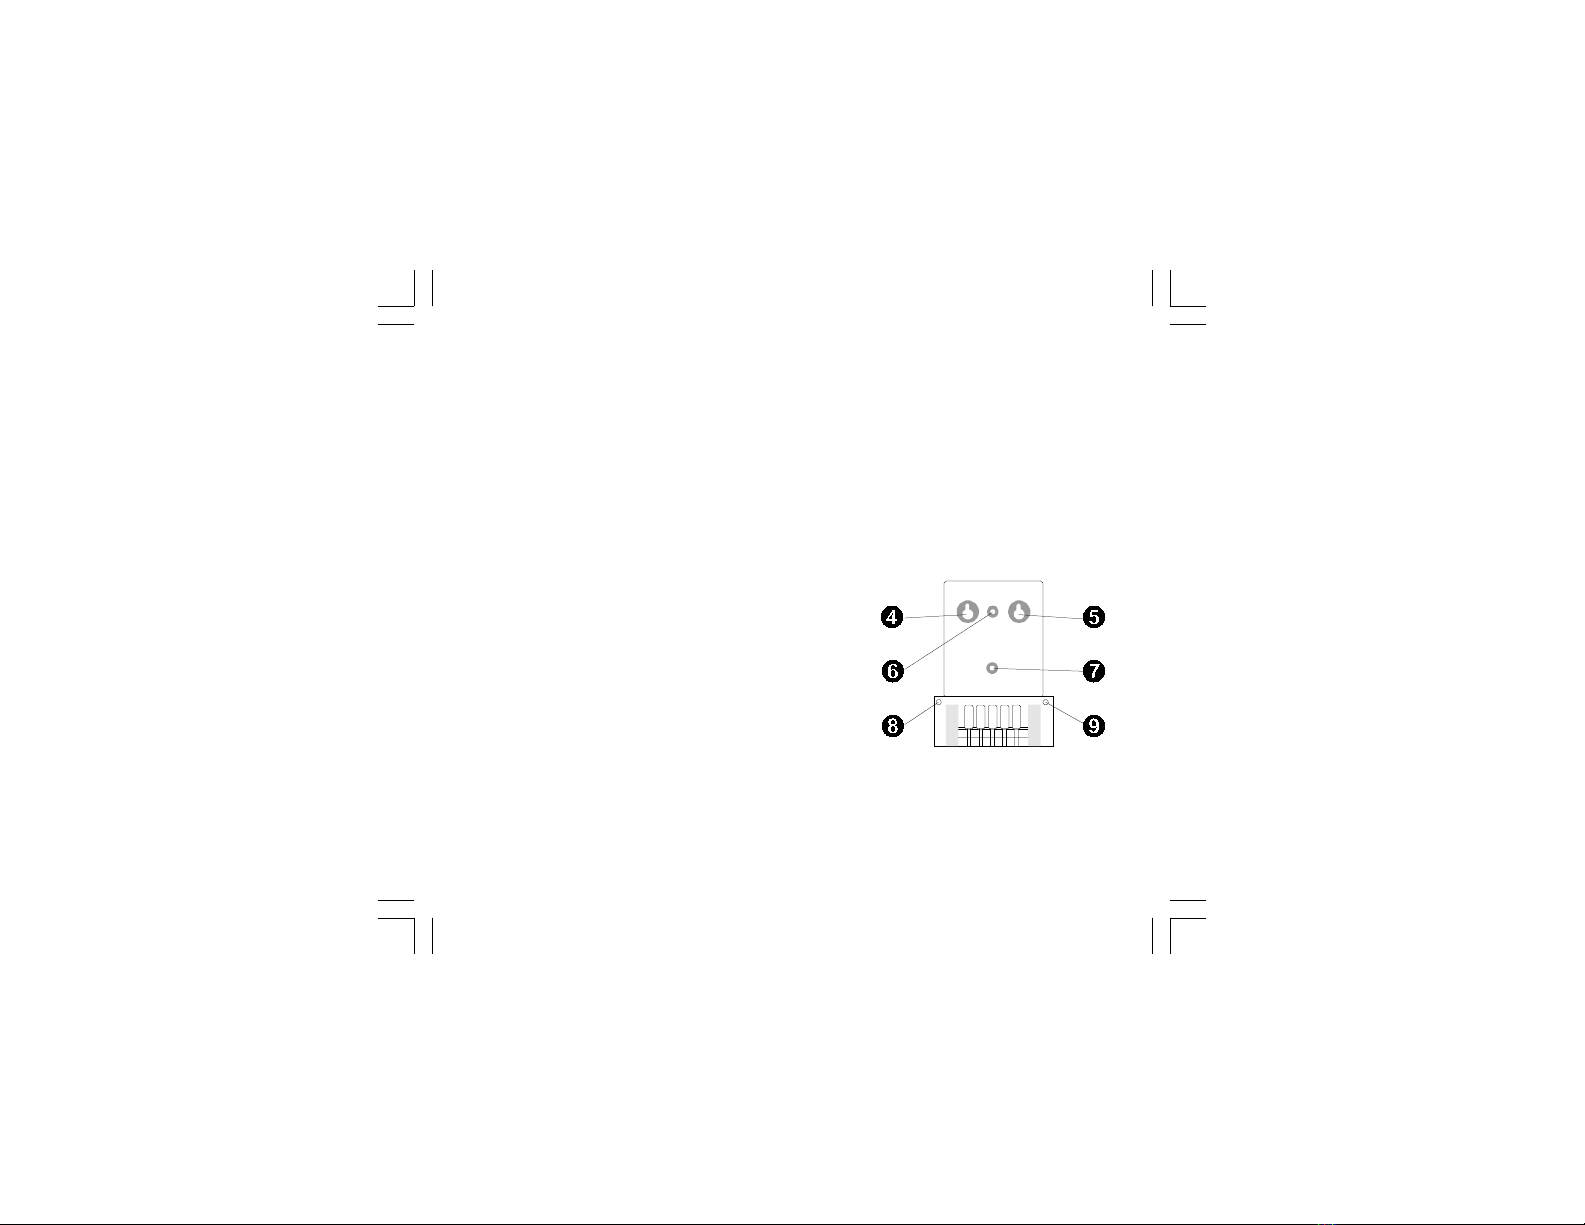
•The RMX-1R comes with a stand-
ard 36" (92 cm) cable. If you need
to position the receiver more than
36" (92 cm) from the controller,
use a Rain Bird Remote Control
Extra Length cable with bracket
(EXB), which will allow you to
place the receiver up to 30' (9 m)
from the controller.
RMX-1Rsande.p65 3/7/00, 10:01 AM7

Page 8 RMX-1R Receiver
36"
6"
Mount the RMX-1R
➊Position the bracket at about eye level, or as high
above ground level as possible. If you need to
position the receiver more than 36" (92 cm) from
the controller, use a Rain Bird Remote Control Extra
Cable Length with bracket (EXB), which will allow
you to place the receiver up to 30' (9 m) from the
controller.
Leave about 6" (15 cm) of space above the bracket to
slide the receiver down over the bracket guides.
➋The RMX-1R Receiver can be mounted on either a flat
surface or a narrow post or exposed wall stud. Mark
the locations of the mounting holes as shown in the
illustrations.
➌For a flat-surface installation, drive two fasteners into
the upper marks. Leave about ¼" (6 mm) of the screw
exposed. The mounting points are sized for a #8 self
tapping screw; however, use the appropriate type of
fasteners for your surface.
Flat surface Narrow surface
Flat surface
RMX-1Rsande.p65 3/7/00, 10:01 AM8

RMX-1R Receiver Page 9
➍On a flat surface, hang the bracket
on the fasteners. Tighten down
the upper fasteners. Then drive a
fastener into the lower mark.
➎For a narrow surface, position the
bracket over the marks and drive
in two fasteners.
➏Using the guides on the back of
the receiver, slide the receiver
down onto the bracket until the
connection is complete.
RMX-1Rsande.p65 3/7/00, 10:01 AM9

Page 10 RMX-1R Receiver
Connect Receiver Cable to Controller
➊Open the front door of the controller.
➋Open the face panel of the controller. Refer to the
drawing for the remote-ready Rain Bird controller
you are using.
➌Run the cable from the RMX-1R
through the wiring opening in
the controller case to the
controller connector.
On the ESP-Si, route the cable
through the notch provided in
the wiring skirt.
On the ESP-LX+, route the cable
through the battery holder.
Align the pins on the connectors
and plug the cable in.
RMX-1Rsande.p65 3/7/00, 10:01 AM10

RMX-1R Receiver Page 11
RMX-1Rsande.p65 3/7/00, 10:01 AM11

Page 12 RMX-1R Receiver
➋
➊
Connect Antennae
➊If you are using the dual whip
antennae, remove the access
screw from the cover. Then
remove the cover from the
receiver.
NOTE: If you are using a remote
antenna, see the directions
supplied with the antenna
(RM-1E).
➋Loosen the screw terminals for
the antennae. Then install the
two antennae under the left and
right antenna terminals. Align
the antennae in the cabinet slots.
RMX-1Rsande.p65 3/7/00, 10:01 AM12

RMX-1R Receiver Page 13
➌
➌Make sure the antennae tips are
below the screw and under the
terminal plate. Tighten the screws
on the terminals.
If you wish to register a transmitter
with the RMX-1R Receiver, leave
the front cover off. Otherwise,
place the cover on the front of the
receiver, and re-install the access
screw.
REGISTERING TRANSMITTERS
See your transmitter manual for directions on registering
a transmitter in the RMX-1Rs memory.
RMX-1Rsande.p65 3/7/00, 10:01 AM13

Page 14 RMX-1R Receiver
➊
➋
➌
➍
CHECK RECEIVERS MEMORY
The RMX-1R receiver can store codes for up to 16
transmitters. Follow these steps if you want to find out
how many transmitter codes are stored in the RMX-1Rs
memory.
➊Remove the lower screw and remove the receivers
cover.
➋Press and hold the Channel 1 button until the
indicator LED lights up.
➌Release the button.
➍Count the number of times the LED blinks. The
number of blinks is equal to the number of
transmitters currently registered in the receiver.
RMX-1Rsande.p65 3/7/00, 10:01 AM14

RMX-1R Receiver Page 15
➎
➏
ERASE RECEIVERS MEMORY
You may need to erase the receivers memory to
remove codes for transmitters you no longer want to
work with the receiver.
➎After removing the receivers cover, press the
Channel 1 button and hold it down until the
indicator light blinks one time for each transmitter
currently registered.
➏After the final blink, continue holding the button
down for a count of 5. The light will blink once
more, indicating that memory has been erased.
Release the Channel 1 button.
RMX-1Rsande.p65 3/7/00, 10:01 AM15

P/N 634260A
RAIN BIRD SALES, INC. Contractor Division
145 North Grand Avenue, Glendora, California 91740, U.S.A. 626-963-9311
© 2000 Rain Bird Sprinkler Mfg. Corp.
® Registered trademark of Rain Bird Sprinkler Mfg. Corp.
Technical Services: 800-247-3782
http://www.rainbird.com
CANADA: Complies with IC RSS-210; en
conformité avec IC: CNR-210: 1078 102
1859A5 3
This device complies with FCC Part 15 and IC
Rules and Regulations. Operation is subject to the
following two conditions: (1) This device may not
cause harmful interference, and (2) This device
must accept any interference received, including
interference that may cause undesired operation.
RMX-1Rsande.p65 3/7/00, 10:01 AM16
Other Rain Bird Receiver manuals
Popular Receiver manuals by other brands

Onkyo
Onkyo TX-SR702 Service manual

Inovonics
Inovonics FA400 installation instructions

ZyCast
ZyCast ABT-210 manual

International Datacasting
International Datacasting SuperFlex SRA2100 Series user guide

Sennheiser
Sennheiser EM 3031-U Service manual

Circle Prime Manufacturing
Circle Prime Manufacturing CP-03276 installation instructions