RAK RAK-CR4AAE User manual

INDUCTION COOKER
INSTRUCTION MANUAL
FORNELLO A INDUZIONE
MANUALE D’ISTRUZIONI
INDUKTIONSHERD
GEBRAUCHSANWEISUNG
PLAQUE À INDUCTION
MANUEL D’INSTRUCTIONS
PLACA DE INDUCCIÓN
MANUAL DE INSTRUCCIONES
Please read these instructions carefully before
operating the appliance | Prima di mettere in
funzione l’apparecchio, leggere attentamente le
presenti istruzioni | Bitte lesen Sie diese Anleitung vor
der Inbetriebnahme des Geräts sorgfältig durch |
Veuillez lire attentivement ces instructions avant
d’utiliser l’appareil | Lea atentamente estas
instrucciones antes de utilizar el aparato

1. Thank you for purchasing a CookingRAK induction cooker.
Before installing and using the appliance, please read all the
instructions carefully. Keep this instruction manual for future
reference.
2. Do not use the appliance other than its intended use. Please
note that the appliance is only compatible with 14.5mm thick
porcelain kitchen tops manufactured by RAK Ceramics. It cannot
be used with any other product.
3. Do not operate appliances with damaged cord sets or plugs.
Any repairs should always be carried out by an experienced
technician or by an authorized service center.
4. When moving the appliance, always be careful not to touch hot
surfaces or to spill any hot liquids.
5. Use of accessories or equipment not supplied by the
manufacturer may damage the appliance or cause injuries.
GENERAL SAFETY PRECAUTION The appliances must be used with recommended types and sizes of pans.
Do not use any pans made of inferior material. Recommended pans sizes
range from 12-26cm. Pans with a diameter of up to 26 cm can also be
used, but their performance is smaller.
12-26cm 12-26cm
Check and ensure that the supply
voltage matches the voltage given
on the specication plate under
the induction cooker.
Ensure the induction cooker is
properly ventilated.
Make sure that installation,
support and inspection are carried
out by qualied personnel only.
Electrical connections must
comply with local regulations.
National and local electrical
regulations must be followed.
Do not install the induction
cooker near or on other heat
sources.
Make sure that the cooker is well
positioned and not exposed to
any vibration.
English

If the porcelain surface is cracked or broken, stop using the cooker, remove
all objects from the surface, switch it o immediately and disconnect the
cooker from the socket. Call your service agent for a replacement.
• Use a pan suitable for induction cooking with a bottom diameter
higher than 12 cm (like most cooking pans available on the market).
• If using pans with a diameter smaller than 12 cm, or unsuitable pans, or
if no pans are placed on the cooking zone, then no power will transfer
and the indicator lamp E1 will ash.
• To verify if the pan is suitable, use a permanent magnet and check if it
sticks to the bottom of the pan. If it does not, your pan is not suitable
for induction cooking. Choose only pans that are recommended for
induction cooking.
The cooking zone of the ceramic
glass may have residual heat after
cooking. To avoid injuries (burns)
do not touch the cooking zone
right after cooking.
To avoid overheating, do not
leave pans unattended when the
appliance is on.
After cooking, switch the cooker
o at once by pressing the “On/O”
key to prevent the heating process
from continuing automatically
when a pan is placed back on the
cooking zone after a while.
Do not insert any paper,
cardboard, cloth, or other material
between the pan and the cooking
zone, as this might initiate a re.
Do not place any other objects on the induction cooker heating zone,
such as closed cans, aluminum foil, cutlery, jewelry, watches, knives, forks,
spoons, lids, or others. Metallic objects may heat up and cause hazards.
Do not place credit cards, phone cards, cassette tapes, or other objects
that are sensitive to magnetic elds on the induction cooker, as they may
cause hazards.
Do not touch any parts inside
the induction cooker.
The pan should always be kept in the center of the cooking zone during
cooking; otherwise, it will heat unevenly, and the food may burn or not
cook properly.
If the supply cord is damaged,
it must be replaced by the
manufacturer, a service agent, or
similarly qualied personnel to
avoid any hazards.

This appliance is not intended for use by persons with reduced physical,
sensory, or mental capabilities or lack of experience and knowledge unless
they are under the supervision of a responsible person or have been given
proper instruction in using the appliance. In addition, this appliance is not
intended for use by children.
Never connect the induction system to an external timer switch or separate
remote-control system.
Do not place/store items that
could melt or catch re in the
cooking zones, even when it is
not in use.
Do not dispose of electrical appliances as unsorted municipal waste,
use separate collection facilities. Contact your local government for
information regarding the collection systems available. If electrical
appliances are disposed of in landlls or dumps, hazardous substances
can leak into the groundwater and get into the food chain, damaging your
health and well-being.
Never leave the cooktop
unattended when in use especially
when heating up oils or fats as they
can easily catch re.
1
498 3
2
56 7
CONTROL PANEL
Connect & Control using a Mobile App
You can also connect the induction hub wirelessly via Bluetooth using
an Android or iOS enabled mobile device. Please download the mobile
application from their respective stores by scanning the QR code below.

Power
(W)
1 2 3 4 5 6 7 8 9 P(-
Max)
Left
Front
100 300 400 500 800 900 1000 1100 1300 1500
Left
Rear
100 300 400 500 800 1000 1200 1300 1500 1800
Left
Flex
Zone
200 400 600 1000 1400 2200 2400 2600 2800 3000
Right
Front
100 300 400 500 800 1000 1200 1300 1500 1800
Right
Rear
100 300 400 500 800 900 1000 1100 1300 1500
Right
Flex
Zone
200 400 600 1000 1400 2200 2400 2600 2800 3000
Level
POWER LEVEL AND DISPLAY TABLE
SPECIFICATION
6600W
4
1600W+1800W+1600W+1800W
OPERATING THE APPLIANCE
ON AND OFF
To switch on: Plug the power into the socket before turning it on.
After turning the power on, the buzzer will beep once and all the
indicator buttons will light up for a second. The induction cooker
will enter standby mode and is now ready to use.
To switch o:
a. Press the “On/O” key of the active cooking zone, and it will
display the desired number. Press the “-” key, and the display will
read “1”, press “-” again, and the activated hob will shut o.
b.Press the desired cooking zone’s “On/O” key, and the digital
display will read the desired number. For example, press the “-”
key, and the display will read “1”; press “-” again, and the selected
cooking zone will shut o.
c.press the “On/O” key, it will “beep” once and then turn o. The
hob will now enter standby mode.
LOCK and UNLOCK
To prevent unintended use of the induction cooker’s control,
press the ‘lock’ button for 3 seconds, the induction cooker will
“beep” and light up, and then it will be in child lock mode.
To unlock, repeat the same process and the “lock” key light will
turn o.
STANDBY and OPERATION MODE
When in power mode, press the “On/O” key; the induction
cooker will beep once and enter a preparation state. Only the
ON/OFF indicator will be on when in preparation. If no further
entry is made within 30 seconds, the induction cooker will return
to standby state. While on standby mode, press the desired
cooking zone then the corresponding burner head display will
ash “0”. Next, press the key “-” or “+” key within 30 seconds to the
desired heating level. For example, the default heating level is “5”,
press “-” to enter the lowest power position (display “1”), and press
“+”. To enter the rated power position (display “P”). If no further
entry is made within 30 seconds, the induction cooker will return
to standby state.

BRIDGE FUNCTION:
In standby mode, press the “bridge” key and the bridge indicator
will turn on, the display screen will ash, and the appliance will enter
the bridge heating preparation mode.
In the bridge heating preparation mode, press the keys “-” and “+”
within 30 seconds to directly enter dierent furnace head heating
positions: the default power level is “5”, press “-” to lower the power
(display “1”) or “+” to increasethe power (display “P”).
If there is no key conrmation within 30 seconds, the induction
cooker will automatically exit the bridge heating preparation mode.
TIMER SETTING
The timer setting range is 1 to 99 minutes. When in working mode,
press the “timer” key; the corresponding burner timer light will ash,
and the timer display will ash to show “00”.
Press + or - to adjust the timing time, which will be increased or
decreased in units of 1 minute if it is less than 15 minutes, in units
of 5 minutes if it is between 15 minutes and 40 minutes, in units of
10 minutes if it is between 40 minutes and 99 minutes. After the
keystroke operation stops, the timer display will ash for 5 seconds,
then turn to normal, the timing light will ash, and the timing time
countdown will start. When the timer countdown is nished, the
induction cooker will “beep” and then shut down automatically.
CAUTION
The induction system is very ecient as the heat is directly
transferred to the cooking pan hene; do not put any empty pans in
the cooking zones. Instead, put oil or liquid into the pan and start the
cooking process.
The pan should always remain in the center of the heating area while
cooking. Otherwise, it will unevenly heat the bottom of the pan, and
the food in the pan will burn. While heating oil, constantly check the
pan to prevent overheating or burning.
The hob has an automatic shuto feature that turns o
the entire hob if any cooking zone has been operating
continuously for 2 hours.
The timer display will read the minimum time after setting
the timer for each burner.
SAFETY AND WARNING
After the induction cooker is turned o, the fan will automatically
delay operation for 1 minute to dissipate heat.
When the center temperature of the microcrystalline plate detected
by NTC is higher than 50℃, the ‘”H” will be displayed. When the
used cookware is inconsistent or is moved away from the induction
cooker, the heating will stop, the power display will read “E,” and
the timer display will show “E1”. If the cookware is not placed in the
desired cooking zone within 10 seconds, it will automatically turn o.
To maximise the eciency of CookingRAK , please use pans suitable
for induction cooking. When the voltage is too high (or too low), the
heating will stop, the power display will show E, and the timer display
will show E3 (or E2). If the voltage does not return to the average
level within 10 seconds, it will automatically turn o. In this case, the
induction cooker will beep as a warning sign and must be unplugged
immediately.

ERROR SIGNS
1. When the induction cooker is in standby or working mode and
the IGBT sensor (NTC1) is open circuit, the display will read E,
the timer display will read E7, and the buzzer will make four
long and ve short beep prompts every 5 seconds.
2. When the induction cooker is in standby or working mode and
IGBT sensor (NTC1) is on a short circuit, the display will read
E, the timer display will read E8, and the buzzer will make four
long, and four short beep prompts every 5 seconds.
3. When the induction cooker is in standby or working mode and
the NTC2 is on an open circuit, the power display will show E,
the timer display will read E9, and the buzzer will make three
long and ve short beep prompts every 5 seconds.
4. When the induction cooker is in standby or working mode and
NTC2 is on short circuit, the power display will read E, the timer
display will read E2, and the buzzer will give out three long and
four short beep prompts every 5 seconds.
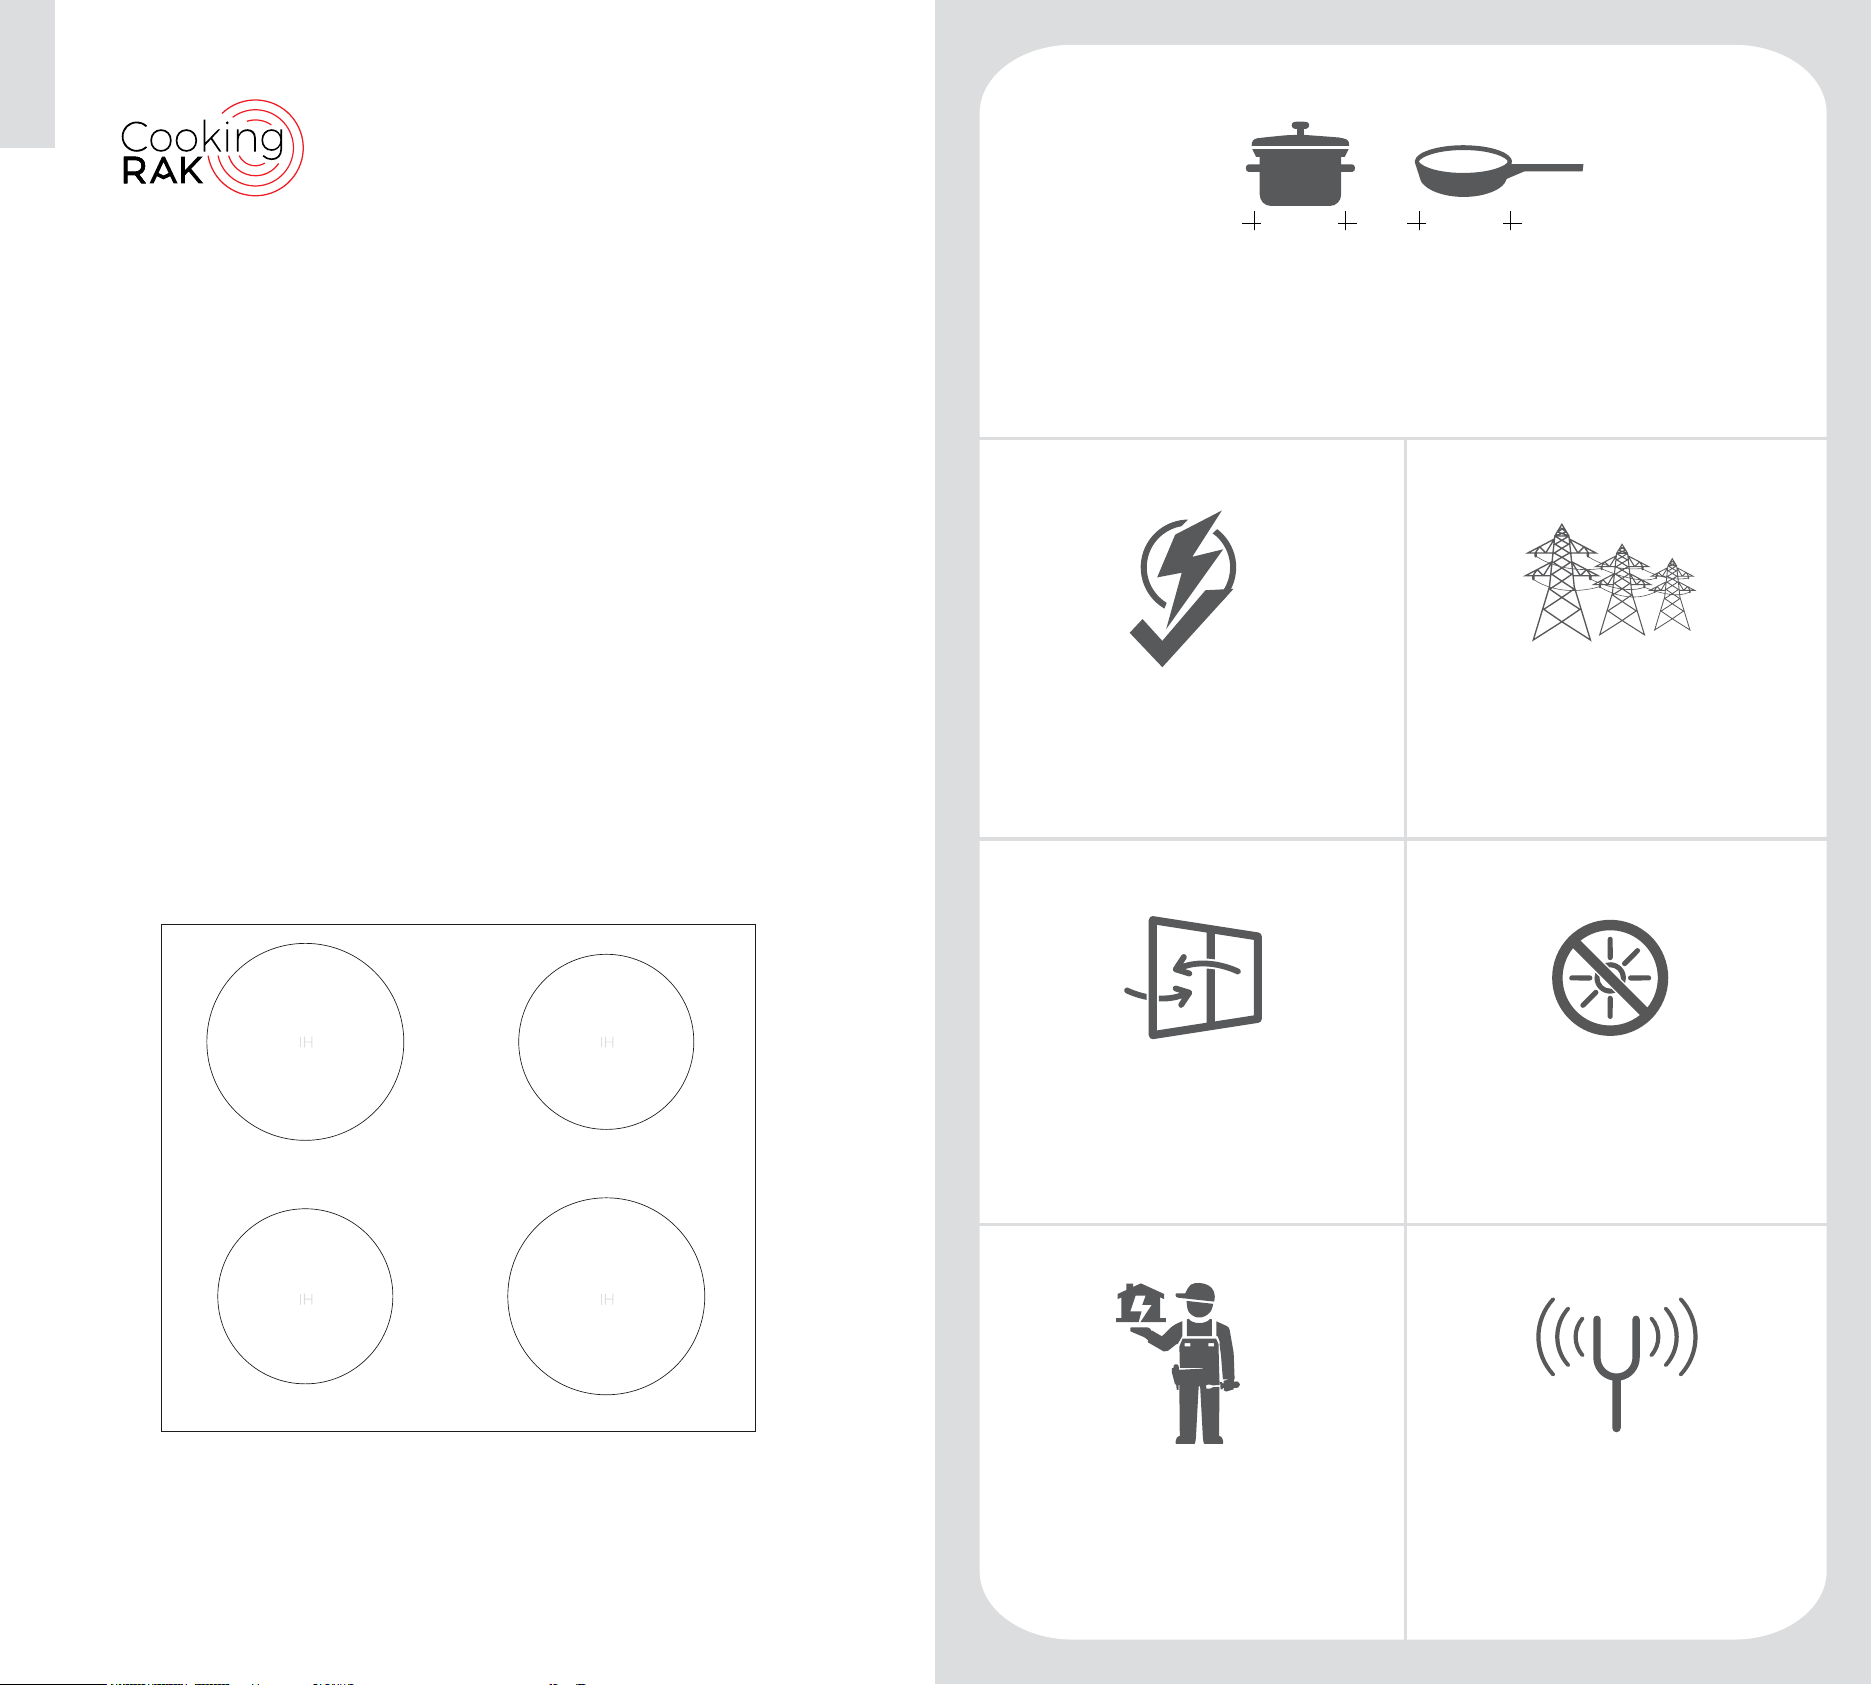
Active cooking zones will not heat up unless we use induction
cooker-compatible cookware.If the system is in working mode’ with
set a temperature, but
• No cookware is placed on the zone.
• The bottom diameter of the cooker is less than 60 mm.
• The cookware is deformed.
• The Floating height is high.
The heating will stop, the power display will read E, the timer display
will read E1, and if it is not recovered within 60 seconds, it will
automatically turn o.
: When the induction cooker is in
working mode, and the voltage is >270V±5V, the heating will
be suspended immediately, the power display will read E, and
the timer display read show E3. If the voltage is <260V±5V for
more than 1 second, the operation will resume automatically.
If the voltage is ≥260V±5V within 10 seconds, the buzzer
will make two long and four short beeps prompts every 5
seconds. The alarm will shut o after 90 seconds or once the
microcrystalline plate’s temperature is lower than 60 ℃.
When the induction cooker is in
working mode, and the voltage is ≤ 160V ± 5V, heating will
be suspended immediately, power display will read E, the
timer display will show E2 and if the voltage is ≥ 170V ± 5V for
more than 1 second, it will automatically resume working if
the voltage is < 170V± 5V within 10 seconds, and the buzzer
will give out two long and three short beep prompts every 5
seconds. The alarm will shut o after 90 seconds or once the
microcrystalline plate’s temperature is lower than 60 ℃.
If the IGBT temperature is too high,
the heating will stop immediately, the power display will read
E the timer display will read E0, and the buzzer will make four
long and three short beep prompts every 5 seconds. Then
change to the shutdown stroke, and the warning beep will
stop.
When the induction
cooker is heated, use a standard lightning surge generator,
apply 1.2/50 μs lightning surge voltage of 1200V, and test at
any phase for 10 minutes continuously, the induction cooker
can be heated normally, and the circuit is not damaged.
when the induction cooker
is working, it is subject to 1500V interference of fast electrical
transient - burst (IEC6100-4-4-2004), and the induction cooker
can be heated normally without crashing, shutdown, reset and
circuit damage.
When the working current exceeds
the set value, the circuit will automatically adjust, and the
constant input current will be within the safe range. When the
main circuit is of short circuit and over current occurs, the fuse
will be used for fuse protection.

TROUBLESHOOTING
Indicator operation is
OFF (dark)
No main supply Check the electrical
supply (cable plugged
in the wall socket),
check preliminary fuses
With fan sound and E1
error sign ash
Pan too small (bottom
diameter is less than
8 cm)
Use a suitable pan
Pan is not placed in the
center of the heating
area (the cooker can’t
detect the pan)
Move the pan to the
center of the heating
area
Unsuitable material pan Choose a pan that is
recommended for an
induction cooker
Cooker defective Unplug the cooker
from the electrical
supply
Ask your supplier for
repair service
Indicator operation is
ON and ashes
Ambient temperature
is too high (the cooling
system is not able
to keep the cooker
in normal operating
conditions)
Verify that there is no
hot air source nearby
the induction cooker or
sucked in by the cooker
ventilation fan. The air
inlet temperature must
be lower than 40 °C
Cooker defective Unplug the cooker
from the electrical
supply
Ask your supplier for
repair service
TROUBLESHOOTING
Heating cycle switches
o and on within
minutes
Fan is active
Air inlet or air outlet
being obstructed
Remove objects from
the air inlet and air
outlet slots
Heating switches o
and on within minutes
Fan is never active
Fan is defective
Fan control is defective
Ask your supplier for
repair service
After a relatively long
continuous operating
time, the heating
switches o and on
within minutes
Coil overheated,
cooking area too hot
Empty pan
Pan with overheated oil
Switch cooker o,
remove pan and wait
until the cooking area
has cooled o
Small metallic objects
(e.g., a spoon) are
heated up within the
heating zone
Pan detection tuned
incorrectly
Call for repairing service

WARNING SOUNDS
Induction heating technology is based on the creation of
electromagnetic elds that which enable heat to be generated
directly at the base of the pan. Depending on the manufacturing of
the pan, these electromagnetic elds may produce certain noises or
vibrations, as detailed below.
A LOW BUZZING NOISE
This happens when cooking at high power levels due to the high
amount of energy transferred to the cookware. This noise will stop or
lessen as the power level is reduced.
A LOW WHISTLING NOISE
This happens when the cookware placed on an active hob is empty.
The noise will stop once the cookware is lled with water or an
ingredient.
A CRACKLING NOISE
This happens when cookware that is made of dierent superimposed
materials is used. The noise is caused by the vibration of the contact
surfaces of the various superimposed materials. The intensity of the
noise may vary depending on the food’s quantity and the cooking
method.
A HIGH-PITCHED WHISTLING NOISE
This noise is mostly produced by pans’ which are composed of
dierent superimposed materials, as soon as they are used at full
heating power and at the same time on two hotplates. This whistling
disappears or lessens as soon as the power is reduced.
FAN NOISE
The induction cooker must operate at a controlled temperature
for the electronic system to run properly. The fan attached to the
cooking system automatically starts when the temperature level
is high. For safety reasons, the fan will continue to run for a few
seconds even after being turned o to cool down the system.
The noises described in this section are normal. They are
part of induction heating technology and do not indicate a
malfunction.
CARE AND CLEANING
Your CookingRAK system is very easy to clean and maintain.
• Make sure that the system is turned o and the surface is
cooled down.
• Always clean the countertop after every use.
• Use regular soap and water or any cleaning material suitable for
countertops.
• Do not use corrosive or abrasive cleaning agents, such as grill
and oven sprays, stain and rust removers, scouring powder, and
rough sponges.
• Ventilation ports should be cleaned with a vacuum cleaner or a
brush. Do not use water as it may enter the induction unit and
damage it.
• The power cord is damaged, please do not repair it yourself.
To avoid any hazards, any repair should be carried out by the
manufacturer or approved technician.
Before cleaning, make sure that the countertop surface is
cooled down.
Other maintenance and servicing work should be performed
by the authorised service personnel only.

INSTALLATION GUIDE
Before installing the appliance, check that the location provides
the required clearances from combustible materials and check if
necessary to provide protection to adjacent surfaces as required by
the regulation.
Remove the appliance from the carton and check if it is in good
condition. (Any damage found must be reported within 7 days. Do
not try to install the appliance if it shows signs of damage.)
Keep the system on the back of the
RAK Ceramics Maximus slab.
Get metal bars with lateral attachments
to x the system.
Apply the conductive thermal paste on the sensor.
Place and screw the metal bars under the system.
Mark the perimeter of the system
on the back of the slab.
Place the porcelain slab on top of the module.
Attach the system to the porcelain slab using a prop
while keeping a space of 5 cm to 10 cm on both sides
for proper airow.
Connect the electrical cables and turn on
the main switch. Finish assembling the furniture.
WARRANTY
We undertake that if within the warranty of 12 months from the date
of purchase, we will, at our option, replace or repair any part of the
product found to be defective in workmanship or material, on the
condition that:
• The appliance has been correctly installed and used only on the
electricity supply stated on the rating plate.
• The appliance has been used for regular, domestic purposes
only and per the manufacturer’s instructions.
• The appliance has not been serviced, maintained, repaired,
taken apart, or tampered with by any person not authorized by
us.
• The appliance uses 14.5mm thick porcelain kitchen tops
manufactured by RAK Ceramics. Any other kitchen tops
manufactured by dierent companies are incompatible, so any
related warranty claims will not be valid.
All service work under this warranty must be undertaken by an ocial
authorized CookingRAK technician. Any appliance or defective part
replaced shall become the Company property. This warranty is in
addition to your statutory and other legal rights. This warranty does
not include maintenance like cleaning the induction cooker.
The manufacturer waives all liability for failing to observe the
instructions for the appropriate installation, maintenance, and
appliance use.
To activate the warranty, ll in the form that you can nd on
the CookingRAK website.

1. Grazie per aver acquistato un fornello a induzione Cooking
RAK. Prima di installare e utilizzare l’apparecchio, leggere
attentamente tutte le istruzioni. Conservare il presente manuale
di istruzioni per future consultazioni.
2. Non utilizzare l’apparecchio per usi diversi da quelli previsti.
L’apparecchio è compatibile solo con i piani di cottura in
porcellana di 14,5 mm di spessore prodotti da RAK Ceramics.
Non può essere utilizzato con altri prodotti.
3. Non utilizzare apparecchi con cavi o spine danneggiati.
Eventuali riparazioni devono sempre essere eettuate da un
tecnico esperto o da un centro di assistenza autorizzato.
4. Quando si sposta l’apparecchio, fare sempre attenzione a non
toccare superci calde o a non versare liquidi caldi.
5. L’uso di accessori o apparecchiature non fornite dal produttore
può danneggiare l’apparecchio o causare lesioni.
PRECAUZIONI GENERALI DI SICUREZZA L’apparecchio deve essere utilizzato con le pentole di tipo e dimensioni
raccomandate. Non utilizzare pentole di materiale scadente. Le dimensioni
consigliate delle padelle vanno da 12 a 26 cm. È possibile utilizzare anche
pentole con diametro no a 26 cm, ma le prestazioni sono inferiori.
12-26cm 12-26cm
Controllare e assicurarsi che
la tensione di alimentazione
corrisponda a quella indicata sulla
targhetta delle speciche sotto il
fornello a induzione.
Assicurarsi che il fornello a
induzione sia adeguatamente
ventilato.
Assicurarsi che l’installazione,
l’assistenza e l’ispezione siano
eseguite esclusivamente da
personale qualicato.
I collegamenti elettrici devono
essere conformi alle normative
locali. Le norme elettriche
nazionali nazionale e locale.
Non installare il fornello a
induzione vicino o sopra altre
fonti di calore.
Assicurarsi che la pentola sia
ben posizionata e non esposta a
vibrazioni.

Se la supercie di porcellana è incrinata o rotta, smettere di usare
la pentola, rimuovere tutti gli oggetti dalla supercie, spegnerla
immediatamente e scollegarla dalla presa di corrente. Rivolgersi al servizio
di assistenza per la sostituzione.
• Utilizzare una padella adatta alla cottura a induzione, con un diametro del fondo
superiore a 12 cm (come la maggior parte delle padelle disponibili sul mercato).
• Se si utilizzano pentole con un diametro inferiore a 12 cm, o pentole non
adatte, o ancora se non si posiziona nessuna pentola sul piano di cottura.
• se non si posizionano padelle sulla zona di cottura, non si trasferisce energia e
la spia E1 lampeggia.
• Per vericare se la pentola è adatta, utilizzare un magnete permanente e
controllare se si attacca al fondo della pentola. se si attacca al fondo della
padella. In caso contrario, la padella non è adatta alla cottura a induzione.
per la cottura a induzione. Scegliere solo pentole consigliate per la cottura a
induzione.
La zona di cottura del vetro
ceramico può presentare dei
residui di calore dopo la cottura.
Per evitare lesioni (bruciature), non
toccare la zona di cottura subito
dopo la cottura.
Per evitare il surriscaldamento,
non lasciare le pentole incustodite
quando l’apparecchio è acceso.
Dopo la cottura, spegnere subito
la pentola premendo il tasto On/
O” per evitare che il processo
di riscaldamento continui
automaticamente quando una
pentola viene rimessa sulla zona di
cottura dopo un po’ di tempo”.
Non inserire carta, cartone, stoa
o altro materiale tra la pentola e la
zona di cottura, perché potrebbe
innescare un incendio.
Non collochi altri oggetti sulla zona di riscaldamento del fornello a
induzione, come lattine chiuse, fogli di alluminio, posate, gioielli, orologi,
coltelli, forchette, cucchiai, coperchi o altro. Gli oggetti metallici potrebbero
riscaldarsi e causare pericoli.
Se il cavo di alimentazione è danneggiato, deve essere sostituito dal
produttore, da un agente di assistenza o da personale altrettanto qualicato,
per evitare qualsiasi pericolo.
Non toccare le parti interne del
fornello a induzione.
Durante la cottura, la pentola deve essere sempre mantenuta al centro
della zona di cottura, altrimenti si riscalda in modo non uniforme e il cibo
potrebbe bruciarsi o non cuocersi correttamente.
Se il cavo di alimentazione è
danneggiato, deve essere sostituito
dal fabbricante, da un addetto
all’assistenza o da personale
qualicato in modo analogo, per
evitare rischi.

Questo apparecchio non è destinato all’uso da parte di persone con
ridotte capacità siche, sensoriali o mentali o con mancanza di esperienza
e conoscenza, a meno che non siano sotto la supervisione di una
persona responsabile o non abbiano ricevuto istruzioni adeguate sull’uso
dell’apparecchio. Inoltre, questo apparecchio non è destinato all’uso da parte
dei bambini.
Non colleghi mai il sistema a induzione a un timer esterno o a un sistema di
controllo remoto separato.
Non collochi/conservi oggetti
che potrebbero fondere o
prendere fuoco nelle zone di
cottura, anche quando non è in
uso.
Non smaltisca gli apparecchi elettrici come riuti urbani non dierenziati,
ma si rivolga a centri di raccolta dierenziata. Contatti l’amministrazione
locale per informazioni sui sistemi di raccolta disponibili. Se gli apparecchi
elettrici vengono smaltiti in discariche o discariche, le sostanze pericolose
possono fuoriuscire nelle falde acquifere ed entrare nella catena alimentare,
danneggiando la sua salute e il suo benessere.
Non lasci mai il piano di cottura
incustodito quando è in uso,
soprattutto quando riscalda oli o
grassi, perché possono facilmente
prendere fuoco.
1
498 3
2
56 7
PANNELLO DI CONTROLLO
E
Collegamento e controllo tramite un’applicazione mobile
È possibile collegare l’hub a induzione in modalità wireless tramite Bluetooth
utilizzando un dispositivo mobile Android o iOS. Scaricare l’applicazione
mobile dai rispettivi store scansionando il codice QR qui sotto.

Potenza
(W)
1 2 3 4 5 6 7 8 9 P(-
Max)
Anteriore
sinistro
100 300 400 500 800 900 1000 1100 1300 1500
Sinistra
posteriore
100 300 400 500 800 1000 1200 1300 1500 1800
Zona
essibile
sinistra
200 400 600 1000 1400 2200 2400 2600 2800 3000
Anteriore
destro
100 300 400 500 800 1000 1200 1300 1500 1800
Posteriore
destro
100 300 400 500 800 900 1000 1100 1300 1500
Zona
essibile
destra
200 400 600 1000 1400 2200 2400 2600 2800 3000
Livello
LIVELLO DI POTENZA E TABELLA DI
VISUALIZZAZIONE
SPECIFICHE
6600W
4
1600W+1800W+1600W+1800W
ACCENSIONE E SPEGNIMENTO
Per accendere: Inserisca la spina nella presa di corrente prima di
accenderla. Dopo l’accensione, il cicalino emetterà un segnale
acustico e tutti i pulsanti indicatori si illumineranno per un
secondo. Il fornello a induzione entrerà in modalità standby e sarà
pronto all’uso.
Per spegnere:
a. Prema il tasto “On/O” della zona di cottura attiva e verrà
visualizzato il numero desiderato. Prema il tasto “-” e il display
visualizzerà “1”, prema nuovamente “-” e il piano cottura attivato si
spegnerà.
b.Prema il tasto “On/O” della zona di cottura desiderata e il
display digitale visualizzerà il numero desiderato. Ad esempio,
prema il tasto “-” e il display visualizzerà “1”; prema nuovamente “-”
e la zona di cottura selezionata si spegnerà.
c.Premere il tasto “On/O” e il piano emetterà un “bip” una
volta, quindi si spegnerà. Il piano cottura entrerà ora in modalità
standby.
BLOCCO e SBLOCCO
Per evitare l’uso involontario dei comandi del piano cottura a
induzione, prema il pulsante ‘blocco’ per 3 secondi; il piano
cottura a induzione emetterà un ‘bip’ e si accenderà, quindi sarà in
modalità blocco bambini.
Per sbloccare, ripeta la stessa procedura e la spia del tasto
‘blocco’ si spegnerà.
MODALITÀ STANDBY e FUNZIONAMENTO
Quando è in modalità di alimentazione, prema il tasto On/O”; il
fornello a induzione emetterà un segnale acustico ed entrerà in
uno stato di preparazione. Solo l’indicatore ON/OFF sarà acceso
durante la preparazione. Se non vengono eettuate ulteriori
immissioni entro 30 secondi, il fornello ad induzione tornerà allo
stato di standby. In modalità standby, prema la zona di cottura
desiderata e il display della testa del bruciatore corrispondente
lampeggerà “0”. Quindi, prema il tasto “-” o “+” entro 30 secondi
per impostare il livello di riscaldamento desiderato. Ad esempio,
il livello di riscaldamento predenito è “5”: prema il tasto “-” per
accedere alla potenza più bassa. “+”. To enter the rated power
position (display “P”). If no further entry is made within 30 seconds,
the induction cooker will return to standby state.

FUNZIONE PONTE:
In modalità standby, premere il tasto ponte”; l’indicatore
del ponte si accende, il display lampeggia e l’apparecchio
entra in modalità di preparazione del riscaldamento a ponte.
Nella modalità di preparazione del riscaldamento a ponte, premere i
tasti “-” e “+” entro 30 secondi per accedere direttamente alle diverse
posizioni di riscaldamento della cappa: il livello di potenza predenito
è “5”, premere “-” per diminuire la potenza (display “1”) o “+” per
aumentarla (display “P”). Se non si conferma il tasto entro 30 secondi,
l’apparecchio esce automaticamente dalla modalità di preparazione
del riscaldamento a ponte”.
IMPOSTAZIONE DEL TIMER
L’intervallo di impostazione del timer va da 1 a 99 minuti. In
modalità di lavoro, premere il tasto “temporizzazione”: la spia
di temporizzazione del bruciatore corrispondente lampeggia
e il display della temporizzazione lampeggia per indicare “00”.
Premere + o - per regolare il tempo di temporizzazione, che sarà
aumentato o diminuito in unità di 1 minuto se è inferiore a 15 minuti,
in unità di 5 minuti se è compreso tra 15 minuti e 40 minuti, in
unità di 10 minuti se è compreso tra 40 minuti e 99 minuti. Dopo
l’interruzione dell’operazione di pressione dei tasti, il display del
timer lampeggia per 5 secondi, quindi torna normale, la spia di
temporizzazione lampeggia e inizia il conto alla rovescia del tempo
di temporizzazione. Al termine del conto alla rovescia, la pentola a
induzione emette un “bip” e si spegne automaticamente.
ATTENZIONE
Il sistema a induzione è molto eciente in quanto il calore viene
trasferito direttamente alla padella, quindi non metta padelle vuote
nelle zone di cottura. Invece, metta l’olio o il liquido nella padella e
inizi il processo di cottura.
La padella deve sempre rimanere al centro dell’area di riscaldamento
durante la cottura. In caso contrario, il fondo della padella si
riscalderà in modo non uniforme e il cibo nella padella si brucerà.
Durante il riscaldamento dell’olio, controlli costantemente la padella
per evitare il surriscaldamento o la bruciatura.
per inserire la posizione di potenza più bassa (display “1”) e premere
“+” per inserire la posizione di potenza nominale (display “P”). Se non
vengono eettuate ulteriori immissioni entro 30 secondi, il piano
cottura a induzione tornerà allo stato di s
Il display del timer indicherà il tempo minimo dopo
l’impostazione del timer per ciascun bruciatore.
SICUREZZA E AVVERTENZA
Dopo aver spento il fornello a induzione, la ventola ritarderà
automaticamente il funzionamento per 1 minuto per dissipare il
calore.
Quando la temperatura centrale della piastra microcristallina
rilevata dall’NTC è superiore a 50℃, verrà visualizzato il simbolo
‘’H’’. Quando la pentola usata non è coerente o la pentola viene
allontanata dal fornello a induzione, il riscaldamento si interrompe, il
display della potenza visualizza E e il display dei tempi visualizza E1.
Se la pentola adatta non viene inserita entro 10 secondi, si spegne
automaticamente.
Per garantire la cottura, utilizzare pentole adatte alla cottura a
induzione. Quando la tensione è troppo alta (o troppo bassa), il
riscaldamento si spegne, il display della potenza visualizza E e il
display del timer visualizza E3 (o E2). Se la tensione non torna al
livello medio entro 10 secondi, si spegnerà automaticamente. In
questo caso, il fornello a induzione emetterà un segnale acustico di
avvertimento e dovrà essere scollegato immediatamente.

SEGNI DI ERRORE
1. 1.Quando la pentola a induzione è in modalità standby o di
lavoro e il sensore IGBT (NTC1) è in circuito aperto, il display
indicherà E, il display del timer indicherà E7 e il cicalino
emetterà quattro segnali acustici lunghi e cinque brevi ogni 5
secondi.
2. Quando la pentola a induzione è in modalità standby o di
lavoro e il sensore IGBT (NTC1) è in cortocircuito, il display
indicherà E, il display del timer indicherà E8 e il cicalino
emetterà quattro segnali acustici lunghi e quattro brevi ogni 5
secondi.
3. Quando la pentola a induzione è in modalità standby o
di lavoro e l’NTC2 è su un circuito aperto, il display di
alimentazione mostrerà E, il display del timer leggerà E9 e il
cicalino emetterà tre segnali acustici lunghi e cinque brevi ogni
5 secondi.
4. Quando la pentola a induzione è in modalità standby o di
lavoro e l’NTC2 è in cortocircuito, il display dell’alimentazione
visualizzerà E, il display del timer leggerà E2 e il cicalino
emetterà tre segnali acustici lunghi e quattro brevi ogni 5
secondi.
Le zone di cottura attive non si riscaldano a meno che non si utilizzi
una pentola compatibile con i fornelli a induzione.Se il sistema è in
modalità di lavoro con una temperatura impostata, ma non viene
posizionata alcuna pentola sulla zona.
• non viene posizionata alcuna pentola sulla zona
• il diametro del fondo della pentola è inferiore a 60 mm
• le pentole sono deformate
• l’altezza di galleggiamento è elevata
il riscaldamento si interromperà, il display della potenza indicherà E,
il display del timer indicherà E1, e se non viene recuperato entro 60
secondi, si spegnerà automaticamente.
quando la pentola a
induzione è in modalità di lavoro e la tensione è >270V±5V,
il riscaldamento verrà sospeso immediatamente, il display
dell’alimentazione visualizzerà E e il display del timer
visualizzerà E3. Se la tensione è <260V±5V per più di 1
secondo, il funzionamento riprenderà automaticamente. Se
la tensione è ≥260V±5V entro 10 secondi, il cicalino emetterà
due segnali acustici lunghi e quattro brevi ogni 5 secondi.
L’allarme si spegnerà dopo 90 secondi o una volta che la
temperatura della piastra microcristallina è inferiore a 60℃.
Quando il fornello
a induzione è in modalità di lavoro, la tensione è ≤ 160V ±
5V, il riscaldamento verrà sospeso immediatamente, il display
di potenza leggerà E, il display del timer mostrerà E2, se
la tensione è ≥ 170V ± 5V per più di 1 secondo, riprenderà
automaticamente a funzionare se la tensione è < 170V± 5V
entro 10 secondi, il cicalino emetterà due segnali acustici
lunghi e tre brevi ogni 5 secondi. L’allarme si spegnerà dopo 90
secondi o quando la temperatura della piastra microcristallina
sarà inferiore a 60℃.
se la temperatura dell’IGBT è troppo
alta, il riscaldamento si interromperà immediatamente, il display
di potenza visualizzerà E, il display del timer visualizzerà E0 e il
cicalino emetterà quattro segnali acustici lunghi e tre brevi ogni
5 secondi. Poi passerà alla corsa di spegnimento e il segnale
acustico di avvertimento si fermerà.
Quando la
pentola a induzione è riscaldata, utilizzi un generatore di
sovratensioni standard, applichi una tensione di sovratensione
di 1200 V pari a 1,2/50 μs e la testi in qualsiasi fase, per 10
minuti continui; la pentola a induzione può essere riscaldata
normalmente e il circuito non è danneggiato.
quando la cucina a induzione
è in funzione, è soggetta all’interferenza di 1500V di transitori
elettrici veloci - burst (IEC6100-4-4-2004), e la cucina a
induzione può essere riscaldata normalmente senza crash,
spegnimento, reset e danni al circuito.
quando la corrente di
lavoro supera il valore impostato, il circuito si regolerà
automaticamente e la corrente di ingresso costante rientrerà
nell’intervallo di sicurezza. Quando il circuito principale è in
cortocircuito e si verica una sovracorrente, il fusibile verrà
utilizzato per la protezione del fusibile.

RISOLUZIONE DEI PROBLEMI
Nessuna luce di
standby L’indicatore di
funzionamento è spento
(scuro)
Assenza di alimentazione
principale
Controllare l’alimentazione
elettrica (cavo inserito
nella presa di corrente),
controllare i fusibili
preliminari.
Nessun riscaldamento
Con il suono della ventola
e il lampeggiamento del
segnale di errore E1
Pentola troppo piccola
(diametro inferiore a 8 cm)
Utilizzare una pentola
adeguata
La pentola non è
posizionata al centro
dell’area di riscaldamento
(la pentola non riesce a
rilevare la pentola)
Spostare la pentola
al centro dell’area di
riscaldamento.
Padella di materiale
inadatto
Scegliere una padella
consigliata per il fornello a
induzione.
Fornello difettoso Scollegare la pentola dalla
rete elettrica Rivolgersi al
proprio fornitore per la
riparazione.
Riscaldamento
insuciente L’indicatore di
funzionamento è acceso e
lampeggia
La temperatura ambiente
è troppo alta (il sistema
di rareddamento non è
in grado di mantenere la
pentola in condizioni di
funzionamento normali).
Vericare che non ci sia
una fonte di aria calda
vicino alla pentola a
induzione o che non
venga aspirata dalla
ventola di ventilazione
della pentola La
temperatura dell’aria in
ingresso deve essere
inferiore a 40°C
Fornello difettoso Scollegare la pentola dalla
rete elettrica Rivolgersi al
proprio fornitore per la
riparazione.
TROUBLESHOOTING
Il ciclo di riscaldamento
si spegne e si accende in
pochi minuti
Il ventilatore è attivo.
Ingresso o uscita dell’aria
ostruiti
Rimuovere gli oggetti dalle
fessure di ingresso e uscita
dell’aria.
Il riscaldamento si spegne
e si accende entro pochi
minuti
Il ventilatore non è mai
attivo
Il ventilatore è un rilevatore
Il comando del ventilatore
è difettoso.
Rivolgersi al fornitore per
la riparazione
Dopo un periodo di
funzionamento continuo
relativamente lungo, il
riscaldamento si spegne
e si accende entro pochi
minuti
Bobina surriscaldata, zona
di cottura troppo calda
Padella vuota Padella con
olio surriscaldato
Spegnere la cucina,
rimuovere la pentola e
attendere che la zona di
cottura si rareddi.
Piccoli oggetti metallici (ad
es. cucchiaio) si riscaldano
all’interno della zona di
riscaldamento
Rilevamento della
pentola non regolato
correttamente
Chiamare il servizio di
riparazione

RISOLUZIONE DEI PROBLEMI
La tecnologia di riscaldamento a induzione si basa sulla creazione
di campi elettromagnetici che consentono di generare calore
direttamente sul fondo della pentola. A seconda della fabbricazione
della pentola, questi campi elettromagnetici possono produrre alcuni
rumori o vibrazioni, come indicato di seguito:
UN BASSO RONZIO
Si verica quando cucina con livelli di potenza elevati, a causa
dell’elevata quantità di energia trasferita alle pentole. Questo rumore
si interrompe o si attenua con la riduzione del livello di potenza.
UN LEGGERO FISCHIO
Si verica quando le pentole posizionate su un piano cottura attivo
sono vuote. Il rumore cessa quando la pentola viene riempita
d’acqua o di un ingrediente.
UN RUMORE SCOPPIETTANTE
Si verica quando si utilizza una pentola composta da diversi
materiali sovrapposti. Il rumore è causato dalla vibrazione delle
superci di contatto dei vari materiali sovrapposti. L’intensità del
rumore può variare a seconda della quantità di cibo e del metodo di
cottura.
UN RUMORE SIBILANTE ACUTO
Questo rumore è prodotto principalmente da pentole composte da
diversi materiali sovrapposti, non appena queste vengono utilizzate
alla massima potenza di riscaldamento e contemporaneamente
su due piastre. Questo sibilo scompare o si attenua non appena la
potenza viene ridotta.
RUMORE DELLA VENTOLAIl fornello a induzione deve funzionare a
una temperatura controllata anché il sistema elettronico funzioni
correttamente. La ventola collegata al sistema di cottura si avvia
automaticamente quando il livello di temperatura è alto. Per motivi
di sicurezza, la ventola continuerà a funzionare per alcuni secondi
anche dopo lo spegnimento, per rareddare il sistema.
Prima di pulire, si assicuri che la supercie del piano di lav-
oro sia rareddata.
CURA E PULIZIA
Il suo sistema CookingRAK è molto facile da pulire e mantenere.
• Si assicuri che il sistema sia spento e che la supercie sia
rareddata.
• Pulisca sempre il piano di lavoro ogni volta che lo utilizza.
• Utilizzi normale acqua e sapone o qualsiasi altro materiale di
pulizia adatto ai piani di lavoro.
• Non utilizzi detergenti corrosivi o abrasivi, come spray per
griglie e forni, smacchiatori e antiruggine, polvere abrasiva e
spugne ruvide.
• Le aperture di ventilazione devono essere pulite con un
aspirapolvere o una spazzola. Non utilizzare acqua perché
potrebbe penetrare A154 a induzione e danneggiarla.
• Se il cavo di alimentazione è danneggiato, non ripararlo da soli.
Per evitare rischi, qualsiasi riparazione deve essere eettuata dal
produttore o da un tecnico autorizzato.
Si assicuri che il sistema sia spento e che la supercie sia
rareddata.
Gli interventi di manutenzione e assistenza diversi dalla pulizia qui
descritta devono essere eseguiti esclusivamente da personale di
assistenza autorizzato.

Prima di installare l’apparecchio, vericare che il luogo di
installazione ora le distanze richieste dai materiali combustibili e
controllare se è necessario proteggere le superci adiacenti come
richiesto dalla normativa.
Estrarre l’apparecchio dalla confezione e vericare che sia in buone
condizioni. (Eventuali danni riscontrati devono essere segnalati entro
7 giorni). Non tentare di installare l’apparecchio se presenta segni di
danneggiamento).
Tenere il sistema sul retro della lastra RAK Ceramics
Maximus.
Procurarsi barre metalliche con attacchi laterali per
ssare il sistema.
Applicare la pasta termale conduttiva sul sensore.
Posizionare e avvitare le barre metalliche sotto il
sistema.
Segnare il perimetro del sistema sul retro della lastra.
Posizionare la lastra di gres porcellanato sopra il
modulo.
Fissare il sistema alla lastra di porcellana utilizzando
un puntello mantenendo uno spazio da 5 cm a 10 cm
su entrambi i lati per un corretto usso d›aria.
Collegare i cavi elettrici e accendere l›interruttore
principale. Terminare il montaggio del mobile.
GARANZIA
Ci impegniamo a sostituire o riparare, a nostra discrezione, entro 12
mesi dalla data di acquisto, qualsiasi parte del prodotto che risulti
difettosa nella lavorazione o nel materiale, a condizione che :
• L’apparecchio sia stato utilizzato esclusivamente per scopi
domestici regolari e secondo le istruzioni del produttore.
• L’apparecchio sia stato utilizzato esclusivamente per scopi
domestici regolari e secondo le istruzioni del produttore.
• Tutti gli interventi di assistenza previsti dalla presente garanzia
devono essere eseguiti da un tecnico uciale autorizzato
Cooking RAK. Qualsiasi apparecchio o parte difettosa sostituita
diventerà di proprietà dell’azienda. La presente garanzia si
aggiunge ai diritti legali e agli altri diritti dell’utente. La garanzia
non comprende la manutenzione, come la pulizia del fornello a
induzione.
• L’apparecchio utilizza piani di cottura in porcellana di 14,5 mm
di spessore prodotti da RAK Ceramics. Eventuali altri piani di
cottura prodotti da aziende diverse sono incompatibili, pertanto
le relative richieste di garanzia non saranno valide.
Tutti gli interventi di assistenza previsti dalla presente garanzia
devono essere eseguiti da un tecnico uciale autorizzato Cooking
RAK. Qualsiasi apparecchio o parte difettosa sostituita diventerà
di proprietà dell’azienda. La presente garanzia si aggiunge ai diritti
legali e agli altri diritti dell’utente. La garanzia non comprende la
manutenzione, come la pulizia del fornello a induzione.
Il produttore declina ogni responsabilità in caso di mancata
osservanza delle istruzioni per l’installazione, la manutenzione e l’uso
appropriati dell’apparecchio.
per attivare la garanzia, compilare il modulo che si trova sul
sito web di CookingRAK.

1. Vielen Dank, dass Sie sich für einen Cooking RAK-Induktionsherd
entschieden haben. Bevor Sie das Gerät aufstellen und in
Betrieb nehmen, lesen Sie bitte alle Anweisungen sorgfältig
durch. Bewahren Sie diese Gebrauchsanweisung zum späteren
Nachschlagen auf.
2. Verwenden Sie das Gerät nicht für einen anderen als den
vorgesehenen Zweck. Bitte beachten Sie, dass das Gerät nur
mit 14,5 mm dicken Porzellan-Küchenplatten von RAK Ceramics
kompatibel ist. Es kann mit keinem anderen Produkt verwendet
werden.
3. Betreiben Sie keine Geräte mit beschädigten Kabeln oder
Steckern. Reparaturen sollten immer von einem erfahrenen
Techniker oder einem autorisierten Service-Center durchgeführt
werden.
4. Achten Sie beim Bewegen des Geräts darauf, keine heißen
Oberächen zu berühren oder heiße Flüssigkeiten zu
verschütten.
5. Die Verwendung von Zubehör oder Geräten, die nicht vom
Hersteller geliefert wurden, kann das Gerät beschädigen oder zu
Verletzungen führen.
ALLGEMEINE SICHERHEITSHINWEISE
Die Geräte dürfen nur mit den empfohlenen Arten und Größen von Töpfen
verwendet werden. Verwenden Sie keine Pfannen aus minderwertigem
Material. Die empfohlenen Pfannengrößen reichen von 12 bis 26 cm. Pfannen
mit einem Durchmesser von bis zu 26 cm können ebenfalls verwendet
werden, die Leistung ist jedoch geringer.
12-26cm 12-26cm
Vergewissern Sie sich, dass
die Netzspannung mit der auf
dem Typenschild unter dem
Induktionsherd angegebenen
Spannung übereinstimmt.
Stellen Sie sicher, dass der
Induktionsherd gut belüftet ist.
Stellen Sie sicher, dass Installation,
Wartung und Inspektion nur
von qualiziertem Personal
durchgeführt werden.
Elektrische Anschlüsse müssen den
örtlichen Vorschriften entsprechen.
Nationale und lokalen Vorschriften
für elektrische Anschlüsse müssen
befolgt werden.
Stellen Sie den Induktionsherd
nicht in der Nähe oder auf anderen
Wärmequellen auf.
Stellen Sie sicher, dass der Herd
gut positioniert ist und keinen
Vibrationen ausgesetzt ist.
Table of contents
Languages: