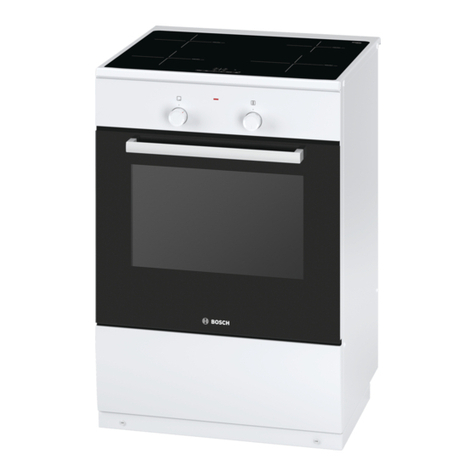
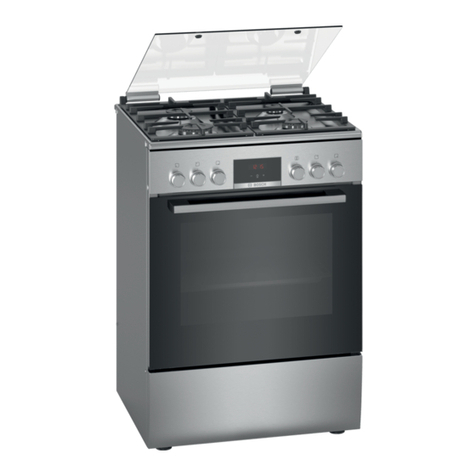
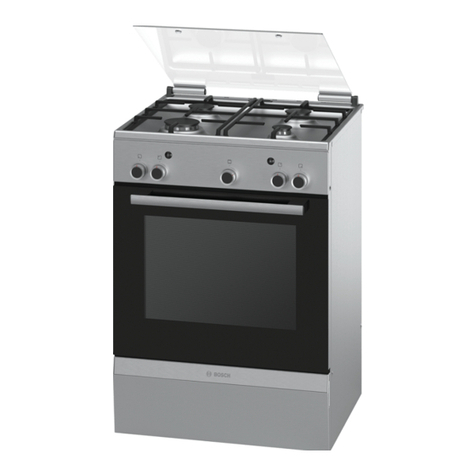
Bosch POP7C O12O Series User manual

en
2
Table of contents
1 ...............................................................................2
2 Safety....................................................................2
3 Preventing material damage ...............................5
4 Causes of damage ...............................................5
5 Environmental protection and saving en-
ergy .......................................................................5
6 Your new appliance .............................................6
7 Before first use.....................................................6
8 Setting the hob.....................................................7
9 Table – Cooking ...................................................8
10 Cookware..............................................................8
11 Cleaning and care ................................................9
12 Troubleshooting.................................................11
13 Customer Service...............................................12
14 Disposal..............................................................12
1
Pan support -
Control panel -
Economy burner 1kW
Standart output burner 1,7kW
High output burner 3kW
POP7C.O12O, EO7C.PO12O, OO37P.O12D
E
B
D D
A C

2 Safety
Observe the following safety instructions.
2.1 General information
¡Read this instruction manual carefully.
¡Keep the instruction manual and the
product information safe for future refer-
ence or for the next owner.
¡Do not connect the appliance if it has been
damaged in transit.
2.2 Intended use
The appliance can only be used safely if it is
correctly installed according to the safety in-
structions. The installer is responsible for en-
suring that the appliance works perfectly at its
installation location.
Only use this appliance:
¡To prepare meals and drinks.
¡Under supervision. Never leave the appli-
ance unattended when cooking for short
periods.
¡In private households and in enclosed
spaces in a domestic environment.
¡Up to an altitude of max. 2000m above
sea level.
Do not use the appliance:
¡On boats or in vehicles.
¡as a room heater.
¡with an external timer or a remote control.
Call the after-sales service if you want to con-
vert your appliance to a different type of gas.
2.3 Restriction on user group
This appliance may be used by children aged
8 or over and by people who have reduced
physical, sensory or mental abilities or inad-
equate experience and/or knowledge,
provided that they are supervised or have
been instructed on how to use the appliance
safely and have understood the resulting
dangers.
Children must not play with the appliance.
Children must not perform cleaning or user
maintenance unless they are at least 15 years
old and are being supervised.
Keep children under the age of 8 years away
from the appliance and power cable.
2.4 Safe use
WARNING‒Risk of explosion!
Escaping gas may cause an explosion. WHAT
TO DO IF YOU SMELL GAS OR IF THERE
ARE FAULTS IN THE GAS INSTALLATION
▶Immediately shut off the gas supply or
close the gas cylinder valve.
▶Immediately extinguish all naked flames
and cigarettes.
▶Do not operate any light switches or appli-
ance switches.
▶Do not pull any plugs out of any sockets.
▶Do not use any telephones or mobile
phones within the building.
▶Open windows and ventilate the room.
▶Call the after sales service or the gas sup-
plier.
3

Safety en
4
Escaping gas may cause an explosion. Small
amounts of gas can collect over a longer
period of time and ignite.
▶Close the safety valve for the gas supply
when the appliance is out of use for pro-
longed periods.
Escaping gas may cause an explosion. If the
liquefied gas bottle is not upright, liquefied
propane/butane can enter the appliance. In-
tense darting flames may therefore escape
from the burners. Components may become
damaged and start to leak over time so that
gas escapes uncontrollably.
▶Always use liquefied gas bottles in an up-
right position.
WARNING‒Risk of suffocation!
Using the gas cooking appliance leads to a
build-up of heat, moisture and combustion
products in the room where the appliance is
installed.
▶Ensure that the kitchen is sufficiently ventil-
ated, in particular when operating the gas
cooking appliance.
▶If the appliance is used intensively and for
prolonged periods, ensure that there is ad-
ditional ventilation so that the combustion
products are safely fed to the outside, e.g.
if using existing ventilation equipment, set a
higher performance level and, at the same
time, ensure that the air is replaced with
fresh air in the room where the appliance is
installed.
▶Consult specialist personnel when installing
additional ventilation equipment.
WARNING‒Risk of fire!
Leaving fat or oil cooking on an unattended
hob can be dangerous and may lead to fires.
▶Never leave hot oil or fat unattended.
▶Never attempt to extinguish a fire using wa-
ter; instead, switch off the appliance and
then cover with a lid or a fire blanket.
The appliance becomes very hot.
▶Never place flammable objects on the hob
or in its immediate vicinity.
▶Never store any objects on the hob.
Hob covers can cause accidents, for example
due to overheating, catching fire or materials
shattering.
▶Do not use hob covers.
When gas burners are in operation without
any cookware placed on them, they can build
up a lot of heat. The extractor hood above it
may become damaged or catch fire.
▶Only operate the gas burners with cook-
ware on them.
The appliance becomes very hot, fabrics and
other objects may ignite.
▶Keep fabrics (e.g. garments or curtains)
away from the flames.
▶Never reach over the flames.
▶Do not place combustible objects (e.g. tea
towels or newspapers) on, next to or be-
hind the appliance.
Escaping gas may ignite.
▶If the burner does not ignite after
15seconds, turn the control knob to the
"Off" position and open the door or window
in the room. Wait at least one minute be-
fore igniting the burner again.
▶In the event of the burner flames being ac-
cidentally extinguished, turn off the burner
control and do not attempt to re-ignite the
burner for at least one minute.
Food may catch fire.
▶The cooking process must be monitored. A
short process must be monitored continu-
ously.
WARNING‒Risk of burns!
The accessible parts can become hot during
operation.
▶Small children should be kept away from
the appliance.
Hob protective grilles may cause accidents.
▶Never use hob protective grilles.
Empty cookware becomes extremely hot
when set on gas burners that are operating.
▶Never heat up empty cookware.
The appliance becomes hot during operation.
▶Allow the appliance to cool down before
cleaning.

en Safety
5
WARNING‒Risk of electric shock!
Incorrect repairs are dangerous.
▶Repairs to the appliance should only be
carried out by trained specialist staff.
▶Only use genuine spare parts when repair-
ing the appliance.
▶If the power cord of this appliance is dam-
aged, it must be replaced by the manufac-
turer, the manufacturer's Customer Service
or a similarly qualified person in order to
prevent any risk.
If the appliance or the power cord is dam-
aged, this is dangerous.
▶Never operate a damaged appliance.
▶Never pull on the power cord to unplug the
appliance. Always unplug the appliance at
the mains.
▶If the appliance or the power cord is dam-
aged, immediately unplug the power cord
or switch off the fuse in the fuse box and
turn off the gas supply.
▶Call customer services. →Page12
An ingress of moisture can cause an electric
shock.
▶Do not use steam- or high-pressure clean-
ers to clean the appliance.
The insulation on cables of electrical appli-
ances may melt if it touches hot parts of the
appliance.
▶Never bring electrical appliance cables into
contact with hot parts of the appliance.
WARNING‒Risk of injury!
Faults or damage to the appliance and re-
pairs that have not been carried out correctly
are dangerous.
▶Never switch on the appliance if there is a
fault with it.
▶If the appliance is faulty, unplug the mains
plug or switch off the fuse in the fuse box.
Shut off the gas supply and call the after
sales service.
▶Always have repairs carried out to the ap-
pliance and damaged gas lines replaced
by trained, specialist personnel.
Cracks or fractures in the glass surface are
dangerous.
▶All of the burners and each electrical heat-
ing element switch off immediately and dis-
connect the appliance from the power sup-
ply.
▶Shut off the gas supply.
▶Do not touch the surface of the appliance
▶Do not use the appliance.
▶Call the customer service.
Strong temperature fluctuations may cause
the glass to break.
▶When using the hob, avoid draughts and
spilling cold liquids.
Cookware that is not the right size, or that is
damaged or incorrectly positioned may cause
serious injuries.
▶See the notes on cookware.
When switching on the burner, sparks are
generated in the ignition plugs.
▶Never touch the ignition plugs while the
burner is being lit.
If a control knob is too stiff to turn or it is
loose, it must no longer be used.
▶Contact our after-sales service immediately
to have the control knob repaired or re-
placed.
An appliance with a cracked or broken sur-
face can cause cuts.
▶Do not use the appliance if it has a cracked
or broken surface.
WARNING‒Risk of suffocation!
Children may put packaging material over
their heads or wrap themselves up in it and
suffocate.
▶Keep packaging material away from chil-
dren.
▶Do not let children play with packaging ma-
terial.
Children may breathe in or swallow small
parts, causing them to suffocate.
▶Keep small parts away from children.
▶Do not let children play with small parts.

Preventing material damage en
6
3 Preventing material damage
ATTENTION!
Heat can cause damage to adjacent appliances or kit-
chen units. If the appliance is in operation for an exten-
ded period, heat and moisture will be generated.
▶Open a window or switch on an extractor hood lead-
ing to the outside.
A build-up of heat may damage the appliance.
▶Do not use two burners or heat sources to heat one
single item of cookware.
▶Avoid using griddle plates, clay pots, etc. for a long
time at full power.
If a control knob is in the wrong position, this could
lead to malfunctions.
▶Always turn the control knob to the "Off" position
when the appliance is not being used.
Moving the cookware may scratch the glass.
▶Lift the cookware when moving it.
Damage may occur if hard or pointed objects fall on
the hob.
▶Do not let hard or pointed objects fall onto the hob.
▶Do not bump into any of the edges of the hob.
Salt, sugar or sand that may fall from the vegetables
will scratch the glass.
▶Do not use the hob as a work surface or storage
space.
Melted sugar or food with a high sugar content may
damage the glass.
▶Remove boiled-over food immediately with a glass
scraper.
4 Causes of damage
Causes of damage to the hotplate
4.1 Causes of damage
WARNING‒Risk of electric shock!
Incorrect repairs are dangerous.
▶Repairs to the appliance should only be carried out
by trained specialist staff.
▶Only use genuine spare parts when repairing the
appliance.
▶If the power cord of this appliance is damaged, it
must be replaced by the manufacturer, the manufac-
turer's Customer Service or a similarly qualified per-
son in order to prevent any risk.
1. Only use the hotplates when cookware has been
placed on top of them. Do not heat up empty pots
or pans. The pot base will be damaged.
2. Only use pots and pans with an even base.
3. Place the pot or pan centrally over the burner. This
will optimise transfer of the heat from the burner
flame to the pot or ban base. The handle or grip is
not damaged, and greater energy savings are guar-
anteed.
4. Ensure that the hotplate burners are clean and dry.
The burner cup and burner cover must be in exactly
the right position.
5. If you operate your appliance with a gas cylinder,
stand the gas cylinder upright. If a gas bottle is
used when it is laying on its side, internal parts of
the appliance may be damaged and this may result
in a gas leak.
6. Do not place hot cookware on the display or the
frame.
7. Salt, sugar and sand may cause scratches on the
glass. Do not use the hotplate as a work surface,
kitchen worktop or storage space.
8. Damage may occur if hard or pointed objects fall on
the hotplate. Do not store any objects on the hot-
plate.
9. Sugar or food with a high sugar content may dam-
age the hotplate. Remove boiled-over food immedi-
ately with a glass scraper. Caution: The scraper is
pointed.
10. The area around the appliance must be clean and
dry. Always keep the appliance and the area around
it clean and dry after cleaning. Ensure that there are
no cleaning materials, cleaning products or water
marks on any of the appliance's surfaces.
11. Lyes or similar chemicals which get into the gas
components below the hotplates or on the burner
seat may lead to problems with the gas compon-
ents. When removing food remnants or residual li-
quids from the burner seat, do not use lye or simil-
arly effective chemicals.
5 Environmental protection and saving energy
Help protect the environment by using your appliance
in a way that conserves resources and by disposing of
reusable materials properly.
5.1 Disposing of packaging
The packaging materials are environmentally compat-
ible and can be recycled.
▶Sort the individual components by type and dispose
of them separately.
Information about current disposal methods are
available from your specialist dealer or local author-
ity.
en Your new appliance
7
5.2 Saving energy
If you follow these instructions, your appliance will use
less energy.
Choose a burner roughly the same size as your pan.
Centre the cookware on the hob.
Use cookware whose base diameter is the same dia-
meter as the hotplate.
Tip:Cookware manufacturers often give the upper
diameter of the saucepan. It is often larger than the
base diameter.
¡Unsuitable cookware or incompletely covered cook-
ing zones consume a lot of energy.
Cover saucepans with suitable lids.
¡Cooking without a lid consumes far more energy.
Lift the lid as infrequently as possible.
¡When you lift the lid, a lot of energy escapes.
Using a glass lid
¡You can see into the pan through a glass lid
without having to lift it.
Use cookware suited to the quantity of food.
¡Large items of cookware containing little food need
more energy to heat up.
Cook with little water.
¡The more water in cookware, the more energy is re-
quired to heat it up.
Turn down to a lower heat setting early on. Use a suit-
able ongoing cooking setting to continue cooking.
¡If you continue cooking with an ongoing cooking
setting that is too high, you'll waste energy
6 Your new appliance
In this section, you will find information about your new
appliance.
6.1 Gas burner button
▶There are indicators on the buttons to show which
burner is operated by which control knob. Use the
appropriate button.
6.2 Setting up the grill
▶Make that the grill is inserted correctly in order to
ensure the functionality of the appliance. Set up ac-
cording to the appliance type.
6.3 Gas cooking zone selector
Use the gas cooking zone selector to set the heat set-
ting for the cooking zones.
Position Function Description
Zero setting The hob is switched off.
Control panel Large flame=highest set-
ting
Small flame=lowest set-
ting
There is a limit stop at the end of the settings range.
Do not turn the selector beyond this point.
6.4 Espresso pot trivet
Use the supplied coffee pot trivet for the economy
burner when making Turkish coffee using pans that
have a base less than 12 cm in diameter or coffee
pots.
1. Place the coffee pot trivet on the economy burner's
pan support.
2. Do not use the coffee pot trivet with pans with a
base that is more than 12 cm in diameter.
3. The coffee pot trivet is suitable for the economy
burner only.
7 Before first use
This is where you can find out how to clean your hob
before the first use.
7.1 Cleaning the accessories
▶Before you use the accessory for the first time,
clean it thoroughly with hot soapy water and a soft
dish cloth.
7.2 Precleaning burner lids and burner
cups
1. Clean the burner lids (1) and the burner cups (2)
using water and washing-up liquid. Carefully dry the
individual parts.
2. Place the burner cups and the burner lids on the
burner plate (5). Ensure that the igniter (3) and the
flame safety pin (4) are not damaged.

Setting the hob en
8
3. Keep the nozzle (6) dry and clean. Ensure that the
burner lid is positioned precisely in the centre on
the burner cup.
1
2
3
4 5
6
8 Setting the hob
Your hob is equipped with four gas burners. The follow-
ing information explains how to light the gas burners
and set the size of flame.
8.1 Igniting the gas burners
Ensure that the burner lid is positioned precisely in the
centre on the burner cup. Keep the slots in the burner
cup free from obstructions. All parts must be dry.
1. Press the burner knob of the selected burner in and
turn it anti-clockwise to the highest power level.
When pressing the burner knob, press and hold
2. for approx. 3-5 seconds for all burners. Gas begins
to flow out and the gas burner ignites. The safety pi-
lot is activated. If the gas flame goes out, the gas
supply is automatically shut off by the safety pilot.
3. Set the required flame size. The flame is not stable
between the Off position and the highest power
level. For this reason, select a setting between the
highest and lowest power level.
4. Check whether the flame is burning. If the flame is
not burning, repeat the process from step 1 on-
wards.
5. 5. To finish cooking, turn the burner knob clockwise
to the Off position.
8.2 No ignition
If there is a power cut or if the ignition plugs are damp,
you can light the gas burners with a gas lighter or a
match.
WARNING‒!
If, after switching the gas hob off, you turn the burner
knob while the gas hob is still hot, gas will escape. If
you do not press the burner knob, the gas is not ig-
nited and the gas supply is shut off within 90 seconds.
▶If you do not press the burner knob, the gas is not
ignited and the gas supply is shut off within 90
seconds.
8.3 Important information about the gas
hob
Follow these instructions when using your gas hob.
¡A slight whistling when operating the burner is nor-
mal.
¡Odour formation during the first uses is normal. This
does not indicate a risk or malfunction. It will stop
after a while.
¡An orange flame is normal. This is caused by dust
in the air, overflowing liquids, etc.
¡If the burner's flame accidentally goes out, switch off
the burner's selector and wait at least 1 minute be-
fore igniting the burner again.
¡A few seconds after switching off the hob, you may
hear noises, such as a slight clicking, from the
burner. This is not unusual, but shows that the pilot
is deactivated.
¡Keep the ignition plugs clean. If the ignition plugs
are dirty, the igniter is damaged. Clean the ignition
plugs regularly with a small, metal-free brush. En-
sure that the ignition plugs are not exposed to any
heavy knocks.

en Table – Cooking
9
9 Table – Cooking
Cooking times may vary depending on the type of
food, its weight and quality. Deviations are therefore
possible. You yourself can best judge the optimal cook-
ing time.
Select the right pot size for each cooking zone. The
diameter of the saucepan or pan base should be the
same as that of the cooking zone.
Note:Vitamins and minerals in the food can easily be
lost. You should therefore use as little water as pos-
sible when cooking, so that the food retains its vitamins
and minerals. Select short cooking times so that the ve-
getables remain firm and full of nutrients.
Example Food Cooking zone Power level
Melting Chocolate, butter, margar-
ine
Economy burner
Electric hotplate**
Small flame
1-2
Heating Stock, tinned vegetables Standard-output burner
Electric hotplate**
Small flame
2-3-4-5
Heating and keeping warm Soups Economy burner
Electric hotplate**
Small flame
2-3
Steaming* Fish Standard-output burner
Electric hotplate**
Between large and small
flame
5
Braising* Potatoes and miscel-
laneous vegetables, meat
Standard-output burner
Electric hotplate**
Between large and small
flame
6-7-8
Cooking* Rice, vegetables, meat dish
(with sauces)
Standard-output burner
Electric hotplate**
Large flame
7-8
Frying Pancakes, potatoes,
schnitzel, fish fingers
Large burner**
Wok burner**
Electric hotplate**
Between large and small
flame
Between large and small
flame
9
Notes
¡* If you are using a pan with a lid, turn the flame
down as soon as the food starts to boil.
¡** Optional. Available for some appliances. Depend-
ing on the appliance model. (For frying on the wok
burner, we recommend that you use a wok.)
10 Cookware
This information has been provided to help you save
energy and avoid damaging your cookware.
10.1 Using cookware
The selection and positioning of the cookware affects
the safety and energy efficiency of your appliance.
WARNING‒Risk of fire!
Flammable objects may ignite.
▶Maintain a distance of at least 50mm between the
cookware and flammable objects.
WARNING‒Risk of injury!
An incorrectly positioned wok may cause injuries. The
wok is not stable and may overturn.
▶Use the wok only on the wok burner and the wok
ring. Never set the wok ring and wok on the stand-
ard output burner and high-output burner.
¡Ensure that the size of
the cookware is suit-
able for the burner
size.
¡Never use small cook-
ware on large burners.
¡Ensure that the flame
does not touch the
sides of the cookware.
¡Do not use deformed
cookware.
¡Deformed cookware is
not stable on the cook-
top and may tip over.
¡Use cookware with a
thick, flat base.

Cleaning and care en
10
¡Do not cook without a
lid.
¡Ensure that the lid
does not move.
¡When cooking without
a lid, a large amount
of the energy escapes.
¡Position the cookware
in the middle of the
burner, otherwise it
may tip over.
¡Do not position large
cookware on the burn-
ers close to the con-
trols.
¡The controls may be
damaged due to over-
heating.
¡Place the cookware on
the pan supports.
¡Never place the cook-
ware directly on the
burner.
¡Before using the appli-
ance, ensure that the
pan supports and the
gas burner covers are
positioned correctly.
¡Handle the cookware
that is on the hob
carefully.
¡Do not bang on the
hob.
¡Do not place heavy
weights on the hob.
11 Cleaning and care
With careful cleaning and good care, your appliance
will remain fully functioning for a long time to come.
To be safe, close the gas supply on the gas regulator.
(If your cooking zone is set to natural gas, close the
natural gas tap).
Disconnect the appliance from the mains power sup-
ply.
If required, wait until the cooking zone has cooled
down.
Damage to the various surfaces caused by using the
wrong cleaning agent can be avoided by observing the
following instructions.
¡Do not use any high-pressure cleaners or steam
jets.
¡Do not use flammable materials such as acids, dilu-
tion, petrol or benzene.
¡Do not use abrasive cleaning agents or cleaning
materials.
If you clean your cooking zone
¡Do not use undiluted washing-up liquid or dish-
washer detergent,
¡Do not use cleaning products with a high alcohol
content,
¡Do not use hard scouring pads or cleaning
sponges,
¡Do not use abrasive cleaning agents such as oven
cleaner or stain remover,
¡And do not use harsh or abrasive cleaning
products.
¡Do not clean individual parts in the dishwasher.
¡Wash new sponge cloths thoroughly before use.
11.1 Cleaning
Observe the following instructions for cleaning.
Area Cleaning instructions
Glass
hob
Care: Protective/care products for glass
Cleaning: Cleaning agents for glass.
Follow the cleaning instructions on the
packaging.
Glass scraper for heavy soiling: Unlock
this and clean using the blade only. Cau-
tion, the blade is very sharp. Risk of injury.
Cover the blade again after cleaning. Re-
place damaged blades immediately.
Enamel,
painted
surfaces
and
screen-
printed
surfaces
Wipe the appliance with hot water and
some washing-up liquid. Dry with a soft
cloth.

en Cleaning and care
11
Area Cleaning instructions
Gas hob
burners
and steel
grids
Do not clean in the dishwasher. Remove
the steel grids and clean with a sponge,
washing-up liquid and some hot water. Re-
move the burner casing and burner cap.
Clean with a sponge, washing-up liquid
and some hot water. Ensure that the gas
openings on the burner casing are clean
and are not blocked. Clean the igniters
with a small, soft brush. The gas burners
only work properly when the igniters are
clean. Use a cloth and some hot soapy
water to remove the food remains from the
burner casing. Only use a little water for
this. Water must not be allowed to enter
the appliance. Ensure that the nozzle
opening is not blocked or damaged during
the cleaning process. Dry all of the parts
thoroughly after they are cleaned, and
place the burner caps exactly onto the
burner casings. Individual parts that are
not correctly positioned make it difficult for
the burner to ignite. Fit the steel grids. The
cleaning agent that we recommend for
cleaning the steel grids is available from
our after-sales service or specialist retail-
ers.
Electric
hotplate
(depend-
ing on
the appli-
ance
model)
Clean with the hard side of a scouring
sponge and some liquid scouring agent.
After cleaning, switch the hob on briefly to
dry it. Wet hobs rust over time. Then apply
a care product. Always remove spilt li-
quids and food residue immediately.
Metal
ring on
the elec-
tric hot-
plate*
(depend-
ing on
the appli-
ance
model)
Over time, discolourations may occur,
which can no longer be removed. This can
be used to remove discolouration. Clean
the ring with the hard side of a scouring
sponge and some liquid scouring agent. In
doing so, do not touch the adjacent sur-
faces. The surfaces may be damaged. The
recommended cleaning agents for the
metal ring on the electric hotplate is avail-
able from our after-sales service or spe-
cialist retailers.
Rotary
knobs
Wipe the appliance with hot water and
some washing-up liquid. Dry with a soft
cloth.
the ac-
cessories
Soak in warm soapy water. Clean with a
non-metallic brush or sponge.
Upper
glass
cover
(depend-
ing on
the appli-
ance
model)
Glass cleaner: Clean with a soft cloth. You
can remove the upper glass cover for
cleaning. To do this, refer to the section
"Upper glass cover".
If the steel grids are provided with a rubber plug, take
care when cleaning. The plug may come loose and the
steel grid may scratch the hotplate.
After cleaning and drying the steel grids, ensure that
they are positioned correctly on the hotplate.
11.2 Care
In order to retain the functionality of your device, ob-
serve the following instructions for care.
¡Always clean off any liquid that boils over immedi-
ately. This prevents food remains from sticking and
prevents the need for unnecessary force.
¡After each use, clean the surfaces of the burner
once it has cooled down. Residues on the surface,
such as boiled-over food or splashes of fat, form a
coating and make subsequent cleaning difficult. To
ensure that the flame can burn correctly, the open-
ings and channels must be clean.
¡When moved, some cookware may leave metal
marks on the steel grid.
¡Clean the burners and steel grids with hot, soapy
water and brush with a non-metallic brush.
¡Do not clean parts of the appliance in the dish-
washer.
¡Keep the burners and steel grids clean. Water
droplets or damp patches at the start of cooking
may damage the enamel.
¡Do not use stainless-steel cleaning agents close to
the selector. The screen-printed symbols may be
smudged.
¡Carefully clean acidic agents, such as spilled oil or
lemon juice.
¡Do not use abrasive cleaning agents to clean the
control panel. Otherwise, the label may be des-
troyed.
¡The burner cap is coated in black enamel. The high
temperatures may cause discolouration. The hot-
plate function is not affected by this.
¡Due to the risk of scratches, do not move pans on
the surface. Do not let heavy or hard objects fall
onto the glass. Do not bump into it with any part of
the pots.
¡Grains of sand from washed fruit or vegetables may
scratch the glass surface.
¡Use a glass scraper to remove melted sugar or
food with a high sugar content on the hotplate.
¡Remove salt from the electric hotplate.

Troubleshooting en
12
12 Troubleshooting
You can rectify minor faults on your appliance yourself. Read the troubleshooting information before contacting after-
sales service. This will avoid unnecessary costs.
WARNING‒Risk of injury!
Improper repairs are dangerous.
▶Repairs to the appliance should only be carried out
by trained specialist staff.
▶If the appliance is defective, call Customer Service.
WARNING‒Risk of electric shock!
Incorrect repairs are dangerous.
▶Repairs to the appliance should only be carried out
by trained specialist staff.
▶Only use genuine spare parts when repairing the
appliance.
▶If the power cord of this appliance is damaged, it
must be replaced by the manufacturer, the manufac-
turer's Customer Service or a similarly qualified per-
son in order to prevent any risk.
12.1 Malfunctions
Fault Cause and troubleshooting
The general electrical
operation is impaired.
The circuit breaker is faulty.
▶Check the circuit breaker in the fuse box.
The circuit breaker or one of the residual-current circuit breakers has been triggered.
▶In the fuse box, check whether the circuit breaker or one of the residual-current circuit
breakers has been triggered.
The mains plug of the power cord is not plugged in.
▶Connect the appliance to the power supply.
There has been a power cut.
▶Check whether the lighting in your kitchen or other appliances are working.
Automatic ignition is
not working.
Food remnants or dirt are located between the ignition plug and the burner.
Burner parts are wet.
The burner parts are positioned incorrectly.
▶Correctly position the burner parts.
The appliance is not earthed or has not been connected correctly, or the earth cable is
damaged.
▶Contact an electrician.
The burner flame is
not uniform.
The burner parts are positioned incorrectly.
▶Correctly position the burner parts.
Openings on the burner are soiled.
The gas does not ap-
pear to be flowing
normally or there is
no gas being pro-
duced at all.
The gas supply has been shut off by the intermediate valves.
▶Open the intermediate valves.
The gas cylinder is empty.
There is a smell of
gas in the kitchen.
The control knob is open.
▶Close the control knob.
The gas cylinder has not been connected correctly.
▶Ensure that the gas cylinder has been connected correctly.
The gas pipe to the appliance is leaking.
1. Close the main gas tap.
2. Ventilate the room.
3. Immediately call an authorised installer, who can inspect the gas system and issue an in-
stallation certificate.
4. Do not use the appliance until you are sure that gas is not leaking from the installation or
the appliance.

en Customer Service
13
Fault Cause and troubleshooting
The burner switches
off as soon as you re-
lease the control
knob.
Control knob not pressed down long enough.
Openings on the burner are soiled.
13 Customer Service
If you have any queries on use, are unable to rectify
faults on the appliance yourself or if your appliance
needs to be repaired, contact Customer Service.
Detailed information on the warranty period and terms
of warranty in your country is available from our after-
sales service, your retailer or on our website.
If you contact Customer Service, you will require the
product number (E-Nr.) and the production number
(FD) of your appliance.
The contact details for Customer Service can be found
in the enclosed Customer Service directory or on our
website.
13.1 Product number (E-Nr.) and
production number (FD)
You can find the product number (E-Nr.) and the pro-
duction number (FD) on the appliance's rating plate.
Make a note of your appliance's details and the Cus-
tomer Service telephone number to find them again
quickly.
14 Disposal
Find out here how to dispose of old appliances cor-
rectly.
14.1 Disposing of old appliance
Valuable raw materials can be reused by recycling.
1. Unplug the appliance from the mains.
2. Cut through the power cord.
3. Dispose of the appliance in an environmentally
friendly manner.
Information about current disposal methods are
available from your specialist dealer or local author-
ity.
This appliance is labelled in accord-
ance with European Directive
2012/19/EU concerning used elec-
trical and electronic appliances
(waste electrical and electronic equip-
ment - WEEE).
The guideline determines the frame-
work for the return and recycling of
used appliances as applicable
throughout the EU.

kk
14
Мазмұны
1 .............................................................................13
2 Қауіпсіздік .........................................................13
3 Материалдық зияндардың алдын алу ..........16
4 Зақымдар себептері ........................................16
5 Қоршаған ортаны қорғау және сақтау..........17
6 Сіздің жаңа құрылғыңыз. ................................17
7 Алғашқы пайдаланудын алдында .................18
8 Пісіру панелін реттеу.......................................18
9 Кесте - Пісіру.....................................................19
10 Пісіру ыдысы ....................................................20
11 Тазалау және күту............................................21
12 Ақауларды жою ...............................................22
13 Сервистік қызмет көрсетү ..............................23
14 Кәдеге жарату...................................................24
1
Тор -
Реттеу тетігі -
Тиімді жанары 1kW
Стандартты жанары 1,7kW
Kаты жанатын жанары 3kW
POP7C.O12O, EO7C.PO12O, OO37P.O12D
E
B
D D
A C

2 Қауіпсіздік
Келесі қауіпсіздік техникасының нұсқауларын
ескеріңіз.
2.1 Жалпы нұсқаулар
¡Бұл нұсқаулықты мұқият оқып шығыңыз.
¡Нұсқаулықты және өнім мәліметтерін
келешекте пайдалану үшін сақтап
қойыңыз.
¡Құрылғыны тасымалдау зақымдары
болғанда қоспаңыз.
2.2 Тиісті ретте пайдалану
Тек орнату нұсқаулығы бойынша мамандық
орнату пайдалану қаупісіздігін қамтамасыз
етеді. Орнатушы орнатылған жерде кедергісіз
жұмыс істеуі үшін жауапкер.
Құрылғыны тек төмендегі ережелерді сақтап
пайдаланыңыз:
¡тамақ және сусындар дайындауға.
¡бақылауда ұстау керек. Қысқа мерзімді
ас әзірлеу процесін әрдайым бақылауда
ұстау керек.
¡жеке үйлерде және үйдегі жабық
бөлмелерде.
¡теңіз деңгейінен 2000м биіктікке дейін.
Құрылғыны мына әрекеттер үшін
пайдаланбаңыз:
¡қайықтар мен автокөліктерде.
¡жылытқыш ретінде.
¡сыртқы таймермен немесе қашықтан
басқару пультімен бірге.
Құрылғыны басқа газ түріне алмастыру үшін,
қызмет көрсету орталығына қоңырау
шалыңыз.
2.3 Пайдаланушыларды шектеу
Бұл құрылғыны жасы 8-дегі және одан үлкен
балалардың, сонымен қатар қозғалу, сезу
және ойлану мүмкіндіктері шектелген және/
немесе жеткілікті білімі жоқ тұлғалардың
пайдалануына тек оларды біреу қадағалаған
жағдайда немесе осы құрылғыны қауіпсіз
пайдалану нұсқауларымен таныс болса және
дұрыс пайдаланбау салдарынан қандай
қауіптердің орын алатынын түсінетін болса
ғана пайдалануларына болады.
Балаларға осы құрылғымен ойнауға рұқсат
етпеңіз.
Тазалау мен пайдаланушыға қызмет көрсетуге
15 жас немесе одан асқан балаларға
ересектердің қадағалауымен рұқсат етіледі.
8 жасқа толмаған балаларды құрылғы және
жалғағыш сымнан алшақ ұстаңыз.
2.4 Қауіпсіз пайдалану
ЕСКЕРТУ‒Жарылу қауіпі!
Шығатын газ жарылуға алып келуі мүмкін.
ГАЗ ИІСІ НЕМЕСЕ ГАЗ
ҚОНДЫРҒЫСЫНДАҒЫ АҚАУЛАР
КЕЗІНДЕГІ ІС-ӘРЕКЕТ
▶Дереу газ ағынын немесе газ баллонының
клапанын жабыңыз.
▶Дереу ашық алау мен сигареталарды
өшіріңіз.
▶Шам мен аспаптың ауыстырып-қосқышын
баспаңыз.
▶Ашаны розеткадан суырмаңыз.
▶Үй ішінде телефон немесе ұялы
телефондарды пайдаланбаңыз.
▶Терезені ашып бөлмеге ауа кірітіңіз.
▶Клиенттер қызметіне немесе газбен
жабдықтау ұйымына қоңырау шалыңыз.
15

kk Қауіпсіздік
16
Шығатын газ жарылуға алып келуі мүмкін.
Газдың аздаған мөлшері ұзақ уақыт бойы
жиналып тұтануы мүмкін.
▶Егер құрылғы ұзақ уақыт бойы
пайдаланылмаса, газ ағынының қауіпсіздік
клапанын жабыңыз.
Шығатын газ жарылуға алып келуі мүмкін.
Егер сұйық газ баллоны тік тұрмаса, сұйық
пропан/бутан құрылғыға кіруі мүмкін. Онда
жанарғыларда қатты алаулар шығуы мүмкін.
Құрамдас бөлшектер зақымдалуы және
уақытпен бітеулі болмауы мүмкін, онда газ
бақылауысыз шығуы мүмкін.
▶Сұйық газ баллондарын әрдайым тік күйде
пайдаланыңыз.
ЕСКЕРТУ‒Тұншығып қалу қатері!
Газдық пісіру құрылғысын пайдалану жылу,
ылғалдық және жану өнімдерінің орнатқан
бөлмеде пайда болуына алып келеді.
▶Ас үйде жеткілікті желдетуді қамтамасыз
етіңіз, әсіресе газ плитасын қолданған
кезде.
▶Құрылғыны қарқынды және ұзақ уақыт
пайдалану кезінде жану өнімдерін сыртқа
қауіпсіз түрде шығару үшін қосымша
желдетуді қамтамасыз етіңіз, мысалы В
қолданыстағы құрылғының механикалық
желдеткішін жоғары қуат деңгейіне
орнатып, сонымен бірге қондырма
бөлмесінде ауаның таза ауамен алмасуын
қамтамасыз етіңіз.
▶Қосымша желдету жүйесін орнату үшін
білікті маманға хабарласыңыз.
ЕСКЕРТУ‒Өрт шығу қатері!
Май немесе сұйық май қосып панельдерде
бақылаусыз пісіру қауіпті және өртке әкелуі
мүмкін.
▶Ыстық майларды ешқашан бақылаусыз
қалдырмаңыз.
▶Өртті сумен сөндіруге тырыспаңыз,
құрылғыны сөндіріп, содан кейін, мысалы
қақпақпен немесе жалын жамылғымен
жабу арқылы жалынды сөндіріңіз.
Құрылғы ыстық болуы мүмкін.
▶Пісіру панеліне немесе жанына тез
тұтанатын заттарды қоймаңыз.
▶Пісіру панеліне заттарды қоймаңыз.
Пісіру аймағы сәтсіз оқиғаларға алып келуі
мүмкін, мысалы, қызып кету, оталу немесе
материал жарылуы себебінен.
▶Пісіру аймағының қаптамасын
пайдаланбаңыз.
Іске қосылған газ конфоркасы,егер оның
үстінде ыдыс орналасқан болса, көп жылу
шығарады. Оның үстіндегі сорғыш
зақымдануы немесе тұтануы мүмкін.
▶Газ конфоркасын тек қана орнатылған
ыдыстар жағдайда іске қосыңыз.
Құрылғы тым қатты қызып кеткенде,
текстиль бұйымдары мен өзге де заттар
тұтанып кетуі мүмкін.
▶Текстиль бұйымдарды мысалы,
жаулықтарды, перделерді жалыннан
алысырақ ұстаңыз.
▶Ешқашан жалынға қолыңызды тигізбеңіз.
▶Құрылғының үстіне, жанына немесе артына
оңай тұтанатын заттарды мысалы, ас үй
сүлгілерін немесе журналдарды қоймаңыз.
Шығып жатқан газ тұтануы мүмкін.
▶Егер жанарғы 15секундтан кейін жанбаса,
реттегішті нөл күйіне бұрап, есікті немесе
бөлменің терезесін ашыңыз. Жанарғыны
қайта тұтатпас бұрын кем дегенде бір
минуттай күтіңіз.
▶Егер пісіру барысында от өздігінен өшіп
қалса, реттегішті нөл күйіне бұраңыз.
Жанарғыны қайта тұтатпас бұрын кем
дегенде бір минуттай күтіңіз.
Тамақ өртеніп кетуі мүмкін.
▶Пісіру процесін бақылау қажет. Пісіру
процесі қысқа мерзімді болса, үнемі
бақылау қажет.
ЕСКЕРТУ‒Күйіп қалу қатері!
Пайдалану кезінде бөлшектер қызуы мүмкін.
▶Кішкентай балаларды құрылғыдан алыс
ұстаңыз.
Пісіру панелінің қорғаныс торлары апатқа
себеп болуы мүмкін.
▶Пісіру панелі үшін қорғаныс торларды
пайдаланбаңыз.
Бос пісіру ыдыстары істеп тұрған газ
конфоркасында қызып кетеді.
▶Бос пісіру ыдыстарын ешқашан
қыздырмаңыз.
Құрылғы жұмыс істегенде қызып кетеді.
▶Құрылғыны тазаламас бұрын суытыңыз.

Қауіпсіздік kk
17
ЕСКЕРТУ‒Электрик тоқ соғу қатері
бар!
Дұрыс жасалмаған жөндеулер қауіпті болып
табылады.
▶Құрылғыдағы жөндеу жұмыстарын тек
білікті мамандар орындай алады.
▶Құрылғыны жөндеу үшін тек түпнұсқа
бөлшектері ғана пайдаланылуы мүмкін.
▶Осы бұйымның желі кабелі бұзылып
зақымданған күйде болса, қауіптердің
пайда болуын болдырмау үшін, оның
шығарушы немесе техникалық қызмет
көрсету орталығының маманы арқылы,
немесе осыларға ұқсас арнайы білімі бар
адам тарабынан ауыстырылуы қажет.
Зақымдалған құрылғы немесе зақымдалған
желіге қосу сымы қауіпті болады.
▶Тек қана зақымдалған құрылғыны
пайдаланыңыз.
▶Құрылғыны электр желісінен ажырату үшін
желілік кабельден тартуға тыйым салынады.
Желіге қосу кабелді ашасынан тартыңыз.
▶Құрылғы немесе желілік кабель
зақымданған жағдайда, желі кабелінің
ашасын розеткадан дереу шығарып алыңыз
немесе сақтандырғыш блогындағы
сақтандырғышты ажыратып, газ беруді
жабыңыз.
▶Қолдау көрсету қызметіне хабарласыңыз.
→
Бет23
Ішке кірген ылғал ток соғуға әкелуі мүмкін.
▶Құрылғыны тазалау үшін булап тазартқыш
немесе жоғары басымдылықты булап
тазартқышты пайдаланбаңыз.
Ыстық құрылғы бөлшектерінде кабель
оқшаулауы электр құрылғыларда еруі
мүмкін.
▶Ешқашан электр құрылғылардың тоқ
кабелін ыстық құрылғы бөлшектеріне
тигізбеңіз.
ЕСКЕРТУ‒Жарақаттану қатері!
Құрылғыда ақаулықтар мен зақымдар,
сондай-ақ дұрыс емес жөндеу қауіпті болып
табылады.
▶Ешқашан бұзылған құрылғыны қоспаңыз.
▶Егер құрылғыда ақау болса, желілік айырды
шығарыңыз немесе сақтандырғыш
шкафындағы сақтандырғышты өшіріп, газ
ағынын жабыңыз және қызмет көрсету
орталығына хабарласыңыз.
▶Тек қана білікті мамандардың құрылғыны
жөндеуіне және зақымдалған газ түтігін
ауыстыруына рұқсат беріледі.
Шыны панельдегі сызаттар мен сынықтар
жарақатқа соқтыруы мүмкін.
▶Тез арада барлық жанарғылар мен
электрлік қыздырғыш элементтерді өшіріп,
құрылғыны электр желісінен ажыратыңыз.
▶Газ ағынын жабыңыз.
▶Құрылғының бетіне қолыңызды тигізбеңіз
▶Құрылғыны пайдаланбаңыз.
▶Қызмет көрсету орталығына хабарласыңыз.
Температураның тым қатты ауытқуынан
шыны бет шытынап кетуі мүмкін.
▶Пісіру панелін пайдаланғанда өтпелі желдің
болмауын қадағалаңыз және оның үстіне
салқын сұйықтықтар төгіп алмаңыз.
Дұрыс емес ыдыс мөлшері, зақымдалған
немесе дұрыс орналастырылмаған ыдыс
ауыр жарақаттарға әкелуі мүмкін.
▶Пісіру ыдыстары үшін нұсқауларды
ескеріңіз.
Жанарғыларды қосу кезінде қосу
шамдарында ұшқындар пайда болады.
▶Жанарғы жағу кезінде ешқашан қолыңызды
оталдыру білтесіне тигізбеңіз.
Егер реттегіш бұралмаса немесе бос тұрса,
оны әрі қарай пайдалануға болмайды.
▶Реттегішті жөндету немесе алмастыру үшін,
дереу қызмет көрсету орталыңына
хабарласыңыз.
Беттері жарылған немесе сынған құрылғы
пайдаланушыны жаралауы мүмкін.
▶Беттерінің жарылғаны немесе сынғаны
көрінетін құрылғыны пайдаланбаңыз.

kk Материалдық зияндардың алдын алу
18
ЕСКЕРТУ‒Тұншығып қалу қатері!
Балалар орама материалын бастарына киіп
немесе оралып тұншығып қалуы мүмкін.
▶Орама материалды балалардан алыс
ұстаңыз.
▶Балаларға орам материалдарымен ойнауға
рұқсат етпеңіз.
Балалар кіші бөлшектерді деммен жұтып
немесе жұтып тұншығып қалуы мүмкін.
▶Кіші бөлшектерді балалардан алыс ұстаңыз.
▶Балаларға кіші бөлшектерді ойнауға рұқсат
етпеңіз.
3 Материалдық зияндардың алдын алу
НАЗАР АУДАРЫҢЫЗ!
Жоғары температураның әсерінен жақын орналасқан
құрылғылар мен жиһаздар зақымдалуы мүмкін.
Құрылғыны ұзақ уақыт пайдаланғанда жылу түзіліп,
ылғалдық артады.
▶Терезені ашыңыз немесе бөлмеден сыртқа ауа
шығаратын жүйені қосыңыз.
Шектен тыс жылу жиналудан құрылғы зақымдалуы
мүмкін.
▶Бір ыдысты жылыту үшін екі жанарғыны немесе
бірнеше жылу көздерін пайдаланбаңыз.
▶Гриль табаларын, саздан жасалған құмыраларды
және т.б. максималды қуатта ұзақ уақыт
пайдаланудан аулақ болыңыз.
Реттегіштердің дұрыс орналаспауынан
функционалдық ақаулар орын алуы мүмкін.
▶Құрылғы пайдаланылмай тұрғанда реттегіштер
әрдайым нөл күйіне келтіріліп тұруы керек.
Ыдысты жылжыту пісіру панелінің шыны бетін
сырғызып алу мүмкін.
▶Оны сәл көтеріп, ауыстырыңыз.
Егер қатты немесе ұштық заттар пісіру аймағына
түссе, зақымданулар пайда болуы мүмкін.
▶Қатты немесе өткір заттарды конфоркаға
түсірмеңіз.
▶Пісіру панелінің шеттерің соғып ұрмаңыз.
Көкөністерден түскен құм, тұз, қант пісіру панелінің
шыны бетін тигенде сырғызып алу мүмкін.
▶Пісіру панелін жұмыс беті немесе сөре ретінде
пайдаланбаңыз.
Карамелденген қант немесе құрамында қант
мөлшері көп тағам шыны бетін зақымдауы мүмкін.
▶Шашыраған сұйықтықтарды дереу шыны
қырғышымен жойыңыз.
4 Зақымдар себептері
Конфорокаларды зақымдау себептері
4.1 Зақымдар себептері
ЕСКЕРТУ‒Электрик тоқ соғу қатері бар!
Дұрыс жасалмаған жөндеулер қауіпті болып
табылады.
▶Құрылғыдағы жөндеу жұмыстарын тек білікті
мамандар орындай алады.
▶Құрылғыны жөндеу үшін тек түпнұсқа бөлшектері
ғана пайдаланылуы мүмкін.
▶Осы бұйымның желі кабелі бұзылып зақымданған
күйде болса, қауіптердің пайда болуын болдырмау
үшін, оның шығарушы немесе техникалық қызмет
көрсету орталығының маманы арқылы, немесе
осыларға ұқсас арнайы білімі бар адам тарабынан
ауыстырылуы қажет.
1. Конфоркаларды оның үстінде ыдыс орнатылған
кезде ғана қосыңыз. Бос кәстрөльді немесе
табаны қыздырмаңыз. Осы жолмен түбіне зақым
келтіруі мүмкін.
2. Түбі тегіс кәстрөльді және табаларды пайдалаңыз.
3. Кәстрөлдерді немесе табаларды конфорканың
ортасына орнатып қойыңыз. Осылайша жалыннан
шыққан жылу кәстрөлдің немесе табаның түбін
оңтайлы қыздырады. Кәстрөльдердің сабы немесе
тұтқалары зақымдалмайды және энергияны
үнемдеудің жоғары деңгейіне қол жеткізіледі.
4. Газ жанарғысы таза мен құрғақ болуына көз
жеткізіңіз. Жанарғының денесі мен қақпасы дәл өз
орындарында орнатылған болу керек.
5. Егер сіз құрылғыны газ баллонымен қолдансаңыз,
газ баллонын тігінен қойыңыз. Егер газ баллондары
көлденеңінен орнатылса, құрылғының ішкі
бөліктері зақымдануы мүмкін және газдың ағуы
мүмкіндігі бар.
6. Қыздырылған ыдыстарды индикаторлық панеліне
немесе жақтауға қоймаңыз.
7. Тұз, қант пен құмның бөлшектері әйнекті тырнауы
мүмкін. Конфоркаларды жұмыс беті, жұмыс үстелі
немесе сақтау орны ретінде пайдаланбаңыз.
8. Конфоркаға қатты немесе үшкір заттарды түсіру
оны зақымдауы мүмкін. Пісіру панелің ештеңе
сақтайтын орын ретінде пайдаланбаңыз.
9. Қант немесе құрамында қант мөлшері көп
тағамдар конфоркаларды зақымдауы мүмкін.
Шашыраған сұйықтықтарды дереу шыны
қырғышымен жойыңыз. Сақ болыңыз, қырғыш
өткір.
10. Құрылғының қоршауы құрғақ және таза болуы
тиіс. Әр тазалаудан кейін құрылғының және оның
айналасының құрғақ әрі таза болып тұрғанына көз
жеткізіңіз. Құрылғының барлық беттерінде
тазартқыш материалдар мен құралдар, су
қалдықтары жоқ екеніне көз жеткізіңіз.
11. Пісіру панелінің астында немесе оттықтың
негізінде орналасқан газшығарғыш түтіктердің
компоненттеріне еніп кететін сілтілі агенттер

Қоршаған ортаны қорғау және сақтау kk
19
немесе құрамы ұқсас химиялық заттар оның
бұзылуына әкелуі мүмкін. Оттықтың түбінен тамақ немесе сұйық қалдықтарды алып тастаған кезде
сілтілі немесе ұқсас химиялық заттарды
қолданбаңыз.
5 Қоршаған ортаны қорғау және сақтау
Құрылғыңызды ресурстарды сақтап пайдаланып
қайта пайдаланатын материалдарды дұрыс кәдеге
жаратып қоршаған ортаны сақтаңыз.
5.1 Буып-түйетін нәрселерді кәдеге
жарату
Орауыш материалдары қоршаған ортаға зиян
тигізбейді және оларды қайта өңдеуге болады.
▶Бөлек компоненттерді ажыратып, сұрыптары
бойынша кәдеге жаратыңыз.
Ағымдағы кәдеге жарату жолдары туралы
мәліметтерді мамандандырылған дүкеннен және
қоғамдық немесе қалалық әкімшіліктен біліп
алыңыз.
5.2 Энергия үнемдеу
Егер Сіз осы нұсқауларды орындасаңыз, құрылғы
электр қуатын үнемдейді.
Кәстрөл өлшеміне сәйкем жанарғыны таңдаңыз.
Ыдысты ортаға қойыңыз.
Түбінің диаметрі ас үй плитасының диаметрімен
сәйкес келетін ыдысты таңдаңыз.
Кеңес:Ыдыс-аяқ өндірушілер көбінесе кәстрөлдің
жоғарғы диаметрін көрсетеді. Ол көбінесе төменгі
диаметрінен үлкен.
¡Сәйкес келмейтін ыдыс немесе толық жабық
емес аймақтар көп энергия тұтынады.
Кәстрөлді сәйкес қақпақпен жабыңыз.
¡Егер қақпақсыз дайындалса, онда құрылғыға
көбірек энергия қажет болады.
Қақпақты мүмкіндігінше сирек көтеріңіз.
¡Қақпақты көтерген кезде, көп жылу кетеді.
Шыны қақпақты пайдаланыңыз
¡Кәстрөл қақпағын көтермей-ақ шыны қақпақтан
көре аласыз.
Тағам мөлшеріне сәйкес ыдысты қолданыңыз.
¡Ішінде аз мөлшерде тамағы бар ыдыс қыздыру
үшін көп қуатты қажет етеді.
Аз мөлшердегі сумен пісіріңіз.
¡Ыдыста неғұрлым су көп болса, қыздыру үшін
көбірек қуат қажет.
Төменгі пісіру деңгейіне ертерек ауысыңыз. Тағам
дайындаудың қолайлы деңгейін пайдаланыңыз.
¡Тым көп қайнатқанда, көп қуат жұмсайсыз
6 Сіздің жаңа құрылғыңыз.
Бұл тарауда сіздің жаңа құрылғыңыз туралы ақпарат
бар.
6.1 Газ жанарғысының түймесі
▶Түймелерде қандай жанарғының қай түйме
арқылы басқарылатынын көрсететін индикаторлар
бар. Сәйкес түймені пайдалаңыз.
6.2 Гриль режимін орнату
▶Құрылғы жұмысын жалғастыра алу үшін, Гриль
режимі дұрыс орнатылғанына көз жеткізіңіз.
Құрылғының түріне сәйкес орнатыңыз

kk Алғашқы пайдаланудын алдында
20
6.3 Газ конфорокалардың ауыстырып-
қосқышы
Конфорокалар ауыстырып- қосқышы арқылы
конфорока қуатының деңгейін орнатыңыз .
күй Функция Сипаттама
Нөл күйі Пісіру панелі өшірулі.
Реттеу аймағы Үлкен алау = ең жоғары
қуат
Кіші алау = минималды
қуат
Реттеу аймағының ақырында тірек. Температура
реттегішін ары қарай аударуға болмайды.
6.4 Эспрессоға арналған кофе
шәйнегінің астына қоятын қондырғы
Түбі диаметрі 12 см-ден аспайтын кәстрөлдер мен
жеткізілім жиынтығымен бірге берілген үнемді
жанарғы қондырмасы бар түрік кофесін қайнату үшін
кофе шайнегін пайдаланыңыз.
1. Кофе қондырмасы үнемді жанарғының торына
қойыңыз.
2. Түбінің диаметрі 12 см-ден үлкен кастрөл үшін
кофе шәйнегінің қондырмасын пайдаланбаңыз.
3. Кофе шәйнегінің қондырмасы тек тежегіш
жанарғы үшін жарамды.
7 Алғашқы пайдаланудын алдында
Пісіру панелің алғашқы пайдаланудын алдында
тазалау әдісі.
7.1 Керек- жарақтарды тазалау
▶Керек- жарақтарды алғашқы пайдаланудын
алдында жылы сілті ерітіндісімен және жұмсақ
шүберекпен әбден тазалаңыз.
7.2 Қақпақтын және жанарғының
табақшасын алдын ала тазалау.
1. Қақпағы (1) мен жанарғының табақшасын (2) су
және жуатын құралмен тазалаңыз. Барлық
бөлшектерді мұқият құрғатыңыз.
2. Жанарғының табақшаларын мен қақпақтарын
жанарғының негізіне (5) орнатыңыз. Оттық (3) пен
ұшқын басатын штифт (4) зақымдалмауына көз
жеткізіңіз.
3. Шүмегін (6) таза және құрғақ күйде ұстаңыз.
Оттықтың қақпағы оттықтың табақшының дәл
ортасында тұрғанына көз жеткізіңіз.
1
2
3
4 5
6
8 Пісіру панелін реттеу
Сіздің пісіру панеліңіз төрт газ жанарғысымен
жабдықталған. Мұнда Сіз газ жанарғыларын қалай
оталдырып, жалын мөлшерін қалай реттеуге
болатындығы туралы біле аласыз.
8.1 Газ жанарғысын оталдыру
Жанарғы қақпағының жанарғы корпусының дәл
үстінде орналасқанын қадағалаңыз. Жанарғы
корпусындағы саңылаулар әрдайым ашық болуы тиіс.
Барлық бөліктер құрғақ болу керек.
1. Таңдалған жанарғының конфорка қосқышын
басып, сол жақтағы ең жоғары қуат басқышына
қарай бұраңыз. Конфорка қосқышын басқан кезде,
барлық жанарғыларды
2. шам. 3-5 секунд бойы басып тұрыңыз. Газ ағыны
қосылғанда газ жанарғысы оталады. От алу
қорғауышы белсендіріледі. Жалын кенеттен өшіп
қалған жағдайда от алу қорғауышы көмегімен
газдың ағыны автоматты түрде тоқтатылады.
Table of contents
Languages:
Other Bosch Cooker manuals

Bosch
Bosch HSB838357A User manual

Bosch
Bosch HLS79W3 0U Series User manual

Bosch
Bosch HCE7443.0R User manual

Bosch
Bosch HXQ38AE50M User manual

Bosch
Bosch HLS79R351A User manual

Bosch
Bosch HGB320E5 M Series User manual

Bosch
Bosch DHU 625M User manual

Bosch
Bosch HXC39AG 0Q Series User manual

Bosch
Bosch HGA120B 0M Series User manual

Bosch
Bosch HXA050D20N User manual

Bosch
Bosch HKS59A20M User manual

Bosch
Bosch HSN 382 C User manual

Bosch
Bosch HXU09AH50A User manual

Bosch
Bosch HEV 1102.0 User manual

Bosch
Bosch HSG737356Z User manual

Bosch
Bosch HGG223120E User manual

Bosch
Bosch HGB320E50M User manual

Bosch
Bosch HXU09AH50A/04 User manual

Bosch
Bosch HXA158F50S User manual

Bosch
Bosch HEA513B 1 Series User manual