R
amsond
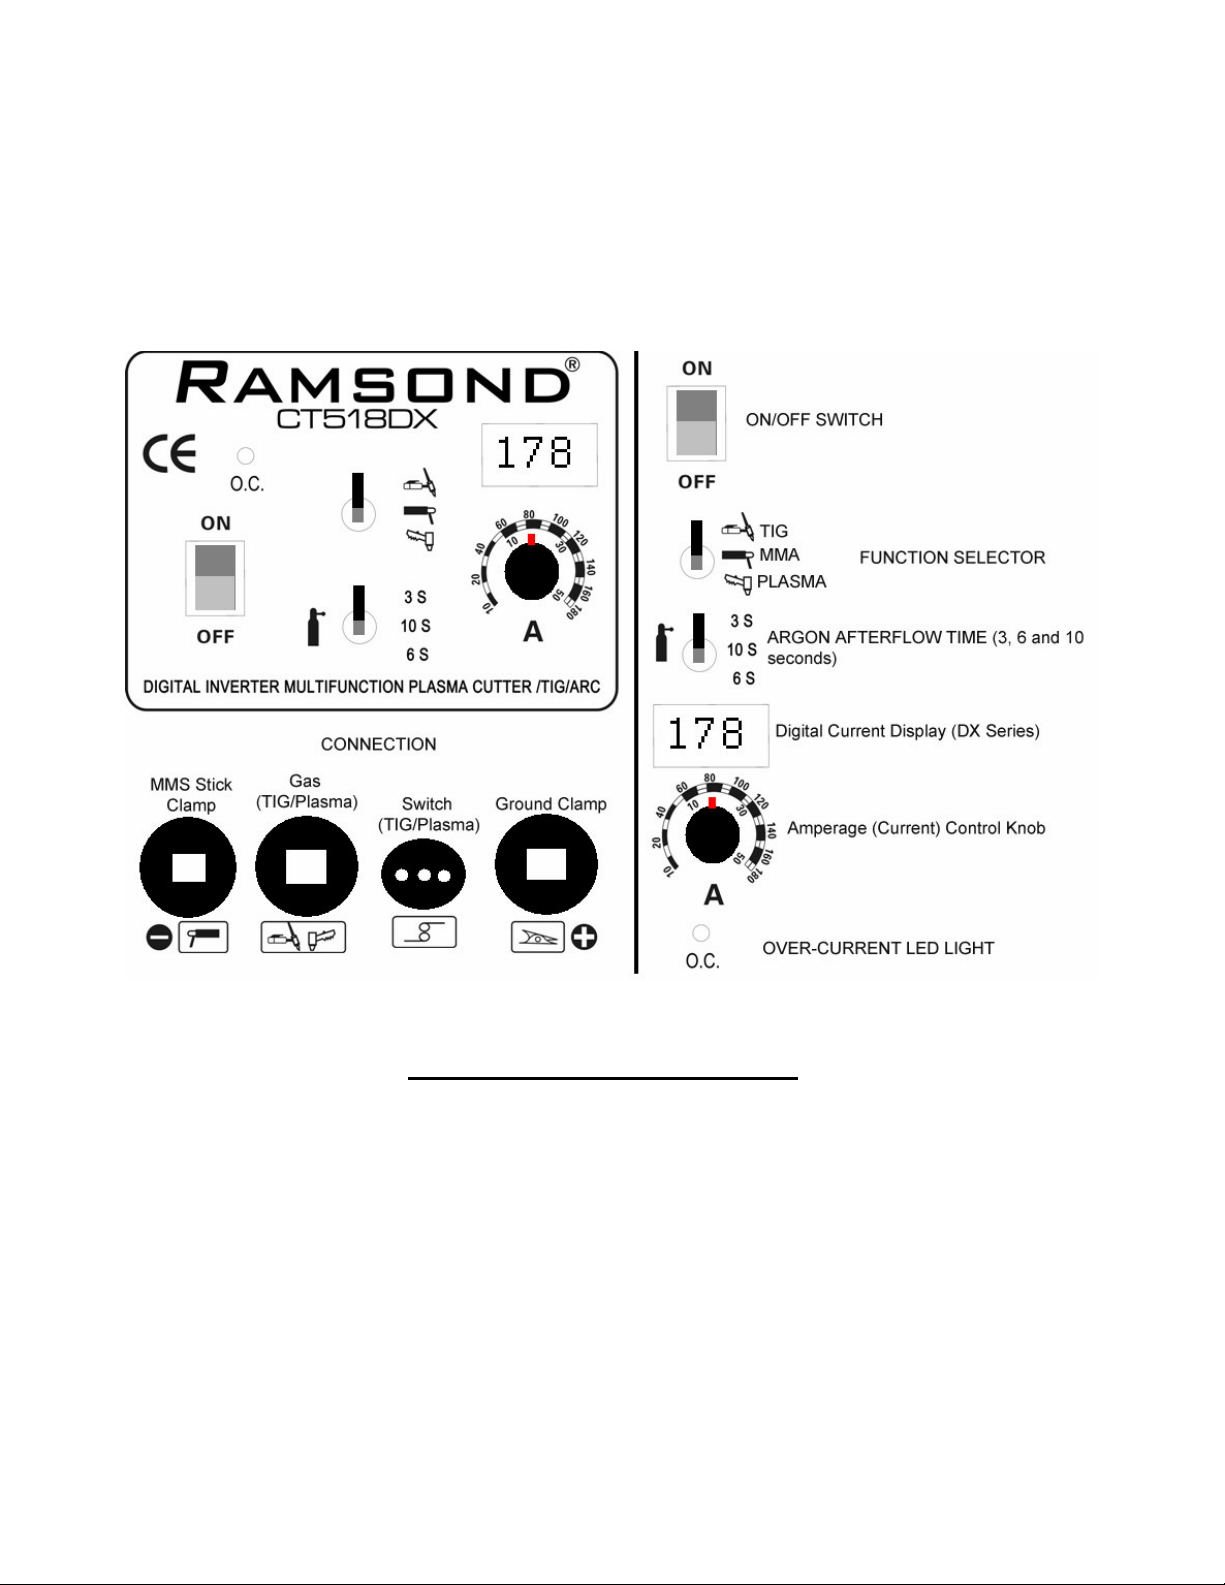
Instruction Manual for CT 416 and 518 D & DX Series
© Copyright RAMSOND Corporation 2007 – All rights protected. Una thorized reprod ction, in part or whole prohibited.
®
IMPORTANT
BEFORE STARTING THE EQUIPMENT, READ THE CONTENTS OF THIS MANUAL, WHICH
MUST BE STORED IN A PLACE FAMILIAR TO ALL USERS FOR THE ENTIRE OPERATIVE
LIFE-SPAN OF THE MACHINE. THIS EQUIPMENT MUST BE USED SOLELY FOR
WELDING/PLASMA CUTTING OPERATIONS.
SAFETY PRECAUTIONS
WELDING AND ARC CUTTING CAN BE HARMFUL TO YOURSELF AND OTHERS
The user must therefore be educated against the hazards, summarized below, deriving from welding/cutting operations.
ELECTRIC SHOCK - May be fatal.
- Install and earth the welding/cutting machine according to the applicable regulations.
- Do not touch live electrical parts or electrodes with bare skin, gloves or wet clothing.
- Isolate yourselves from both the earth and the workpiece.
- Make sure your working position is safe.
- Prior to performing maintenance make sure the unit is disconnected from the power source.
FUMES AND GASES - May be hazardous to your health.
- Keep your head away from fumes.
- Work in the presence of adequate ventilation, and use ventilators around the arc to prevent
gases from forming in the work area.
- Do not breathe in the fumes. Use proper ventilators and masks.
ARC RAYS - May injure the eyes and burn the skin.
- Protect your eyes with welding masks fitted with filtered lenses, and protect your body with
appropriate safety garments.
- Protect others by installing adequate shields or curtains.
RISK OF FIRE AND BURNS
Sparks (sprays) may cause fires and burn the skin; you should therefore make sure there are no
flammable materials in the area, and wear appropriate protective garments.
NOISE
This machine does not directly produce noise exceeding 80dB. The plasma cutting/welding procedure
may produce noise levels beyond said limit; users must therefore implement all precautions required by
law.
PACEMAKERS
The magnetic fields created by high currents may affect the operation of pacemakers. Wearers of vital
electronic equipment (pacemakers) should consult their physician before beginning any arc welding,
cutting, gouging or spot welding operations.
EXPLOSIONS
Do not weld/cut in the vicinity of containers under pressure, or in the presence of explosive dust, gases or
fumes. · All cylinders and pressure regulators used in welding operations should be handled with care.
Page 2