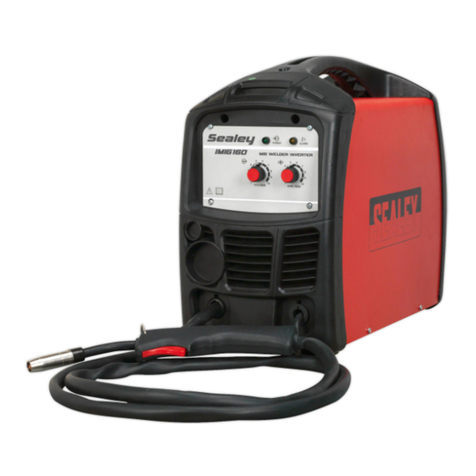
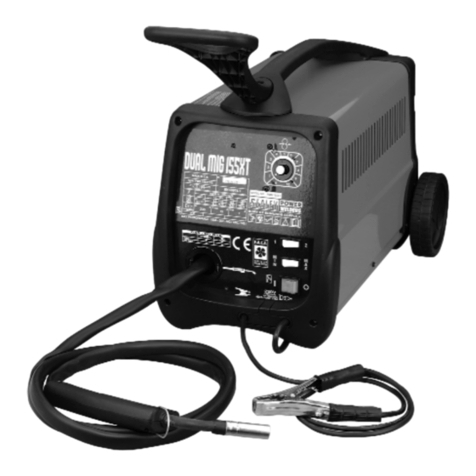
Sealey SUPERMIG 150/5.V2 User manual

Thank you for purchasing a Sealey Welder. Manufactured to a high standard this product will, if used according to these instructions and properly maintained,
give you years of trouble free performance.
1.2 GENERAL SAFETY
p
p
WARNING: unplug the welder from the mains power supply before performing maintenance or service.
3 Keep the welder and cables in good working order and condition. (Take immediate action to repair or replace damaged parts).
3 Use recommended parts and accessories only. (Non recommended parts may be dangerous and will invalidate the warranty).
3 Check the gas cup and contact tip and spray regularly with anti-spatter spray available from your Sealey dealer.
Note: Read instructions 3.4.6. carefully.
3 Use an air hose to regularly blow out any dirt from the liner, and keep the welder clean for best and safest performance.
3 Locate the welder in an adequate working area for its function, and ensure the area is well ventilated. Keep working area clean and tidy
and free from unrelated materials. Also ensure the working area has adequate lighting.
p
p
WARNING: use a welding head shield to protect your eyes against ultraviolet rays given off by the electric arc, also wear safety welding gauntlets.
3 Stand correctly keeping a good footing and balance, and ensure the floor is not slippery and wear non slip shoes.
3 Remove ill fitting clothing, remove ties, watches, rings, and other loose jewellery, and contain long hair.
7 DO NOT store gas cylinders in areas where temperature exceeds 50°C, and DO NOT puncture or damage the gas cylinder.
7 DO NOT use the welder in damp or wet locations.
p
p
DANGER! DO NOT weld near inflammable materials, solids, liquids, or gases.
7 DO NOT operate welder while under the influence of drugs, alcohol or intoxicating medication, or if fatigued.
7 DO NOT operate the welder if it or its cables are damaged.
7 DO NOT allow untrained persons to operate the welder, and keep children and unauthorised persons away from the working area.
7 DO NOT pull the welder by the cable, or the torch, and DO NOT bend the torch.
3 Turn voltage switch to "0" (off) when not in use and unplug from the mains power supply. Store welder in a safe, clean, dry, childproof area.
SUPERMIG150/5.V2 - (1) - 24 1002
IMPORTANT: PLEASE READ THESE INSTRUCTIONS CAREFULLY. NOTE THE SAFE OPERATIONAL REQUIREMENTS, WARNINGS & CAUTIONS.
USE THE PRODUCT CORRECTLY AND WITH CARE FOR THE PURPOSE FOR WHICH IT IS INTENDED. FAILURE TO DO SO MAY CAUSE
DAMAGE OR PERSONAL INJURY, AND WILL INVALIDATE THE WARRANTY. PLEASE KEEP INSTRUCTIONS SAFE FOR FUTURE USE.
1.1. ELECTRICAL SAFETY
p WARNING! It is the responsibility of the owner and the operator to read, understand and comply with the following:
You must check all electrical products, before use, to ensure that they are safe. You must inspect power cables, plugs, sockets and any other
connectors for wear or damage. You must ensure that the risk of electric shock is minimised by the installation of appropriate safety devices.
A Residual Current Circuit Breaker (RCCB) should be incorporated in the main distribution board. We also recommend that a Residual Current
Device (RCD) is used. It is particularly important to use an RCD with portable products that are plugged into a supply which is not protected
by an RCCB. If in any doubt consult a qualified electrician. You may obtain a Residual Current Device by contacting your Sealey dealer.
You must also read and understand the following instructions concerning electrical safety.
1.1.1. The Electricity at Work Act 1989 requires all portable electrical appliances, if used on business premises, to be tested by a qualified
electrician, using a Portable Appliance Tester (PAT), at least once a year.
1.1.2. The Health & Safety at Work Act 1974 makes owners of electrical appliances responsible for the safe condition of those appliances
and the safety of the appliance operators. If in any doubt about electrical safety, contact a qualified electrician.
1.1.3. Ensure that the insulation on all cables and on the appliance is safe before connecting it to the power supply. See 1.1.1. and 1.1.2.
and use a Portable Appliance Tester.
1.1.4. Ensure that cables are always protected against short circuit and overload.
1.1.5. Regularly inspect power supply cables and plugs for wear or damage and check all
connections to ensure that none is loose.
1.1.6. Important: Ensure that the voltage marked on the appliance matches the power supply
to be used and that the plug is fitted with the correct fuse - see fuse rating at right.
1.1.7. DO NOT pull or carry the appliance by the power cable.
1.1.8. DO NOT pull the plug from the socket by the cable.
1.1.9. DO NOT use worn or damaged cables, plugs or connectors. Immediately have any faulty
item repaired or replaced by a qualified electrician. When a BS 1363/A UK 3 pin plug is
damaged, cut the cable just above the plug and dispose of the plug safely.
Fit a new plug according to the following instructions (UK only).
a) Connect the GREEN/YELLOW earth wire to the earth terminal E.
b) Connect the BROWN live wire to the live terminal L.
c) Connect the BLUE neutral wire to the neutral terminal N.
d) After wiring, check that there are no bare wires, that all wires have been correctly connected, that the cable outer insulation
extends beyond the cable restraint and that the restraint is tight.
Double insulated products, which are always marked with this symbol , are fitted with live (brown) and neutral (blue) wires only.
To rewire, connect the wires as indicated above - DO NOT connect either wire to the earth terminal.
1.1.10. Products which require more than 13 amps are supplied without a plug. In this case you must contact a qualified electrician to ensure that a
suitably rated supply is available. We recommend that you discuss the installation of an industrial round pin plug and socket with your electrician.
1.1.11. If an extension reel is used it should be fully unwound before connection. A reel with an RCD fitted is preferred since any appliance
plugged into it will be protected. The cable core section is important and should be at least 1.5mm2, but to be absolutely sure that the
capacity of the reel is suitable for this product and for others which may be used in the other output sockets, we recommend the use of
2.5mm2section cable.
1. SAFETY INSTRUCTIONS
FUSE RATING 13 AMP
Blue
Neutral
Wire
Yellow & Green
Earth Wire
Cable
Restraint
Brown
Live
Wire
INSTRUCTIONS FOR:MIG WELDER
MODEL NO :SUPERMIG 150/5.V2

3. 2. Connecting the gas cylinder
3. 2. 1. When using Argon or Argon mixtures, you
will need to use the bull nose adaptor. If
you intend to use CO2 gas the regulator will
fit directly onto the cylinder. Fit the bull nose
adaptor to the cylinder with a spanner.
3. 2. 2. Fit the gas regulator on the bull nose
adaptor and connect it to the machine gas
hose (fig.2).
3. 2. 3. Set the regulator flow rate to 5-8 litres/min
depending on the material to be welded,
and whether there are draughts which are
strong enough to disturb the gas flow.
3. 3. Fitting a reel of wire - Ensure the welder
is unplugged from mains power.
( Refer to fig.4 )Your machine comes with a
mini spool of wire, but will accept up to 5kg spools without modification.
Firstly remove the nut, spring, metal washer and outer plastic retainer from
the threaded reel shaft.
3. 3. 1. Push the reel of wire over the threaded spindle and onto the flange of the
inner circular plastic retainer. Replace the nut, spring, metal washer and outer
plastic retainer. Tighten the nut whilst turning the reel until a slight braking
pressure is felt. Do not over tighten. Ensure the spool rotates clockwise, with
the wire drawing off the reel from the top as shown in fig 5.
3. 3. 2. Reduce the wire feed tension by turning the wire feed knob ( fig.6-A ) 2 or 3
turns anticlockwise. ( Do not unscrew the knob completely.) Pull the knob
towards you and allow it to disengage from the counter roller bracket and
hinge downwards to the position shown in fig.5. Push the counter roller
bracket upwards and away from the grooved drive roller as shown in fig.5.
3. 3. 3. Ensure that the correct size of drive roller is installed and that the roller is the
right way round to drive the the chosen wire. Refer to section 3.5.
3. 3. 4. Before releasing the wire from the reel ensure that the reel is not
freewheeling ( See section 3.3.1 ) As you release the wire keep a slight
tension on it to prevent coils coming off the reel. Straighten the first 50mm of
the wire and feed it into the flexible hose ( see fig.5A ), over the grooved
drive roller ( see fig.5B ), and into the torch liner collet ( see fig.5C ).
3. 3. 5. Now hinge the counter roller bracket back down onto the wire and secure it by
swinging the tension lever/knob up into the socket in the bracket. Turn the knob
clockwise by 2 or 3 turns to exert medium pressure. ( fig.6-A )
3. 3. 6. Before feeding the wire through to the torch remove the gas cup (fig 3.3.5.a) and
contact tip (b) from end of torch as follows:
a) Take torch in left hand with the torch tip facing to the right.
b) Grasp gas cup firmly in your right hand.
c) Turn gas cup clockwise only (c) and pull cup out to the right.
pWARNING! do not turn gas cup anti-clockwise, as this will damage internal spring.
d) Unscrew the copper contact tip (right hand thread) to remove.
3. 3. 7. Check welder is switched off 0, and that the earth clamp is away from the torch tip.
Connect the welder to the mains power supply and set the voltage switch to one.
3. 3. 8. Set the wire speed knob to position 5 or 6. Keeping the torch cable as straight as
possible and press the torch switch. The wire will feed through the torch.
3. 3. 9. When wire has fed through, switch welder off, unplug from mains.
a) Take torch in left hand and screw contact tip back into place. Cut the wire back to
within 3mm of the tip.
b) Grasp gas cup in right hand, push onto torch head and turn clockwise only.
pWARNING! do not turn gas cup anti-clockwise, as this will damage internal spring.
c) Cut wire so that it is just protruding the cup.
fig 1.
fig 2.
3. ASSEMBLY
To fit the mains power plug see safety instructions (Chapter 1).
SPECIFICATION.
This Manual contains instructions to assist you prepare your Mig Set for welding, together with information on maintenance, and trouble shooting. Read manual
carefully in order to get the best results from your machine. These instructions are not intended to show you how to be an expert welder. It is with continued
practice that you will achieve the desired results. Mig welding requires a steady hand, and time spent practising with scrap metal will be rewarded when you
progress to an actual workpiece.
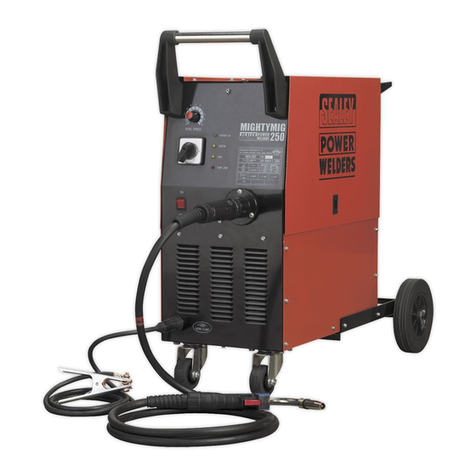
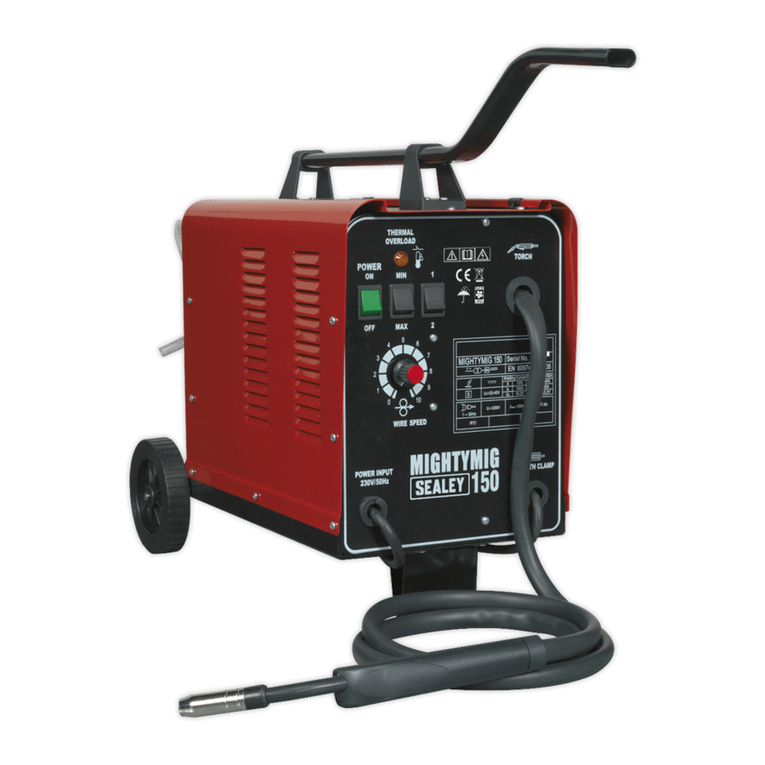
The SUPERMIG150/5.V2 is a compact power source with integral wire feed which protects the wire from dust and dirt (especially in Body Shops). It is suitable for
welding with either CO2, Argon/CO2 mix or Argon gas. The unit has a forced air cooling system to slow transformer heating in order to increase the duty cycle and
a non live torch to prevent the risk of accidentally striking an arc. Your Mig is designed to operate with two diameters of welding wire, 0.6mm, & 0.8mm. (We
recommend that 0,8mm wire is used for welding stainless steel and aluminium).
MODEL IS EQUIPPED WITH:3Torch, 3Mini reel of 0.6mm wire, 3Argon/CO2 regulator, 3Bull nose adaptor 3Gas hose.
Welding Current . . . . . . . . . . . . . . . . . . .30-150 Amps
Duty Cycle . . . . . . . . . . . . . . . . . . . . . . .100% @ 30A
. . . . . . . . . . . . . . . . . . . . . . . . . . . . . . . .80% @ 50A
. . . . . . . . . . . . . . . . . . . . . . . . . . . . . . . .50% @ 70A
. . . . . . . . . . . . . . . . . . . . . . . . . . . . . . .10% @ 150A
2. INTRODUCTION & SPECIFICATION
Power efficiency . . . . . . . . . . . . . . . . . . .4.3 Kva
Wire capacity . . . . . . . . . . . . . . . . . . . . . . . . .5kg
Power input . . . . . . . . . . . . . . . . . . . .230V - 1ph
Power efficiency . . . . . . . . . . . . . . . . . . . .4.3kVA
Weight . . . . . . . . . . . . . . . . . . . . . . . . . . . . .26kg
fig 4
fig 3.
fig 5.
fig 6.
3. 1. Wheel Assembly
Fit the axle on to the bottom (rear) of the machine with the nuts,
bolts and washers provided. Push the wheels on to the axle and
hold them in place by pushing the wheel retainers supplied onto
the ends of the axles.( See fig.1) Fit front stay by screwing it into
the centrally placed threaded insert on the underside of the
chassis close to the front face of the unit.
SUPERMIG150/5.V2 - (1) - 241002
4.1. Mig/Mag Welding.
A spool of welding wire is positioned on the welders spool holder and automatically fed through an insulated
liner in the torch to the tip. The torch assembly consist of a switch, liner, gas hose, and control cable. The
switch activates the wire feed roller and the gas flow. Conversely, releasing the switch stops the wire feed and
gas flow. The weld current is transferred to the electrode (the wire) from the contact tip at the end of the
torch. A gas cup fits over the contact tip to direct the gas flow towards the weld ensuring that the arc welding
process is shielded from oxidising air contaminates. The shielding gas also assists heating of the weld materials.
The torch is connected to the positive side of a DC rectifier, and the negative clamp is attached to the workpiece.
4.2. Spot Welding.
Remove the gas cup and fit a spot welding gas cup. Turn the voltage to the highest setting allowed by your machine. Drill
a small hole in the top plate. Push the spot gas cup onto the material to be welded. The castellations on the cup keep it the correct
distance from the weld pool and allow you to push the two pieces being welded together. Press the torch trigger and hold it for 2 to 3 seconds.
The wire will feed through during the allotted time and create the weld.
4.3. Preparation for Welding.
IMPORTANT: BEFORE YOU COMMENCE, MAKE SURE THE MACHINE IS SWITCHED OFF AT THE MAINS. IF WELDING A CAR,
DISCONNECT THE BATTERY OR FIT AN ELECTRONIC CIRCUIT PROTECTOR. ENSURE YOU HAVE READ AND UNDERSTOOD THE
ELECTRICAL SAFETY INSTRUCTIONS IN CHAPTER 1.
4. 3. 1. Connecting the Earth Lead
To ensure a complete circuit, the earth lead must be securely attached to the work piece that is to be welded.
a) Best connection is obtained by grinding the point of contact on the workpiece before connecting clamp to the workpiece.
b) The weld area must also be free of paint, rust, grease, etc.
c) If welding a vehicle, disconnected or fit a Electronic Circuit Protector available from your Sealey dealer.
4. 3. 2. Wire feed switch controls the speed of the wire feed. In principle, the lower the amperage number the slower the wire speed.
4. 3. 3. To weld mild steel, CO2 gas is suitable for most tasks where spatter and the high build up of weld do not pose a problem.
To achieve a spatter free and flat weld however, you must use an Argon/CO2 mixture.
4. 3. 4. To weld aluminium use: 3Argon gas, 3 0.8mm contact tip (AK957), 30.8mm aluminium wire.
Note: Ensure you feed the wire through the correct sized groove in the feed roller (see 6.3).
4. WELDING PRINCIPLES & PREPARATION
The position of the torch,
its angle and direction of travel in
relation to the workpiece
is essential for the appearance
and quality of the weld.
Illustrations demonstrate various
positions and directions. Rightward Welding
Welding in general
Welding with a long arc reduces penetration and widens
the arc.
This in turn results in more spatter.
A long welding arc can be appropriate for welding butt
joints in thin materials.
Welding with a short arc (at the same weld settings)
results in greater penetration and a narrower weld
and reduces the amount of spatter.
Leftward Welding Vertical Rightward Downhard leftward Down Rightward
5. VARIOUS WELDING METHODS
1. Direction of
Welding 3. Fillet Weld
3. Butt Weld
Normal
Welding
Arc
Short
Welding
Arc
Long
Welding
Arc
IMPORTANT: Should you have no welding experience, we recommend you seek training from an expert source to ensure your own personal
health and safety. Good mig welding may be achieved only with continued supervised practice.
3.4 Setting wire tension
IMPORTANT: You must set the correct tension, too little or too much tension will cause problematic wire feed and result in poor welding.
3.4.1 The wire tension mechanism should only apply sufficient tension to the wire to successfully drive it out of the torch. Too much
tension will deform the wire causing wire feed problems and the possible blowing of a fuse on the printed circuit board. Too little
tension will result in the wire driving unevenly or not at all. To test for the correct tension wear welding gloves and attempt to
momentarily slow the wire down as it emerges from the torch. If the wire stops immediately the tension is too low. If the wire cannot
be stopped the tension is too high. If the upper roller slows down as the wire is gripped then the tension is correct. NOTE: Torches
and liners damaged as a result of incorrect wire tension settings are not covered by warranty.
p WARNING! When testing the wire tension as described above the wire emerging from the torch is live and should be directed
away from the welding unit and any other metallic / conductive materials in the area. Welding gloves must be worn during this operation.
3.5 Setting up drive roller / access for maintenance.
3.5.1 The drive roller is reversible and has two drive grooves on it, one for 0.6mm wire and one for
0.8mm wire. When the roller is in place it is always the groove that is nearest to you that is driven.
Each groove size is stamped onto the nearest face of the roller and the groove size in use will be
visible on the roller face when the roller retainer lock is removed.
3.5.2 To access the drive roller, first release the counter roller arm and hinge it up and
away from the drive roller. Take hold of the triangular roller retainer lock
( see fig.6B ) and turn it anticlockwise through 90Ountil it stops. Then pull it off the drive spindle to
reveal the drive roller beneath. Pull the roller off the square drive shaft and reverse it and/ or clean
it as necessary. When the roller is back in place take the roller retainer and orientate it so that the
hole in the side of it ( see fig.7-A ) is facing to the left and the two wings at the base of its rim are
orientated up and down. Push the roller retainer over the roller and spindle and turn it through 90O
clockwise to lock it in place.
fig 7 .
SUPERMIG150/5.V2 - (1) - 241002
s
Duty Cycle u
Rated weld current u
Conventional load voltage u
GUIDE TO RATINGS PLATE AND SYMBOLS ( For actual ratings of your model refer to front panel.
For further clarification refer to British Standard EN 60974-1 )
MIG/MAG welding symbol u
Single Phase
Transformer and Rectifier q
Indicates a welding
powersource
suitable for supplying
power to welding
operations carried out in
an environment with
increased hazard of
electric shock. q
International standard relating
qto moisture ingress.
Mains supply u
Rated maximum supply current u
Power efficiency u
Power factor u
q Wire feed device / control
6. 1. Wire feed unit Check the wire feed unit at regular intervals. The feed roller wire guide plays an important part in obtaining consistent
results. Poor wire feeding affects welding. Clean the rollers weekly, especially the feed roller groove, removing all dust deposits.
( See section 3.5 )
6. 2. Torch Protect the torch cable assembly from mechanical wear. Clean the liner from the machine forwards by using compressed air. If
the liner is clogged it must be replaced.
6. 3. Turning or Changing the Feed Roller There are two grooves on the feed roller, 0.6mm and 0.8mm. Always use the groove on the
outside of the roller, (the groove nearest to you). ( See section 3.5 ) IMPORTANT: Adjust the feed roller to the corresponding wire size.
6. 4. Contact Tip (to remove tip follow steps in 3.3.6. and to replace 3.3.9. a & b very carefully). The contact tip is a consumable item
and must be replaced when the hole becomes enlarged or oval. The contact tip MUST be kept free from spatter to ensure an unimpeded
flow of gas.
6. 5. The Gas Cup (Conical Nozzle) (to remove cup follow steps in 3.3.6. and to replace 3.3.9. a & b very carefully).The gas cup must
also be kept clean and free from spatter. Build up of spatter inside the gas cup can cause a short circuit at the contact tip which will
result in either the fuse blowing on the printed circuit card, or expensive machine repairs. To keep the contact tip free from spatter, we
recommend the use of Sealey anti-spatter spray available from your Sealey Dealer. We also recommend that you keep spare tips and
gas cups in stock.
6. 8. Changing Fuses The fuse is located on the wire feed control board inside the machine. Fuses blow for following reasons:
3Spatter in gas cup and contact tip causing short circuit. 3Wire tension too great. 3Sudden surge of current.
6. 6. Replacing the Liner
Wind the wire back on to the spool and secure it. To access the end of the liner in the wire feed unit remove the screw A, and the bolts
B and lift off the plastic cover to reveal the end of the liner which terminates in a brass collet C. ( See fig.8.) To remove the bolts B you
will need to remove the side cover from the welder to access the nuts and washers on the other side of the bulkhead to which the wire
feed unit is attached.
Remove the four screws that secure the two halves of the torch handle and remove the loose side cover. Pull the connector from the
end of the trigger spring and lift the cable, swan neck and brass block out of the moulding. ( See fig.9.) To remove the old liner cut it at
approximately 2cm from the brass termination fitting screwed into the block and pull the old liner out of the sheath from the wire feed
end. Unscrew the brass collet from the wire feed end of the liner and retain it for use on the new liner. Remove the remaining stub of
the old liner by unscrewing it anticlockwise out of the brass termination fitting. ( See fig.9-D.)
Uncoil the new liner and screw one end of it directly into the brass liner termination fitting on the torch block ( See fig.9-D.) Feed the
other end of the liner into the sheath at the torch end and push it through until it emerges into the wire feed area. Take care not to kink
the liner when feeding the last portion into the sheath. Screw the brass collet onto the wire feed end of the liner and position the collet
and liner as shown in fig.8-C. Cut off any excess liner flush with the end of the collet. Place the plastic cover back over the sheath and
liner and retain it with screw A. Replace the two bolts B and fasten them on the other side of the bulkhead with the nuts and washers.
Refix the side panel onto the welder with the four self tapping screws.
Reassemble the torch ensuring that you push the connector back onto the trigger spring.
6. MAINTENANCE
fig 8 . fig 9 .
SUPERMIG150/5.V2 - (1) - 241002
1. Power source stops
2. No weld current, fuse blowing in 13amp plug
3. No weld current
4. Feed motor not working, lamp is on
5. Wire does not feed, feed roller rotates
6. Wire feeds unevenly.
7. Unstable arc.
8. Porous weld
9. Electrode sticking in contact tip or gas cup
(nozzle)
10. Irregular weld head
11. Weld bead too narrow and raised
12. Weld bead too wide
13. Poor penetration
14. Excessive penetration
15. Fuse blowing
Overheating protection activated due to overload
Rectifier blown
Bad connection between clamp & workpiece
Break in earth lead
Break in torch lead
Fuse blown
Gear damaged or worn
Motor defective
Pressure roller improperly adjusted
Dirt, copper, dust, etc, have collection in torch liner
Gas cup (Nozzle) defective
Deformed wire
Dirt, etc, in liner
Gas cup (Nozzle) or contact tip defective
Gas cup (Nozzle) spattered
Feed roller groove clogged
Feed roller groove deformed
Wrong tension
Incorrect settings
Impurities in weld area
Worn or defective gas cup (nozzle)
No gas
Gas cup clogged
Draft blowing away shielding gas
Rusty or dirty joints
Torch too far from or at wrong angle to work
Gas leak
Worn or defective gas cup (nozzle)
Electrode deformed
Wire speed too slow
Torch incorrectly held
Wire weaving in weld pool
Weld current too high
Weld speed too low
Weld current too high
Weld speed too low
Arc too long
Weld current too high
Arc too long
Weld current too high
weld speed too slow
incorrect distance of torch to workpiece
Tension too great
Gas cup contact tip clogged
PROBLEM POSSIBLE CAUSE REMEDY (Numbers refer to chapter and item heading)
7. TROUBLESHOOTING
Protection automatically resets when transformer has cooled
(about 15 min).
Replace rectifier.
Clean or grind contact surface and weld area.
Repair or replace earth lead.
Repair or replace torch.
Replace fuse 1.5 amp.
Replace gears.
Replace motor (Contact service agent).
Adjust tension. (Chapter 3).
Clean the liner from the machine forward. Use compressed air.
If too much dirt, replace the liner. (Chapter 6).
Replace gas cup (nozzle) and check tip. (Chapter 4 & 6).
Check pressure roller tension & adjust if necessary (Chtr 6).
Clean the liner from the machine forward. Use compressed air.
Replace gas cup (nozzle) or contact tip (Chapter 6).
Clean or replace gas cup (nozzle). (Chapter 6).
Clean feed roller. (Chapter 6).
Replace feed roller. (Chapter 6).
Adjust tension. (Chapter 3).
Use recommended settings. (Chapter 4).
Clean or grind weld area. (Chapter 4).
Replace gas cup (nozzle) and check tip. (Chapter 6).
Open gas cylinder, regulate gas flow.
Clean or replace cup. (Chapter 6.).
Screen off welding site or increase gas flow.
Clean or grind. (Chapter 4).
The distance from gas cup to workpiece should be 8-10mm
and torch angle 600.
Check hoses, connections and torch assembly. (Chapter 6).
Press the gas cup in correction position.
Replace gas cup (nozzle). (Chapter 6).
Check pressure roller tension. (Chapter3. & Chapter 6).
See recommendations for wire speed. (Chapter 4).
Use torch angle 600. (Chapter 5).
Check pressure roller tension & adjust as needed. (Chapter 3).
Increase voltage and wire speed. (Chapter 4).
Move torch slower and weave a little more.
Decrease voltage and wire speed. (Chapter 4).
Move torch faster and weave less.
Bring torch closer to workpiece.
Increase voltage and wire speed. (Chapter 4).
Bring torch closer to workpiece.
Decrease voltage and wire speed. (Chapter 4).
Move torch faster.
Torch distance should be 8-10mm. (Chapter 5).
Release tension. (Chapter3.).
Clean gas cup and contact tip. (Chapter 6).
NOTE: It is our policy to continually improve products and as such we reserve the right to alter data, specifications and component parts without prior notice.
IMPORTANT: No liability is accepted for incorrect use of product. WARRANTY: Guarantee is 12 months from purchase date, proof of which will be required
for any claim. INFORMATION: Call us for a copy of our latest catalogue on 01284 757525 and leave your full name and address including your postcode.
01284 757500
01284 703534
E-mail:
sales@sealey.co.uk
Sole UK Distributor
Sealey Group,
Bury St. Edmunds, Suffolk.
Web address: www.sealey.co.uk
Declaration of Conformity We, the sole importer into the UK, declare that the
product listed below is in conformity with the following EEC standards and directives.
The construction file for this product is held by the Manufacturer and may
be inspected by a national authority by contacting Jack Sealey Ltd
For Jack Sealey Ltd. Sole importer into the UK of Sealey as Power Welders
25th September 2002
Signed by Mark Sweetman
Model: SUPERMIG150/5.V2
73.23/EEC
Low Voltage Directive (S.I. 1994/3260)
89/336/EEC
EMC Directive (S.I. 1992/2372 &
Amendments).
SUPERMIG150/5.V2 - (1) - 241002
Table of contents
Other Sealey Welding System manuals

Sealey
Sealey POWERMIG2500 User manual

Sealey
Sealey SuperMig185 User manual

Sealey
Sealey 180XT User manual

Sealey
Sealey SUPERMIG130 User manual

Sealey
Sealey Mightymig170 User manual

Sealey
Sealey 140XT.V2 User manual

Sealey
Sealey SUPERMIG100 User manual

Sealey
Sealey 160XT.V2 User manual

Sealey
Sealey MIGHTYMIG100.V3 User manual

Sealey
Sealey EM130XT.V3 User manual

Sealey
Sealey POWERMIG2750.V2 User manual

Sealey
Sealey POWERMIG3525 User manual

Sealey
Sealey MW180i User manual

Sealey
Sealey INVMIG160 User manual

Sealey
Sealey SR20 User manual

Sealey
Sealey MIGHTYMIG170.V2 User manual

Sealey
Sealey SR20.V3 User manual

Sealey
Sealey SGA2 User manual

Sealey
Sealey SGA1.V2 User manual

Sealey
Sealey PP40H.V2 User manual