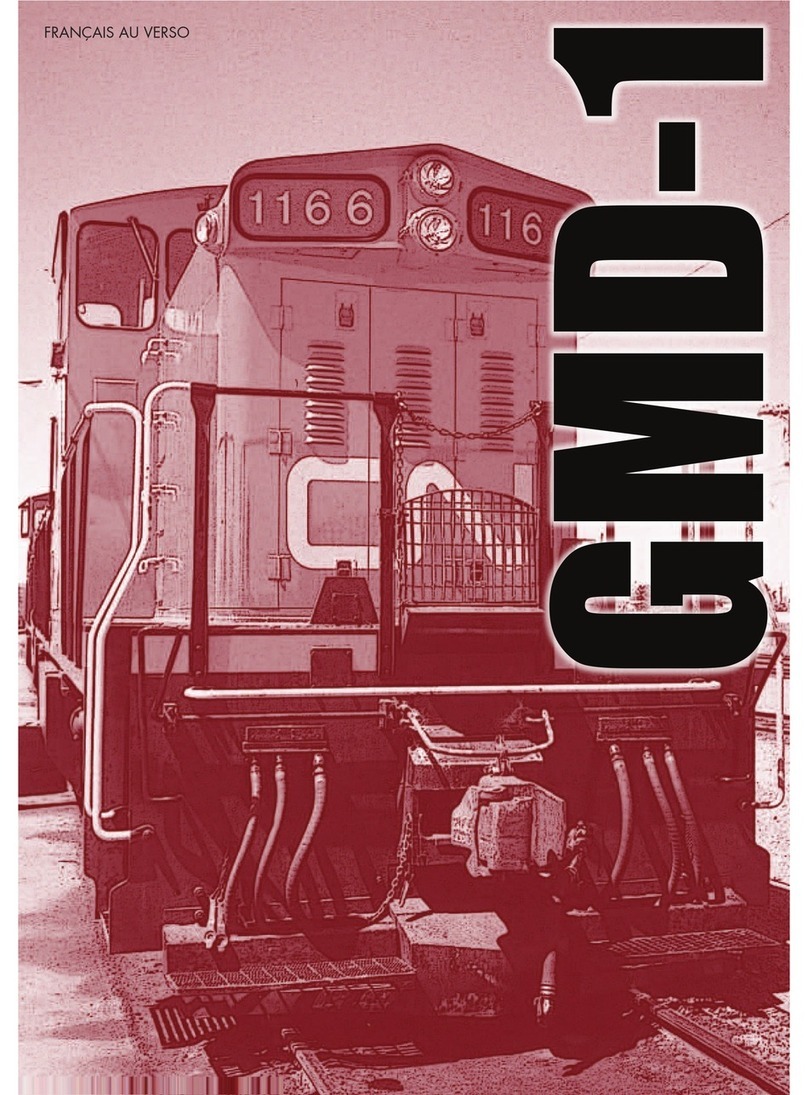
Rapido GMD-1 User manual

GMD-1 Rebuild
OPERATOR’S
MANUAL
FRANÇAIS AU VERSO

2
REBUILT GMD-1 LOCOMOTIVE PRODUCT GUIDELINES
Thank you for purchasing this model of CN’s rebuilt GMD-1… The One With The Stripes.
All you modern-era model railroaders bugged us for this version since the first day we
announced we were making a GMD-1 back in 2012. We are certain you will not be
disappointed. We have tooled all three rebuilt GMD-1 series – the 1400s, the 1600s,
and the 1430-1444 series of retrucked 1600s.
If this is your first Rapido locomotive, well hello! It’s nice to meet you! We must say you
are looking particularly handsome today. And we look forward to you owning many
more Rapido products in the future. This manual is full of useful and interesting informa-
tion for you to get the utmost pleasure out of your GMD-1 model. Did we mention how
handsome you are? We hope you will take the time to read it, enjoy our witty yet ac-
cessible humour, and perhaps make a life-long friend. Someone as cultured, classy and
elegant as your kind self only deserves the best that the model railroad industry has to
offer.
If you are a returning customer, just put the darn thing on the track, note the ditch lights
are on F6, and don’t burn it up with a cheap DC controller.
As always, if there is anything amiss with your GMD-1 please do not hesitate to con-
tact us. We stand by our products 100%. The best way to contact us is through email
Please do not send a faulty model back to us without first getting authorization. If you
bought this model in 2017, stuck it under your layout, died 30 years later, had your
family sell it in an estate sale, and it is being opened for the first time by its new owner
in 2055… Don’t call us. We’re all retired and living the good life at Joey’s Yak Farm and
Yoga Spa in Cochabamba, Bolivia.
CONTACT US!
Rapido Trains Inc.
500 Alden Road, Unit 21
Markham, Ontario
L3R 5H5 Canada
Tel. (905) 474-3314 - Toll Free 1-855-LRC-6917
Fax. (905) 474-3325
Email. [email protected]

3
TABLE OF CONTENTS
Prototype History ...............................................................................................4
Break-In ............................................................................................................5
Which Way is the Front?.....................................................................................5
How to Hold Your GMD-1...................................................................................5
Ditch Lights........................................................................................................6
Checking and Adjusting Your Locomotive..............................................................6
Missing or Damaged Parts ..................................................................................7
Removing the Shell.............................................................................................7
Operation – DC (Silent) ......................................................................................7
Installing a Silent DCC Decoder...........................................................................8
Operation – DC (Sound) .....................................................................................8
Operation – DCC with Sound..............................................................................9
• Locomotive Address ...............................................................................9
• Turn On the Sound ...............................................................................10
• Functions ............................................................................................11
• Functions: More Information ..................................................................12
• Horns .................................................................................................14
• Sound Volume Settings .........................................................................14
• Sound Volume Settings Chart ................................................................15
• Factory Reset ......................................................................................16
• Awesome Slow Speed Thingy ...............................................................16
• More Information ................................................................................16
• Limited Lifetime Warranty .....................................................................16
• Acknowledgements ..............................................................................17
GMD-1 DCC FUNCTION QUICK REFERENCE
F0 HEADLIGHTS F11 DOPPLER HORN - FAST
F1 BELL F12 SWITCHING MODE
F2 HORN F14 NUMBER BOARDS
F3 CURVE SQUEAL F15 BRAKE
F4 FULL THROTTLE F20 SARCO VALVE (SPITTER) - SLOW
F5 DOPPLER HORN - SLOW F21 SARCO VALVE (SPITTER) - FAST
F6 DITCH LIGHTS F22 SARCO AFTER SHUTDOWN
F7 DIMMER F23 BRAKE SET/RELEASE
F8 STARTUP/MUTE/SHUTDOWN
F9 CLASS LIGHTS - FRONT
F10 CLASS LIGHTS - REAR

4
PROTOTYPE HISTORY
1600-Series GMD-1A
In 1988 CN rebuilt 15 more GMD-1 locomotives for continued branchline use on the
Prairies. Unlike the 1100s, this was a major rebuild performed by CN’s Pointe St-Charles
shops in Montreal. The batteries were removed from the short hood and replaced with a
chemical toilet and access door; the batts were moved outboard beside the short hood.
The units received anticlimbers, ditch light brackets, improved spark arrestors, straight
exhaust stacks, upgraded sanding, snowplows, improved traction motors, and Wabco
26L brakes (replacing the old 6SL and 26L systems). The cabs were re-oriented to run
short hood forward, and interior facilities were improved – they now had a fridge! The
1600-series units were called GMD-1A and received the class designation GR-612A.
Most importantly for railfans, the 1600-series GMD-1 locomotives received what would
become the definitive GMD-1 paint scheme: red short hood and gorgeous striped long
hood. These were instantly recognizable to railfans from a distance and came to symbol-
ize Canadian branchline traffic in the 1990s.
1400-Series GMD-1B
CN followed the 1600-series rebuilds in 1988 with the 1400-series rebuilds in 1989.
The GMD-1B, classified GR-412B, is mechanically very similar to its 1600-series cousin.
The main differences are the larger, 2000 gallon fuel tank and the 4-wheel, Flexicoil
trucks. The 1400s also received a toilet, accessed from inside the cab. According to one
CN engineer who has operated the GMD-1 locomotives since the dark ages, the addi-
tion of toilets was a reflection of the fact that railroading was no longer a boys-only club.
The women engineers requested toilets in more units. Operation of the 1400s remained
long-hood forward.
1400-1402 were rebuilt from 1917, 1916 and 1913 respectively, thus retaining their
original Flexicoil trucks. The remaining 1400s done in 1989 (numbers 1403-1423)
were rebuilt from 1000-series GMD-1 locomotives using the trucks from retired GP9
engines.
The 1400s and 1600s received upgraded power assemblies, effectively creating a
645C prime mover rather than its original 567C. The 1100s did not receive upgraded
engines.
1400-1437 Series Retrucked 1600s
Between 1998 and 2000, all 15 1600-series GMD-1 locomotives were rebuilt to 1400s
using the trucks and fuel tanks from retired 1100s. Just to add some interest for railfans,
these were numbered 1430-1444.
At the time of writing, many GMD-1 locomotives are still in service today and there is
talk of a further rebuild program.

5
BREAK-IN
Don’t break in to anyone’s layout room to steal their GMD-1. Just buy more for yourself.
But this isn’t about that kind of break-in.
Every locomotive needs a break-in period. Your GMD-1 has been tested at our new LRC
factory for about two minutes. That is not enough time to get the gears to mesh nicely
or to even out any jerky operation in a new motor. We suggest that, after reading this
manual, you put your GMD-1 on a test loop and just let it run in each direction for an
hour or two. Fast and slow.
There already should be enough grease in the gearbox so you don’t need to add any.
Just let the thing run.
WHICH WAY IS FRONT?
The 1600-series GMD-1A locomotives were configured to operate short-hood forward,
as they did when retrucked into 1400-1434. But the 1400-series GMD-1Bs, they were
left to operate long-hood forward when they were rebuilt. Your DCC-equipped models
reflect these differences. If you wish to change the direction that your GMD-1 operates
in, you can use CV29. Simply read the value for CV29, and then add 1 to that value.
Simple!
HOW TO HOLD YOUR GMD-1
The GMD-1 has numerous very delicate parts. If you want to back date it to be the qual-
ity of a model produced in 1978, then rip all the parts off. We’re assuming you don’t
want to do that, so the GMD-1 should be picked up carefully. The fuel tank and the
middle of the long hood are both easily accessed and well balanced — if your hands
are big enough, the best way to pick up the unit is to grab it from above with your thumb
and forefinger on either side of the fuel tank. Always make sure your hands are free of
shmutz before touching your engine.
If you are taking your GMD-1 to the club all the time and regularly handling it, stuff will
break off. We suggest wrapping your GMD-1 in a plastic bag before placing it in the
packaging or in your holder so you can catch bits that fall off. White glue is the recom-
mended adhesive for reattaching the bits, although you can also use CA if you are very
careful and very brave.

6
DITCH LIGHTS
The neatest innovation on our rebuilt GMD-1 model is the ditch lights. We’re very happy
with the way the ditch lights turned out and we hope you will be too. It is extremely dif-
ficult to make deck-mounted, tall-stalk ditch lights that actually work.
One particular challenge that cannot be easily surmounted is that the real GMD-1 ditch
lights were removable. This means that they could be installed at either end of the real
thing. We checked 100s of photographs and there really was no rhyme or reason, but
we did find that in later years they tended to be left on both ends. Consequently, we
have mounted the ditch light at the respective “front” ends of the 1400s and 1600s, and
we’ve mounted them on both ends of 1430-44.
We will be selling the ditch lights separately if you would like to install ditch lights on
both ends of your 1400s. It was very rare to see ditch lights on the long-hood end of a
1600.
CHECKING AND ADJUSTING YOUR LOCOMOTIVE
We try and make sure that every locomotive is perfectly up to spec before it leaves the
factory, but if the karaoke was particularly good the night before your model was as-
sembled there may be a couple of bugs. Doing a quick pre-service check will solve most
operational glitches.
• Check to see that all wheelsets are correctly in gauge using an NMRA RP-2
Standards Gauge. Should any of the wheelsets be out of gauge, then remove the
affected wheelset from the truck by prying off the bottom lid of the gearbox with a
small flat screwdriver and then spreading apart the sideframes. The wheelset can
be regauged by grabbing each wheel and twisting. Reverse the steps to replace
the wheelset, and ensure the gearbox cover is snapped into place before placing
it on the track.
• Check that all underbody piping and appliances are firmly installed and clear of
the track. Of particular note are the air hoses on the ends of the locomotive and
both coupler trip pins. Bend up any low coupler trip pins so they don’t interfere
with your switches and crossings. We recommend using Kadee part #237 (Trip
Pin Pliers) or Micro-Mark part #80600 (Trip Pin Bending Plier).
• Make sure that the trucks swivel freely and without binding. If they catch on any-
thing, check to ensure that the ends of the trucks don’t bind against the steps. If
they do, see that everything is firmly installed.

7
MISSING OR DAMAGED PARTS
If you open your GMD-1 box and discover that something has obviously been bumped
in transit and is damaged, please contact us. We know that some of you don’t like to
touch your models, but if it is a matter of gluing an exhaust stack back on you can do it
yourself in less than a minute with a drop of white glue. If you really want to send your
model back to us for us to install that, we would be happy to. But if you do send it back
to us for us to put that one part back on and other stuff falls off when we send it back to
you, then tough tooties. We’re not fixing it again.
If you see some grab irons are missing and they are not floating around the packaging,
let us know and we will send you replacements. More information about our limited
lifetime warranty can be found towards the end of this manual.
REMOVING THE SHELL
If you need to open up your GMD-1 (to install a crew, install a decoder, etc.) it is actually
quite easy to do. Just be sure to remember these important points:
• We have a transporter lock on the molecular pattern of your locomotive. If some-
thing pops off while you are removing the shell, our starship’s transporters will
automatically lock on to the little part and beam it directly into the heart of the sun.
Don’t bother looking for it. It’s gone. You might hear the transporter effect as the
part is beamed away. I know it would have been more useful for us to beam the
part back onto your workbench but someone’s been fiddling with our transporters
and we haven’t been able to fix them. Sorry.
• To that end, please make every effort to ensure nothing flies away. Work on a
clean, white surface. In fact, paint all the walls, the floor and the ceiling white,
wear white coveralls, and remove everything else from within a three-mile radius
of your workbench, especially (but not limited to) vegetation, people and wind.
• Turn the locomotive upside down in a foam cradle (painted white, of course) and
remove the coupler screws. Pull the coupler boxes out of the ends and turn the
loco right-way up. Now wiggle the shell off. Carefully. Remember the transporter
lock.
• That’s it, really.
• No, really. That’s it.
• Be aware that for the first time, we have wires between the chassis and the shell.
Don’t yank too hard.

8
OPERATION - DC (SILENT)
If your GMD-1 locomotive is not equipped with a sound decoder, it should function like
most other HO scale locomotives. Put it on the track. Give it some juice. Watch it go.
If you are new to the hobby (or just like to occasionally “play trains”) and you have a
DC-powered train set, please contact us before operating your GMD-1 as it may not be
safe (for your engine and/or your wallet) for you to use your controller.
Some train set throttles put out a very high maximum voltage that is not suitable for scale
model trains. The maximum recommended voltage is 16 volts DC. Similarly, controllers
designed for large scale trains put out a much higher voltage than your GMD-1 can
handle.
If you use a train set throttle or a throttle designed for large scale trains, your locomo-
tive’s circuitry may end up looking like those “your brain on drugs” commercials. In
such situations, we’ll try our best to fix it for you. But we may have to charge you for the
replacement parts and/or the labour involved. That’s because you didn’t read this bit
of the manual. In DC, the number boards are always on and the headlights/ditch lights
are directional. The class lights are installed and wired, but they will not work in DC.
INSTALLING A SILENT DCC DECODER
The GMD-1 contains an ESU-designed motherboard which is connected to the track,
motor and lighting outputs. A blind plug is attached to the motherboard using a 21-pin
connector. To install a decoder, remove the blind plug and install a 21-pin decoder
(recommended) or a 21-pin adapter to attach an 8-pin or a 9-pin decoder. Your chosen
decoder should have six function outputs.
At the time of writing, we recommend the following 21-pin decoder:
• ESU #54615 - LokPilot V4.0 DCC with 21MTC
We feel the 21-pin connectors are superior because there are enough pins to ensure that
all your lighting functions are connected. The necessary resistors are included on our
ESU-designed motherboard so you don’t have to futz around with resistors. Just plug in
the recommended decoder and you have DCC.
ESU has made a GMD-1 function mapping which can be downloaded into their non-
sound decoder (54615) so that the function buttons and motor control are exactly the
same as our factory-released sound versions. This is available for download on the
GMD-1 page in the Support section of our web site. You will need an ESU LokProgram-
mer to write the function mapping to the 54615 decoder. If you don’t have a LokPro-
grammer, you can adjust CVs in the usual way.
We will be selling rebuilt GMD-1 sound decoders separately; if they aren’t on our web
site by the time you read this, call Dan Garcia at the office and yell at him.

9
OPERATION – DC (SOUND)
To operate your sound-equipped GMD-1 locomotive on a DC layout, just give the throttle
some juice. The engine will start up once sufficient voltage has been reached (around
seven volts). See the note above (in Operation – DC (Silent)) about using train-set or
large-scale throttles. With DC layouts, you have very little control over the sounds of
your model.
WARNING: If you have purchased a sound-equipped GMD-1 and you
operate your trains with a Model Rectifier Corporation RailPower 1300
DC controller, stop what you are doing immediately. Do not pass Go.
Do not collect $200. The RailPower 1300 is notorious for voltage spikes
and it WILL destroy your locomotive. There is no “if” about it. We will
not repair any GMD-1 destroyed by a 1300 or any other “train set”
DC controller. “Train set” DC controllers should not be used with sound-
equipped locomotives.
The only lights that work in DC are the headlights, ditch lights and number boards. You
can’t turn on the class lights in DC. Some throttle manufacturers produce special doo-
dads which are meant to trigger the sounds in locomotives on DC layouts. As we have
no involvement in the development of those doo-dads, we have absolutely no idea how
they will affect your GMD-1, for good or for ill. As always, we’ll try to help you fix your
GMD-1 if one of these doo-dads scrambles your locomotive’s circuitry, but we can’t
guarantee we’ll be able to.
It is usually at this point in the manual that Jason inserts a gentle dig at his fellow mod-
ellers who won’t switch from DC to DCC. He has chosen not to do that this time around,
because the last time he made fun of people still using DC he was kidnapped by a band
of journeymen from the masons’ guild, tied to a bale of hay with straps made at the local
tannery, and burned at the stake for being a warlock. Luckily he got better.
If you want a taste of what you are missing by not switching to DCC, please read on…
OPERATION – DCC WITH SOUND
We go to extreme lengths for accuracy, in sounds as well as in looks. Our sound decod-
ers are LokSound Select decoders by ESU, programmed with sounds we recorded from
a rebuilt SW1200RS, which has the same prime mover, exhaust and hood design as the
rebuilt GMD-1. So you can rest assured that the sounds are bang-on accurate. We did
not just toss our original GMD-1 sounds onto the decoder as the rebuilt GMD-1 sounds
completely different.
As we do for all of our sound decoders, we recorded the prime mover under load – it
was hauling loaded ballast hoppers. Locomotives sound a lot different when they are
working. If you have decoders from other manufacturers in your locomotives you might
want to check out the available line of Rapido decoders on our web site. All of our de-

10
coder sounds were recorded under load and we simply can’t stand decoders that don’t
have this feature.
More detailed decoder instructions, including all sorts of weird CV settings we don’t
understand, can be found in the ESU Loksound Select decoder manual. This is available
for download on the GMD-1 page in the Support section of our web site.
LOCOMOTIVE ADDRESS
Your Rapido GMD-1 comes from the factory with a decoder address of 3. We suggest if
you are using DCC control that you first test that the locomotive responds on address 3.
Once you have verified that the locomotive is responding you should assign it a unique
address (we suggest the road number of the locomotive) before going any further. This
can be done either on your programming track (recommended) or on the main if your
system supports programming on the main. Be aware however that if you do program
the locomotive on the main and you have any other locomotives on your layout assigned
to address 3 (the normal default address for new locomotives) that ALL of them will likely
also be changed to your new address! Also be aware that if you give your locomotive a
four-digit address it will not work at all if you try to run it on a friend’s DC layout.
Also please keep in mind that some DCC systems do not have sufficient power to pro-
gram sound-equipped locomotives on the mainline. If your sounds do not operate cor-
rectly on a Digitrax DCC system, this likely means that you need to clear the memory
on your system, achieved by “clearing slot #36.” A basic summary of how to do this
can be found on the GMD-1 page in the Support section of our web site. More detailed
information can be found on the Digitrax web site.
If you have a really old DCC system, you may find that this locomotive won’t work at
all – nor will many other new models. Go update your DCC system to a newer version.
Your computer is updated regularly. Your DCC system should be updated as well.
TURN ON THE SOUND
Press F8 and you will hear the GMD-1 startup sequence followed by the sound of it
idling. You can adjust CVs to prevent the locomotive from moving until the startup se-
quence has played out. Jason is really impatient so he turned this feature off. Refer to
a full ESU LokSound Select decoder manual for more information. You can download it
from the GMD-1 page in the Support section of our web site. The feature is called the
“Prime Mover Startup Delay” and at the time of writing it was on page 35 of the ESU
manual.
If you press F8 when the locomotive is already moving, it will skip the startup and the
sound will just turn on. Press F8 again to turn the sound off.
Note that if you are listening to your GMD-1 idling nicely and then you select another

11
engine with your throttle, your locomotive still thinks F8 is pressed so it will keep idling
along. However, if someone else selects your locomotive’s number and F8 isn’t pressed
on his or her controller, the GMD-1 will promptly shut down. He or she will need to press
F8 again.
“She?” you ask. “You mean there are female model railroaders?” Well, yes. We have
at least three female customers. We’re keen to increase that number, so the next bit of
this manual is a “women’s interest” section specially tailored for the women who have
bought this locomotive.
FUNCTIONS
F0 Headlights F14 Number Boards
F1 Bell F15 Brake
F2 Horn F20 Sarco Valve (Spitter) - Slow
F3 Curve Squeal F21 Sarco Valve (Spitter) - Fast
F4 Full Throttle F22 Sarco After Shutdown
F5 Doppler Horn - Slow F23 Brake Set/Release
F6 Ditch Lights
F7 Dim the Headlights
F8 Startup/Mute/Shutdown
F9 Class Lights - Front
F10 Class Lights - Rear
F11 Doppler Horn - Fast
F12 Switching Mode

12
FUNCTIONS: MORE INFORMATION
F1 Bell
We have used a new bell recording for our rebuilt GMD-1. We watched hours of foot-
age and came to the conclusion that the bell ring rate is firmly set to “whatever.” Every
engine had a different bell ring rate. We chose a nice one.
F2 Horn
Since our first GMD-1 release we have improved the horn file to make it easier to do
a short “toot” without having a long tail off. To get a short “toot” just tap F2 or your
“HORN” button. If you hear a long tail-off you are tapping for too long. If, no matter
what you do, you just can’t get the darn thing to make a short “toot,” switch to NCE.
F3 Curve Squeal
This is a new sound for a Rapido model, but appropriate for these hard-working road
switchers. Press F3 for curve squeal. If your DCC system supports latching on F3, the
curve squeal will continue as long as F3 is pressed. If not, you need to press once to turn
on the squeal and press again to turn it off.
F4 Full Throttle
ESU’s “Full Throttle” feature allows you to play the prime mover of your GMD-1 like a
musical instrument. When you press F4, you turn on “drive hold.” This keeps the speed
of the engine constant at whatever speed step your throttle happens to be on. Then as
you increase the throttle, you hear the prime mover revving up. This allows you to simu-
late hauling a heavy load. On the prototype the prime mover would be up at 7 or 8
while the engine is moving slowly. If you want to recreate the “straight to 8” feature of
our older GMD-1 models, just crank up the throttle really quickly.
“Full Throttle” is even neater when you throttle down, as it allows you to simulate “coast-
ing” which is such an important part of running a real train. When you press F4 again
you turn off “Full Throttle” and the engine will accelerate or decelerate to whatever
speed step your throttle happens to be on. For realism it’s a good idea to take note of
what speed step your throttle was on when you turned on “Full Throttle” and be back at
that speed step when you turn “Full Throttle” off. Otherwise your GMD-1 may fly like a
bird.
F5 Slow Doppler Horn
This is another new feature on our Rebuilt GMD-1. The Doppler recording on our first
release was of a clapped-out M3H and it sounded a bit awful. So we have sourced a
K3L recorded on a moving locomotive doing about 30MPH.
F6 Ditch Lights
These do exactly what you would expect. F6 turns them on. F6 turns them off. The ditch
lights are directional. If you are approaching a station or an oncoming train you can
turn off the ditch lights and dim the headlights automatically by pressing F7. You don’t
want to blind anyone. See F7 Dim Lights.

13
F7 Dim Lights
If you are approaching a station or an oncoming train you can turn off the ditch lights
and dim the headlights automatically by pressing F7. You don’t want to blind anyone.
I’m getting a sense of déjà vu. I’m getting a sense of déjà vu.
F9 Front Class Lights
F10 Rear Class Lights
They do exactly what they say – these function buttons turn on the class lights. GMD-1
locomotives only use white class lights. The rebuilt GMD-1 is not often called upon to
lead two sections of The Canadian, so the greens aren’t needed. And the GMD-1s aren’t
pushing GO trains, so the red lights aren’t needed. If you want to order more GMD-1s
and put them into GO or AMT service pushing commuter trains, just shmear the class
lights with a red marker.
F11 Fast Doppler Horn
OK – GMD-1 locomotives never go this fast. But it’s a neat recording. If your engineer
is really in a hurry and is hauling nothing but a van or maybe one boxcar behind his
three-unit consist, play this Doppler recording. Then get out of the way.
F12 Switching Mode
If you press F12, the headlight and rear light will both be on dim. This is appropriate
for switching operations. On the real GMD-1, it actually is not possible to have both
the headlight and rear light on at full strength. Press F12 again to turn off the switching
mode lighting.
F14 Turn Off Number Boards
The number boards are lit by default, a big improvement over our last GMD-1. It was
annoying when you’d lose power because of a short somewhere else on the layout and
then you had to go through the tedious task of turning your number boards back on. If
you really want them off, press F14. We suggest you be a radical and just leave them
on.
F15 Brake
In 13 years of making model trains we have met one person who uses the brake feature
on our locomotives. So we’ve shoved this to a higher function button. If you are that one
person, you can remap this feature onto a lower function button by following the instruc-
tions in the full ESU Select Decoder manual, which can be downloaded from the GMD-1
page of the Support section of the Rapido web site.
Functions F16-F19
These are not used. Don’t press them. Your GMD-1 may explode.
F20 and F21 Sarco Valve (Spitter)
These functions turn on or off the Sarco Valve. On the real GMD-1, it’s always going. But
you often can’t hear it from a distance. In contrast, if you are close to the engine you can
hear the Sarco valve pretty prominently. We feel that on many sound-equipped engines,

14
the Sarco Valve is way too loud. So we’ve included two versions of it, controlled by
functions. You can choose whether or not you hear the Sarco Valve, and you can choose
how fast you want it to spit.
If you press F20, the Sarco Valve will be heard intermittently. If you press F21, it will be
heard less intermittently. Make sure you turn off F20 first.
If you have a silent GMD-1 and you want to recreate the Sarco Valve effect, please aim
away from the models. Your GMD-1 warranty does not include malfunction due to ac-
cumulated saliva.
F22 Sarco After Shutdown
On real engines you can hear the Sarco Valve after the engine shuts down. So the de-
fault for this is “off.” If you want to hear the Sarco Valve spit for a minute after shutdown,
make sure F22 is pressed.
F23 Brake Set/Release
This function turns off the brake release and brake set sounds when you start or stop mov-
ing, respectively. It has no effect on the function of the engine — it just affects the sounds.
HORNS
There are numerous extra horn recordings included with your GMD-1, and you can
change them around by changing the value of CV 48. Though why you’d want to
change the horn from the GORGEOUS one that we recorded and is included from the
factory is beyond us.
CV48-0 Nathan K3L #1 (Default Horn)
CV48-1 Nathan K3L #2
CV48-2 Nathan M3H
CV48-3 Nathan K3
CV48-4 Nathan P5A
CV48-5 Nathan K3LA
CV48-6 Leslie RS3L
CV48-7 Nathan K3L #3
CV48-8 Nathan K5H
Note that you can only change the horn on a programming track or using a LokProgram-
mer.
SOUND VOLUME SETTINGS
The sound volumes on your decoder have been pre-set at the factory to levels that we
found comfortable on our test tracks. This is considerably quieter than what you are
probably used to when first turning on a sound-equipped locomotive, because we feel
that most locomotive models are set to ABSURDLY LOUD out of the box.

15
Sound levels are very much a matter of personal taste (especially if you are going deaf
like we are), and what sounds great in one layout environment may sound too loud or
too soft in another. Fortunately all sound levels can be easily adjusted to best suit your
own requirements and we recommend that you experiment with different settings if you
don’t care for the default levels.
To set the volume levels go into the program mode on your DCC system (refer to your
system’s manual for instructions on how to do this as each system is slightly different);
enter the desired CV number; then enter the desired levels. Note that this can be done
either on a programming track or on the main (ops mode) if your DCC system supports
programming on the main.
We strongly recommend that you keep notes on which settings you have changed and
which values were used. If you ever need to do a reset on the decoder (see “Factory
Reset” below) then having good notes will allow you to easily re-enter any changes that
you might want to keep.
VERY IMPORTANT: Before you change any of the volume control CVs,
please make sure that CV 32 is set to 1. CV 32 is used as an index selec-
tion register and if you don’t set it first then we are not responsible for
your resulting rage and the fact that you will probably throw the loco-
motive against the wall in frustration.
REBUILT GMD-1 SOUND VOLUME SETTINGS
FUNCTION CV DEFAULT RANGE YOUR VALUE
MASTER VOLUME 63 192 0-192
DIESEL VOLUME 259 128 0-128
HORN VOLUME 275 128 0-128
BELL VOLUME 283 50 0-128
SLOW DOPPLER VOLUME 427 128 0-128
FAST DOPPLER VOLUME 339 128 0-128
FAST SARCO VALVE VOLUME 371 80 0-128
SLOW SARCO VALVE VOLUME 387 80 0-128
CURVE SQUEAL VOLUME 403 128 0-128
FACTORY RESET
On your GMD-1, you perform a factory reset by entering a value of “8” into CV 8. Note
that this will cause all of your new volume and motor settings to be lost, so you will need
to reprogram any settings that you want to keep. You did keep notes like we suggested
earlier, didn’t you?
You can NOT lose all of the pre-recorded sounds on your GMD-1 decoder by doing a

16
factory reset. This is a myth about ESU decoders that was related to function mapping
settings using an early version of JMRI. If you manage to lose all of the sounds on your
GMD-1 then you have probably set fire to your decoder with a voltage spike. Open up
your GMD-1 and pour out the ashes.
AWESOME SLOW SPEED THINGY
There is an awesome trick that you can use to get even better slow speed running and
smoother operation. It’s called the Automatic Motor Tuning Feature. This feature will
automatically adjust the Back-EMF in most cases and give you phenomenal slow-speed
performance.
In order to use this automatic adjustment you need to use Ops mode programming, i.e.
programming on the main. Make sure your locomotive is in “forward” and that you have
lots of room in front of it on your mainline. Set CV 54 to a value of 0. Then get out of
programming mode and turn on the bell (press F1). We’ll say this again: Make sure you
have plenty of room in front of your locomotive and it is not headed for the layout edge
and the basement floor!!!
Your GMD-1 will quickly take off at full speed and gradually slow down to a stop while
the decoder reads the motor responses. You’ll have fabulous motor control after you do
this. If you ever have to reset your locomotive, you can do the automatic adjustment
again – it just takes a few seconds.
MORE INFORMATION
While addressing the features that most modelers will need for normal operation, these
instructions have covered just a small number of the many customizable features of
your ESU LokSound decoder. For advanced users who want to more fully explore the
capabilities of the decoder we suggest downloading the ESU Loksound Select decoder
manual. This is available on the GMD-1 page in the Support section of our web site.
LIMITED LIFETIME WARRANTY
We will do our best to solve any problems or issues that you may have with your GMD-1
locomotive. If your locomotive has any defects that originate from the factory, we will
repair your locomotive using new components or replace it outright should a repair not
be possible. However, we can only replace your locomotive while we have additional
ones in stock. We normally keep spares for up to six months after a model is released.
If you are like most of us and – after purchasing this locomotive – you shoved it under
your layout and are now opening it for the first time in 2033, then you are on your own
if there are any issues.
There are a number of things that this warranty can not cover. If your GMD-1 arrives with

17
a couple of loose grab irons or underbody bits, there is a very good chance that you can
effect a repair in less time and effort than it would take to contact us. Don’t be afraid to
do some model railroading! White glue, such as Weldbond, works wonders for securing
all sorts of parts and will not mar or damage your paint. However, if parts are missing
that is another story – call us or send us an email and we’ll send you some replacements.
Of course, damage caused by running your GMD-1 at full speed around a 15”-radius
curve along the edge of your layout, modifying your GMD-1 to work off diesel fuel, not
modifying your GMD-1 to work off diesel fuel but still filling it with diesel fuel, strapping
your GMD-1 to a rocket for an entertaining YouTube video, or any other damage caused
by you that we haven’t been able to cover here is not covered by the warranty. However,
if catastrophe does strike and your locomotive gets damaged, please give us a shout
and we’ll do our best to help you out. Yes, even if it was your fault we will try
our best to fix your locomotive for you. Don’t be shy!
ACKNOWLEDGEMENTS
Many people have provided their kind assistance in order to ensure that our rebuilt
GMD-1 is an amazing model. Special thanks go to Maxime Boulianne, Stephen Chea-
sley, Nadine Cloutier, Mike Da Costa, Dan Dell’Unto, Ken Goslett, Matt Herman, Gord
Hilderman, Mark Kaluza, Steve Lucas, Dave Minshall, Jakob Mueller, Mark Perry, Kevin
Robinson, Brian Schuff, Stan Smaill, Graham Wood. We very much appreciate the help
of Exporail in ensuring we got the amazing locomotive sound recordings. Thanks to
Richard Longpre for the excellent translation into French, as usual. And finally thanks to
Nyota Uhura for the excellent translations into Swahili and Klingon. Unfortunately we
did not have room to include them. Next time, Admiral. We promise.
Packaging cover photo by Ken Goslett.
Other manuals for GMD-1
1
Table of contents
Other Rapido Toy manuals
Popular Toy manuals by other brands

Pokemon
Pokemon Poké Ball Plus instruction manual

JR
JR Venture CP Assembly instructions

TTS
TTS Recordable Shining Stars Rewards quick start guide

CYmodel
CYmodel Pt-19 instruction manual

Carrera RC
Carrera RC Super Mario Flying Cape Mario Assembly and operating instructions

Lionel
Lionel Union Pacific RS-3 owner's manual