Rapido GMD-1 User manual

FRANÇAIS AU VERSO
GMD-1

2
GMD-1 LOCOMOTIVE PRODUCT GUIDELINES
Thank you for purchasing this model of Canada’s most unique locomotive, the GMD-1.
This is the first freight locomotive produced by Rapido and the first locomotive produced
by the MLW factory. (Funny that MLW’s first model is a GMDD prototype.... don’t tell
any Alco fans!)
As always - but especially as this is the first locomotive from the MLW factory - please do
not hesitate to contact us should there be anything wrong with your model. Whether you
have a warranty issue (missing parts, exploding model, etc.), a question (“Why won’t
the class lights work with my 87-year-old AC controller?”) or a comment (“Mmmm....
GMD-1. Aaaarrrglglglhhhh.”) please give us a shout. More warranty information is
available towards the back of this manual.
+1-905-474-3314) or by snail mail at the address below.
Please do not send any models back to us without first speaking to us to get authoriza-
tion. You’d be amazed at how many models arrive at our location with no documenta-
tion whatsoever. And if models get sent to one of our old addresses, they might as well
have been beamed into the mouth of a wormhole as we’ll never see them.
If you’ve finally got around to opening this model after your retirement in 2042, you’re
on your own. Sorry.
CONTACT US!
Rapido Trains Inc.
500 Alden Road, Unit 16
Markham, Ontario
L3R 5H5 Canada
Tel. (905) 474-3314 - Toll Free 1-855-LRC-6917
Fax. (905) 474-3325
Email. [email protected]

3
TABLE OF CONTENTS
Nomenclature ...................................................................................................4
Break-In ............................................................................................................4
Prototype Practices .............................................................................................4
How to Hold Your GMD-1...................................................................................5
Extra Stuff in the Box .........................................................................................5
What is that Empty Space on the Roof? ................................................................ 6
Sand Boxes .......................................................................................................6
Checking and Adjusting Your Locomotive..............................................................6
Missing or Damaged Parts ..................................................................................7
Removing the Shell.............................................................................................7
Operation – DC (Silent) ......................................................................................8
Installing a Decoder ...........................................................................................8
Operation – DCC/DC with Sound .......................................................................9
• Locomotive Address ...............................................................................9
• Turn On the Sound ............................................................................... 10
• Functions ............................................................................................10
• Functions: More Information ..................................................................11
• Horns .................................................................................................12
• Sound Volume Settings .........................................................................13
• Sound Volume Settings Chart ................................................................14
• Factory Reset ......................................................................................14
• Awesome Slow Speed Thingy ...............................................................15
• More Information ................................................................................15
• Limited Lifetime Warranty .....................................................................15
• Acknowledgements ..............................................................................16
GMD-1 DCC FUNCTION QUICK REFERENCE
F0 HEADLIGHT
F1 BELL
F2 HORN
F3 STRAIGHT TO 8 (ON/OFF)
F5 DOPPLER HORN
F7 DIMMER
F8 STARTUP/MUTE/SHUTDOWN
F9 NUMBER BOARDS
F10 CLASS LIGHTS
F11 BRAKE
F12 SWITCHING MODE

4
NOMENCLATURE
You’ll notice that we only refer to the GMD-1 as the GMD-1, with a hyphen between the
D and the 1. Some early sources such as Extra 2200 South used the incorrect “GMD1”
and that incorrect name has become popular, but after a lot of digging we have deter-
mined that the hyphen should ALWAYS be there.
When we made the FP9A, it was a matter of choosing whichever name we thought was
best. GMD refers to both “FP9” and “FP9A” in the pages of one locomotive manual, and
CN refers to it as FP9 and FP9A, not to mention FP-9A and FP9-A. So there were plenty
of names to choose from!
But the GMD-1 does not have a similar plethora of options. The original locomotive
manual, the original documents from CN, and even the blueprints from General Motors
all unanimously refer to the locomotive as a GMD-1. These are what are called primary
sources – documents produced by the locomotive manufacturer and owner. The docu-
ments that refer to “GMD1” are secondary sources usually produced by railfans.
It’s obvious to us which sources should be trusted, and we hope it’s obvious to you too.
So it’s the GMD-1 from now on!
BREAK-IN
No, we don’t mean you should sneak into your buddy’s layout room when he’s on vaca-
tion to steal his GMD-1s. Instead you should buy more of your own.
Every locomotive needs a break-in period. Your GMD-1 has been tested at the factory...
for about 30 seconds. That is not enough time to get the gears to mesh nicely or to even
out any jerky operation in a new motor. We suggest that, after reading this manual, you
put your GMD-1 on a test loop and just let it run in each direction for an hour or two.
Fast and slow.
There already should be enough grease in the gearbox so you don’t need to add any.
Just let the thing run.
PROTOTYPE PRACTICES
The GMD-1 almost always operated in groups of two or three, and sometimes up to
five in a train. If you ordered just this one, call your hobby shop immediately and see if
they have any more. If they are sold out, sign up for our email newsletter so you won’t
miss the next production announcement and you can get your locomotive a companion.
You’ll make your engine even happier if you buy it ten companions. GMD-1 locomotives
feel more confident and less anxious when they are in a pack...
The 1000-series GMD-1 locomotives were not equipped with steam generators. If you
wish to pull a passenger train with a pair of 1000s, you will need a Steam Generator

5
Unit behind it. Fortunately, we manufacture those too!
Our model will pull far more than the prototype. Please ignore that and order more.
HOW TO HOLD YOUR GMD-1
The GMD-1 has numerous very delicate parts. If you want to back date it to be the qual-
ity of a model produced in 1978, then rip all the parts off. We’re assuming you don’t
want to do that, so the GMD-1 should be picked up carefully. The fuel tank and the
middle of the long hood are both easily accessed and well balanced — if your hands
are big enough, the best way to pick up the unit is to grab it from above with your thumb
and forefinger on either side of the fuel tank. Always make sure your hands are free
of shmutz before touching your engine. I suppose a 1:1 fingerprint could look like the
remains of an HO scale zebra that wandered onto the tracks, but I doubt that is the look
you are aiming for on your layout.
If you are taking your GMD-1 to the club all the time and regularly handling it, stuff will
break off. We suggest wrapping your GMD-1 in a plastic bag before placing it in the
packaging or in your holder so you can catch bits that fall off. White glue is the recom-
mended adhesive for reattaching the bits, although you can also use CA if you are very
careful and very brave.
EXTRA STUFF IN THE BOX
You can run your GMD-1 right out of the box. You don’t need to add anything to it as
all of the basic grab irons and other details are installed. (The exception is the area on
the long hood above the radiator for CN 1954 1000-series models. If that applies to
you, see the next section.)
However, every GMD-1 locomotive is unique. Different crews in different parts of the
country added extra grab irons and other details as and when they were needed. It is
impossible for us to install all of these extra parts at the factory because, during the lifes-
pan of a given paint scheme, a set of grab irons could be removed and replaced with
a ladder, and then the ladder removed and replaced with a set of stairs. If we chose to
install the stairs, the loco detailing would be wrong for those guys who model an earlier
year.
The same holds true for the all-weather windows and sun shades and wind deflectors on
the cab. On most units, we installed the sun shade and wind deflectors on the fireman‘s
side because they remained there throughout the model’s service life. But the engineer’s
side received an all-weather window around 1974. Because the 1954 scheme and the
1961 scheme both lasted well past 1974, we left everything off the engineer’s side. You
can choose to install the all-weather window or the wind deflectors according to the year
you are modelling. As to whether or not to install the sun shade, refer to photos.

6
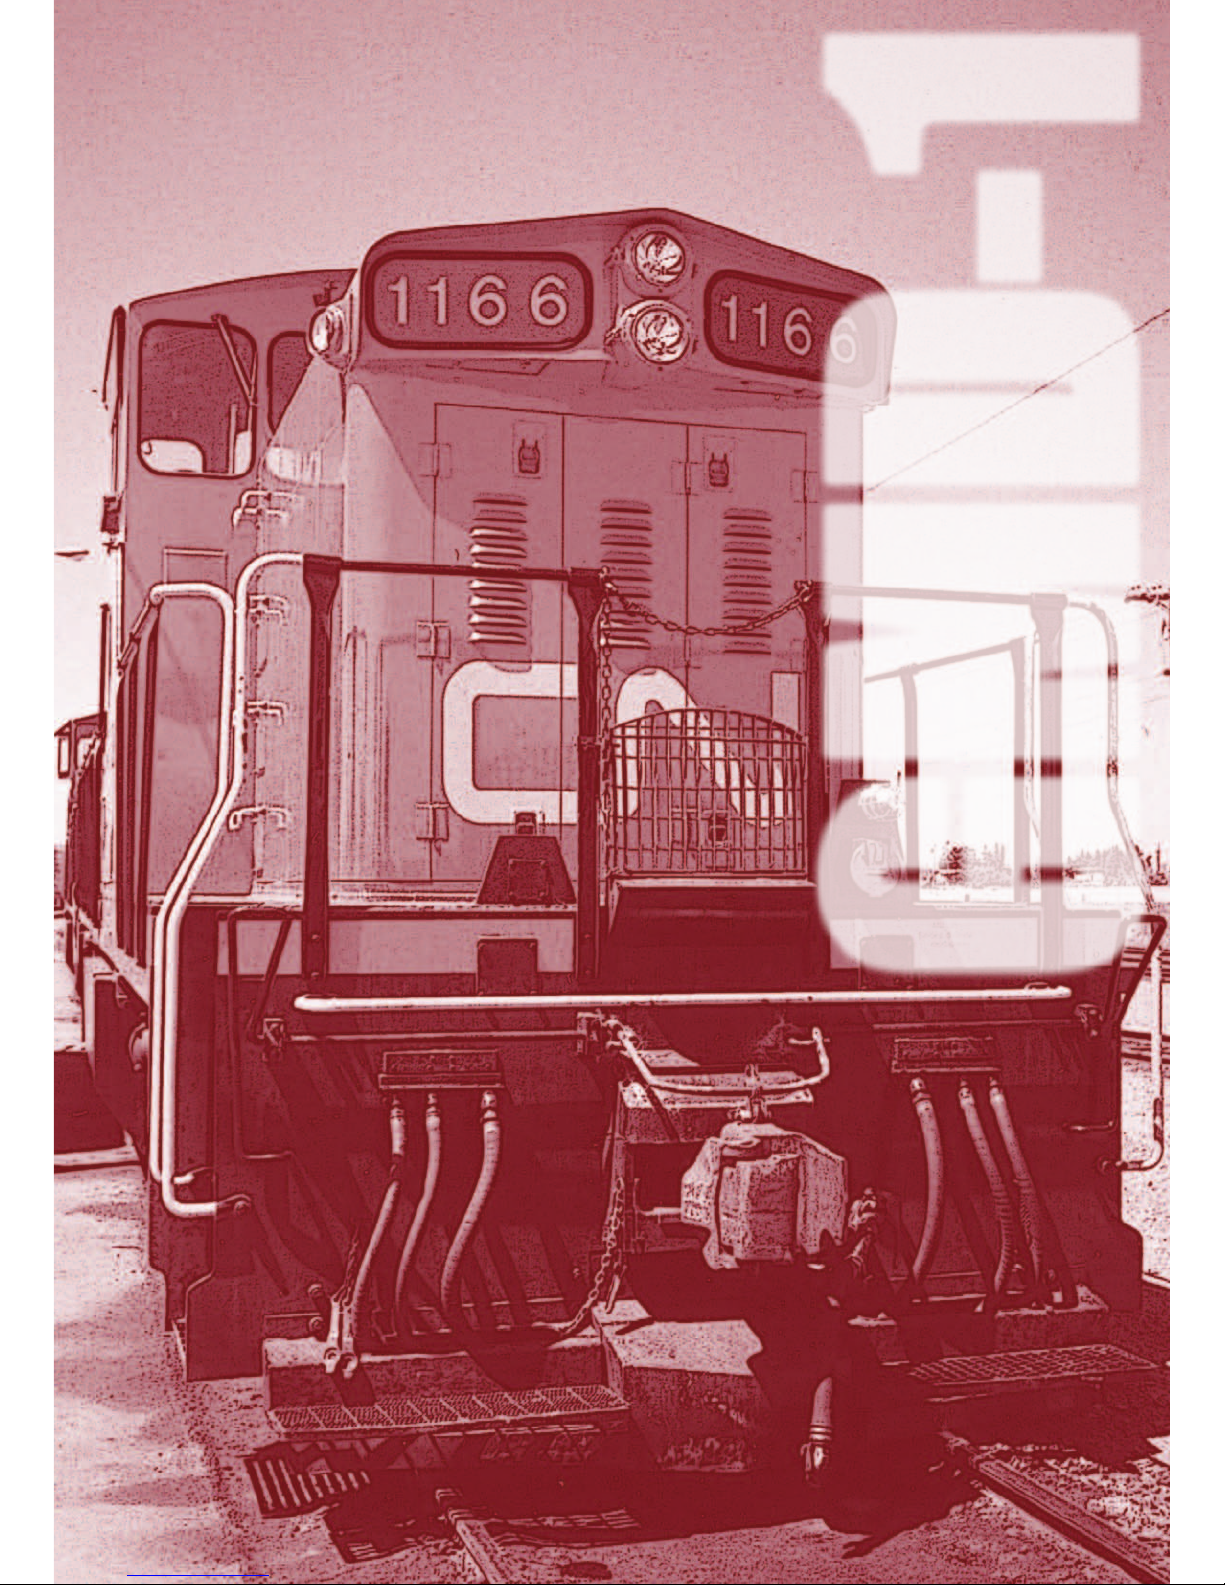
We had to make some decisions that will make the model inaccurate for the earliest
classes in the very early days, so all units have spark arrestors installed and all have
frame-mounted handrails. Note that all 1000-series GMD-1s from the second order on-
ward were delivered with frame-mounted handrails, and that all 1000-series GMD-1s
from the fourth order onward were delivered with spark arrestors. So if you are model-
ling 1959 and you want 100% accurate details, look at photos of your chosen unit
before you start hacking away at your model. You may not need to.
The vast majority of early-order units were modernized with spark arrestors and frame-
mounted handrails by 1965.
We suggest you refer to photos on www.cnrphotos.com and either find your specific
number or look for other locomotives in the year you are modelling for guidance as to
what details to include and what to leave off. You will find just about all of the details you
need to accurately customize your locomotive in the polybags hidden in the foam insert.
WHAT IS THAT EMPTY SPACE ON THE ROOF?
For CN 1954 1000-series engines, we were in a quandary. All of these were delivered
with standard radiator covers which were replaced on most units by tall radiator shutter
frames starting in 1966 . As the units stayed in 1954 colours into the 1980s, we didn’t
feel we could force the later guys to hack off the normal rad covers or force the earlier
guys to hack off the shutter frames. So we didn’t install either of them.
If you are modelling the late 1950s or early 1960s, install the standard, low covers. If
you are modelling the late 1960s or later, install the tall shutter frames.
We recommend using white glue sparingly to install the parts. If it oozes, you can clean
it up with a damp cotton swab or a damp tissue or even a clean toothpick. White glue
will not leave a permanent stain on your model the way CA does.
SAND BOXES
The GMD-1 was delivered with eight sand boxes, and these were mounted to the trucks.
They are included with all the extra detail parts. If you install all of them on your 1000-se-
ries loco you will need a huge minimum radius and really easy vertical curves... But nev-
er fear! CN removed them over time, first cutting them down to four and then to none.
In our opinion, reliable operation is more important than installing a detail that might
cause you a big headache. If you plan to actually run your GMD-1, just leave them off.
CHECKING AND ADJUSTING YOUR LOCOMOTIVE
We try and make sure that every locomotive is perfectly up to spec before it leaves the
factory, but if the karaoke was particularly good the night before your model was as-

7
sembled there may be a couple of bugs. Doing a quick pre-service check will solve most
operational glitches.
• Check to see that all wheelsets are correctly in gauge using an NMRA RP-2
Standards Gauge. Should any of the wheelsets be out of gauge, than remove the
affected wheelset from the truck by prying off the bottom lid of the gearbox with
a small flat screwdriver. The wheelset can be regauged by grabbing each wheel
and twisting. Reverse the steps to replace the wheelset, and ensure the gearbox
cover is snapped into place before placing on the track.
• Checkthatallunderbodypipingandappliancesarermlyinstalledandclearof
the track. Of particular note are the air hoses on the ends of the locomotive and
both coupler trip pins. Bend up any low coupler trip pins so they don’t interfere
with your switches and crossings. We recommend using Kadee part #237 (Trip
Pin Pliers) or Micro-Mark part #80600 (Trip Pin Bending Plier).
• Makesurethatthetrucksswivelfreelyandwithoutbinding.Iftheycatchonany-
thing, check to ensure that the ends of the trucks don’t bind against the steps. If
they do, see that everything is firmly installed.
MISSING OR DAMAGED PARTS
If you open your GMD-1 box and discover that something has obviously been bumped
in transit and is damaged, please contact us. We know that some of you don’t like to
touch your models, but if it is a matter of gluing a spark arrestor back on you can do it
yourself in less than a minute with a drop of white glue. If you really want to send your
model back to us for us to install that spark arrestor, we would be happy to. But if you
do send it back to us for us to put that one part back on and other stuff falls off when we
send it back to you, then tough tooties. We’re not fixing it again.
If you see some grab irons are missing, read the section above about “Extra Stuff in the
Box” and it may well be that we left off those grabs deliberately. If there are big gaping
holes where grab irons obviously fell out, then please give us a shout as that should not
be the case! More information about our limited lifetime warranty can be found towards
the end of this manual.
REMOVING THE SHELL
If you need to open up your GMD-1 (to install a crew, install a decoder, etc.) it is actually
quite easy to do. Just be sure to remember these important points:
• Wehaveatransporterlockonthemolecularpatternofyourlocomotive.Ifsome-
thing pops off while you are removing the shell, our starship’s transporters will
automatically lock on to the little part and beam it directly into the heart of the sun.
Don’t bother looking for it. It’s gone. You might hear the transporter effect as the

8
part is beamed away. I know it would have been more useful for us to beam the
part back onto your workbench but someone’s been fiddling with our transporters
and we haven’t been able to fix them. Sorry.
• Tothatend,pleasemakeeveryefforttoensurenothingiesaway.Workona
clean, white surface. In fact, paint all the walls, the floor and the ceiling white,
wear white coveralls, and remove everything else from within a three-mile radius
of your workbench, especially (but not limited to) vegetation, people and wind.
• Turnthelocomotiveupsidedowninafoamcradle(paintedwhite,ofcourse)and
remove the coupler screws. Pull the coupler boxes out of the ends and turn the
loco right-way up. Now wiggle the shell off. Carefully. Remember the transporter
lock.
• That’sit,really.
• No,really.
OPERATION – DC (SILENT)
If your GMD-1 locomotive is not equipped with a sound decoder, it should function like
most other HO scale locomotives. The gear ratio is 14:1 so there is a good chance that
it will MU (multiple unit) with your existing fleet. Put it on the track. Give it some juice.
Watch it go.
But please note that we can’t guarantee that your GMD-1 will actually MU with locomo-
tives from other manufacturers. There are just too many variables involved - things like
how much or how little drag the gearbox has, the speed of the motor itself or the current
draw of the lighting. All of these affect how a unit runs and what its start voltage will be.
The gear ratio is only one factor, albeit a big one.
(Of course, you can easily ensure that all of your locomotives from all manufacturers MU
smoothly together by upgrading your layout to DCC. Jason likes to say that DC is a great
system, but so was Betamax...)
In DC, the number boards are always on and the headlights are directional. The class
lights are installed and wired, but they will not work in DC.
INSTALLING A DECODER
The GMD-1 contains an ESU-designed motherboard which is connected to the track,
motor and lighting outputs. A blind plug is attached to the motherboard using a 21-pin
connector. To install a decoder, remove the blind plug and install a 21-pin decoder
(recommended) or a 21-pin adapter to attach an 8-pin or a 9-pin decoder. Your chosen
decoder should have six function outputs.

9
We recommend the following 21-pin decoders:
• ESU#54615-LokPilotV4.0DCCwith21MTC
• TCS#EU621-BEMFsix-functiondecoder
We feel the 21-pin connectors are superior because there are enough pins to ensure that
all your lighting functions are connected. The necessary resistors are included on our
ESU-designed motherboard so you don’t have to futz around with resistors. Just plug in
one of the two recommended decoders and you have DCC.
ESU has made a GMD-1 function mapping which can be downloaded into their non-
sound decoder (54615) so that the function buttons and motor control are exactly the
same as our factory-released sound versions. This is available for download on the
GMD-1 page in the Support section of our web site. You will need an ESU LokProgram-
mer to write the function mapping to the 54615 decoder. If you don’t have a LokPro-
grammer, you can adjust CVs in the usual way.
The silent ESU 54615 decoder with our GMD-1 settings can be purchased prepro-
grammed from your favourite retailer. Just order ESU item number 91644. As the sound
version uses custom sounds we recorded ourselves, the GMD-1 sound file is not avail-
able as a download from ESU. We will be selling GMD-1 sound decoders separately; if
they aren’t on our web site by the time you read this, call Jason and yell at him.
OPERATION – DCC/DC WITH SOUND
We go to extreme lengths for accuracy, in sounds as well as in looks. Our sound decod-
ers are LokSound Select decoders by ESU, programmed with sounds we recorded from
GMD-1 #1118 on the Alberta Prairie Railway in Stettler, Alberta. 1118’s guts are origi-
nal, so the sounds are correct for the 1000-series and 1900-series GMD-1 locomotives.
Most importantly, we recorded 1118 under load, pulling 12 covered hoppers at a good
clip along the Alberta Prairie “mainline.” Locomotives sound different when they are
working. We were one of the first manufacturers to record locomotives under load for
our sound decoders, and while others have since followed in our footsteps few manu-
facturers are as insane about it as we are. You know we’ve done everything possible to
ensure the model sounds right — we even have wheel slip!
More detailed decoder instructions, including all sorts of weird CV settings we don’t
understand, can be found in the ESU Loksound Select decoder manual. This is available
for download on the GMD-1 page in the Support section of our web site.
LOCOMOTIVE ADDRESS
Your Rapido/MLW GMD-1 comes from the factory with a decoder address of 3. We
suggest if you are using DCC control that you first test that the locomotive responds on

10
address 3. Once you have verified that the locomotive is responding you should assign
it a unique address (we suggest the road number of the locomotive) before going any
further. This can be done either on your programming track (recommended) or on the
main if your system supports programming on the main. Be aware however that if you
do program the locomotive on the main and you have any other locomotives on your
layout assigned to address 3 (the normal default address for new locomotives) that ALL
of them will likely also be changed to your new address!
TURN ON THE SOUND
Press F8. It will start up. That was easy enough. If you press F8 when the locomotive is
already moving, it will skip the startup and the sound will just turn on. Press F8 again to
turn the sound off.
Note that if you are listening to your GMD-1 idling nicely and then you select another
engine, your GMD-1 still thinks F8 is pressed so it will keep idling along. However, if
someone else selects your GMD-1’s number and F8 isn’t pressed on his or her controller,
the GMD-1 will promptly shut down. He or she will need to press F8 again.
Ah, bless... We’re being gender neutral by saying “he or she” when 99.999% of model
railroaders are male. Suzanne we hope you appreciate that.
If you are operating with sound on a DC layout, the sounds won’t come on until the volt-
age is up around six volts or more. This is normal.
FUNCTIONS
F0 Headlights
F1 Bell
F2 Horn
F3 Straight to 8
F4 Sarco Valve (Spitter) - Slow
F5 Doppler Horn
F6 Sarco Valve (Spitter) - Fast
F7 Dimmer
F8 Startup/Mute/Shutdown
F9 Number Boards
F10 Class Lights
F11 Brake
F12 Switching Mode
F18 Brake Set/Release
F19 Air Release
F20 Sarco After Shutdown

11
FUNCTIONS: MORE INFORMATION
F3 “Straight to 8”
This unique feature simulates the prototypical operation of the GMD-1 locomotive. If you
are switching out an industry and you are having trouble pulling those heavy grain cars
out of the siding, you will want to put the GMD-1 consist straight into 8. That means you
move right into notch 8 (rather than going through the notches slowly) and gun it - wheel
slip and all (and there is a LOT of wheel slip).
Obviously, this sounds very different from a typical freight engine slowly notching up to
8 and back down again. When F3 is selected, applying any throttle to the locomotive
will cause the locomotive sound to ramp up quickly to “Run 8” (full power). If you decel-
erate, it will go right back down to idle. If you push F3 when the locomotive is at notch
8 and then you decelerate, it will notch down normally. Note that this function controls
the sound only and not the motor speed. Motor speed is still controlled using the throttle
settings as normal.
If you want your consisted engines to respond to F3 when you press it, refer to your DCC
system to check how consisted engines respond to functions. You may need to change
some CV settings in your consisted engines following the detailed instructions in sec-
tion 5.2.3 of the ESU Loksound Select decoder manual, available for download on the
GMD-1 page in the Support section of our web site.
F4 and F6 Sarco Valve (Spitter)
These functions turn on or off the Sarco Valve. On the real GMD-1, it’s always going. But
you often can’t hear it from a distance. In contrast, if you are close to the engine you can
hear the Sarco valve pretty prominently. We feel that on many sound-equipped engines,
the Sarco Valve is way too loud. So we’ve included two versions of it, controlled by
functions. You can choose whether or not you hear the Sarco Valve, and you can choose
how fast you want it to spit.
If you press F4, the Sarco Valve will be heard intermittently. If you press F6, it will be
heard less intermittently. Make sure you turn off F4 first.
If you have a silent GMD-1 and you want to recreate the Sarco Valve effect, please aim
away from the models. Your GMD-1 warranty does not include malfunction due to spit.
F5 Doppler Horn
Play this when approaching level crossings. We planned to include our Doppler horn
as used on the FP9A, but as that train was doing about 80MPH when the horn was
recorded we didn’t think it appropriate to use that recording for the GMD-1. The train in
this recording is going a wee bit slower.

12
F10 Class Lights
If you have our FP9A locomotive, you might be wondering why the GMD-1 only has
white class lights. Green class lights mean a second section is following. Red class lights
mean the engine is pushing a passenger train. While we would love to see the GMD-1
hauling the Super Continental during the Expo 67 rush or pushing GO trains in com-
muter service, these events are not entirely likely. So we just put in the white class lights.
When you press F10, all the class lights come on.
F11 Brake
F11 works just like the brakes on a real engine. Press F11 and you put on the brakes.
Turn off F11 and the brakes come off so you start moving again.
F12 Switching Mode
If you press F12, the headlight and rear light will both be on dim. This is appropriate
for switching operations. On the real GMD-1, it actually is not possible to have both
the headlight and rear light on at full strength. Press F12 again to turn off the switching
mode lighting.
F18 Brake Set/Release
This function turns off the brake release and brake set sounds when you start or stop mov-
ing, respectively. It has no effect on the function of the engine — it just affects the sounds.
F19 Air Release
This makes an air release sound. Ahhhhh....
F20 Sarco After Shutdown
On real engines you can hear the Sarco Valve after the engine shuts down. Some people
like to hear this on the model, but Jason finds it annoying. So the default for this is “off.”
If you want to hear the Sarco Valve spit for a minute after shutdown, make sure F20 is
pressed.
HORNS
There are numerous extra horn recordings included with your GMD-1, and you can
change them around by changing the value of CV 48. Though why you’d want to
change the horn from the GORGEOUS one that we recorded and is included from the
factory is beyond us.
CV48-0 Nathan K5LA
CV48-1 Nathan K3L ( Default Horn - Rapido Recording)
CV48-2 Nathan M5
CV48-3 Nathan P3

13
CV48-4 Nathan P5A
CV48-5 Nathan K3L (ESU Recording)
CV48-6 Leslie RS3L
CV48-7 Leslie S3L
CV48-8 Leslie S5T
CV48-9 Nathan M3
CV48-10 Hancock Air Whistle (you can blame Dan for this….)
CV48-11 Leslie RS3K
CV48-12 Leslie Supertfon
CV48-13 Nathan M3H
CV48-14 Nathan K5H
CV48-15 ANOTHER Leslie 3 Chime
Note that you can only change the horn on a programming track or using a LokProgram-
mer.
SOUND VOLUME SETTINGS
The sound volumes on your decoder have been pre-set at the factory to levels that we
found comfortable on our test tracks. This is considerably quieter than what you are
probably used to when first turning on a sound-equipped locomotive, because we feel
that most locomotive models are set to ABSURDLY LOUD out of the box.
Sound levels are very much a matter of personal taste (especially if you are going deaf
like we are), and what sounds great in one layout environment may sound too loud or
too soft in another. Fortunately all sound levels can be easily adjusted to best suit your
own requirements and we recommend that you experiment with different settings if you
don’t care for the default levels.
To set the volume levels go into the program mode on your DCC system (refer to your
system’s manual for instructions on how to do this as each system is slightly different);
enter the desired CV number; then enter the desired levels. Note that this can be done
either on a programming track or on the main (ops mode) if your DCC system supports
programming on the main.
We strongly recommend that you keep notes on which settings you have changed and
which values were used. If you ever need to do a reset on the decoder (see “Factory
Reset” below) then having good notes will allow you to easily re-enter any changes that
you might want to keep.
VERY IMPORTANT: Before you change any of the volume control CVs,
please make sure that CV 32 is set to 1. CV 32 is used as an index selec-
tion register and if you don’t set it first then we are not responsible for
your resulting rage and the fact that you will probably throw the loco-
motive against the wall in frustration.

14
GMD-1 SOUND VOLUME SETTINGS
FUNCTION CV DEFAULT RANGE YOUR VALUE
MASTER VOLUME 63 40 0-192
DIESEL VOLUME 259 128 0-128
HORN VOLUME 275 128 0-128
BELL VOLUME 283 99 0-128
COUPLER SOUND VOLUME 291 128 0-128
ODD VOLUME 299 128 0-128
ODD VOLUME #2 307 128 0-128
RADIATOR FAN VOLUME 315 90 0-128
ODD VOLUME #3 323 128 0-128
ODD VOLUME #4 331 128 0-128
DOPPLER HORN VOLUME 339 128 0-128
SHORT AIR LET OFF VOLUME 363 128 0-128
FAST SARCO VALVE VOLUME 371 80 0-128
SLOW SARCO VALVE VOLUME 387 80 0-128
SARCO VALVE AT SHUTDOWN VOLUME 395 80 0-128
ODD VOLUME #5 403 128 0-128
RANDOM SOUND VOLUME 451 90 0-128
BRAKE SQUEAL VOLUME 459 128 0-128
FACTORY RESET
On your GMD-1, you perform a factory reset by entering a value of “8” into CV 8. Note
that this will cause all of your new volume and motor settings to be lost, so you will need
to reprogram any settings that you want to keep. You did keep notes like we suggested
earlier, didn’t you?
You can NOT lose all of the pre-recorded sounds on your GMD-1 decoder by doing a
factory reset. This is a myth about ESU decoders that was related to function mapping
settings using an early version of JMRI. Even then the sounds were still there; they were
just not mapped to the proper function buttons. ESU has changed their software so that
this cannot happen again. If you manage to lose all of the sounds on your GMD-1 then
you have probably set fire to your decoder with a voltage spike. Open up your GMD-1
and pour out the ashes.

15
AWESOME SLOW SPEED THINGY
There is an awesome trick that you can use to get even better slow speed running and
smoother operation. It’s called the Automatic Motor Tuning Feature. This feature will
automatically adjust the Back-EMF in most cases and give you phenomenal slow-speed
performance.
In order to use this automatic adjustment you need to use Ops mode programming, i.e.
programming on the main. Make sure your locomotive is in “forward” and that you have
lots of room in front of it on your mainline. Set CV 54 to a value of 0. Then get out of
programming mode and turn on the bell (press F1). We’ll say this again: Make sure you
have plenty of room in front of your locomotive and it is not headed for the layout edge
and the basement floor!!!
Your GMD-1 will quickly take off at full speed and gradually slow down to a stop while
the decoder reads the motor responses. You’ll have fabulous motor control after you do
this. If you ever have to reset your locomotive, you can do the automatic adjustment
again – it just takes a few seconds.
MORE INFORMATION
While addressing the features that most modelers will need for normal operation, these
instructions have covered just a small number of the many customizable features of
your ESU LokSound decoder. For advanced users who want to more fully explore the
capabilities of the decoder we suggest downloading the ESU Loksound Select decoder
manual. This is available on the GMD-1 page in the Support section of our web site.
LIMITED LIFETIME WARRANTY
We will do our best to solve any problems or issues that you may have with your GMD-1
locomotive. If your locomotive has any defects that originate from the factory, we will
repair your locomotive using new components or replace it outright should a repair not
be possible. However, we can only replace your locomotive while we have additional
ones in stock. We normally keep spares for up to six months after a model is released. If
you purchased this locomotive or first opened it after that time, it is possible that we no
longer have any replacements and that a repair is the only option. Please give us a call
or write us an email, and we will see what we can do to help you out.
There are a number of things that this warranty can not cover. If your GMD-1 arrives with
a couple of loose grab irons or underbody bits, there is a very good chance that you can
effect a repair in less time and effort than it would take to contact us. Don’t be afraid to
do some model railroading! White glue, such as Weldbond, works wonders for securing
all sorts of parts and will not mar or damage your paint. However, if parts are missing
that is another story – call us or send us an email and we’ll send you some replacements.

16
Of course, damage caused by trips to the basement floor, running your locomotive
around 18” radius curves at ridiculously high speeds, throwing it to your friend across
the room, picking it up with wet paint on your hands, or any other damage caused by
you that we haven’t been able to cover here is not covered by the warranty. However, if
catastrophe does strike and your locomotive gets damaged, please give us a shout and
we’ll do our best to help you out. Yes, even if it was your fault we will try our
best to fix your locomotive for you. Don’t be shy!
ACKNOWLEDGEMENTS
A lot of people have been instrumental in ensuring this GMD-1 is both gorgeous and
accurate. Special mention needs to be made of Mark Perry and Graham Wood for their
extensive GMD-1 knowledge, experience and photos; Brian Schuff and Gord Hilderman
for their extensive photo collections; Steve Lucas and Dave Minshall for all of their fabu-
lous detail shots. For photos, research, recordings and advice, thanks also go to: Jon
Archibald; Jeff Arnold; Steve Boyko; Glen Brosinsky; Jon Calon; Paul Cordingley; Peter
Cox; Dan Dell’Unto; David Emmington; Mark Forseille; Don Gillespie; Kelly Gillespie;
Jim Gilley; Don Gordon; Ken Goslett; Matt Herman; Kevin Holland; Doug Hunter; Al
Jaster; Don Jaworski; Mark Kaluza; Julian Lengauer; Lloyd Marshall; Lonnie McGowan;
John Mellow; Jakob Mueller; Ray Reinhardt; Mike Schafer; Bob Scott; Shane Snideman;
Matt Soknacki; Jeff Simpson; John Vincent; Tim Vitelli; Darrel Wendt; Bob Willis; Gord
Wilson; Richard Yaremko; Chuck Zenius. Special mention must also be made of Jeff Bir-
mingham for making it all happen, and of the Alberta Prairie Railway and the Winnipeg
Railway Museum for giving us free rein of their GMD-1 locomotives. Finally, thanks go
to Richard Longpre for doing this amazing translation into French, especially all the Star
Trek stuff — I don’t make it easy for him!
Packaging cover photo by John Mellow.
Instructions cover photo by Brian Schuff.
Visit rapidotrains.com/signup to sub-
scribe to our free email newsletter,
Rapido News. That way you’ll never
miss another product announcement or
update again.
Other manuals for GMD-1
1
Table of contents
Other Rapido Toy manuals
Popular Toy manuals by other brands

V-tech
V-tech Splash & Play Octopus instruction manual

V-tech
V-tech V.Smile Motion-Winnie the Pooh-The Honey... user manual

Step 2
Step 2 Chariot Wagon 8750 manual

Tyco R/C
Tyco R/C Turbo Street Wheelie Cycle instructions

WATT AGE
WATT AGE F-22 Raptor EP instruction manual

Air Hogs
Air Hogs Lightning McQueen Instruction guide

Step 2
Step 2 MY FIRST JACK-O-LANTERN 4858 manual

Holystone
Holystone F+ Series Instructions for use

KNEX
KNEX Imagine-Build-Play BUILDING WITH BRICKS manual

Step 2
Step 2 PERCY THE SMALL ENGINE COASTER CAR 4022 manual

V-tech
V-tech GearBuddies Lion & Mouse Parents' guide

Spinmaster
Spinmaster Netflix DreamWorks CABBY'S DOLLHOUSE Instruction guide