7
煙囪式抽油煙機 | Chimney Range Hood
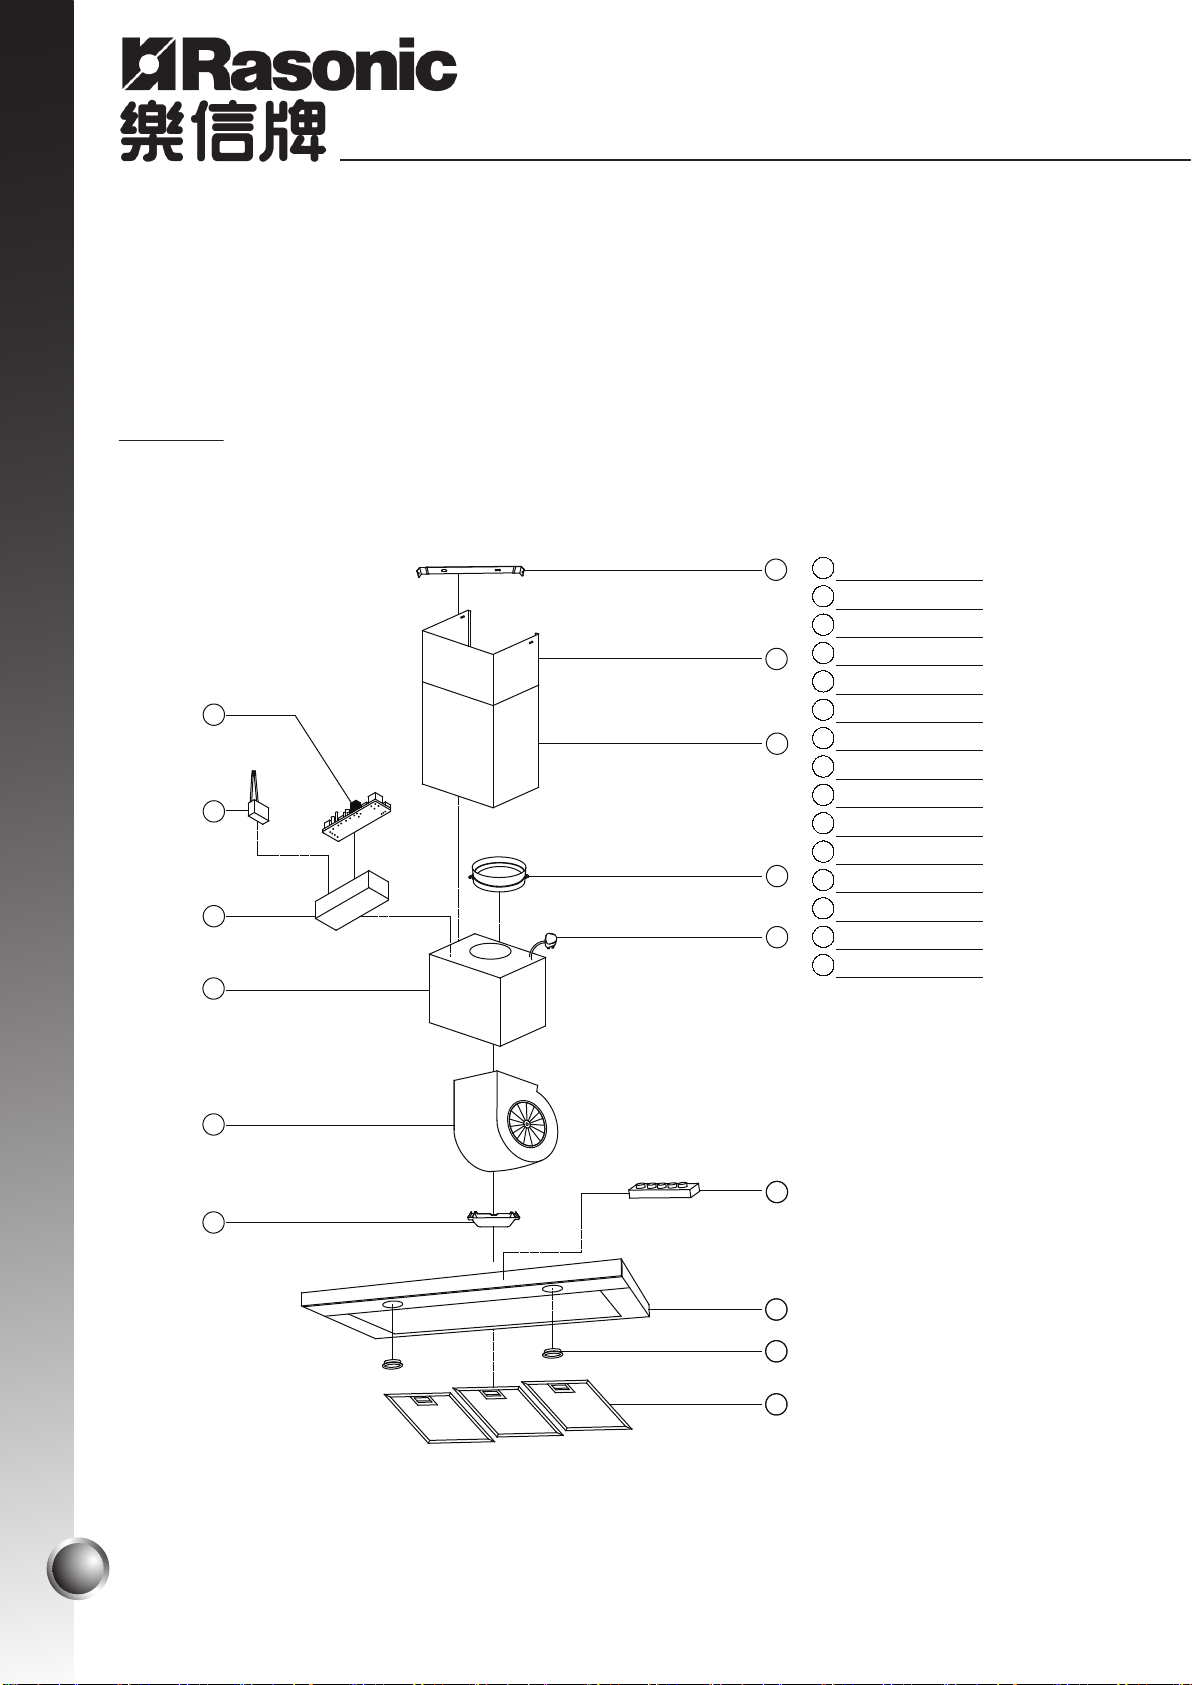
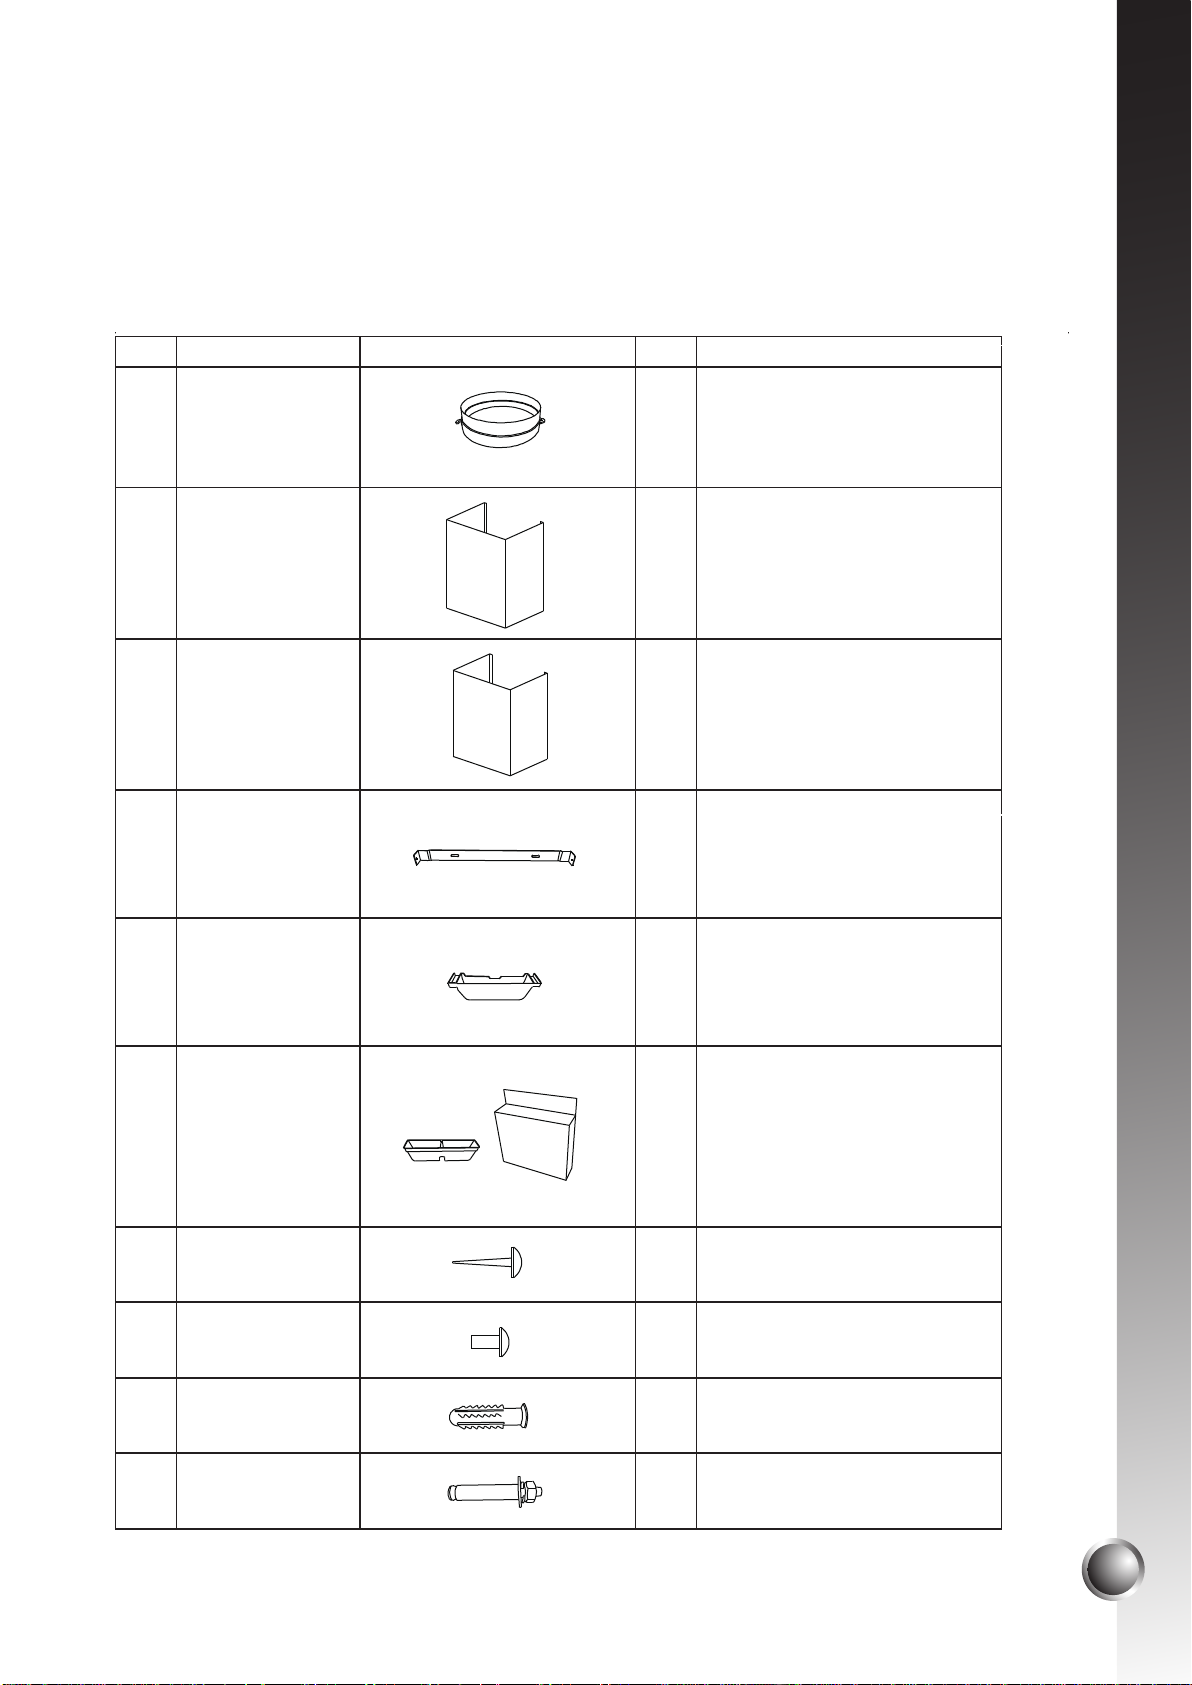
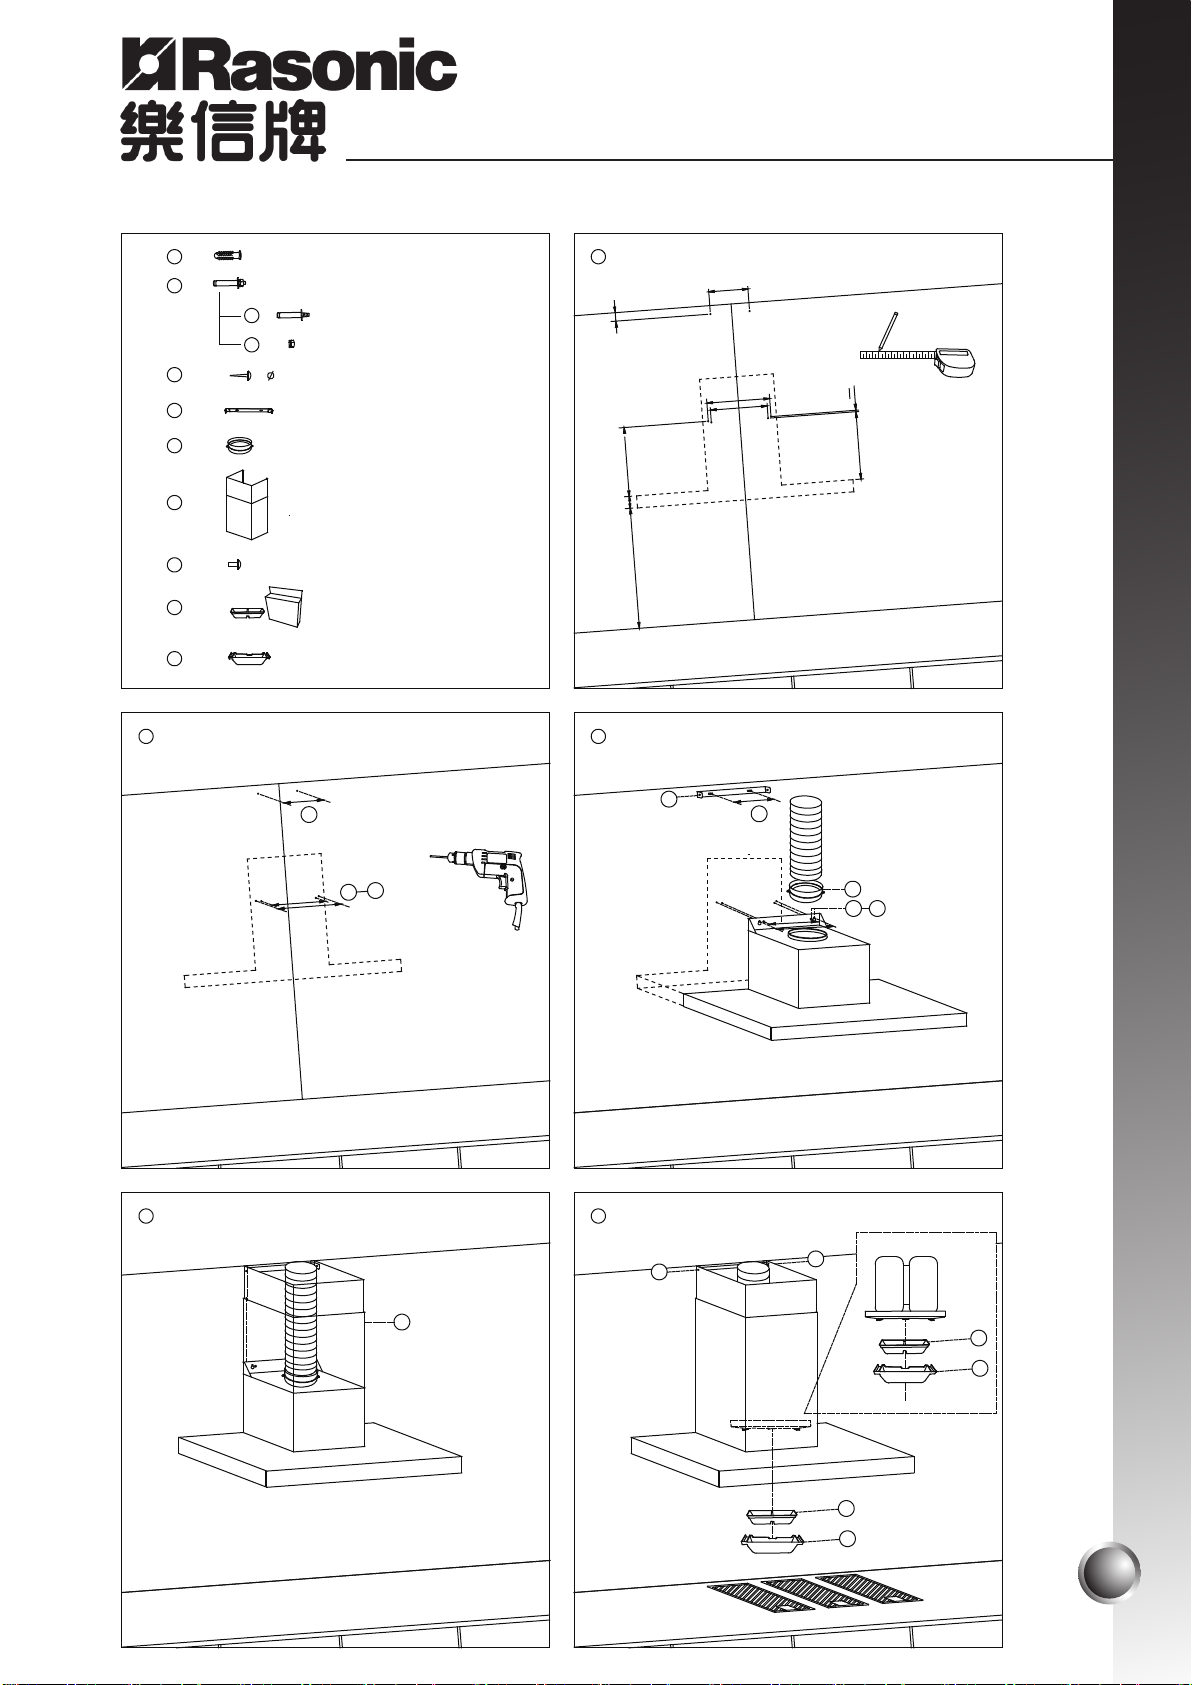
3. 產品安裝
3.1 安裝注意事項
警告:不按照以下說明安裝螺釘或固定裝置可能會導致電氣危險。
1. 安裝前須詳細閱讀說明書,並按照要求進行安裝,確認安裝無誤後,才可接通電源。
請務必進行試運行,並了解正確的使用方法。
2. 嚴禁安裝在浴室或其他潮濕房間,否則可能會引起電擊或損害。
3. 抽油煙機必須由合資格的專業工程人員進行安裝。
4. 廢氣絕不可以排放到一般用於氣體爐具或其它燃具的排氣管道中。
5. 必須提供合適的通風口接通戶外。為減少火災危險及有效通風,務必將氣體排到戶外。
切勿排入空心牆壁或天花板夾層或屋頂夾層、小房間、汽車庫等空間。
6. 安裝前先檢查抽油煙機的銘牌,並請確保額定的電壓與所使用的電壓相符
(220-240伏特(V)~/50赫茲(Hz))。
7. 安裝前先接上電源,測試操作各項功能的開關是否正常(如摩打、照明等),切勿伸手
或將其他物件插入抽油煙機內部以避免觸及風輪而產生危險或損壞機件。
8. 電源插座必須安裝接地線,安裝時務必關掉電源。
9. 請勿將接地線接於水管,易燃氣管或電話線等,以避免危險。
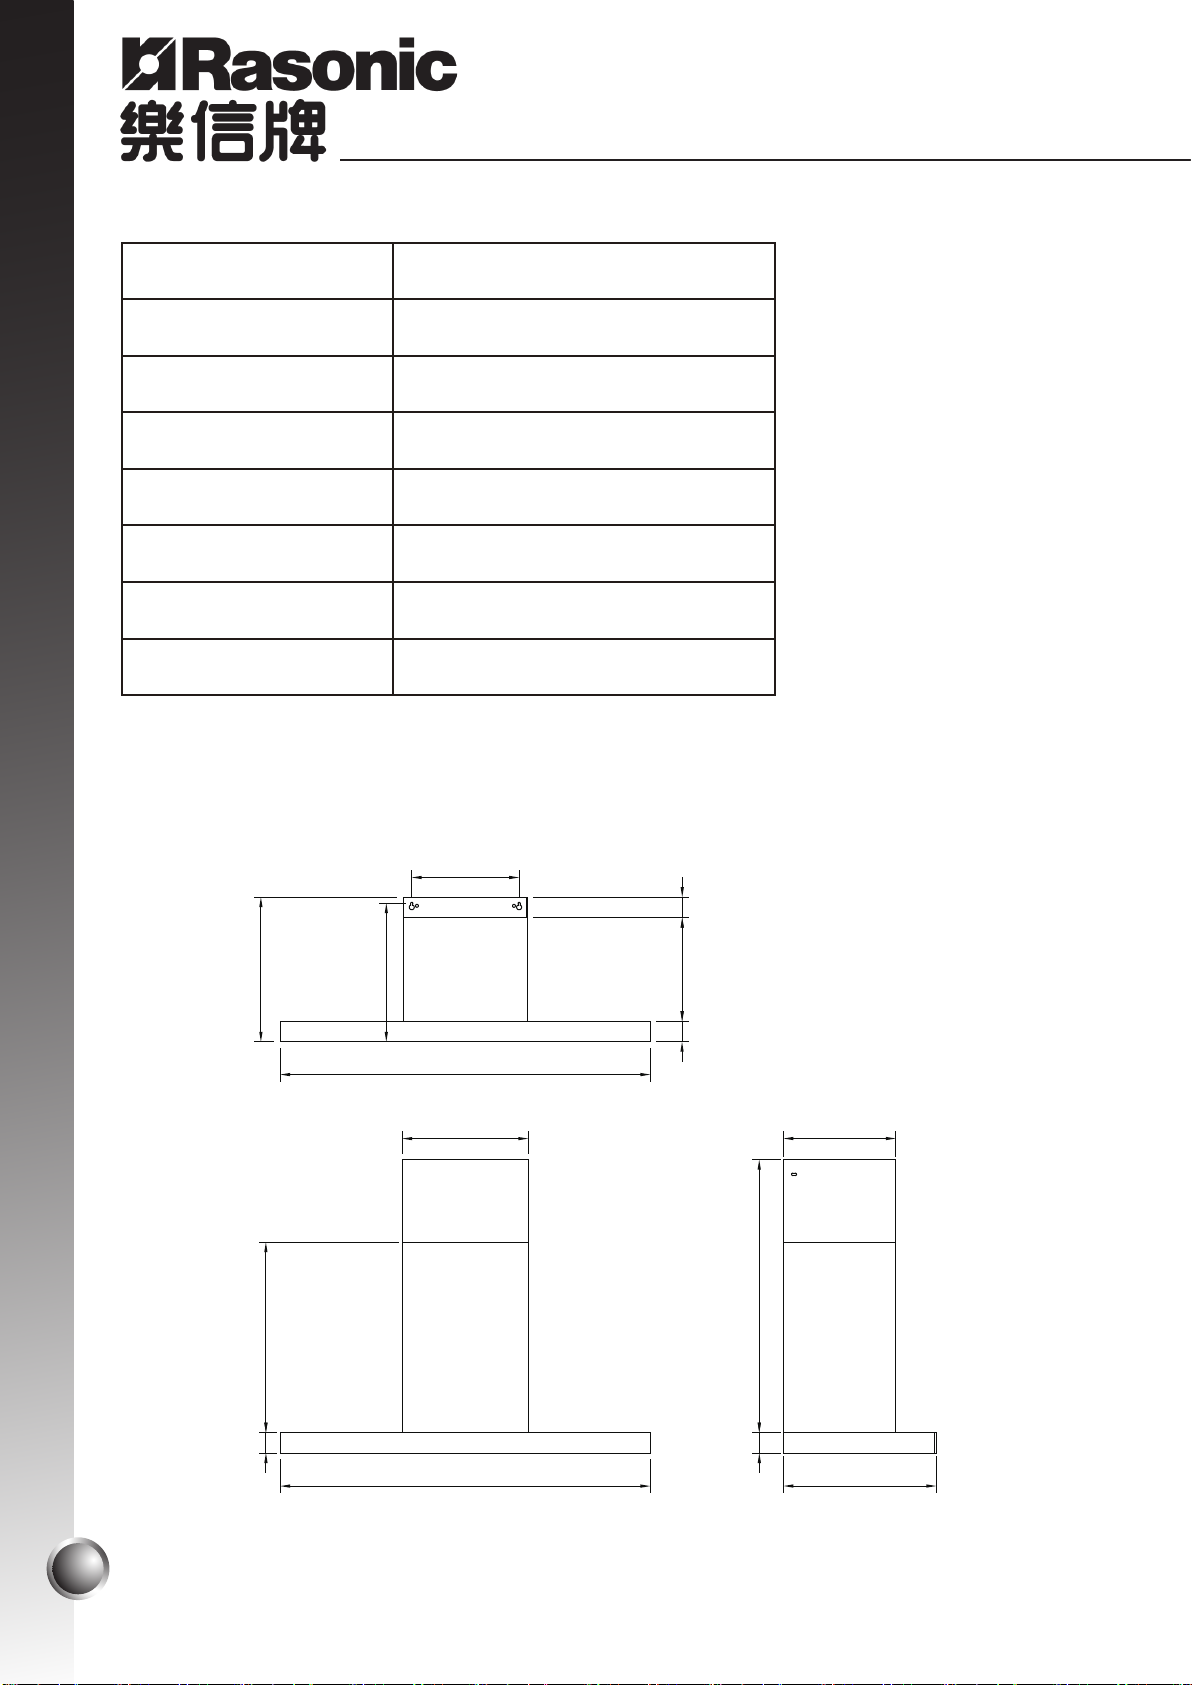
10. 抽油煙機最低部位與爐灶頂部垂直計算必須有65-70厘米的距離。左右必須保持水平,否
則集油杯內的積油可能傾向單邊並溢出機體外。
11. 為確保排氣效率,建議使用5.5吋的排氣喉管。排氣喉應平直排列及避免過長(以1至
1.8米的長度為佳),如不能平直排列,轉彎角的彎度亦應該盡大及不多於兩個彎位。
室外排氣喉口必須向下垂直排風,以防雨水及風倒流破壞抽油煙機。
12. 抽油煙機安裝之周圍,應避免過多門窗而產生太大的空氣對流,導致抽油煙機無法發
揮其排煙效果。
13. 抽油煙機及各部件必須安裝牢固,否則可能引起危險或災害。