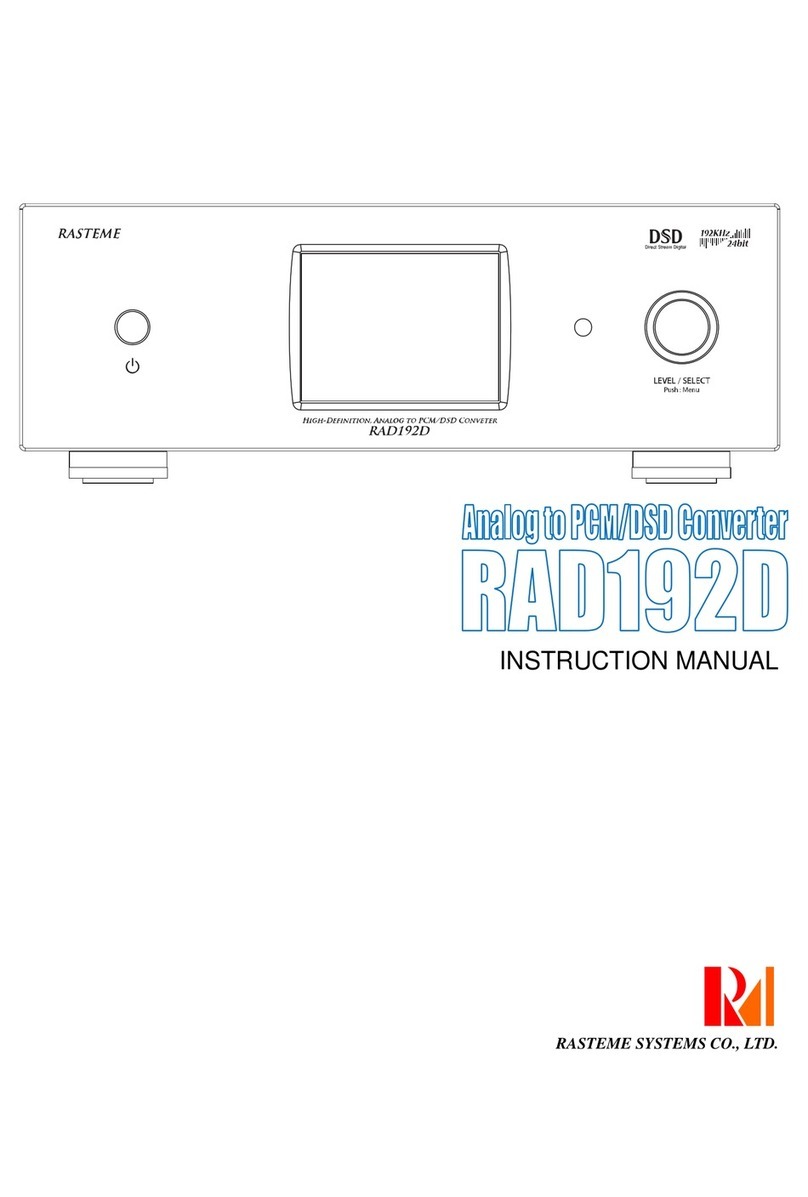
Rasteme Systems UDAC32 User manual

RASTEME SYSTEMS CO., LTD.

- 2 -
CONTENTS
SAFETY NOTICES..........................................................................................................................3
1. Accessories check .......................................................................................................................6
2. Features.......................................................................................................................................7
3. Part names and functions............................................................................................................8
Front panel ...................................................................................................................................8
Rear panel....................................................................................................................................9
4. Notices during connection ...........................................................................................................9
5. Installation of USB audio driver .................................................................................................10
6. Connection Method....................................................................................................................14
6-1. USB audio signal connection..............................................................................................14
6-2. Optical digital signal connection..........................................................................................14
6-3. Coaxial digital signal connection.........................................................................................15
6-5. Headphone connection.......................................................................................................15
6-6. Power cable connection......................................................................................................16
7. Power-on Notice ........................................................................................................................16
8. Operation Method......................................................................................................................17
8-1. Power on ~ possible situations ...........................................................................................17
8-2. Headphone volume adjustment..........................................................................................17
8-3. Input source change ...........................................................................................................18
8-4. Liquid crystal display...........................................................................................................18
8-5. SETTING switch .................................................................................................................19
9. USB Connection Check.............................................................................................................20
9-1. Windows Vista / 7................................................................................................................21
9-2. Windows XP........................................................................................................................24
9-3. MAC OS 10.6.3 or later version..........................................................................................27
10. Abnormal Conditions................................................................................................................29
Main Specifications........................................................................................................................30
External dimension ........................................................................................................................31

- 3 -
SAFETY NOTICES
While using this machine, please follow the following guidelines to secure the safety. The
meanings of the marks are described as below. Please read to understand them.
Warning
It is possible that a user suffers death or serious injury because
of improper use.
Caution It is possible that a user suffers death or serious injury and
property damage because of improper use.
※The so-called property damage is including house, house belongings, livestock, and
related damage such as the pet, etc.
Meaning of marks
The left mark means general caution, warning and hazard.
The left mark means general prohibition.
The left figure means general compulsion ( must do ).

- 4 -
Please observe the following instructions in order to use safely.
Warning
Please do not disassemble or modify this machine
because it may cause electric shock and breakdown.
Please observe the instruction manual to repair or
replace parts. Otherwise, no action should be carried
out.
Please do not use or store this machine in following
places.
•Extremely high temperature place (
under direct
sunlight, near heater, on top of a machine which is
hot and running.)
•Near water (bathroom, washing basins, wet floors
etc.) and humid places
•Dusty place
•Easy-to-vibrate place
•Poor-ventilated place
Please never put any external objects (flammable
things, coins, metal needles etc.) and liquid (water,
juice etc.) into this machine.
Please make sure to insert the power plug into a safety
approved AC100~240V power socket.
Warning
Please do not bend the power cable with force, and do
not put heavy things on power cable. When the power
cable is defective, it may cause fire.
The volume setting may cause permanent unpleasant
volume, please do not use disagreeable high volume
for long time when you combine this machine with an
amplifier and headphone for use. In case of hearing
loss or tinnitus, stop using it at once and consult a
physician.
In following situations, please turn off power at once
and disconnect power cable from power socket, and
ask for repair.
•When the power cable and/or plug is damaged.
•When external objec
ts or liquid goes into the
machine.
•When the machine is wet.
•When the machine fails or malfunctions.
Please do not connect or disconnect power plug with
wet hand as it may cause electric shock.

- 5 -
Caution
Please locate the machine in a well-ventilated
place during use.
Please use the power plug for disconnecting or
connecting the power cable.
If the machine is not in use for a long time,
please disconnect power plug from the power
socket.
When moving this machine, please disconnect
all the cables under disconnecting situation.
Please always install the machine in a flat
location. Unsteady and tilted places should be
avoided.
Do not put volatile gases (pesticides etc.) on
the machine or let it touch gum, vinyl product
for long time.
Please do not use thinner and benzene for
cleaning the machine. Use water-diluted
neutral detergent and moisten with cloths to
wipe.
Caution
When connecting USB, please do not use PCs
with Windows OS prior to XP (Windows 98 / Me
/ NT / 2000). It’ll cause system error, turn the
screen blue and hang up.
To use the machine through USB port, our
special audio driver for Windows XP / Vista / 7 is
required. Please use a CD-ROM to install the
attached driver.
Under Foobar 2000 etc.,
with ASIO driver,
please do not disconnect USB cable or turn off
power while playing. It may cause system error,
turn the screen blue and hang up.
Under MAC, our audio driver only supports
MAC OS 10.6.3 or later version. The older MAC
OS is not guaranteed
Under ASIO and WASAPI, sampling frequency
input during transmission may cause slight pop
noise.

- 6 -
1. Accessories check
Please make sure you have all of the following accessories.
AC Adaptor :1pc (12V 2A)
USB cable (USB (A to B) ) : 1
(for USB Audio)
USB cable (USB (A to mini B)): 1
(for update, image transferring)
Instruction manual :1
UDAC32UTL operation manual :1
CD-ROM :1
** If the above accessories are not complete, please contact the shop where you purchase or
contact us.
** For the cables not included in the above accessories, please purchase separately.

- 7 -
2. Features
•Built in high-end TI PCM1795 192KHz / 32bit DAC IC, also supports D/A converter with
high-performance headphone amplifier,
•The high-end TI TPA6120 IC allows best headphone outputs with 120dB dynamic range and
excellent S/N ration at ultra-low distortion of 0.00014%. The professional TI PGA2320 IC
allows DC amp configuration at maximum 100mW (32 ohm) with 102dB dynamic range and
ultra-low distortion of 0.0003%.
•Special design allows all high performance parts to be enclosed in a compact case and
delivers higher level sound quality and playback excellent atmosphere.
•The S/PDIF (Toslink & COAX) and USB inputs are all compatible with 192 KHz / 24bits.
•The analog output is using standard RCA pin jack.
•USB audio signal is compatible to USB AUDIO 2.0 (High-Speed) digital voice input.
•The USB is compatible with Windows XP / Vista / 7 or later version, and MAC OS 10.6.3 or
later version, also compatible with maximum 192KHz / 24 bit.
•The USB side is digitally isolated to isolate the noise from PC.
•The special Windows drivers are also compatible with ASIO, and WASAPI can also be used
with Vista and Windows 7 to enjoy better quality sound.
•The highly accurate ±1.0ppm TCXO (Temperature Compensated Crystal Oscillator) allows
fast sampling and high bit rate audio data processing, as ideal data, without deterioration.
The +/-1.0ppm TCXO suppresses clock jitter, which is an important factor in audio
deterioration, to achieve sound that is clear and faithful to the audio source.
•The headphone outputs are OCL (output capacitor-less). Without capacitors, the sound is
transmitted directly to achieve crystal clear resolution.
•The headphone terminal is using φ6.5 standard jack.
•The built in 96x96 dot OLED displays shows input sampling rate and can be used as a level
meter.
•The OLED has a broad angle of vision and does not glare like LCD and can be clearly seen
from any angle.
•The circuit for driving OLED is designed for avoiding noises from traditional fluorescent tube
and LCD.
•The OLED screen can be customized by users to display their favorite images from other
sources.
•The USB port can be used to update the firmware. The built-in 96 x 96 dot full color OLED
screen can be customized by users to display logo or images from other sources.
•The use of SMV (Smoothing-Volume) technology allows very fine adjustment of volume,
and a pleasant volume can be maintained without any sudden sharp changes as there are
from analog devices.

- 8 -
3. Part names and functions
Front panel
1 Power switch Turns power ON and OFF.
2 Headphone output Connects a headphone
3 Display area A level meter that displays current input sampling rate and
volume. It can be customized by users to display image
from other sources. For detailed information, please refer
to “8-4. Liquid crystal display”.
4 VOLUME
Push: Select Adjust headphone output volume by turning left and right.
Push to switch the input source.

- 9 -
Rear panel
5 LINE OUTPUT The converted analog signal from D/A (line level) is output.
6 USB AUDIO USB audio signal input from PC.
7 OPTICAL Optical digital audio input (S/PDIF, TOSLINK).
8 COAXIAL 75Ω Coaxial digital audio signal input (S/PDIF, COAX).
9 UPDATE USB When updating the machine or changing the display
images, please refer to separate "UDAC32UTL operation
manual" for usage of connector.
10 SETTING Change various settings. For detailed information, please
refer to “8-5 SETTING switch”.
11 DC IN +12V
Power input To accept power from attached AC power adapter.
4. Notices during connection
•Power switch must be always turned off when connecting power (switch knob is down).
•Please do not connect power cable until all connections are completed.
•Please insert plug firmly.
•Incomplete connection may cause system error and noise.

- 10 -
5. Installation of USB audio driver
The special driver is for Windows XP / Vista / 7 (32bit/64bit compatible) installed PC.
When the CD-ROM driver is inserted in PC, the browser will start, and menu screen will be
automatically displayed.
If the menu is not displayed automatically, please click the index.html on CD-ROM.
Please click the "Installation of UDAC32 USB Audio Driver (Please run first)" from the menu.
In addition, please use Microsoft Internet Explorer browser.
When security warning screen is shown as below, please click “Run (R)”.

- 11 -
If setup screen is started, please click “Next”.
To display next screen, please click “Install”.
Under Windows Vista / 7, if warnings like "User Account Control" and so on appear, it means
allowable, please click “Continue” and “Next”.

- 12 -
Under Windows XP, following process may not be possible to execute and will be skipped.
In that case, the following warning may be hidden in Setup screen. Please try to move mouse to
the Setup screen and click “Continue (C)”.

- 13 -
Under Windows Vista / 7, the following screen will appear.
Under Windows XP, it shows the following screen will appear.
In this case, turn on the power of UDAC32, process the next page of ”6-1. USB audio signal
connection” setting, then clicks “OK”. The installation of driver will be completed very soon.
Under MAC, the standard MAC OS driver 10.6.3 or later version will auto run, the “6-1 USB audio
signal connection” will be auto detected.

- 14 -
6. Connection Method
6-1. USB audio signal connection
Connect the USB terminal of PC to the USB AUDIO connector of this machine. In addition, the
USB driver does not support Windows OS prior to XP (eg. Windows 98 / Me / NT / 2000).
Please be careful! When system error happens, the screen will turn blue and hang up. Under
MAC, please use the standard USB driver for MAC OS 10.6.3 or later version.
The UPDATE USB connector (mini B type) is for data update and
image transmission only. It cannot be used for USB audio input.
For usage of this connector, please refer to the
separate ”UDAC32UTL operation manual”.
6-2. Optical digital signal connection
Digital audio devices (CD, DVD player etc.) connect optical digital output terminal. They can
also be connected to PC screens. (When UDAC32 is used to receive the signals from stereo
linear PCM, it does not support AC3, 5.1ch etc.)

- 15 -
6-3. Coaxial digital signal connection
Digital audio devices (CD, DVD player etc.) connect coaxial digital output terminal (COAX).
(When UDAC32 is used to receive signals from stereo linear PCM, it does not support AC3,
5.1ch etc.)
6-4. Line output signal connection
This machine can convert the input digital audio signal into analog signal (line level). The
digital signal input will become analog signal output through this machine.
It can connect the analog (line) input of Class-D amplifier and Class-A amplifier and so on.
6-5. Headphone connection
Front headphone terminal connects headphone.
The stereo standard plug (φ6.5) headphone should be within 16Ω to 600Ω impedance.
The headphone is not accessory, please purchase separately.

- 16 -
6-6. Power cable connection
Connect the attached AC adapter to the DC INPUT terminal on the back of the machine and
the power plug to the power socket on wall.
7. Power-on Notice
When the power is on, the last volume will appear. So, please make sure the volume
value is suitable when using the headphone.
When the power is on, the audio signal will be on immediately. When the position of
volume is not suitable, it’s possible that the volume may become too loud.
In this case, it may cause too big burden to the ears, and it is extremely dangerous.
Besides, the headphone and the speaker may become out of order.
Please avoid performing following actions within 1 second after the USB cable is
connected because the environment may cause pop noise and damage to the
headphone and the machine.
POWER OFF →Remove USB Cable →Insert USB cable →POWER ON
Performing the above actions, the interval between power OFF and ON should be 10
seconds.

- 17 -
8. Operation Method
8-1. Power on ~ possible situations
1 Please double check whether the connection
is correct or not.
2 When the metal bar is up, the power is ON.
When the metal bard is down, the power is
OFF.
3 When the power is on, the machine will start
the initialization. When the initialization screen
change to “READY” it is ready for use.
8-2. Headphone volume adjustment
1 Please make sure that it is ready for use as
shown on the right figure.
2 Turn the knob to the left (counterclockwise)
and reach the minimum volume value. The
HVOL on the OLED screen will not display any
status.
3
Connect the headphone to the headphone
terminal.
4 Turn the knob to the right (clockwise) slowly to
change to your favorite volume. Turn to the left
(counterclockwise) to turn down the volume.
The volume value will be displayed on the
screen.
** The volume value will be saved after the change. Don’t power off right after the change.
Otherwise, the volume value cannot be saved. Please wait for 5 seconds to power off.

- 18 -
8-3. Input source change
1
Change the input source by pressing the knob.
Press the knob slowly and firmly according to
the following sequence..
OPT → COAX → USB → OPT ... ... ...
Input source setting will be saved after the change. Don’t power off right after the change.
Otherwise, the new input source cannot be saved. Please wait for 5 seconds to power off.
8-4. Liquid crystal display
Top logo area It displays the basic default setting. The full logo area
screen can be customized by users per their preference.
For screen setting, please refer to the description on [8-5
SETTING switch]. In addition, for image creation and
transmission, please refer to the “UDAC32UTL operation
manual”
Input sampling frequency It displays the input audio data. When there is no input
signal, the machine’s corresponding audio format (AC3
etc,) will show [- - - - - -KH
z
].
Level meter It displays the input level and the headphone output level.
For switch method, please refer to the description on “8-5.
SETTING Switch”.
Input level is displayed by [Li], [Ri].
Out level is displayed by [Lo], [Ro].
Volume value Displays the current volume of headphone output.
input source display It displays the current input source.
Optical digital is displayed as “OPT”,
coaxial digital is displayed as “COAX”,
USB Audio is displayed as “USB”.
Please keep the LCD screen from impact or finger touch.

- 19 -
8-5. SETTING switch
You can do various settings.
Switch number Switch status
No. Setting item Screen example
1 : Full screen setting
OFF The default setting displays the screen
of the finished product for delivery.
The top area displays the logo. The
bottom area displays different status.
ON Full user setting screen: Users can
customize their favorite images on full
screen. Then, all status like level
meter and so on cannot be displayed.
2 : Top logo area setting
OFF The default setting displays the screen
of the finished product for delivery.
The top area displays the logo. The
bottom area displays different status.
ON Top user setting screen:
Users can customize their favorite
images on top part of the screen. The
bottom part of the screen displays
different status.
** When switch 1 and 2 are both on, full screen setting is the first priority.
** For image creation and transmission, please refer to "UDAC32UTL operation
manual”.
** If user setting image is not transmitted successfully, it will display the default setting. It
is nothing to do with the ON / OFF switch.

- 20 -
No. Setting item Screen example
3 : Level meter setting
OFF
The level meter displays the
headphone output level.
"Lo" and "Ro" will be displayed on the
left of the level meter.
ON The level meter displays the input
level.
"Li" and "Ri" will be displayed on the
left of the level meter.
4 : Reserve
OFF Normally, please use OFF.
ON Prohibition
9. USB Connection Check
When the machine is connected to a Windows PC USB port, please use the attached special
CD-ROM driver for Windows XP and later version
When it’s a MAC PC, please use the MAC OS Ver10.6.3 and later version. The USB audio device
will be auto detected.
Besides, the Windows XP / Vista / 7 are compatible with ASIO. The Windows Vista / 7 are also
compatible with WASAPI.
* The machine does not support Windows OS prior to Windows 98 / Me / NT / 2000. Please be
careful that when system error happens, the PC screen will appear full blue and hang up.
Table of contents
Other Rasteme Systems Media Converter manuals
Popular Media Converter manuals by other brands

StarTech.com
StarTech.com HDMI2HDMI instruction manual

StarDental
StarDental DentalEZ Titan Blis-sonic K 264564 instruction manual

Cerio
Cerio FPOE-MPD80 user guide

Panduit
Panduit Atlona AT-HDR-M2C manual

MSB Technology
MSB Technology Platinum Studio ADC user manual

Neousys Technology
Neousys Technology PCIe-USB380/340 user manual