manuals.online logo
Brands
  1. Home
  2. •
  3. Brands
  4. •
  5. Rayline
  6. •
  7. Toy
  8. •
  9. Rayline R100G User manual

Rayline R100G User manual

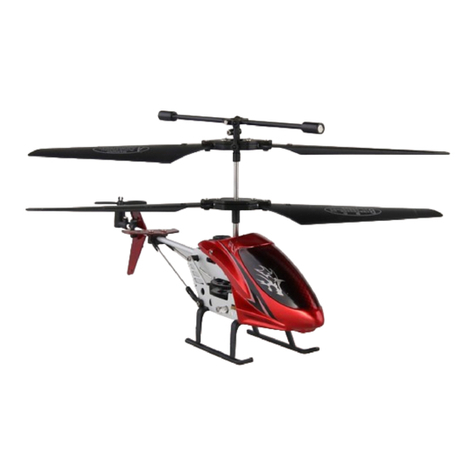
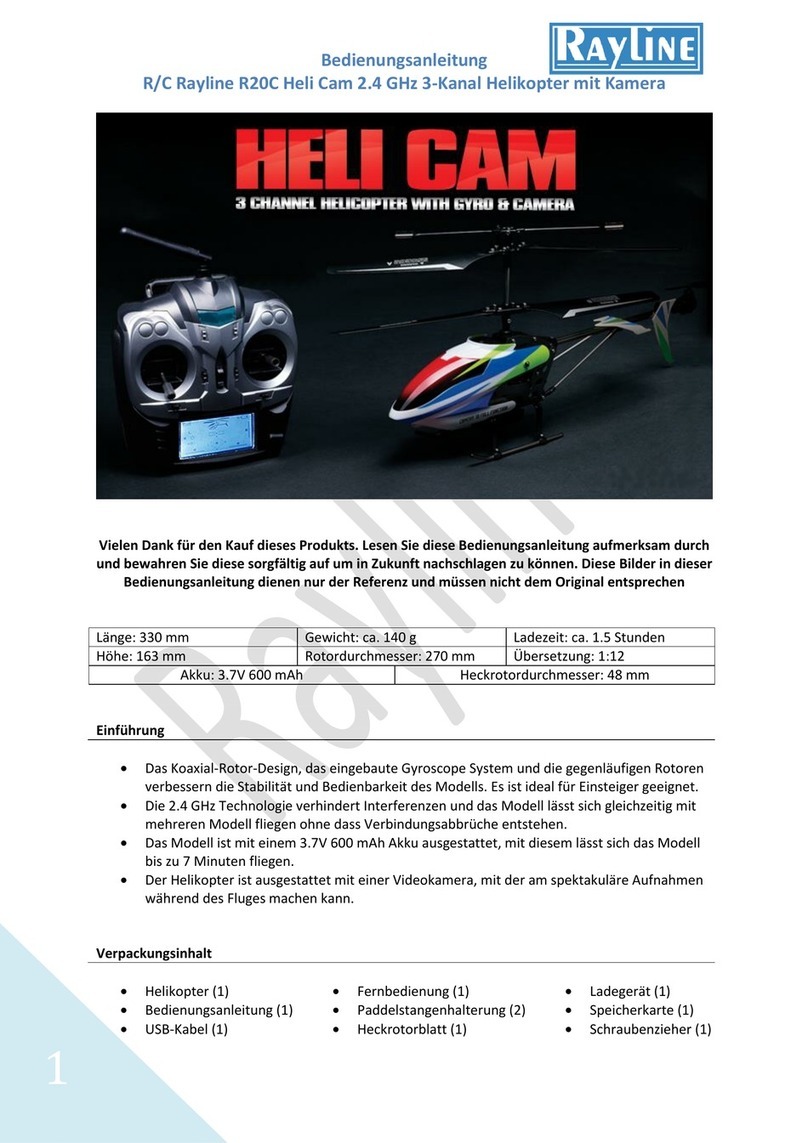
R/C Rayline „R100G“
1
DE Bedienungsanleitung
Vielen Dank für den Kauf dieses Produkts. Lesen Sie diese Bedienungsanleitung aufmerksam durch
und bewahren Sie diese sorgfältig auf um in Zukunft nachschlagen zu können. Die Bilder in dieser
Bedienungsanleitung dienen nur der Referenz und müssen nicht dem Original entsprechen.
GB Manual
Thank you for purchasing this product. Read these instructions carefully and keep them in a safe
place for easy reference in the future. The pictures in this manual are for reference only and may not
match the original.
FR Manuel
Merci d'avoir acheté ce produit. Lisez attentivement ces instructions et les conserver dans un endroit
sûr pour s'y référer facilement à l'avenir. Les images de ce manuel sont fournies à titre indicatif et
peuvent ne pas correspondre à l'original.
NL Handboek
Dank u voor de aankoop van dit product. Lees deze instructies aandachtig en bewaar ze op een
veilige plaats voor gemakkelijke verwijzing in de toekomst. De afbeeldingen in deze handleiding zijn
alleen ter referentie en mag niet overeen met het origineel.
ES Manual
Gracias por comprar este producto. Lea atentamente estas instrucciones y guárdelas en un lugar
seguro para referencia en el futuro. Las imágenes de este manual son sólo de referencia y pueden no
coincidir con el original.
PL Ręczny
Dziękujemy za zakup tego produktu. Te należy dokładnie przeczytać i przechowywać je w
bezpiecznym miejscu, aby łatwo w przyszłości. Rysunki w tej instrukcji są tylko w celach
informacyjnych i nie mogą odpowiadać oryginałowi.
IT Manuale
Grazie per aver acquistato questo prodotto. Leggere attentamente le istruzioni e conservarle in un
luogo sicuro per un facile riferimento in futuro. Le immagini in questo manuale sono solo di
riferimento e potrebbero non corrispondere all'originale.
R/C Rayline „R100G“
2
DE Batterieinstallation
Öffnen Sie das Batteriefach auf der Rückseite der Fernbedienung mit deinem
Schraubenzieher.
Legen Sie nun 6x „AA“ Batterien in die Fernbedienung ein. Achten Sie hierbei auf die korrekte
Polarität.
Schließen Sie nun erneut das Batteriefach.
GB Battery Installation
Open the battery compartment on the back of the remote with your screwdriver.
Now put 6x "AA" batteries into the remote control. Pay attention to the correct polarity.
Now close the battery compartment again.
FR Installation de la batterie
Ouvrez le compartiment des piles au dos de la télécommande avec votre tournevis.
Maintenant, mettez batteries 6x "AA" dans la télécommande. Faites attention à la polarité.
Maintenant refermer le compartiment de la batterie.
NL Batterij plaatsen
Open het batterijvak aan de achterkant van de afstandsbediening met uw schroevendraaier.
Zet nu 6x "AA" batterijen in de afstandsbediening. Let op de juiste polariteit.
Nu sluit het batterijvak weer.
ES Instalación de las pilas
Abra el compartimiento de la batería en la parte posterior del mando a distancia con el
destornillador.
Ahora ponga las pilas 6x "AA" en el mando a distancia. Preste atención a la polaridad
correcta.
Ahora cerrar el compartimento de las pilas de nuevo.
PL Instalacja baterii
Otwórz komorę baterii z tyłu pilota z śrubokrętem.
Teraz umieścić 6x "AA" baterie do pilota. Należy zwrócić uwagę na prawidłową polaryzację.
Teraz zamknij komorę baterii ponownie.
IT Installazione della batteria
Aprire il vano batterie sul retro del telecomando con il cacciavite.
Ora mettere 6x batterie "AA" nel telecomando. Fare attenzione alla corretta polarità.
Ora richiudere il vano batterie.
DE Ladevorgang
Ladevorgang A:
Öffnen Sie die Abdeckung an der Vorderseite der Fernbedienung, dort befindet sich ein
Ladekabel. Schließen Sie nun das Ende des Ladekabels an den Ladeanschluss des Helikopters.
Die Statusleuchte der Fernbedienung wechselt nun von grün zu rot. Eine volle Akkuladung
benötigt 40-50 Minuten. Die Statusleuchte wechselt wieder auf grün sobald der Helikopter
aufgeladen ist.
R/C Rayline „R100G“
3
Ladevorgang B:
Schließen Sie das mitgelieferte USB-Ladekabel an einen Computer an. Stecken Sie nun das
USB-Ladekabel auch an den Helikopter an. Eine volle Akkuladung benötigt 40-50 Minuten.
Sobald der Helikopter geladen ist, leuchtet die Statusleuchte am Ladekabel auf.
GB Charging
Charging A:
Open the cover on the front of the remote, there is a charging cable. Now connect the end of
the charging cable into the charging port of the helicopter. Now the status light on the
remote control will change from green to red. A full battery charge requires 40-50 minutes.
The status light changes back to green once the helicopter is charged.
Charging B:
Connect the supplied USB charging cable to a computer. Plug the USB charging cable also to
the helicopter. A full battery charge requires 40-50 minutes. Once the helicopter is charged,
the lamp lights up on the charger.
FR Charge
Charge A:
Ouvrir le couvercle sur la face avant de la télécommande, il existe un câble de charge.
Maintenant, connectez l'extrémité du câble de chargement dans le port de chargement de
l'hélicoptère. Maintenant, le voyant d'état de la télécommande passera du vert au rouge.
Une charge complète de la batterie nécessite 40-50 minutes. Le voyant d'état repasse au vert
lorsque l'hélicoptère est chargée.
Charge B:
Branchez le câble USB fourni charge à un ordinateur. Branchez le câble de recharge USB aussi
à l'hélicoptère. Une charge complète de la batterie nécessite 40-50 minutes. Une fois
l'hélicoptère est chargé, le voyant s'allume sur le chargeur.
NL Opladen
Opladen A:
Open het klepje aan de voorkant van de afstandsbediening, is er een oplaadkabel. Sluit nu
het einde van de laadkabel in de vulopening van de helikopter. Nu is het statuslampje op de
afstandsbediening verandert van groen naar rood. Een volledig opgeladen batterij vergt 40-
50 minuten. Het statuslampje verandert naar groen zodra de helikopter is opgeladen.
Opladen B:
Sluit de meegeleverde USB-oplaadkabel aan op een computer. Steek de USB-laadkabel ook
voor de helikopter. Een volledig opgeladen batterij vergt 40-50 minuten. Zodra de helikopter
is opgeladen, het lampje op de oplader.
ES Carga
Carga A:
Abra la tapa de la parte frontal del mando a distancia, hay un cable de carga. Ahora conecte
el extremo del cable de carga en el puerto de carga del helicóptero. Ahora la luz de estado
del mando a distancia cambiará de verde a rojo. Una carga completa de la batería requiere
de 40 a 50 minutos. La luz de estado cambia a verde una vez que el helicóptero está cargada.
Carga B:
Conecte el cable de carga USB suministrado al ordenador. Conecte el cable de carga USB
también al helicóptero. Una carga completa de la batería requiere de 40 a 50 minutos. Una
vez que el helicóptero está cargada, la lámpara se enciende para arriba en el cargador.
PL Ładowanie
Ładowanie A:
Otwórz pokrywę z przodu pilota, jest kabel do ładowania. Teraz połączyć końcówkę kabla
ładowania do portu ładowania śmigłowca. Teraz światło statusu na pilocie zmieni się z
zielonego na czerwony.Pełne naładowanie baterii wymaga 40-50 minut.Lampka stanu
zmienia się z powrotem na zielono raz helikopter jest naładowany.
R/C Rayline „R100G“
4
Ładowanie B:
Podłącz dostarczony kabel USB do ładowania do komputera. Podłącz kabel USB do ładowania
także do śmigłowca.Pełne naładowanie baterii wymaga 40-50 minut. Gdy helikopter jest
naładowany, zapala się lampka na ładowarce.
IT Ricarica
Ricarica A:
Aprire il coperchio sulla parte anteriore del telecomando, c'è un cavo di carico. Ora collegare
l'estremità del cavo di ricarica nella porta di ricarica dell'elicottero. Ora la spia di stato sul
telecomando passa da verde a rosso. Una carica completa della batteria richiede 40-50
minuti. La spia di stato cambia torna a verde una volta che l'elicottero è carica.
Ricarica B:
Collegare il cavo di ricarica al computer USB in dotazione. Collegare il cavo di ricarica anche
per l'elicottero USB. Una carica completa della batteria richiede 40-50 minuti. Una volta che
l'elicottero è carica, la spia sul caricabatterie.
DE Flugvorbereitung
Stellen Sie den Helikopter und die Fernbedienung auf die gleiche Frequenz ein.
Schalten Sie den Helikopter ein. Nun leuchtet die Statusleuchte auf.
Stellen Sie den Helikopter auf eine Ebene.
Schalten Sie nun die Fernbedienung ein. Nun schieben Sie den Gashebel (links) nach ganz
oben und anschließend direkt wieder nach unten.
Nun ist die Verbindung zwischen Helikopter und Fernbedienung hergestellt.
GB Flight Preparation
Set the helicopter and the remote control at the same frequency.
Turn on the helicopter. Now, the status light comes on.
Set Helicopter to a plane
Now switch on the remote control. Now move the throttle lever (left) to the top right and
then back down.
Now the connection between helicopter and remote control is established.
FR La préparation du vol
Réglez l'hélicoptère et la télécommande à la même fréquence.
Allumez l'hélicoptère. Maintenant, le voyant d'état s'allume.
Réglez. Hélicoptère à un plan
Maintenant, passez sur la télécommande. Maintenant, déplacez la manette des gaz (à
gauche) en haut à droite, puis vers le bas.
Maintenant, le lien entre l'hélicoptère et la télécommande est établie.
NL Vluchtvoorbereiding
Stel de helikopter en de afstandsbediening op dezelfde frequentie.
Schakel de helikopter. Nu, het statuslampje gaat branden.
Ingesteld. Helikopter op een vliegtuig
Schakel nu de afstandsbediening. Beweeg nu de gashendel (links) naar de top rechts en dan
weer naar beneden.
Nu is de verbinding tussen helikopter en de afstandsbediening is ingesteld.
R/C Rayline „R100G“
5
ES preparación del vuelo
Ajuste el helicóptero y el mando a distancia en la misma frecuencia.
Encienda el helicóptero. Ahora, a la luz de estado se enciende.
Establecer. Helicóptero a un plano
Ahora conectar el mando a distancia. Ahora mueva la palanca del acelerador (a la izquierda)
a la parte superior derecha y luego hacia abajo.
Ahora se establece la conexión entre el helicóptero y el control remoto.
PL Przygotowanie lotu
Ustaw helikopter i pilota na tej samej częstotliwości.
Włącz helikoptera. Teraz, lampka stanu zapala się.
Ustaw. Śmigłowca do samolotu
Teraz przełącz na pilocie zdalnego sterowania. Teraz przesuń dźwignię przepustnicy (po
lewej) w prawym górnym rogu, a następnie z powrotem w dół.
Teraz połączenie między pilotem śmigłowca i ma swoją siedzibę.
IT Preparazione del volo
Impostare l'elicottero e il telecomando con la stessa frequenza.
Accendere l'elicottero. Ora, la spia di stato si accende.
Impostare. Elicottero ad un piano
Ora accendere il telecomando. Ora spostare la leva del gas (a sinistra) in alto a destra e poi di
nuovo giù.
Ora viene stabilita la connessione tra elicottero e telecomando.
DE Bedienung
Drücken Sie den Gashebel nach oben und der Helikopter steigt hoch. Lassen Sie den
Gashebel runter, senkt sich der Helikopter.
Drücken Sie den Steuerhebel nach rechts oder links, nun dreht sich der Helikopter in die
entsprechende Richtung
Drücken den Steuerhebel vorwärts und der Helikopter fliegt nach vorne.
Drücken den Steuerhebel nach hinten und der Helikopter fliegt rückwärts.
GB Operation
Press the throttle lever and the helicopter rises up. Let down the throttle, the helicopter
lowers.
Press the joystick to the right or to the left, now the helicopter turns in the appropriate
direction
Press the control lever forward and the helicopter flies forward.
Press the control lever back and the helicopter flying backwards.
FR Opération
Appuyez sur la manette des gaz et l'hélicoptère se lève. Soit on coupe les gaz, l'hélicoptère
s'abaisse.
Appuyez sur le joystick vers la droite ou vers la gauche, maintenant l'hélicoptère tourne dans
le bon sens
Appuyez sur le levier de commande vers l'avant et l'hélicoptère vole vers l'avant.
Appuyez sur l'arrière du levier de commande et l'hélicoptère en vol vers l'arrière.
NL Operatie
Druk op de gashendel en de helikopter stijgt. In de steek gelaten de gashendel, de helikopter
verlaagt.
Druk op de joystick naar rechts of naar links, nu de helikopter draait in de juiste richting
Druk op de bedieningshendel naar voren en de helikopter vliegt naar voren.
Druk op de hendel terug en de helikopter vliegen achteruit.
R/C Rayline „R100G“
6
ES Operación
Presione la palanca del acelerador y el helicóptero se eleva. Que cierre el gas, el helicóptero
desciende.
Pulse el mando de control hacia la derecha o hacia la izquierda, ahora el helicóptero gira en
la dirección adecuada
Presione la palanca de control hacia adelante y el helicóptero vuela hacia adelante.
Presione la palanca de control y el helicóptero volando hacia atrás.
PL Operacja
Naciśnij dźwignię przepustnicy i helikopter wznosi się. Let down przepustnicę, helikopter
obniża.
Naciśnij joystick w prawo lub w lewo, teraz helikopter obraca się w odpowiednim kierunku
Naciśnij dźwignię do przodu i helikopter leci do przodu.
Naciśnij przycisk z tyłu dźwigni sterowania i helikopter latający do tyłu.
IT Operazione
Premere la leva del gas e l'elicottero si alza. Lasciate giù la valvola a farfalla, l'elicottero si
abbassa.
Premere il joystick verso destra o verso sinistra, ora l'elicottero gira nella direzione
appropriata
Premere la leva di comando in avanti e l'elicottero vola in avanti.
Premere la leva di comando e l'elicottero volare all'indietro.
DE Trimmung
Sollte der Helikopter sich drehen, ohne dass ein Signal von der Fernbedienung ausgeht nutzen Sie die
Trimmung um dies auszugleichen.
GB Trim
If the helicopter turn without a signal from the remote control runs out you use the trim to
compensate for this.
FR Coupez
Si le tour d'hélicoptère sans signal de la télécommande s'épuise vous utilisez la garniture pour
compenser cela.
NL Trimmen
Als de helikopter weer zonder een signaal van de afstandsbediening leeg is u de trim te gebruiken om
dit te compenseren.
ES Recortar
Si el giro del helicóptero sin señal del mando a distancia se queda sin utilizar el ajuste para
compensar esto.
PL Trym
Jeżeli kolej helikopter bez sygnału z pilota zabraknie użyć trim to zrekompensować.
IT Trim
Se il turno elicottero senza un segnale dal telecomando si esaurisce si usa il trim per compensare
questo.
R/C Rayline „R100G“
7
DE Hinweise
Achten Sie darauf, dass Sie nicht unter starken Sonneneinstrahlung oder großen Lichtquellen
fliegen, dies könnte Interferenzen hervorrufen.
Es wird empfohlen den Helikopter innen zu nutzen.
Achten Sie darauf, dass die Fernbedienung immer direkten Kontakt zum Helikopter besitzt.
Achten Sie auf Luftverwirbelungen aus z.B. Klimaanlagen oder Ventilatoren, die könnte den
Flug Ihres Helikopters beeinflussen. Achten Sie auch auf zerbrechliche Gegenstände oder
Dinge die Sie beschädigen könnten.
Suchen Sie sich eine große Fläche. Es wird eine Fläche von 6 m x 9 m x 3 m
(Breite/Länge(Höhe) empfohlen.
GB Notes
Make sure that you do not fly in strong sunlight or large light sources, this could cause
interference.
It is recommended to use the helicopter inside.
Make sure that the remote control has always direct contact with the helicopter.
Look for air turbulence from example Air conditioners or fans, which could affect the flight of
your helicopter. Make sure you also might damage fragile objects or things.
Find yourself a large area. It is (height) recommended an area of 6 mx 9 mx 3 m (width /
length.
FR Remarques
Assurez-vous que vous ne volez pas en plein soleil ou grandes sources de lumière, ce qui
pourrait provoquer des interférences.
Il est recommandé d'utiliser l'hélicoptère à l'intérieur.
Assurez-vous que la télécommande a toujours un contact direct avec l'hélicoptère.
Recherchez les turbulences de l'air de l'exemple Climatiseurs ou des ventilateurs d'air, ce qui
pourrait affecter le vol de votre hélicoptère. Assurez-vous que vous pourriez également
endommager les objets fragiles ou de choses.
Trouvez-vous une grande surface. Il est (hauteur) a recommandé une superficie de 6 mx 9 mx
3 m (largeur / longueur.
R/C Rayline „R100G“
8
NL Aantekeningen
Zorg ervoor dat u niet vliegen in sterk zonlicht of grote lichtbronnen, kan dit storingen
veroorzaken.
Het wordt aanbevolen om de helikopter binnen te gebruiken.
Zorg ervoor dat de afstandsbediening heeft altijd direct contact met de helikopter.
Kijk voor luchtturbulentie van bijvoorbeeld Airconditioners en ventilatoren, die de vlucht van
uw helikopter kunnen beïnvloeden. Zorg ervoor dat u misschien ook breekbare voorwerpen
of dingen beschadigen.
Zoek jezelf een groot gebied. Het is (hoogte) aanbevolen een oppervlakte van 6 mx 9 mx 3 m
(breedte / lengte.
ES Notas
Asegúrese de que usted no vuela en la luz solar o grandes fuentes de luz, esto podría causar
interferencias.
Se recomienda utilizar el helicóptero en el interior.
Asegúrese de que el mando a distancia tiene siempre el contacto directo con el helicóptero.
Busque la turbulencia del aire del ejemplo Acondicionado o ventiladores de aire, lo que
podría afectar el vuelo de su helicóptero. Asegúrese de que también puede dañar los objetos
frágiles o cosas.
Búscate un área grande. Se (altura) recomienda un área de 6 mx 9 mx 3 m (ancho / largo).
PL Notatki
Upewnij się, że nie latają w silnym świetle słonecznym lub w wielkich źródeł światła, może to
powodować zakłócenia.
Zaleca się, aby stosować śmigłowiec wewnątrz.
Upewnij się, że pilot ma zawsze bezpośredni kontakt z helikoptera.
Sprawdzić turbulencji z przykładu Klimatyzatory i wentylatory, które mogą mieć wpływ na lot
helikoptera. Upewnij się, że również może uszkodzić delikatne przedmioty lub rzeczy.
Znajdź sobie duży obszar. Jest (wysokość) zalecany obszar 6 mx 9 mx 3 m (szerokość /
długość.
IT Note
Assicurarsi che non si vola in forte luce solare o grandi fonti di luce, questo potrebbe causare
interferenze.
Si consiglia di utilizzare l'elicottero dentro.
Assicurarsi che il telecomando ha sempre il contatto diretto con l'elicottero.
Cercare turbolenza dell'aria da esempio Condizionatori o ventilatori, che potrebbero
influenzare il volo di un elicottero. Assicurarsi che si potrebbe anche danneggiare gli oggetti
fragili o cose.
Vi troverete una vasta area. E '(altezza) raccomanda una superficie di 6 mx 9 mx 3 m
(larghezza / lunghezza.
DE Sicherheitsrichtlinien
Dieses Produkt ist kein Spielzeug. Es wird empfohlen das Produkt erst ab 14 Jahren zu
verwenden.
Bitte lesen Sie die Bedienungsanleitung sorgfältig durch bevor Sie es in Betrieb nehmen.
Der Benutzer ist in vollem Umfang für die richtige Bedienung des Helikopters verantwortlich.
Der Hersteller und die Händler lehnen jegliche Verantwortung für den Schaden, der durch
unsachgemäßen Gebrauch entstanden ist ab.
Halten Sie Kleinteile fern von Kleinkindern.
Halten Sie Batterien und Akkus fern von großer Hitze oder offenen Feuer.
Halten Sie einen Sicherheitsabstand von 1-2 Meter um sich oder andere vor Verletzungen zu
schützen.
R/C Rayline „R100G“
9
Demontieren oder modifizieren Sie dieses Produkt nicht, dies könnte zu Fehlfunktionen und
Unfälle verursachen.
Fliegen Sie den Helikopter nur in Ihrem Sichtfeld.
Der Helikopter darf nur in Aufsicht von Erwachsenen benutzt werden.
Nur Batterien und Akkus des gleichen oder gleichwertigen Typs dürfen verwendet werden.
Achten Sie beim Einlegen von Akkus und Batterien immer auf die korrekte Polarität.
Nicht wiederauflbare Batterien dürfen nicht geladen werden.
Mischen Sie keine alten und neuen Batterien.
GB Security Policies
This product is not a toy. It is recommended to use the product only after 14 years.
Please read the manual carefully before operating it.
The user is responsible for the proper operation of the helicopter in full.
The manufacturer and its distributors disclaim any responsibility for the damage caused by
improper use.
Keep small parts away from young children.
Keep batteries away from excessive heat or open flame.
Keep a safe distance of 1-2 meters to themselves or others, to protect against injury.
Never disassemble or modify this product, it may cause malfunction and accidents.
Fly the helicopter just in your field of vision.
The helicopter may be used only in adult supervision.
Only batteries of the same or equivalent type may be used.
When installing batteries and batteries always observe the correct polarity.
Not wiederauflbare batteries should not be charged.
Do not mix old and new batteries.
FR Politiques de sécurité
Ce produit n'est pas un jouet. Il est recommandé d'utiliser le produit seulement après 14 ans.
S'il vous plaît lire attentivement le manuel avant de l'utiliser.
L'utilisateur est responsable du bon fonctionnement de l'hélicoptère dans son intégralité.
Le fabricant et ses distributeurs déclinent toute responsabilité pour les dommages causés par
une mauvaise utilisation.
Gardez les pièces détachées hors de jeunes enfants.
Gardez les piles hors de la chaleur et des flammes nues.
Maintenez une distance sécuritaire de 1-2 mètres à eux-mêmes ou d'autres personnes, pour
protéger contre les blessures.
Ne jamais démonter ou modifier ce produit, il peut provoquer des dysfonctionnements et
accidents.
Piloter l'hélicoptère juste dans votre champ de vision.
L'hélicoptère peut être utilisé que dans la surveillance d'adultes.
Seules les piles de type identique ou équivalent peut être utilisé.
Lors de l'installation des piles et des batteries toujours respecter la polarité.
Pas de piles wiederauflbare ne devraient pas être facturés.
Ne pas mélanger piles neuves et anciennes.
NL Beveiligingsbeleid
Dit product is geen speelgoed. Het wordt aanbevolen om het product te gebruiken pas na 14
jaar.
Lees de handleiding voordat het.
De gebruiker is verantwoordelijk voor de goede werking van de helikopter in volle.
De fabrikant en zijn distributeurs wijzen elke verantwoordelijkheid voor de schade
veroorzaakt door oneigenlijk gebruik.
Houd kleine onderdelen uit de buurt van jonge kinderen.
Houd batterijen uit de buurt van grote hitte of open vuur.
R/C Rayline „R100G“
10
Houd een veilige afstand van 1-2 meter voor zichzelf of anderen, te beschermen tegen
verwondingen.
Nooit demonteren of wijzigen van dit product, kan het storingen en ongelukken veroorzaken.
Vliegt de helikopter alleen in uw gezichtsveld.
De helikopter mag alleen worden gebruikt in toezicht van een volwassene.
Alleen batterijen van hetzelfde of een soortgelijk type worden gebruikt.
Bij het installeren van batterijen en accu's altijd de juiste polariteit.
Niet wiederauflbare batterijen mogen niet worden opgeladen.
Gebruik geen oude en nieuwe batterijen door elkaar.
ES Políticas de Seguridad
Este producto no es un juguete. Se recomienda utilizar el producto sólo después de 14 años.
Por favor, lea atentamente el manual antes de usarla.
El usuario es responsable de la operación correcta del helicóptero en su totalidad.
El fabricante y sus distribuidores declinan toda responsabilidad por los daños causados por
un uso inadecuado.
Mantenga las piezas pequeñas fuera del alcance de los niños pequeños.
Mantenga las pilas lejos del calor excesivo o fuego.
Mantenga una distancia de seguridad de 1 a 2 metros a sí mismos oa otros, para proteger
contra las lesiones.
Nunca desarme ni modifique este producto, puede causar un mal funcionamiento y
accidentes.
Volar el helicóptero justo en su campo de visión.
El helicóptero puede ser utilizado sólo en la supervisión de adultos.
Sólo se pueden utilizar pilas del mismo tipo o equivalente.
Al instalar las baterías y las pilas observe siempre la polaridad correcta.
No wiederauflbare baterías no deben ser cargadas.
No mezcle pilas nuevas y viejas.
PL Zasady bezpieczeństwa
Ten produkt nie jest zabawką. Zaleca się stosowanie produktu tylko po 14 lat.
Proszę uważnie przeczytać instrukcję przed uruchomieniem go.
Użytkownik jest odpowiedzialny za prawidłowe działanie śmigłowca w całości.
Producent i jego dystrybutorzy nie ponoszą odpowiedzialności za szkody spowodowane
niewłaściwym użytkowaniem.
Niewielkie elementy z dala od małych dzieci.
Trzymaj baterie z dala od źródeł ciepła lub otwartego ognia.
Zachowaj bezpieczną odległość 1-2 metrów do siebie lub innych, w celu ochrony przed
skaleczeniem.
Nie wolno demontować ani modyfikować urządzenia, może to spowodować awarię i
wypadków.
Lataj helikopterem po prostu w swoim polu widzenia.
Śmigłowiec może być stosowane wyłącznie w nadzorem osoby dorosłej.
Akumulatora tego samego typu lub odpowiedniki mogą być stosowane.
Podczas instalacji baterii i akumulatorów należy przestrzegać właściwej polaryzacji.
Nie wiederauflbare baterie nie powinny być pobierane.
Nie mieszaj starych i nowych baterii.
IT Politiche di sicurezza
Questo prodotto non è un giocattolo. Si raccomanda di utilizzare il prodotto solo dopo 14
anni.
Si prega di leggere attentamente il manuale prima di utilizzarlo.
L'utilizzatore è responsabile del corretto utilizzo dell'elicottero in pieno.
R/C Rayline „R100G“
11
Il produttore ei suoi distributori declinano ogni responsabilità per i danni causati da un uso
improprio.
Tenere le parti piccole lontano da bambini.
Tenere lontane le batterie da fonti di calore o fiamme libere.
Mantenere una distanza di sicurezza di 1-2 metri a se stessi o altri, per evitare infortuni.
Non smontare o modificare il prodotto, può causare malfunzionamenti e incidenti.
Volare l'elicottero proprio nel vostro campo visivo.
L'elicottero può essere utilizzato solo in supervisione di un adulto.
Solo batterie dello stesso tipo o equivalenti possono essere utilizzati.
Quando si installano le batterie e le batterie osservare sempre la corretta polarità.
Non wiederauflbare batterie non devono essere ricaricate.
Non mischiare batterie vecchie e nuove.

Other Rayline Toy manuals

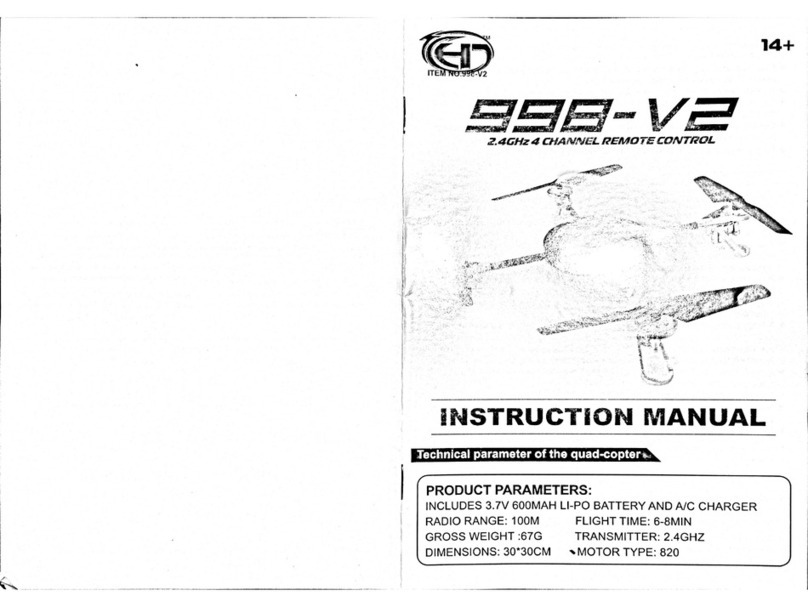
Rayline 998-V2 User manual

Rayline

Rayline 998-V2 User manual

Rayline R202 User manual

Rayline

Rayline R202 User manual

Rayline R120 User manual

Rayline

Rayline R120 User manual

Rayline R200 User manual

Rayline

Rayline R200 User manual

Rayline R20C User manual

Rayline

Rayline R20C User manual

Rayline S04-1 User manual

Rayline

Rayline S04-1 User manual

Rayline R300 User manual

Rayline

Rayline R300 User manual

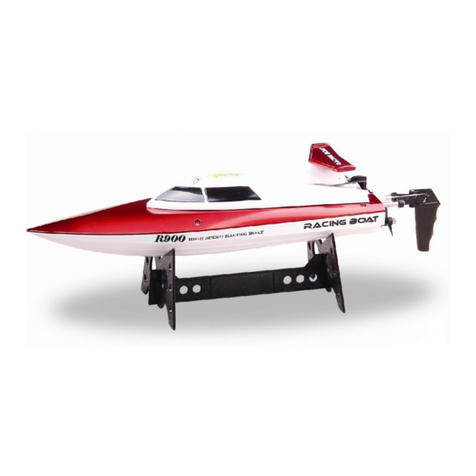
Rayline R900 User manual

Rayline

Rayline R900 User manual

Popular Toy manuals by other brands

Dynam PBY Catalina instruction manual

Dynam

Dynam PBY Catalina instruction manual

UGEARS 70 series manual

UGEARS

UGEARS 70 series manual

Eduard Weekend I-16 TYPE 10 quick start guide

Eduard

Eduard Weekend I-16 TYPE 10 quick start guide

Madcow Rocketry Frenzy instructions

Madcow Rocketry

Madcow Rocketry Frenzy instructions

Hasbro FurReal Kitten-Figaro 70079/70077 instruction manual

Hasbro

Hasbro FurReal Kitten-Figaro 70079/70077 instruction manual

Eduard 32 984 quick start guide

Eduard

Eduard 32 984 quick start guide

Tower Hobbies Power  Vee instruction manual

Tower Hobbies

Tower Hobbies Power Vee instruction manual

Sopwith Pup BALSAWOOD MINI instruction manual

Sopwith Pup

Sopwith Pup BALSAWOOD MINI instruction manual

Moni Toys VICKY PINK Operating instructions and assembly manual

Moni Toys

Moni Toys VICKY PINK Operating instructions and assembly manual

Dynam E-Razor instruction manual

Dynam

Dynam E-Razor instruction manual

Canon PAPER CRAFT Moving Tiger through o ring of... Assembly instructions

Canon

Canon PAPER CRAFT Moving Tiger through o ring of... Assembly instructions

Eduard M-4 Tractor 90mm quick start guide

Eduard

Eduard M-4 Tractor 90mm quick start guide

Seagull Models TEMPEST DRAGON 15cc ARF Assembly manual

Seagull Models

Seagull Models TEMPEST DRAGON 15cc ARF Assembly manual

marklin 30301 instruction manual

marklin

marklin 30301 instruction manual

Mega Bloks Collector Series instructions

Mega Bloks

Mega Bloks Collector Series instructions

Tiger Electronics Jurassic Park Spinosaurus Keychain instructions

Tiger Electronics

Tiger Electronics Jurassic Park Spinosaurus Keychain instructions

Bachmann Ivatt Mogul 2-6-0 Assembly instructions

Bachmann

Bachmann Ivatt Mogul 2-6-0 Assembly instructions

Radio Shack Silver Line RC Train owner's manual

Radio Shack

Radio Shack Silver Line RC Train owner's manual

manuals.online logo
manuals.online logoBrands
  • About & Mission
  • Contact us
  • Privacy Policy
  • Terms and Conditions

Copyright 2025 Manuals.Online. All Rights Reserved.