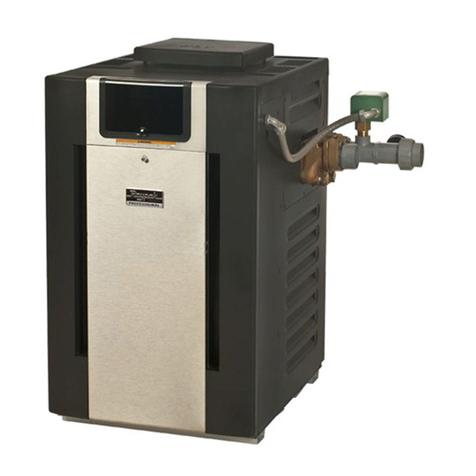
Raypak Xtherm 1005A User manual

P/N 241513 Rev. 5
AAWARNING: Improper installation, adjustment, alteration, service or maintenance can cause property
damage, personal injury, exposure to hazardous materials* or loss of life. Review the information in this manual
to humans.
FOR YOUR SAFETY: Do not store or use gasoline or other flammable vapors and liquids or other com-
bustible materials in the vicinity of this or any other appliance. To do so may result in an explosion or
fire.
WHAT TO DO IF YOU SMELL GAS:
• Do not try to light any appliance.
• Do not touch any electrical switch; do not use any phone in your building.
• Immediately call your gas supplier from a neighbor’s phone. Follow the gas supplier’s instructions.
• If you cannot reach your gas supplier, call the fire department.
Installation and service must be performed by a qualified installer, service agency or the gas supplier.
This manual should be maintained in legible condition and kept adjacent to the heater or in a safe place for future
reference.
CATALOG NO. 3400.552D Effective: 09-20-18 Replaces: 08-23-18
INSTALLATION AND
OPERATION MANUAL
Models 1005A - 2005A
Type H, WH, and P
ULTRA HIGH EFFICIENC
Y

2
CONTENTS
1. WARNINGS ................................................................... 3
1.1. Pay Attention to These Terms..............................3
2. BEFORE INSTALLATION ............................................ 4
2.1. Product Receipt........................................................4
2.2. ModelIdentication................................................4
2.3. RatingsandCertications.....................................4
2.4. Installations at Elevation........................................4
2.5. Component Locations............................................5
2.6. General Safety...........................................................6
3. INSTALLATION............................................................. 7
3.1. Installation Codes....................................................7
3.2. Equipment Base.......................................................7
3.3. Clearances.................................................................7
3.4. Outdoor Installation ................................................8
3.5. Combustion and Ventilation Air ..........................8
3.6. Air Supply ................................................................ 11
3.7. Water Piping ........................................................... 12
3.8. Raypak Integral Cold Water Protection.......... 13
3.9. Hydronic Heating.................................................. 14
3.10. Pool/Spa Water Chemistry ................................ 21
3.11. Gas Supply .............................................................. 21
3.12. Electrical Power Connections.......................... 23
3.13. Field Wiring Connections................................... 24
3.14. Venting - General .................................................. 28
3.15. Vent Terminal Location ....................................... 30
3.16. Venting Installation Tips..................................... 31
3.17. VerticalVentingCongurations ....................... 31
3.18. Horizontal Through-the-Wall and Direct
Vent(CategoryIV)................................................. 32
3.19. Direct Vent - Vertical ............................................ 34
3.20. Common Venting .................................................. 35
3.21. Outdoor Installation ............................................. 35
3.22. Condensate Treatment ....................................... 36
3.23. PVCVentingOption(D-32) ................................ 37
3.24. Centrotherm™ Polypropylene Venting
Option(D-33).......................................................... 38
4. CONTROLS..................................................................39
4.1. Ignition Control Functions ................................. 39
4.2. High Limit - Manual Reset ................................. 39
4.3. HighLimit-AutoReset(Optional)................... 39
4.4. Variable-Speed Injector Pump ......................... 39
4.5. Condensate Float Switch ................................... 40
4.6. Flow Switch ............................................................ 40
4.7. LowWaterCut-O(Optional)............................ 40
4.8. HighandLowGasPressureSwitches
(Optional)................................................................. 40
4.9. Blocked Vent Switch ............................................ 41
4.10. User Interface ........................................................ 41
5. WIRING DIAGRAM FOR MODELS
...........................................................47
.....................................................................48
6.1. Pre Start-up............................................................. 48
6.2. Pre Start-up Check............................................... 48
6.3. Initial Start-up......................................................... 48
6.4. Preparation ............................................................. 48
6.5. Start-Up.................................................................... 49
................................................................52
7.1. Lighting Instructions............................................ 52
7.2. ToTurnOGasToAppliance ........................... 52
8. TROUBLESHOOTING................................................52
8.1. XTherm Error Codes............................................ 52
8.2. Heater Errors.......................................................... 52
8.3. Heater Faults.......................................................... 52
8.4. XTherm Fault Text................................................. 53
9. MAINTENANCE .........................................................55
9.1. Suggested Minimum
Maintenance Schedule....................................... 55
9.2. Preventive Maintenance Schedule................. 56
9.3. Filter Maintenance ............................................... 57
...................................................................57
10.1. Inside Air Contamination.................................... 57
COMMONWEALTH OF MASSACHUSETTS .........58
Section 2.5.1, updated Table A "Basic Product Data" on page 5.

3
AADANGER Indicates the presence of immediate hazards which will cause severe personal injury, death or
substantial property damage if ignored.
AAWARNING Indicates the presence of hazards or unsafe practices which could cause severe personal injury,
death or substantial property damage if ignored.
AACAUTION Indicates the presence of hazards or unsafe practices which could cause minor personal injury
or product or property damage if ignored.
CAUTION CAUTION used without the warning alert symbol indicates a potentially hazardous condition
which could cause minor personal injury or product or property damage if ignored.
NOTE Indicates special instructions on installation, operation, or maintenance which are important but
not related to personal injury hazards.
1. WARNINGS
1.1.
AADANGER: Make sure the gas on which the heater will
rating plate.
AAWARNING: Do not use this heater if any part has
technician to inspect the heater and to replace any part
of the control system and any gas control which has been
under water.
AAWARNING: To minimize the possibility of improper
heater:
• Always keep the area around the heater free of
liquids and vapors.
• Heater should never be covered or have any blockage
AAWARNING: Risk of electrical shock. More than one
disconnect switch may be required to de-energize the
equipment before servicing.
AAWARNING: Should overheating occur or the gas
supply at a location external to the heater.
AACAUTION: If this heater is to be installed above
radiation level, it must be provided with a low water cut-
AACAUTION: If this heater is to be installed in a negative
or positive pressure equipment room, there are special
installation requirements. Consult factory for details.
AAWARNING: Both natural gas and propane have an
odorant added to aid in detecting a gas leak. Some people
may not physically be able to smell or recognize this
odorant. If you are unsure or unfamiliar with the smell
of natural gas or propane, ask your local gas supplier.
Other conditions, such as “odorant fade,” which causes
the odorant to diminish in intensity, can also hide,
AAWARNING: UL-recognized fuel gas detectors are
recommended in all enclosed propane and natural gas
applications wherein there is a potential for an explosive
mixture of fuel gas to accumulate and their installation
should be in accordance with the detector manufacturer’s
recommendations and/or local laws, rules, regulations,
or customs.

4
2. BEFORE INSTALLATION
Raypak strongly recommends that this manual be re-
viewed thoroughly before installing your XTherm heater.
Please review the General Safety information before
installing the heater. Factory warranty does not apply to
heaters that have been improperly installed or operated.
Refer to the warranty at the back of this manual.
Installationandservicemustbeperformedbyaqualied
installer, service agency or gas supplier. If, after reviewing
this manual, you still have questions which this manual
does not answer, please contact your local Raypak
representative or visit our website at www.raypak.com.
NOTE: Raypak recommends laying out and installing the
vent system before installing water piping. This will ensure
that the venting system and associated components will
Thank you for purchasing a Raypak product. We hope you
willbesatisedwiththehighqualityanddurabilityofour
equipment.
2.1.
On receipt of your heater it is suggested that you visually
check for external damage to the shipping crate. If the
crateisdamaged,makeanotetothateectontheBillof
Lading when signing for the shipment. Next, remove the
heater from the shipping packaging. Report any damage
to the carrier immediately.
On occasion, items are shipped loose. Be sure that you
receive the correct number of packages as indicated on
the Bill of Lading.
Claimsforshortagesanddamagesmustbeledwiththe
carrier by consignee. Permission to return goods must
be received from the factory prior to shipping. Goods
returned to the factory without an authorized Returned
Goods Receipt number will not be accepted. All returned
goods are subject to a restocking charge.
When ordering parts, you must specify the model and
serial number of the heater. When ordering under warranty
conditions, you must also specify the date of installation.
Purchased parts are subject to replacement only under the
manufacturer’s warranty. Debits for defective replacement
parts will not be accepted. Parts will be replaced in kind
only per Raypak’s standard warranties.
2.2.
Themodelidenticationnumberandheaterserialnumber
are found on the rating plate located on the rear jacket
panel of the heater.
The model number will have the form H7 or similar
dependingontheheatersizeandconguration.
• Theletter(s)intherstgroupofcharactersidenties
the application (H=Hydronic Heating, WH=Water
Heating,P=PoolHeating).
• Thenumberwhichfollowsidentiestheringmode
(7=electronicmodulation).
• The second group of characters identies the size
of the heater (the four numbers representing the
approximateMBTUHinput),and,whereapplicable,a
letter, indicating the manufacturing series.
2.3.
2.3.1. Standards
• ANSI Z21.13 · CSA 4.9 - latest edition, Gas-Fired Hot
Water Heaters
• CAN 3.1 - latest edition, Industrial and Commercial
Gas-Fired Package Heaters
• ANSI Z21.10.3 · CSA 4.3 - latest edition, Gas Water
Heaters
• ANSI Z21.56 · CSA 4.7 - latest edition, Gas-Fired Pool
Heaters
• SCAQMD Rule 1146.2
• Low-leadcontent(<.25%)CSA-certied
All Raypak heaters are National Board registered, and
design-certied and tested by the Canadian Standards
Association(CSA)fortheU.S.andCanada.Eachheateris
constructed in accordance with Section IV of the American
SocietyofMechanicalEngineers(ASME)HeaterPressure
Vessel Code and bears the applicable ASME stamp. H
models bear the "H" stamp. WH and P models bear the
"HLW" stamp. This heater also complies with the latest
edition of the ASHRAE 90.1 Standard.
AAWARNING: Altering any Raypak pressure vessel by
installing replacement heat exchangers, or any ASME
parts not manufactured and/or approved by Raypak will
instantly void the ASME and CSA ratings of the vessel and
any Raypak warranty on the vessel. Altering the ASME or
CSA ratings of the vessel also violates national, state, and
local approval codes.
2.4. Installations at Elevation
Ratedinputsaresuitableforupto2000ft(610m)elevation
without de-rating. Consult your local representative or
thefactoryforinstallationsataltitudes over2000ft (610
m) above sea level. No hardware changes are required
to the heaters for installations up to 10,000 ft (3,050 m)
(adjustmentsmayberequired).Aderateofupto4%per
1000ft(305m)mayapply.

5
2.5. Component Locations
Figure 1. Component Locations – Side View
Figure 2. Component Locations - Front View
Figure 3. Component Locations - Rear View
Figure 4. Component Locations - Top View
GAS TRAINBLOWER
CONDENSING
HEAT
EXCHANGER
OPERATING
CENTER
PRIMARY HEAT
EXCHANGER
FRONT OF
HEATER
VFD
(ALTERNATE CONSTRUCTION)
BURNER FLAME
VIEWING PORT
F10241
HIGH VOLTAGE
ELECTRICAL CONNECTIONS
GAS SUPPLY
CONNECTION
FLUE OUTLET
WATER INLET
2-1/2 NPT
CONDENSATE DRAIN
3/4 NPT, PVC
WATER OUTLET
2-1/2 NPT
COMBUSTION AIR
INLET (OPTIONAL)
F10243
HIGH VOLTAGE
SWITCH
LOW VOLTAGE
SWITCH
F10242
LOW VOLTAGE
ELECTRICAL
CONNECTIONS
LOW VOLTAGE
CONDUIT
CONNECTION
TOUCHSCREEN
DISPLAY
IGNITER
FLAME SENSOR
FRONT OF HEATER
BURNER
F10244

6
2.5.1. General Information
Model
No.
Input
MBTUH (kW) Water Conn
Gas Conn
Vent Size Comb Air
Max Min Nat In. (mm) In. (mm)
1005A 999(293) 140(41.0) 2-1/2" 1-1/4" 1" 6(152) 6(152)
1505A 1500(440) 210(61.6) 2-1/2" 1-1/4" 1" 8(203) 8(203)
2005A 1999(586) 280(82.1) 2-1/2" 2" 1" 8(203) 8(203)
Table A.
2.6. General Safety
This section applies to Hot Water Supply Boilers and Hot
Water Heaters ONLY.
To meet commercial hot water use needs, the high limit
safetycontrolonthiswaterheaterwill shuto themain
gas valve before the outlet temperature reaches 210°F
(99°C).However,watertemperaturesover125°F(52°C)can
cause instant severe burns or death from scalds. When
supplying general purpose hot water, the recommended
initialsettingforthetemperaturecontrolis125°F(52°C).
For sanitary rinse applications where outlet temperatures
of 180°F (82°C) to 195°F (91°C) are required, a boiler is
requiredbecausethe210°F(99°C)limitonwaterheaters
will NOT allow the heater to maintain these desired
sanitary rinse temperatures.
Safety and energy conservation are factors to be
considered when setting the water temperature on the
thermostat.Themostenergy-ecientoperationwillresult
whenthetemperaturesettingisthelowestthatsatises
the needs of the application.
Water temperature over 125°F (52°C) can cause instant
severe burns or death from scalds. Children, disabled and
elderly are at highest risk of being scalded. See Table B.
• Feel water before bathing or showering.
• Temperature limiting valves are available.
NOTE: When this water heater is supplying general-
purposehotwaterforusebyindividuals,athermostatically-
controlled mixing valve for reducing point-of-use water
temperature is recommended to reduce the risk of scald
injury. Contact a licensed plumber or the local plumbing
authority for further information.
Maximum water temperatures occur just after the heater’s
burnerhasshuto.Todeterminethewatertemperature
being delivered, turn on a hot water faucet and place
a thermometer in the hot water stream and read the
thermometer.
AACAUTION: Hotter water increases the risk of scalding!
There is a hot water scald potential if the thermostat is
set too high.
Water temperature over 125°F can
cause instant severe burns or death
from scalds.
Children, disabled, and elderly are
at highest risk of being scalded.
See instruction manual before set-
ting temperature at water heater.
Feel water before bathing or show-
ering.
Temperature limiting valves are
available, see manual.
Water Temp.
120°F(49°C) More than 5 minutes
125°F(52°C) 1-1/2 to 2 minutes
130°F(54°C) About 30 seconds
135°F(57°C) About 10 seconds
140°F(60°C) Less than 5 seconds
145°F(63°C) Less than 3 seconds
150°F(66°C) About 1-1/2 seconds
155°F(68°C) About 1 seconds
Table B.

7
Figure 5.
CAUTION: This heater should be located in an area
where water leakage will not result in damage to the area
adjacent to the appliances or to the structure. When such
locations cannot be avoided, it is recommended that a
suitable catch pan, adequately drained, be installed under
In addition, the heater shall be installed such that the gas
ignition system components are protected from water
(dripping,spraying,rain,etc.)duringapplianceoperation
orservice(circulatorreplacement,controlreplacement,
etc.).
If the heater needs to be secured to the ground, use the
hole pattern shown in Figure 5, following local codes.
Additional clearance may be required when using the
factory anchor bracket.
3.3. Clearances
3.3.1. Indoor Installations
Heater Side
Minimum
Clearances from
Combustible
Surfaces
in. (mm)
Minimum Service
Clearance
in. (mm)
Floor * 0 0
Rear 12(305) 36(914)
Right Side 1(25) 24(610)
Left Side 1(25) 1(25)
Top 010(254)
Front Open 24(610)
Vent 1(25) 1(25)
See also National Fuel Gas Code, Table 10.2.3, Clearance Reduction
* DO NOT install on carpeting
Table C. Clearances - Indoor Installations
Foreaseofservicing,aclearanceofatleast24"(610mm)
ontherightside,atleast24"(610mm)infrontand36"
(914mm)abovethetopoftheheaterisrequired.Thiswill
allow the heater to be serviced in its installed location
without movement or removal of the heater.
Service clearances less than the minimum may require
removal of the heater to service either the heat exchanger
or the burner components. In either case, the heater must
be installed in a manner that will enable the heater to
be serviced without removing any structure around the
heater.
0.75"
(19 mm)
32.88"
(835 mm)
REAR OF UNIT
0.56"
(14 mm)
0.56"
(14 mm)
DIA. TYP.
1.125"
(29 mm)
48.50"
(1232 mm)
FRONT OF UNIT
F10245
3. INSTALLATION
3.1. Installation Codes
Installations must follow these codes:
• Local, state, provincial, and national codes, laws,
regulations and ordinances
• National Fuel Gas Code, ANSI Z223.1/NFPA 54 –
latestedition(NFGC)
• National Electrical Code, ANSI/NFPA 70 - latest
edition(NEC)
• Standard for Controls and Safety Devices for
Automatically Fired Heaters, ANSI/ASME CSD-1,
(CSD-1)whenrequired
• For Canada only: CAN/CSA B149 Natural Gas and
Propane Installation Code and CSA C22.1 C.E.C. Part
1(C22.1)
3.2. Equipment Base
The heater should be mounted on a level, structurally
sound housekeeping pad. The heater is approved for
installation on a combustible surface but must NEVER be
installed on carpeting. Gas-fueled equipment installed in
enclosed parking garages must be located at least 18"
(457mm)abovetheoor.

8
3.4. Outdoor Installation
Heaters must not be installed under an overhang unless
clearances are in accordance with local installation codes
and the requirements of the gas supplier.
Three sides must be completely open in the area under
the overhang. Roof water drainage must be diverted away
from heaters installed under overhangs.
AACAUTION: Do not install where the condensate can
freeze. Take appropriate measures.
Heater Side
Minimum
Clearances from
Combustible
Surfaces
in. (mm)
Minimum Service
Clearance
in. (mm)
Rear 12(305) 36(914)
Right Side 1(25) 24(610)
Left Side 1(25) 1(25)
Top Unobstructed Unobstructed
Vent
Termination 12(305) 12(305)
Table D.
3.5. Combustion and Ventilation Air
NOTE: Use of this heater in construction areas where
is present may result in damage to the heater that is not
covered by the warranty. If operated in a construction
environment, a clean source of combustion air must be
provided directly to the heater.
3.5.1. Indoor Units
NOTE: On Indoor installations, the clear panel in the outer
bezel may be removed to allow access to the touchscreen
without removing the outer panel.
This heater must be supplied with sufficient quantities of
non-contaminated air to support proper combustion and
equipment ventilation. Combustion air can be supplied via
conventional means where combustion air is drawn from
theareaimmediatelysurroundingtheheater,(asshipped
from factory, combustion air is drawn through louvers in
jacket panels) or via direct vent, where combustion air
is drawn directly from outside. (See Section 3.6.1 for
instructions on how to connect ducting to the unit). All
installations must comply with the requirements of the
NFGC(U.S.)andB149(Canada),andalllocalcodes.
AACAUTION: Combustion air must not be contaminated
by corrosive chemical fumes which can damage the
heater and cause a non-warrantable failure. See the
Appendix.
NOTE: It is recommended that the intake vent be insulated
to minimize sweating in freezing climates.
Figure 6. Minimum Clearances from Combustible
Surfaces – Indoor and Outdoor Installations
TOP VIEW
36" (914 mm)
SERVICE
CLEARANCE
24" (610 mm)
XTHERM
24"
(610 mm)
36" (914 mm)
SERVICE
CLEARANCE
1" (25 mm)
REAR EXHAUST INSTALLATION
FRONT VIEW
VERTICAL CLEARANCE
(ALL INSTALLATION)
10" (254 mm)
SERVICE
CLEARANCE
MIN 4" HOUSEKEEPING PAD (BY OTHERS)
REQUIRED FOR GRAVITY DRAIN OF CONDENSATE

9
Figure 7. Minimum Clearances from Vent/Air Inlet Terminations – Indoor and Outdoor Installations
U.S. Installations1Canadian Installations 2
AClearance above grade, veranda, porch, deck, or
balcony 1'(30cm) 1'(30cm)
B Clearance to window or door that may be opened 4'(1.2m)belowortosideof
opening 3'(91cm)
C Clearance to permanently closed window * *
D
Verticalclearancetoventilatedsotlocatedabovethe
terminalwithinahorizontaldistanceof2'(61cm)from
the centerline of the terminal
5'(1.5m) *
EClearancetounventilatedsot * *
F Clearance to outside corner * *
G Clearance to inside corner 6'(1.83m) *
HClearance to each side of center line extended above
meter/regulator assembly *
3'(91cm)withinaheight15'
above the meter/regulator
assembly
I Clearance to service regulator vent outlet *6'(1.83m)
J
Clearance to non-mechanical air supply inlet to
building or the combustion air inlet to any other
appliance
4'(1.2m)belowortosideof
opening;1'(30cm)above
opening
3'(91cm)
K Clearance to mechanical air supply inlet 3'(91cm)aboveifwithin
10'(3m)horizontally 6'(1.83m)
LDo not terminate above paved sidewalk or paved
driveway
Slip hazard due to frozen
condensate
Slip hazard due to frozen
condensate
M Clearance under veranda, porch, deck or balcony *12"(30cm)t
1In accordance with the current ANSI Z223.1/NFPA 54 National Fuel Gas Code.
2In accordance with the current CAN/CSA-B149 Installation Codes.
tPermitted only if veranda, porch, deck, or balcony is fully open on a minimum of two sides beneath the floor and top of terminal, and underside
ofveranda,porch,deckorbalconyisgreaterthan1'(30cm).
*Clearances in accordance with local installation codes and the requirements of the gas supplier.
Table E. Vent/Air Inlet Termination Clearances

10
Inside Air Intake
Cover Panel
Figure 8.
5. Optional—For applications where condensation
may form on cold intake air ducting, install the
condensate drip pan to the bottom of the air filter
boxusing thefourscrewsprovided (verifythat the
pan is angled slightly downward toward the rear of
the heater as shown in Figure 9).
Condensate
Drip Pan
Figure 9.
6. Remove the air intake cover panel by removing the
five Phillips head screws holding it in place.
Air Intake
Cover Panel
Air Filter
Access
Panel
Figure 10. Remove the Air Intake Cover
3.5.2. Combustion Air Filter
Thisheaterissuppliedwithanintegralcombustionairlter.
Thislterwill reducethe amount ofparticulatespassed
through the combustion system and heat exchanger but
will not protect against chemical air contamination (See
Appendix). The lter must be checked periodically to
verify that adequate combustion air is being supplied to
the heater. See the Maintenance section of this manual for
informationoncheckingthelterandestablishingservice
intervals.
3.5.3. Ducted Combustion Air
Combustion air may be ducted directly to the heater using
PVC, CPVC or sealed single-wall galvanized ducting.
The resulting installation meets the requirements for a
direct-vent installation. See venting section for detailed
information.
1. Install combustion air duct in accordance with
Figure 38 and Figure 39.
2. Ventilation of the space occupied by the heater(s)
is required and can be provided by an opening(s)
for ventilation air at the highest practical point
communicating with the outdoors. The total cross-
sectional areas must be at least 1 in.² of free area per
20,000BTUH(111mm²perkW)oftotalinputrating
of all equipment in the room, when the opening is
communicating directly with the outdoors or through
verticalduct(s).Thetotalcross-sectionalareamust
beatleast1in.²offreeareaper10,000BTUH(222
mm²perkW)oftotalinputratingofallequipmentin
the room, when the opening is communicating with
theoutdoorsthroughhorizontalduct(s).Damageto
the equipment due to inadequate ventilation of the
space is not a warrantable failure.
3. In cold climates, and to mitigate potential freeze-
up, Raypak highly recommends the installation of a
motorized sealed damper to prevent the circulation
of cold air through the heater during the non-
operating hours. Such a damper must be electrically
interlockedtotheunit(s)suchthatacallforheatfrom
any connected unit will energize the damper, but no
connected unit is allowed to fire until the damper
proves fully open.
3.5.4. Installation Instructions
1. Turn off all power to the heater. All necessary parts
are provided with the appliance.
2. Ensure that the heater is cool to the touch before
proceeding with the installation.
3. Remove both the left and right rear side access
panels.
4. From the right-rear side access area, install the
inside air intake cover panel using the nine hex-head
screws provided. See Figure 8.

11
7. Removethedebrisscreen(orcoverpanelformodel
1005A)byremovingthescrewsholdingitinplace.
Debris Screen
Figure 11. Remove the Debris Screen
8. Install the intake air collar using the six screws
removed in Step 7.
Intake Air Collar
Figure 12. Install the Intake Air Collar
9. Replace all the access panels.
10. 1Install ducted air intake piping appropriate for your
installation using PVC, CPVC or sealed single-wall
galvanized ducting. The duct will attach directly to
the field-installed air collar located on the rear of
the heater, using three or four sheet metal screws
(not supplied) equally positioned around the
circumference of the duct.
NOTE: Make sure that the air intake piping is installed in
3.5.5. TruSeal®Combustion Air
In addition to the previous steps, the combustion air
system can be sealed to meet Direct Vent requirements
by sealing the mounting screws and duct connection
pointwithRTV(notsupplied).AllductingMUST be self-
supported.
AACAUTION: Use TruSeal combustion air if damaging
airborne contaminants are or may be present in the
heater area. See the Appendix of this manual regarding
air contamination.
3.6. Air Supply
3.6.1. U.S. Installations
All Air from Inside the Building
The conned space shall be provided with TWO
permanent openings communicating directly with
an additional room(s) of sucient volume so that the
combined volume of all spaces meets the criteria for a
room large in comparison (NFGC). The total input of all
gas utilization equipment installed in the combined space
shall be considered in making this determination.
Each opening shall have a minimum free area of 1 square
inchper1,000BTUH(2,225mm²perkW)ofthetotalinput
rating of all gas utilization equipment in the conned
space,butnotlessthan100squareinches(645cm²).One
openingshallcommencewithin12"(305mm)ofthetop,
and one opening shall commence within 12" (305 mm)
of the bottom of the enclosure. The minimum dimension
ofairopenings shallbe notlessthan3"(76mm)in any
direction.
All Air from Outdoors
Theconnedspaceshallcommunicatewiththeoutdoors
in accordance with one of the methods below. The
minimum dimension of air openings shall not be less than
3"(76mm)inanydirection.Whereductsareused,they
shall be of the same cross-sectional area as the net free
area of the openings to which they connect.
1. Two permanent openings, one commencing within
12"(305mm)ofthetop,andonecommencingwithin
12"(305mm)ofthebottomoftheenclosure,shallbe
provided. The openings shall communicate directly,
or by ducts, with the outdoors or spaces (crawl or
attic)thatfreelycommunicatewiththeoutdoors.
a. Where directly communicating with the
outdoors or where communicating to the
outdoors through vertical ducts, each opening
shall have a minimum free area of 1 square inch
per4,000BTUH(550mm²perkW)oftotalinput
rating of all equipment in the enclosure.

12
b. Where communicating with the outdoors
through horizontal ducts, each opening shall
have a minimum free area of 1 square inch per
2,000 BTUH (1,100 mm² per kW) of total input
rating of all equipment in the enclosure.
2. One permanent opening, commencing within
12" (305 mm) of the top of the enclosure, shall be
permitted where the equipment has clearances
of at least 1" (25.4 mm) from the sides and back
and 6" (152 mm) from the front of the appliance.
The opening shall directly communicate with the
outdoors or shall communicate through a vertical or
horizontal duct to the outdoors or spaces that freely
communicate with the outdoors, and shall have a
minimum free area of:
a. 1squareinchper3,000BTUH(740mm²perkW)
of the total input rating of all equipment located
in the enclosure, and
b. Not less than the sum of the areas of all vent
connectors in the confined space.
AAWARNING: Do not use the “one permanent opening”
method if the equipment room is under negative-pressure
conditions.
3.6.2. Canadian Installations
AACAUTION: All combustion air must be drawn from the
air outside of the building; the mechanical equipment
room must communicate directly with the outdoors.
Ventilation of the space occupied by the heater shall be
providedbyanopening(s)forventilationairatthehighest
practical point communicating with the outdoors. The
totalcross-sectionalareaofsuchanopening(s)shallbeat
least10%ofthearearequiredbelow,butinnocaseshall
thecross-sectionalareabelessthan10squareinches(65
cm²).
AAWARNING: Make sure that the equipment room is not
under negative-pressure conditions.
1. Ventilation of the space occupied by the heater shall
be provided by an opening(s) for ventilation air at
the highest practical point communicating with the
outdoors. The total cross-sectional area of such an
opening(s)shallbeatleast10%ofthearearequired
in steps 2 and 3 (below), but in no case shall the
cross-sectional area be less than 10 in.2(65cm2).
2. For heaters using a barometric damper in the
vent system there shall be a permanent air supply
opening(s) having a cross section area of not less
than 1 in.2per7,000BTUH(320mm2perkW)upto
and including 1 million BTUH, plus 1 in.2per 14,000
BTUH(160mm2perkW)inexcessof1millionBTUH.
Thisopening(s)shallbeeitherlocatedatorducted
toapointnotmorethan18"(450mm)norlessthan
6"(152mm)abovethefloorlevel.Theductcanalso
“goose neck” through the roof. The duct is preferred
to be straight down and terminated 18" (450 mm)
from the floor, but not near piping. This air supply
opening requirement shall be in addition to the air
openingforventilationairrequiredin1(above).
AAWARNING: Care must be taken to ensure that
the equipment room is not under negative pressure
conditions.
3. For heaters not using a barometric damper in the
vent system, and when air supply is provided by
natural air flow from outdoors for a power burner
and there is no draft regulator, drafthood or similar
flue gas dilution device installed in the same space,
in addition to the opening for ventilation air required
above, there shall be a permanent air supply
opening(s)havingatotalcross-sectionalareaofnot
less than 1 square inch for each 30,000 BTUH (74
mm² per kW) of total rated input of the burner(s),
andthelocationoftheopening(s)shallnotinterfere
with the intended purpose of the opening(s) for
ventilation air referred above. This opening(s) can
be ducted to a point not more than 18" (450mm)nor
less than 6" (152mm)abovetheoorlevel.Theduct
can also “goose neck” through the roof. The duct is
preferredtobestraightdown18"(450mm)fromthe
oor,butnotnearpiping.
4. Refer to the B149 Installation Code for additional
information.
3.7.
3.7.1. General
The heater should be located so that any water leaks will
not cause damage to the adjacent area or structures.
AACAUTION: This heater must be installed with a
pumping system to function properly.
NOTE: Minimum pipe size for the heater inlet/outlet
connections is dependent on the equivalent length of
piping between the load loop and the heater loop, the
operating conditions and the size of the heater. See Table
G and Table H.

13
3.7.2.
AAWARNING:
the potential of severe burns. Do not pipe to any area
where freezing could occur. Refer to local codes.
3.7.3.
The temperature and pressure gauge is shipped threaded
onto the heater outlet assembly.
3.7.4. Hydrostatic Test
Unlike many types of heaters, this heater does not require
hydrostatic testing prior to being placed in operation. The
heat exchanger has already been factory-tested and is
ratedfor160psi(1100kPa)operatingpressure.However,
Raypak does recommend hydrostatic testing of the piping
connections to the heater and the rest of the system
prior to operation. This is particularly true for hydronic
systems using expensive glycol-based anti-freeze. Raypak
recommends conducting the hydrostatic test before
connecting gas piping or electrical supply. Leaks must
be repaired at once to prevent damage to the heater.
NEVER use petroleum-based stop-leak compounds.
Isolate heater water connections from the system prior to
performing a hydrostatic test.
To perform hydrostatic test:
1. Connect fill water supply. Fill heater with water.
Carefully fill the rest of the system, making sure to
eliminate any entrapped air by using high-point
vents. Close feed valve. Test at standard operating
pressure for at least 24 hours.
2. Make sure constant gauge pressure has been
maintained throughout test.
3. Check for leaks. Repair any that are found.
3.7.5. System Sensor Installation
The System Sensor (S3) is required for all piping
congurationsunlesstheunitsringratewillbecontrolled
by an external source such as our Temp Tracker MOD+
Hybrid sequencer. Proper placement and method of
installation are critical for proper operation of the system.
The sensor must be installed in a drywell in conjunction
with heat conductive compound as shown in Figure 13.
The drywell must be installed no more than 5 equivalent
feet(1.52m)ofpipe/tubingdownstreamofthede-coupler
and installed in such a way that ensures the sensor bulb is
intheowpath.
AACAUTION: Be careful when installing the drywell not to
over-tighten the well as this can damage the well and may
Locating the sensor on the outside of the pipe will slow
the unit's response and yield less accurate results. Use
18AWG wire minimum for sensor wiring.
4 PIPE DIA
NOT TO EXCEED
12 IN. (305 mm)
5 FT. (1.5 M)
MAX
NOT TO SCALE
DRYWELL
SYSTEM
SENSOR
THERMAL PASTE
NPT FITTING
SYSTEM
PIPING
TO BOILER FROM BOILER
F10501
Figure 13. System Sensor Installation
3.8. Raypak Integral Cold
XTherm heaters are equipped with an integral CWP
system that utilizes a Variable-Speed Pump or pumps to
inject just the right amount of water from the main system
loop into the heater loop to maintain the optimum inlet
temperature. This feature allows the system to achieve
andmaintainaspecicinlettemperaturetarget.
XTherm H boiler models equipped with the dual-injector
pump system are designed to operate with heater inlet
water temperatures down to 50°F (10°C) continuous.
Under start-up conditions the dual-injector system can
operate with uid temperatures down to 32°F (0°C).
Continuous operation below 50°F (10°C) return water
temperature may cause operational issues for the unit
as well as temperature control instability. XTherm WH
models equipped with the single-injector pump system
are constructed with materials appropriate for domestic
hot water operating conditions. XTherm P models are
equipped with a single-injector pump system and are
constructed with all nonferrous materials for rust-free
operation. Contact your local representative or the factory
for applications assistance.
For detailed information about CWP in VERSA-equipped
systems,seeVERSAICmanual(5000.72).
AACAUTION: Damage due to internal condensation may
occur if the primary heat exchanger inlet temperature
does not exceed 120°F (49°C) within 7 minutes of startup.
Warranty claims will be denied for damage or failures
caused by condensation.

14
FROM SYTEM
TO SYTEM
SYTEM PUMP
HEATER
Figure 14. Three-Way Valves (Usage as shown NOT
supported)
3.9. Hydronic Heating
3.9.1.
The heater is equipped with an integral cold water
protection system that includes either Single or dual
modulating injector pumps to pull the required ow
from the system loop and a heater pump for the optimal
ΔT across the primary heat exchanger. The system is
designed for continuous return temperatures from 50°F to
200°F(10°Cto93°C).
NOTE:
rate when the maximum water temperature of 240°F
(115°C) is approached.
NOTE: All hot water heating systems have unique levels
of operating diversity that must be accounted for in
the system design. The system should always include
will result in heater short-cycling and may reduce heater
life. Always contact your local Raypak representative for
system design assistance to avoid these issues.
3.9.2. Feedwater Regulator
Raypak recommends that a feedwater regulator be in-
stalledandsetat12psi(8.3kPa)minimumpressureatthe
highest point of the system. Install a check valve or back
flow device upstream of the regulator, with a manual shut-
off valve as required by local codes.
3.9.3.
All high points should be vented. A heater installed above
radiationlevelmustbeprovidedwithalowwatercut-o
device(salesorderoptionF-10).Thisheater,whenusedin
connection with a refrigeration system, must be installed
so that the chilled medium is piped in parallel with the
heater with appropriate valves to prevent the chilled
medium from entering the heater. System ow must
exceed115%ofmaxheaterow.
The piping system of a hot water heater connected to
heating coils located in air-handling units where they
may be exposed to circulating refrigerated air, must be
equipped with ow-control valves or other automatic
means to prevent gravity circulation of the heater water
during the cooling cycle. It is highly recommended that
the piping be insulated.
XTherm heaters require access to a certain amount
of water to provide adequate thermal mass for stable
operation. If the volume of water in the heater loop is not
adequate, the outlet temperature may rise faster than the
onboard controls can react, causing a high limit fault. In
suchacase,abuertankinthesystemloop(acrossthe
heaterconnections)isrequiredtoprovidethedierence
between the needed volume and the available loop
volume. See Table F.
Model Size
Internal Water
Volume
(gal. / liters)
Minimum Loop
Volume Needed
(gal. / liters)
1005A 11.8(45) 21(79)
1505A 12.4(48) 31(117)
2005A 15.6(59) 41(155)
Table F. Minimum Hydronic Loop Volume
3.9.4. Air-Separation/Expansion Tank
All heaters should be equipped with a properly-sized
expansiontankandairseparatorttingasshowninFigure
15.
EXPANSION TANK
AIR SEPARATOR
WITH
BLEED VALVE
Figure 15. Air-Separation/Expansion Tank
Fitting Type Equivalent Length (ft/m)
90°Elbow(Std.) 8.5(2.5) 9.4(2.8)
90°Elbow(Longrad.) 3.5(1) 3.6(1.1)
45° Elbow 3.0(0.9) 3.4(1)
GateValve(Fullopen) 1.6(0.5) 1.6(0.5)
Swing Check Valve 22(6.7) 25(7.6)
Table G.
Fittings
3.9.5. Three-Way Valves
Three-way valves intended to regulate system water
temperaturesbyreducingowintheheatermustnotbe
used. Raypak heaters are high-recovery, low-mass heaters
which are not subject to thermal shock.

15
Tank/
Return
Temp
(°F / °C)
Model 1005A Model 1505A Model 2005A
Supply
Temp1
(°F / °C)
Min. Tubing Size2Supply
Temp1
(°F / °C)
Min. Tubing Size2Supply
Temp1
(°F / °C)
Min. Tubing Size2
<80' equiv. 80-200'
equiv. <80' equiv. 80-200'
equiv.
60(15) 147(64) 2" NPT 2-1/2" NPT 147(64) 2" NPT 2-1/2" NPT 154(68) 2" NPT 2-1/2" NPT
80(27) 147(64) 2" NPT 2-1/2" NPT 147(64) 2" NPT 2-1/2" NPT 154(68) 2-1/2" NPT 3" NPT
100(38) 147(64) 2-1/2" NPT 3" NPT 147(64) 2-1/2" NPT 3" NPT 154(68) 2-1/2" NPT 3" NPT
120(49) 145(63) 2-1/2" NPT 3" NPT 158(70) 2-1/2" NPT 3" NPT 170(77) 2-1/2" NPT 3" NPT
140(60) 165(74) 2-1/2" NPT 3" NPT 178(81) 2-1/2" NPT 3" NPT 190(88) 2-1/2" NPT 3" NPT
160(71) 185(85) 2-1/2" NPT 3" NPT 198(92) 2-1/2" NPT 3" NPT 210(99) 2-1/2" NPT 3" NPT
1Approximatehighreheateroutlettemperaturebasedonthestandardheaterpumpandtherecommendedconnectingpipesize.
2Minimum pipe size based on total equivalent feet of supply and return piping between the system loop and heater, not to exceed 2.7 ft of head at 70 gpm.
Table H.
System Return Temperature
50°F (°C) 70°F (°C) 90°F (°C) 110°F (°C) 120°F (°C)
Model Low Fire
(gpm/lpm)
High Fire
(gpm/lpm)
Low Fire
(gpm/lpm)
High Fire
(gpm/lpm)
Low Fire
(gpm/lpm)
High Fire
(gpm/lpm)
Low Fire
(gpm/lpm)
High Fire
(gpm/lpm)
Low Fire
(gpm/lpm)
High Fire
(gpm/lpm)
1005A 4(15) 21(79) 5(19) 27(102) 8(32) 38(144) 20(76) 61(231) 70(265)* 87(329)** 70(265)* 87(329)**
1505A 6(23) 31(117) 8(30) 39(148) 12(45) 53(201) 29(110) 70(265)* 82(310)** 70(265)* 113(428)** 70(265)* 113(428)**
2005A 7(27) 38(143) 10(38) 48(182) 16(61) 63(238) 37(140) 70(265)* 91(344)** 70(265)* 116(439)** 70(265)* 116(439)**
*Flowratesareshownforstandardmodels.Pipesizeselectionnottoexceed2.7fthdpressuredropat70gpm(265lpm)
** For High Temp/Process unit utilizing a single injector pump, pipe sizing to be based on the following:
H7-1005A-87gpm@3.5ft(329lpm@1m)hdpressuredrop
H7-1505A-113gpm@7.6ft(428lpm@2.3m)hdpressuredrop
H7-2005A-116gpm@8ft(439lpm@2.4m)hdpressuredrop
NOTE:Systemowmustbegreaterthanboilerowatalltimeforproperoperation.
Table I. Injection Flow Rates vs Return Water Temperatures
3.9.6.
The VERSA IC Control system is designed for a wide range
of applications. The installer/design engineer should refer
tothefollowingModestodeterminewhich bestts the
intended application and functionality for the unit being
installed. Type H models of XTherm have three modes
available to them to address the various applications the
units can be applied to. Type WH units will only have the
WHconguration availabletothem for usewithpotable
water applications when directly connected to a hot water
storagetank.TypePunitswillonlyhavethePconguration
available. For detailed information on the VERSA IC control
system,seetheVERSAICmanual(5000.72).Thismanual
can be found in the document library at www.raypak.com.
Mode 1 (Type H Units Only)
This mode selection is for hydronic heating systems with
singleormultipleheaters(Maximum4heaters)inprimary/
secondary piping conguration with or without Outdoor
AirReset(S4). See Figure 16 and Figure 17.
Sensor Name
Installed at
Applies to Mode
Factory Field
S1 Inlet X All
S2 Outlet X All
S3 System X All
S4 Outdoor Air X H w/ Outdoor Reset
S5 Indirect
DHW
X H mode 2
X H mode 3
S6
Indirect
Supply X H mode 3
Poolstat X P
Table J. Sensor Usage

16
Not to exceed 4 pipe diameters
or 12" (305 mm)
1
FACTORY INSTALLED SENSOR
FIELD INSTALLED SENSOR
S1 S2
P2
S4
P1
VERSA PIM
MODBUS
ENABLE
0-10/4-20mA
S3
1
Figure 16.
Figure 17.
A B C D
P1a P1b P1c P1d
S1a
S4a
MODBUS
ENABLE
S2a S1b S1c S1d S2d
S3a
1
P2a
S2cS2b
MASTER
FACTORY INSTALLED SENSOR
CONNECT SYSTEM PUMP
IN PARALLEL FROM EACH
CASCADE FOLLOWER
OUTPUT
FIELD INSTALLED SENSOR
VERSA
(MASTER)
0–10 / 4–20mA
PIM
VERSA
PIM
VERSA
PIM
VERSA
PIM
Not to exceed 4 pipe diameters
or 12" (305 mm)
1
The system temperature is controlled by the System sensor
(S3).Theintegralboilerpump(P1)runsduringanycallfor
heat. The System Pump (P2) runs whenever the system
is enabled for heating and the outdoor air temperature is
lowerthantheWWSDtemperaturesetting(ifutilized).
The System Pump (P1) is delayed “O” as user-dened
intheHeatermenuandtheSystemPump(P2)isdelayed
“O” in the ADJUST menu, and the integral Boiler /
InjectionPump(P1)isdelayed"O"asuser-denedinthe
BOILER menu.
For pipe sizing, see Table G and Table H.
NOTE: MODE 1 can also be used for process heating
when operating temperatures above 150°F (66°C) are
required. Care must be given to ensure water hardness is
no more than 15 grains per gallon for scale free operation.

17
Mode 2 (Type H Units Only)
This mode selection is for hydronic heating systems with
singleormultipleboilers(Maximum4boilers)inprimary/
secondary piping conguration with or without Outdoor
AirReset(S4)withindirectDHWonthesystemloop(with
orwithoutpriority).Thesystemtemperatureiscontrolled
bytheSystemsensor(S3).See Figure 18.
The Indirect DHW sensor (S5) determines the indirect
call/tank setpoint. The system temperature is boosted
toTargetMaxwhenusingtheIndirectDHWsensor(S5)
during an indirect call for heat.
PrioritymodetogglesotheSystemPump(P2)whenan
indirect call for heat is present. The Indirect DHW Pump
(P3)runsduringanindirectcallforheatwithno“o”delay.
TheSystemPump(P2)delay“o”asuser-denedinthe
ADJUSTmenu,andtheintegralBoiler/Injectorpump(P1)
isdelayed“o”asuser-denedintheBOILERmenu.The
SystemPump(P2)runswheneverthesystemisenabled
for heating and the outdoor air temperature is lower than
the WWSD temperature setting (if utilized) unless an
indirect call for heat is present with priority.
For pipe sizing, see Table G and Table H.
Figure 18. Mode 2 - Single Boiler with Indirect on System Loop
S1 S2
P2
S4
P1
VERSA
PIM
MODBUS
ENABLE
0-10/4-20mA
S3
1
P3
S5
AQUASTAT LOCATED
IN OUTLET PIPE
Not to exceed 4 pipe diameters
or 12" (305 mm)
1
FACTORY INSTALLED SENSOR
FIELD INSTALLED SENSOR
Mode 3
This mode selection is for hydronic heating systems with
singleormultipleboilers(Maximum4boilers)inprimary/
secondary piping conguration with or without Outdoor
AirReset(S4)withindirectDHWontheboilerloop(with
priority).SeeFigure 19.
The system temperature is controlled by the Supply sensor
(S3)whenevertheindirectcallforheatisnotactive.The
indirectDHWSupplysensor(S5)determinestheindirect
call/tank setpoint. During an indirect call for heat the
boilerringrateisdeterminedbythewatertemperatureat
theIndirectSupplysensor(S6)andtheTargetMaxsetting
when using the Indirect DHW sensor (S5). The Indirect
DHWPump(P3)runsduringanindirectcallforheatwith
no“o”delay.TheSystemPump(P2)delay“o”asuser-
dened in the ADJUST menu, and the integral Boiler /
Injectorpump(P1)isdelayed“o”asuser-denedinthe
BOILER menu. The system pump (P2) runs whenever
the system is enabled for heating and the outdoor air
temperature is lower than the WWSD temperature setting
(ifutilized)unlessanindirectcallforheatispresent.
For piping Sizing, see Table G and Table H.
NOTE: A Tank Aquastat can be used in lieu of the Indirect
DHW Sensor (S5). See VERSA IC manual (5000.72) for
additional details.
NOTE: See VERSA IC manual (5000.72) for more
information on cascade systems.
Figure 19. Mode 3 - Single Boiler with Indirect on Boiler Loop
S1 S2
P2
S4
P1
VERSA
PIM
MODBUS
ENABLE
0-10/4-20mA
S3
1
P3
S5
AQUASTAT LOCATED
IN OUTLET PIPE
S6
Not to exceed 4 pipe diameters
or 12" (305 mm)
1
FACTORY INSTALLED SENSOR
FIELD INSTALLED SENSOR

18
Tank/
Return
Temp
(°F / °C)
Model 1005A Model 1505A Model 2005A
Soft/Med
Sup. Temp1
(°F / °C)***
Hard Sup.
Temp1
(°F / °C)*
Minimum Tubing Size2Med Sup.
Temp1
(°F / °C)
Hard Sup.
Temp1
(°F / °C)*
Minimum Tubing Size2Soft/Med
Sup. Temp1
(°F / °C)***
Minimum Tubing
Size2
<80’ equiv. 80-200’ equiv. <80’
equiv. 80-200’ equiv. <80’
equiv.
80-200’
equiv.
60(15) 138(59) 135 2" 2-1/2" 145(63) 143(62) 2" 2-1/2" 154(68) 2" 2-1/2"
80(27) 138(59) 135 2" 2-1/2" 145(63) 143(62) 2" 2-1/2" 154(68) 2-1/2" 3"
100(38) 138(59) 135 2-1/2" 3" 145(63) 143(62) 2-1/2" 3" 154(68) 2-1/2" 3"
120(49) 146(63) 146(63) 2-1/2" 3" 146(63) 146(63) 2-1/2" 3" 155(68) 2-1/2" 3"
130(54) 156(69) 156(69) 2-1/2" 3" 156(69) 156(69) 2-1/2" 3" 165(74) 2-1/2" 3"
140(60 166(74) 166(74) 2-1/2" 3" 166(74) 166(74) 2-1/2" 3" 175(79) 2-1/2" 3"
1Approximatehighreheateroutlettemperaturebasedonthestandardheaterpumpandtherecommendedconnectingpipesize.
2Minimum pipe size based on total equivalent feet of supply and return piping between the tank and heater.
WH-1005A-87gpm@3.5ft(329lpm@1m)hdpressuredrop
WH-1505A-113gpm@7.6ft(428lpm@2.3m)hdpressuredrop)
WH-2005A-116gpm@8ft(439lpm@2.4m)hdpressuredrop)
Table K.
*Must utilize optional cupro-nickel tubes. If over 25 grains per gallon, a water softener/treatment system must be utilized.
**Caution:Forscale-freeoperationwith“HardWater”(16-25grainspergallonoftotalhardness),theoperatingcontrolmustNOTbesethigherthan130°F(54°C).
Forhigherthan130°F(54°C)operation,awatersoftener/treatmentsystemmustbeutilized.
***Care should be given to prevent over-softening of the water as over-softened water can become aggressive. Cupro-nickel tubes are recommended for water
softened below 5 grains per gallon.
3.9.7. Domestic Hot Water
NOTE: Soft = 3–4 grains per gallon; Medium = 5–15 grains
per gallon; Hard = 16–25 grains per gallon.
When the unit is ordered as a “WH” conguration, the
only application available to it is direct DHW with single
ormultipleheaters(Maximum4heaters).See Figure 20.
The tank temperature is controlled by the System sensor
(S3).TheintegralBoilerPumps(P1)runduringanycallfor
heat.TheSystemPump(P2)outputisactivewheneverthe
system is enabled. The Boiler / Injector Pumps are delayed
“o”aftertheTankTargettemperatureisachievedandas
user-denedintheBOILER menu.
NOTE: If local codes require a vacuum relief valve,
acquire one locally and install per valve manufacturer’s
instructions.
NOTE: WH units will operate to a maximum setpoint
of 150°F (66°C). For temperatures required above
temperature potable operation must be used and great
care must be given to ensure water hardness is no more
than 15 grains per gallon for scale-free operation. MODE
for process heating applications.
For DWH pipe sizing, see Table G and Table K.
3.9.8.
AACAUTION: When this heater is used for both potable
water and space heating, observe the following to ensure
proper operation.
1. All piping materials and components connected to
the water heater for the space heating application
shall be suitable for use with potable water.
2. Toxic chemicals, such as used for boiler treatment,
shall not be introduced into the potable water used
for space heating.
3. If the heater will be used to supply potable water,
it shall not be connected to any heating system or
components previously used with a non-potable
water heating appliance.
4. When the system requires water for space heating
attemperatures higherthan 140°F(60°C),a means
such as a mixing valve shall be installed to temper
the water in order to reduce scald hazard potential.

19
Figure 20.
S1 S2
TANK
P1
VERSA PIM
MODBUS ENABLE
0-10 VDC / 4-20mA
S3
HW RETURN
FACTORY INSTALLED SENSOR
FIELD INSTALLED SENSOR
CITY
WATER
HW SUPPLY
A
P1a
ENABLE
MODBUS
(MASTER)
VERSA
PIM PIM PIM PIM CITY
WATER
VERSA VERSA VERSA
0–10 VDC
S1a S2a S1b S1c S2c S2d
P2a
S1d
S2b
P1b P1c P1d
S3
B C D
FACTORY INSTALLED SENSOR
FIELD INSTALLED SENSOR
DIRECT DHW/PROCESS CASCADE
CONDENSING APPLICATIONS
A = MASTER B – D = FOLLOWER UNITS
Figure 21.

20
3.9.9. Automatic Chemical Feeders
All chemicals must be introduced and completely diluted
into the water before being circulated through the heater.
High chemical concentrations will result when the pump
isnotrunning(e.g.overnight).
AACAUTION: Combustion air must not be contaminated
by corrosive chemical fumes which can damage the
heater and void warranty.
AACAUTION: High chemical concentrations from feeders
that are out of adjustment will cause rapid corrosion to
the heat exchanger. Such damage is not covered under
the warranty.
CAUTION: Failure of a heat exchanger due to lime scale
build-up on the heating surface, low pH or other chemical
imbalance is non-warrantable.
3.9.10.
When a boiler or water heater is used in a pool heating
application, ensure that all the following installation
requirements are met. See Figure 22.
The XTherm must be equipped with a direct-coupled
injector pump for pool applications. The standard integral
wet-rotor injector pump system supplied with all H and
model 1005A WH XTherm heaters MUST NOT be used
for pool service. The direct-coupled pump is optional on
all H and 1005A WH models, and standard on 1505A and
2005A WH and all P models.
Theinjectorpumpmustbesettomaintain120°F(49°C)
at the inlet to the primary heat exchanger on all XTherm
models. To complete installation of the heater, the system
sensor must be installed in the return water line, upstream
of the heater and wired to the S3 sensor position (TB1,
pins6and7).
TheonboardVERSAICoperatingcontrolisconguredto
operate as the poolstat. A sensor is shipped loose to be
installed in the system piping downstream of the heater
outlet. See Figure 22 for the sensor locations. Wire the
sensortotheS6sensorposition(TB1,pins2and3).
For data on acceptable pool chemistry, see Table L. For
pipe sizing, see Table G and Table K.
AAWARNING:
pool heater, plumbing from the heater outlet to the main
AACAUTION: Combustion air must not be contaminated
by corrosive chemical fumes which can damage the
heater and can cause unwarrantable damage to the
heater.
Maximum distance not to exceed
4 pipe diameters or 12" (305 mm)
1
TO POOL
S6 SENSOR
S3 SYSTEM SENSOR
CPVC UNION (SLIP)
FROM FILTER
1
F10018
CHECK VALVE
Figure 22.
3.9.11. Winterizing Your Heater
Heaters installed outdoors as pool heaters in freezing
climate areas should be shut down for the winter. To
shutdowntheheater,turnomanualmaingasvalveand
maingasshut-o.Closeisolationvalves.Draintheheater
using the hose bibs located on the bottom of both heat
exchangers. Disconnect the condensate hose from the
stainless steel condensing heat exchanger and drain the
condensate trap.
NOTE:
must ALL be drained to protect the heat exchangers.
These are accessible by removing the lower front door
from the heater for the 2 primary drains and the right-rear
panel for the condensing heat exchanger drain. Drain any
piping of all water that may experience below-freezing
temperatures.
AACAUTION:
with the main system pump to make sure the heater
damage the heater. Follow these instructions to make
sure your heater is properly installed.
This manual suits for next models
2
Table of contents
Other Raypak Heater manuals

Raypak
Raypak 106 Operating instructions

Raypak
Raypak 266 User manual

Raypak
Raypak 206A User manual

Raypak
Raypak 408 Owner's manual

Raypak
Raypak 207A User manual

Raypak
Raypak SPA-PAK 151 User manual

Raypak
Raypak AVIA 264A User manual

Raypak
Raypak 5350 Series User manual

Raypak
Raypak Xfiire 300B User manual

Raypak
Raypak 268A User manual