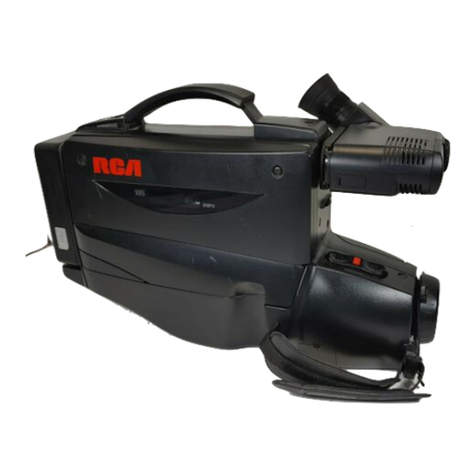
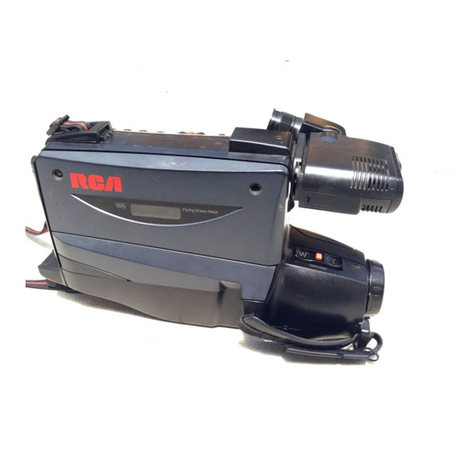
RCA ProV950HB User manual

USER'S
GUIDE
ProV950HB
CAMCORDER

i
CAUTION: To reduce the risk of electric shock and fire hazard, do NOT
use any other power source.
To reduce risk of injury, charge only rechargeable batteries recommended by the
manufacturer for this camcorder. Other batteries may burst causing damage and
personal injury.
FCC Regulations state that unauthorized changes or modifications to this equipment
may void the user’s authority to operate it.
NOTE: The camcorder’s LCD panel is a very high technology product with 112,000
thin-film transistors*, giving you fine picture detail. Occasionally, a pixel may appear
on the screen as a fixed point of blue, green, red, or black. Please note that this
does not affect your camcorder’s performance.
*Specifications are subject to change without notice.
CAUTION:
TO REDUCE THE RISK OF ELECTRIC SHOCK, DO
NOT REMOVE COVER (OR BACK). NO USER-
SERVICEABLE PARTS ARE INSIDE. REFER
SERVICING TO QUALIFIED SERVICE PERSONNEL.
WARNING: TO REDUCE THE RISK OF FIRE OR ELECTRIC SHOCK, DO
NOT EXPOSE THIS CAMCORDER OR AC ADAPTER/
CHARGERTO RAIN OR MOISTURE.
IMPORTANT SAFETY INFORMATION
Be sure to read all safety information before you begin to use this product.
This symbol warns the user of uninsulated voltage within the
unit that can cause dangerous electric shocks.
This symbol alerts the user that there are important operating and
maintenance instructions in the literature accompanying this unit.
Product Registration
Please fill out the product registration card and return it immediately.
Returning this card allows us to contact you if needed.
Keep your sales receipt for proof of purchase to obtain warranty parts and service and
attach it here. Record the serial and model numbers located on the bottom of the
camcorder.
Model No: ProV950HB
Serial No:
Purchase Date:
Purchased From:
CAUTION: To prevent electric shock, match wide blade of plug to wide slot,
fully insert.
ATTENTION: Pour éviter les chocs électriques, introduire la lame la plus large
de la fiche dans la borne correspondante de la prise et pousser jusqu au fond.

IMPORTANT SAFEGUARDS
In addition to the careful attention devoted to
quality standards in the manufacture of your
video product, safety is a major factor in the
design of every instrument. However, safety is
your responsibility too.
This sheet lists important information that will
help to assure your enjoyment and proper use of
the video product and accessory equipment.
Please read it carefully before operating and
using your video product.
Installation
1Read and Follow Instructions—
All the safety and operating instructions should
be read before the video product is operated.
Follow all operating instructions.
2Retain Instructions—The safetyand
operating instructions should be retained for
future reference.
3Heed Warnings—Comply with all
warnings on the video product and in the
operating instructions.
4Polarization—This video product is
equipped with a polarized alternating-current line
plug (a plug having one blade wider than the
other). This plug will fit into the power outlet only
one way. This is a safety feature. If you are
unable to insert the plug fully into the outlet, try
reversing the plug. If the plug still fails to fit,
contact your electrician to replace your obsolete
outlet. To prevent electric shock, do not use this
polarized plug with an extension cord, recep-
tacle, or other outlet unless the blades can be
fully inserted without blade exposure. If you
need an extension cord, use a polarized cord.
5Power Sources—This video product
should be operated only from the type of power
source indicated on the marking label. If you are
not sure of the type of power supply to your
home, consult your video dealer or local power
company. For video products intended to
operate from battery power, or other sources,
refer to the operating instructions.
6Overloading—Do not overload wall
outlets or extension cords as this can result in a
risk of fire or electric shock. Overloaded AC
outlets, extension cords, frayed power cords,
damaged or cracked wire insulation, and broken
plugs are dangerous. They may result in a shock
or fire hazard. Periodically examine the cord,
and if its appearance indicates damage or
deteriorated insulation, have it replaced by your
service technician.
7Power-Cord Protection—Power-supply
cords should be routed so that they are not likely to be
walked on or pinched by items placed upon or
against them, paying particular attention to cords at
plugs, convenience receptacles, and the point where
they exit from the video product.
8Ventilation—Slots and openings in the case
are provided for ventilation to ensure reliable operation
of the video product and to protect it from overheat-
ing. These openings must not be blocked or covered.
The openings should never be blocked by placing the
video product on a bed, sofa, rug, or other similar
surface. This video product should never be placed
near or over a radiator or heat register. This video
product should not be placed in a built-in installation
such as a bookcase or rack unless proper ventilation
is provided or the video product manufacturer’s
instructions have been followed.
9Attachments—Do not use attachments
unless recommended by the video product manufac-
turer as they may cause hazards.
10 Water and Moisture—Do not use this video
product near water—for example, near a bath tub,
wash bowl, kitchen sink or laundry tub, in a wet
basement, or near a swimming pool and the like.
ii
Caution: Maintain electrical safety. Powerline
operated equipment or accessories connected
to this unit should bear the UL listing mark or
CSA certification mark on the accessory itself
and should not be modified so as to defeat the
safety features. This will help avoid any
potential hazard from electrical shock or fire. If
in doubt, contact qualified service personnel.
11 Accessories—Do not place this video
product on an unstable cart, stand, tripod, bracket, or
table. The video product may fall, causing serious
injury to a child or adult as well as serious damage to
the video product. Use this video product only with a
cart, stand, tripod, bracket, or table recommended by
the manufacturer or sold with the video product. Any
mounting of the product should follow the
manufacturer’s instructions and use a mounting
accessory recommended by the manufacturer.
11A A video product and cart combination should
be moved with care. Quick stops, excessive force,
and uneven surfaces may cause the video product
and cart combination to overturn.
Note to CATV System Installer:
This reminder is provided to call the CATV system
installer’s attention to Section 820-40 of the NEC
which provides guidelines for proper grounding and,
in particular, specifies that the cable ground shall be
connected to the grounding system of the building,
as close to the point of cable entry as practical.
(continued on next page)
iii
12 Outdoor Antenna Grounding—If
an outside antenna or cable system is
connected to the video product, be sure the
antenna or cable system is grounded so as to
provide some protection against voltage surges
and built-up static charges. Section 810 of the
National Electrical Code, ANSI/NFPA No. 70
(Section 54 of Canadian Electrical Code, Part 1)
provides information with respect to proper
grounding of the mast and supporting structure,
grounding of the lead-in wire to an antenna-
discharge unit, size of grounding conductors,
location of antenna-discharge unit, connection
to grounding electrodes, and requirements for
the grounding electrode. See example below.
Example of Antenna Grounding
16 Lightning—For added protection for this
video product during a lightning storm, or when it is left
unattended and unused for long periods of time,
unplug it from the wall outlet and disconnect the
antenna or cable system. This will prevent damage to
the video product due to lightning and power line
surges.
Service
17 Servicing—Do not attempt to service this
video product yourself as opening or removing covers
may expose you to dangerous voltage or other
hazards. Refer all servicing to qualified service
personnel.
18 Conditions Requiring Service—Unplug
this video product from the wall outlet and refer
servicing to qualified service personnel under the
following conditions.
A. When the power-supply cord or plug is
damaged.
B. If liquid has been spilled, or objects have
fallen into the video product.
C. If the video product has been exposed to rain or
water.
D. If the video product does not operate normally by
following the operating instructions. Adjust only
those controls that are covered by the operating
instructions. Improper adjustment of other controls
may result in damage and will often require
extensive work by a qualified technician to restore
the video product to its normal operation.
E. If the video product has been dropped or the
cabinet has been damaged.
F. When the video product exhibits a distinct change
in performance—this indicates a need for service.
19 Replacement Parts—When replacement
parts are required, have the service technician verify
that the replacements he uses have the same safety
characteristics as the original parts. Use of replace-
ments specified by the video product manufacturer can
prevent fire, electric shock, or other hazards.
20 Safety Check—Upon completion of any
service or repairs to this video product, ask the service
technician to perform safety checks recommended by
the manufacturer to determine that the video product is
in safe operating condition.
21 Wall or Ceiling Mounting—The product
should be mounted to a wall or ceiling only as
recommended by the manufacturer.
22 Heat—The product should be situated away
from heat sources such as radiators, heat registers,
stoves, or other products (including amplifiers) that
produce heat.
IMPORTANT SAFEGUARDS
13 Power Lines—An outside antenna
system should not be located in the vicinity of
overhead power lines, other electric light or
power circuits, or where it can fall into such
power lines or circuits. When installing an
outside antenna system, extreme care should
be taken to keep from touching or approaching
such power lines or circuits as contact with
them might be fatal. Installing an outdoor
antenna can be hazardous and should be left
to a professional antenna installer.
Use
14 Cleaning—Unplug this video
product from the wall outlet before cleaning.
Do not use liquid cleaners or aerosol cleaners.
Use a damp cloth for cleanig.
15 Object and Liquid Entry—Never
push objects of any kind into this video product
through openings as they may touch danger-
ous voltage points or “short-out” parts that
could result in a fire or electric shock. Never
spill liquid of any kind on the video product.
ANTENNA
LEAD IN
WIRE
GROUND CLAMP
GROUNDING CONDUCTORS
(NEC SECTION 810-21)
GROUND CLAMPS
POWER SERVICE GROUNDING
ELECTRODE SYSTEM
(NEC ART 250, PART H)
ELECTRIC SERVICE
EQUIPMENT
ANTENNA
DISCHARGE UNIT
(NEC SECTION 810-20)

1
PROV950H/pp. 001-003; 96/5/8/14:00
G.K. Associates, Tokyo
Table of Contents
Assistance
We want to make sure you enjoy your new camcorder. If you have any questions, call:
Camcorder Exchange Warranty................................... 800-283-6503 (pages 70–71)
Customer Service................................................................. 800-336-1900 (page 69)
Accessories .................................................................. 800-338-0376 (pages 58-61)
Important Safety Information................................. i
Important Safeguards ....................................... ii-iii
Supplied Accessories .......................................... 3
Camcorder Controls .......................................... 4-5
Installing the Lithium Cell in the Camcorder ........ 6
Installing the Lithium Cell in the Remote Control ... 6
Attaching the AC Adapter/Battery Charger ......... 7
Charging on the Docking Station ......................... 8
Inserting and Removing the Battery Pack ........... 9
Powering the Camcorder from an AC Outlet ....... 10
Powering the Camcorder from Your Car Battery.. 11
Inserting and Removing a Cassette .................. 12
Controlling the Monitor Display .......................... 13
Using the On-Screen Menu .......................... 14-15
Warning Indicators ............................................. 16
Setting the Area, Date, and Time ....................... 17
World Clock................................................... 18-20
Picture/Backlight Adjustments ........................... 21
Using the Hand Strap ........................................ 22
Attaching the Shoulder Strap ............................. 22
Easy Camera Recording with Full Auto ............. 23
Zooming ............................................................. 24
Setting the Digital Zoom..................................... 24
Digital Quick Zoom (Extend Zoom) ..................... 25
Auto Focus ......................................................... 25
Backlight Compensation (BLC) ......................... 26
Gain-up (Cat’s Eye) ............................................ 26
Digital Image Stabilization (DIS) ........................ 27
Macro Shots ....................................................... 27
Fade In and Fade Out ........................................ 28
Recording with the Wide Screen (16:9) ............. 29
Quick Return ...................................................... 30
Edit Search......................................................... 30
Tips on Recording Positions .............................. 31
Hints for Better Shooting .................................... 31
Setting the Camcorder to Full Auto Mode.......... 32
Recording the Date and Time ............................ 32
Remaining Recording Time Display .................. 33
Remaining Battery Power Display ..................... 33
First-Time Operation
Important
Information
Important
Information
Basic Operations
Camera Recording

2
PROV950H/pp. 001-003; 96/5/8/14:00
G.K. Associates, Tokyo
Playback ............................................................ 34
Volume Control ................................................... 34
Fast Forward and Rewind .................................. 34
Using the Stand ................................................. 35
Video Search...................................................... 35
Still...................................................................... 35
Slow.................................................................... 35
Program Search ................................................. 36
Using the Tape Counter ..................................... 37
Counter Memory ................................................ 38
Turning Off the LCD Monitor Backlight .............. 38
Using the lnfrared Remote Control .................... 39
Self Recording .............................................. 40-42
Manual Focus..................................................... 43
Scene Menu (Program AE) ................................ 44
Setting the Shutter Speed .................................. 45
White Balance Lock ........................................... 46
Manual Iris.......................................................... 47
Recording a Five-second Still Image
(Snapshot) ...................................................... 48
Still Recording................................................... 48
Strobe Recording ............................................... 49
Stopwatch ..................................................... 49-50
Lighting .............................................................. 51
Connection to TV Using the Docking Station ..... 52
Connection to TV Using a VCR .......................... 52
Connections for Playback on a TV Using
Audio/Video Jacks .......................................... 53
Use the Camcorder to Play Back Tapes on a TV ..... 53
Using the Optional SAV103 A/V Pack ................ 54
Editing ................................................................ 55
Recording from an External Source ................... 56
Fluorescent Lamp Backlight .............................. 57
Optional Accessories ......................................... 58
Accessory Order Form ................................. 59-61
Use and Care ................................................ 62-65
Trouble Checks ............................................. 66-67
Specifications..................................................... 68
Information to User ............................................ 68
Customer Assistance and Service ..................... 69
Limited Warranty ........................................... 70-71
Index ............................................................. 72-75
Basic Operations
Playback
Useful Features for
Camera Recording
Connections and
Editing
Table of Contents
References

3
PROV950H/pp. 001-003; 96/5/8/14:00
G.K. Associates, Tokyo
This section describes only the basic steps necessary to set up your camcorder to
record. Refer to the other sections for detailed operation and feature options.
Assistance
These toll-free numbers are available to help you with any problems you may encounter.
Camcorder Exchange Warranty ........................ 800-283-6503
Customer Service .............................................. 800-336-1900
Accessories ...................................................... 800-338-0376
Supplied Accessories
Model ProV950HB
Rechargeable Battery Pack
Part No. BB75
AC Adapter/Charger
Part No. 233576
CAUTION: Do not use this
adapter/charger for any
purpose other than
charging the BB75 or BB90
battery pack or supplying
power to the camcorder.
Shoulder Strap
Part No. 233580
Remote Control
Part No. 233581
Docking Station
Part No. 233665
DC Output Cable
Part No. 233578
S-Video Cable
Part No. 233579
Audio/Video Cable
Part No. 233582
CAUTIONS: Lithium cells must be disposed of properly. Never handle punctured or
leaking cells. May cause burns or personal injury.
Keep out of the hands of children. Can cause death or injury if swallowed. If
swallowed, consult a physician immediately for emergency treatment.
The lithium cells used in these devices may explode resulting in a fire or chemical
burn if mistreated. Do not recharge, disassemble, heat above 212ºF (100ºC), or
incinerate.
Never use metallic tweezers to hold the cell, and never short circuit the + and – sides
of the cell.
WARNING: LITHIUM-ION
(RECHARGEABLE) BATTERY MUST
BE RECYCLED OR DISPOSED OF
PROPERLY.
DO NOT INCINERATE OR
DISASSEMBLE–MAY EXPLODE OR
RELEASE TOXIC MATERIALS. DO
NOT SHORT CIRCUIT–MAY CAUSE
BURNS.
REMOTE CONTROL
ZOOM
REC
START/
STOP
PLAY
PAUSE/STILL
STOP
VOLUME
SLOW
REW FF
Supplied Accessories
Important
Information
Two Lithium Cells
3-Volt Micro Lithium
Cells – such as CR2025
– are available from
most local drug stores
and camera shops.
Use of other cells
present a risk of fire or
explosion.

4
PROV950H/pp. 004-007; 96/5/17/13:00
G. K. Associates, Tokyo
For details on the use of each control, refer to the page number indicated in the brackets.
Front View
Camcorder Controls
Removing the Lens Protector
Before mounting an optional wide or
telephoto conversion lens, remove the
lens protector by turning it counter-
clockwise.
When the cassette compartment door is opened Cassette Holder
[p. 12]
Cassette Compartment
Door Release [p. 12]
Stereo
Microphone
A/V Pack Terminal Cover
[p. 54]
Retractable Stand [p. 35]
Zoom Lens
Memory Backup
Cell Compartment
[p. 6]
Shoulder Strap Loop
[p. 22]
Cassette
Compartment
Door [p. 12]
Lens Protector

5
PROV950H/pp. 004-007; 96/5/17/13:00
G. K. Associates, Tokyo
SideView Bottom View
Important
Information
RearView
System Connector
*About the PLUG IN POWER MIC Jack
This external microphone jack outputs a DC voltage of 4.0 V. It is for use with any 2.5–4.0 volt DC use
condenser-type microphone with a 3.5 mm diameter plug. The use of other types of microphones may
result in damage to the microphone or the camcorder.
Tripod Socket
Battery Compartment
door release [p. 9]
LCD Monitor
MENU Button
[p. 13]
MODE
DISPLAY
Button [p.15]
Operation
Button
[p.13]
EarPHONES Jack [p. 34] Photoreceptor
[p. 39]
PLUG IN POWER MICrophone
Jack*
SNAPshot Button [p. 48]
Power Switch (CAMERA/VCR
Select Switch) [p. 13]
Speaker
Power Zoom Wide/
Telephoto Control Buttons
[p. 24]
VOLume Control Buttons
[p. 34]
RECord START/STOP
Button [p. 23]
Shoulder Strap
Loop [p. 22]
Hand Strap [p. 22]
Fluorescent Lamp
Compartment [p. 57]
When Camera Module is Rotated

6
PROV950H/pp. 004-007; 96/5/17/13:00
G. K. Associates, Tokyo
First-Time Operation
Installing the Lithium Cell in
the Camcorder
1Slide the release and open the cassette
compartment door. (The cassette holder
opens automatically.) Pull out the cell
holder using a pointed object such as the
point of a pen, as shown.
2Insert the supplied lithium cell into the
holder with the `side facing outward.
3Insert the cell holder back into its
compartment, and push it in completely.
4Press the “PUSH” mark until the cassette
holder clicks into place. Then, close the
cassette compartment door firmly until it
clicks.
Notes:
• The lithium cell is used to back up the calendar and
other memory functions.
• The battery will last about one year of normal usage.
• Replace the battery with a new CR2025 cell when
the camcorder’s time indicator starts to fall behind
the correct time.
Installing the Lithium Cell in
the Remote Control
1Hold the remote control
face down. Then pull out
the cell holder while
pressing the tab toward
the center.
2Install the supplied CR2025 lithium cell
with its `side matching the jmarked
side of the cell holder into the cell holder.
3Insert the cell holder in the direction of the
arrow. Make sure that the jside faces the
back of the remote control.
Cassette Compartment Door Release
WARNING: Replace cell only with 3-volt micro lithium
cells – such as CR2025 – available from most local drug
stores and camera shops. Use of other cells present a risk
of fire or explosion.
Cautions:
Lithium cells must be disposed of properly. Never handle
punctured or leaking cells. May cause burns or personal
injury.
Keep out of the hands of children. Can cause death or
injury if swallowed. If swallowed, consult a physician
immediately for emergency treatment.
The lithium cells used in these devices may explode
resulting in a fire or chemical burn if mistreated. Do not
recharge, disassemble, heat above 212ºF (100ºC), or
incinerate.
Never use metallic tweezers to hold the cell, and never
short circuit the + and - sides of the cell.
“PUSH” mark

7
PROV950H/pp. 004-007; 96/5/17/13:00
G. K. Associates, Tokyo
Attaching the AC Adapter/
Battery Charger
Precautions:
• If used near a radio, the AC adapter/battery charger
may interfere with reception.
• Prevent flammables, liquids, and metal objects from
entering the unit.
• This is a sealed unit. Do not attempt to open or
modify it.
• Do not damage, drop, or subject the unit to
vibration.
• Do not leave the unit in direct sunlight.
• Avoid using the unit in humid or extremely hot
places.
• If the power source becomes disconnected during
recording, playback, or other operations, the tape
will remain wrapped around the drum, causing
possible damage to the tape. Reconnect the power
source to the main unit immediately.
• The supplied AC adapter/battery charger is
specially designed for use with this camcorder, and
should not be used as a power supply for other
camcorders.
Charging the Battery Pack
1Be sure the DC output cable is
disconnected from the AC adapter/battery
charger. Insert the AC plug into a power
outlet. The POWER indicator will light.
2Align the Dmark on the battery with the C
mark on the charger (Q). Guide the
battery into the groove.
Pressing the battery (W), slide it in the
direction of the arrow (E) until it locks into
place.
3When the battery is charged, all three
CHARGE indicators will light. Remove the
battery and the AC plug.
CHARGE Indicators
Charging starts.
(Indicator starts flashing.)
Now charging.
Charging completed.
(The indicators will turn off
approximately 90 to 120 minutes
after charging is completed.)
Battery Pack
BB75
ChargingTime
Approx. 90 min.
First-Time
Operation
ChargingTime Using AC Adapter/Battery
Charger
To Power Outlet POWER Indicator
CHARGE Indicators
Notes:
• The battery and charger warm up during charging.
This is not a malfunction.
• Charging time depends on the ambient temperature
and the condition of the battery.
Cautions:
• Charge only BB75 battery pack. Other types of
batteries may burst, causing personal injury and
damage.
• Do not incinerate or mutilate the battery pack. It may
present the risk of a rise in surface temperature,
and/or the release of flammable vapors.
• Replace battery with BB75 only. Use of another
battery may present a risk of fire or explosion.
Attaching the AC Adapter to the
Docking Station
Attach the AC adapter to the Docking Station
and insert the AC plug into a power outlet.
Removing the AC Adapter from the
Docking Station
Press the AC adapter release button and pull
out the adapter.
Release Button

8
PROV950H/pp. 008-011; 96/5/8/14:00
G. K. Associates, Tokyo
First-Time Operation
Charging on the Docking
Station
If the camcorder is attached to the Docking
Station, the battery pack in the camcorder can be
charged automatically and continuously. The
Docking Station keeps your camcorder ready to
operate at any time.
1Attach the AC adapter to the Docking
Station and insert the AC plug into a
power outlet (see page 7).
2Insert the battery pack in the camcorder
(see page 9).
• Make sure that the Power switch is set to
OFF. Charging is not possible when the
camcorder is in the VCR or Camera mode.
3Attach the camcorder to the Docking
Station with the LCD monitor facing the
Docking Station’s LED lamp window side
(Q). Then slide the camcorder securing
lever on the Docking Station in the
direction of the arrow to the lock position
(W). Charging starts automatically.
Caution:
• If you remove the camcorder from the Docking
Station without first setting the Power switch to OFF
while the battery pack is in the camcorder, the
power may turn off and not turn on even if you set
the Power switch to CAMERA or VCR.
ChargingTwo Battery Packs at the
SameTime
You can charge two battery packs at the same
time using the Docking Station unit.
1Attach the first battery pack to the AC
adapter/battery charger.
2Insert the second battery pack in the
camcorder and attach the camcorder to
the Docking Station.
• The battery pack on the AC adapter/battery
charger will be charged first and then the
battery pack in the camcorder will be
charged.
• The charge level of the battery pack in the
camcorder can be monitored by removing
the camcorder from the Docking Station
and setting it to Camera or VCR mode.
Note:
• Charging the battery pack fully in the camcorder on
the Docking Station will take approximately 11 hours
with BB75. If you are in a hurry, we recommend you
use the AC adapter.
Removing the Camcorder from the
Docking Station
Press the camcorder
release button and
remove the camcorder.
Note:
• If the camcorder is removed from the Docking
Station, the battery pack inside will naturally
discharge with time, even after it has been fully
charged. We recommend you place the camcorder
on the Docking Station even when it is not in use.
Cautions:
• Do not use excessive force with the camcorder
and/or Docking Station. Doing so may cause
damage or malfunction.
• When installing the camcorder on the Docking
Station, be sure to lock it firmly with the securing
lever. When removing, hold the camcorder firmly
while releasing the lock so that the camcorder will
not fall over.
2
1
Securing lever
LED Lamp Window
Release button

9
PROV950H/pp. 008-011; 96/5/8/14:00
G. K. Associates, Tokyo
Inserting and Removing the
Battery Pack
Inserting the Battery Pack
1Slide the battery compartment door
release on the bottom of the
camcorder in the direction of the
arrow (Q), to open the battery
compartment door (W).
2Insert the battery pack into the
compartment (Q), as shown, and
push it in completely (W).
Caution:
• Do not force the battery pack into the
battery compartment if it does not go in
easily.
3Close the door. Be sure to push firmly
until it clicks.
Removing the Battery Pack
Perform step 1 above. Then, with the
camcorder facing down, press the lock as
shown (Q), and remove the battery pack
(W).
Cautions:
• BEFORE REMOVING THE BATTERY PACK,
ALWAYS STOP THE TAPE AND TURN THE
POWER OFF. If you remove the battery pack
during recording or playback, the tape will
remain wound around the video head drum and
may be damaged. Should the power source
(battery or adapter) become disconnected
during operation, reconnect it again immediately.
• Do not expose the battery compartment door to
strong force, as it may come off.
• Be sure to close the battery compartment door
firmly, especially during operations. If you do not,
the battery pack may come off or camcorder
operation may fail because of the poor contact
pressure.
• Remove the battery pack from the camcorder or
disconnect the camcorder from the AC adapter if
the camcorder will not be used for a long time.
• When removing the battery pack, do not tilt the
camcorder so that the battery compartment
faces down. The battery pack may fall out.
Battery Pack Handling
•Make sure that you take enough battery
packs with you to provide two to three
times your estimated recording time.
•Recording time will be reduced in cold
weather.
•The battery will drain in Recording
Standby mode. Turn off the power if you
will not be recording again soon.
First-Time
Operation
Lock

10
PROV950H/pp. 008-011; 96/5/8/14:00
G. K. Associates, Tokyo
First-Time Operation
Powering the Camcorder
from an AC Outlet
1Slide the battery compartment door
release on the bottom of the camcorder in
the direction of the arrow (Q), to open the
battery compartment door (W).
2Slide the cable notch cover in the direction
of the arrow shown in the diagram.
3Insert the DC cable connecting plate into
the compartment (Q), pass the DC cable
through the battery compartment notch,
and then close the battery compartment
door firmly (W).
4Insert the cable plug into the DC OUT jack
on the supplied AC adapter.
5Plug the power cord into a power outlet.
The POWER indicator on the AC adapter
will light.
Removing the DC Cable from the
Camcorder
1Slide the battery compartment door
release and open the door.
2Press the lock as shown (Q), remove the
cable from the notch and then remove the
DC cable (W).
Note:
• The DC cable can be easily removed by facing
the camcorder down at an angle.
Cautions:
• Turn the Power switch off before removing the
DC cable.
• When removing the DC cable, grasp the
connecting plate, not the cable itself, and pull it
out of the compartment.
Using an Optional Plug Adapter
An optional plug adapter may be required in some
countries.
1Plug the adapter/charger’s plug into the
AC plug adapter.
2Plug the AC plug adapter into the AC
outlet.
Notch
Lock
Notch
Optional AC
Plug Adapter
AC 100-240V
Cable Notch
Cover
4
5
POWER indicator

11
PROV950H/pp. 008-011; 96/5/8/14:00
G. K. Associates, Tokyo
Powering the Camcorder
fromYour Car Battery
Use the optional SDC100 car battery adapter
(shown on page 58) to power the camcorder from
your car battery.
1Open the battery compartment door
release on the bottom of the camcorder
and insert the DC cable connecting plate
in the camcorder.
2Pass the DC cable through the battery
compartment notch, then close the battery
compartment door.
3Insert the DC cable plug into the DC OUT
jack on the car battery adapter.
4Start the car engine and leave it idling.
Then, insert the power cord plug of the car
battery adapter into the cigarette lighter
socket.
Note:
• See the SDC100 operation manual for details.
Cautions:
• Use only in DC 12 V or 24 V negative ground
system cars. Positive-ground car batteries
CANNOT BE USED. Check your car operation
manual or consult a local car dealer.
• Use the car battery adapter only when the car is
idling or being driven. Otherwise, the car’s
battery will be drained.
• Before starting the car engine, the car battery
adapter must be unplugged from the cigarette
lighter socket.
• Before removing either the DC plug or the
cigarette lighter plug, the camcorder’s Power
switch should be set to OFF.
• Do not apply strong force to the DC cable
connected to the camcorder as this will cause a
malfunction.
First-Time
Operation
DC Cable
To Cigarette
Lighter Socket
Car Battery Adapter
SDC100
4
3
DC OUT
Jack

12
PROV950H/pp. 012-016; 96/5/8/14:00
G. K. Associates, Tokyo
Inserting and Removing a
Cassette
Inserting a Cassette
1Slide the release and fully open the
cassette compartment door.
• The cassette holder opens automatically.
2Insert the tape cassette fully with the
window facing out and the erasure protect
tab facing up.
3Press the “PUSH” mark until the cassette
holder clicks into place.
• The cassette holder retracts automatically.
“PUSH” Mark
Erasure Protect Tab
First-Time Operation
4Wait for the cassette holder to fully retract.
Close the compartment door pressing its
center until it clicks into place.
Removing a Cassette
Perform step 1 and then remove the cassette.
Cautions:
• Be careful not to get your fingers caught in the
cassette compartment.
• Do not apply force to the cassette compartment
except for pressing the “PUSH” mark to close it.
• Do not tilt the camcorder or hold it upside down
when you are inserting or removing a cassette. It
may damage the tape.
• Remove the cassette if you will not use the
camcorder for a long time.
• If you do not press the cassette holder closed
correctly in step 3, the camcorder’s cassette
protection mechanism might eject the cassette.
If this happens, repeat the insertion procedure.
• Do not attempt to pick up the camcorder by the
cassette compartment door.
• If the compartment door does not close when
gently pressed into position, check the
compartment door release. The door release
may not be completely opened as shown below
on the left. In this case, slide the door release in
the direction of the arrow and press the
compartment door closed.
• If the battery power is too low, you may not be
able to eject the cassette or operate the Power
switch. Replace the battery pack with a fully
charged one.
• If the tape cassette is loaded when dew has
formed, the camcorder’s cassette protection
mechanism might eject the cassette (see page
63). Check that the cassette holder has retracted
completely before closing the cassette
compartment door.
Cassette compartment door release
Press Here.

13
PROV950H/pp. 012-016; 96/5/8/14:00
G. K. Associates, Tokyo
Controlling the Monitor Display
You can use various functions and make mode settings while viewing the monitor display.
Camera mode (when the Power switch
is set to CAMERA)
• Each time you press the MENU button, the
screen changes from to .
• With the screen displayed, press B on the
operation button ( ) to select “MENU”.
Each time you press Cor Bon the
button, the screen changes from MENU-PAGE
1
to
4
.
• If the area, date and time have not been set,
MENU-PAGE
4
appears when you press B
on the button to select “MENU” on
screen (see page 17).
VCR mode (when the Power switch
is set toVCR)
• Each time you press the MENU button, the
screen changes from to .
• With the screen displayed, press B on the
button to select “MENU”. The menu screen
will appear.
Note:
• The monitor illustrations in this operation
manual are for the purpose of explaining the
functions of the camcorder, and may differ
from the actual monitor displays.
Camera Mode
Lock Button
• Hold down the Lock button when setting
the Power switch to CAMERA or VCR.
BLC
FADE
AUTO
D
I
S
E
X
T
E
N
D
AUTO
AUTO
STOP WATCH
COUNTER
AUTO
M
E
N
U
ITEM
ITEM
S
E
T
S
E
T
PAGE
DATE/TIME
DISPLAY
SELF REC
PREV. PAGE
ON
DATE DATETIME
AUTO
AUTO
AUTO NO OFF
CORRECT
1234
OFF
1234
16 : 9
REMOTE
CAM. DISP.
DGTL ZOOM
PREV. PAGE
ITEM
ITEM
S
E
T
S
E
T
PAGE
ON
OFF
OFF
ON
OFF
ON
ON
OFF
1234
PREV. PAGE
ITEM
ITEM
S
E
T
S
E
T
PAGE
PHOTO SNAP
EXTEND ZOOM
SNAP
STILL
1.5
2.0 2.5
X
1234
AREA
DYLT SAVE
SETTING
PREV. PAGE
ITEM
ITEM
S
E
T
S
E
T
PAGE
ON
OFF
Power
Switch
MENU Button
MODE DISPLAY Button VCR Mode
Operation
Button
First-Time
Operation
Note:
• The above displays are those when a cassette is
loaded in the camcorder and the power is
supplied from a battery pack.
About the Operation button
( )
Use this button to select and set the
various functions on the monitor by
pressing Q , W C, E A, or
RBas shown.
(QUp, W Left, EDown, R Right)
PLAY
STILL
STOP
F
F
R
E
W
SEARCH
STOP WATCH
COUNTER
M
E
N
U
ITEM
ITEM
S
E
T
S
E
T
EDIT
PREV. PAGE
AUTO
OFF
OFF
REMOTE
ON
ON
OFF
VCR DISP.
OFF
ON

14
PROV950H/pp. 012-016; 96/5/8/14:00
G. K. Associates, Tokyo
4Press Cor Bon the button to
change from MENU-PAGE
1
to
4
.
Ex. Camera Mode
5Press orAon the button to select the
menu item you wish to set.
6Press Cor Bon the button to set the
desired mode.
• Each time you press the button, the item
setting changes as shown on the next
page.
Using the On-Screen Menu
1To display the Camera
mode menu screen:
Hold down the Lock
button and slide the
Power switch to CAMERA.
To display theVCR
mode menu screen:
Hold down the Lock
button and slide the
Power switch to VCR.
2Press the MENU button until screen
appears. (Select in VCR mode.)
Ex. Camera Mode
3Press Bon the operation button ( ) to
select “MENU”. MENU-PAGE
1
will appear
on the monitor.
• There is only one menu page in VCR mode.
Skip step 4.
STOP WATCH
COUNTER
AUTO
M
E
N
U
First-Time Operation
STOP WATCH
M
E
N
U
ITEM
ITEM
S
E
T
S
E
T
PAGE
DATE /TIME
DISPLAY
SELF REC
PREV. PAGE
ON
DATE DATETIME
AUTO
AUTO
AUTO NO OFF
CORRECT
1234
OFF
Operation
Button
ITEM
ITEM
S
E
T
S
E
T
PAGE
DATE/TIME
DISPLAY
SELF REC
PREV. PAGE
ON
DATE DATETIME
AUTO
AUTO
OFF
1234
OFF
1234
16 : 9
REMOTE
CAM. DISP.
DGTL ZOOM
PREV. PAGE
ITEM
ITEM
S
E
T
S
E
T
PAGE
ON
OFF
OFF
ON
OFF
ON
ON
OFF
1234
PREV. PAGE
ITEM
ITEM
S
E
T
S
E
T
PAGE
PHOTO SNAP
EXTEND ZOOM
SNAP
STILL
1.5 2.0 2.5
X
1234
AREA
DYLT SAVE
SETTING
PREV. PAGE
ITEM
ITEM
S
E
T
S
E
T
PAGE
ON
OFF
AUTO NO
CORRECT
ITEM
ITEM
S
E
T
S
E
T
PAGE
DATE/TIME
DISPLAY
SELF REC
PREV. PAGE
ON
DATE DATETIME
AUTO
AUTO
OFF
1234
OFF
AUTO NO
CORRECT
Note:
• If the area, date and time have not been set,
MENU-PAGE
4
appears.
Lock Button
Lock Button

15
PROV950H/pp. 012-016; 96/5/8/14:00
G. K. Associates, Tokyo
2) VCR Mode
1) Camera Mode
First-Time
Operation
7After completing the setting, press the
MENU button. The menu screen will
disappear.
Notes:
• Certain menu items are common to both the Camera
and VCR modes. If the “REMOTE” menu item, for
example, is set to “OFF” in the Camera mode, it will
automatically be set to “OFF” in the VCR mode.
• The menu screen cannot be displayed when the
camcorder is recording.
• To turn off the menu display, press the MENU button
or MODE DISPLAY button. When the MENU button
is pressed, the menu screen will disappear and the
screen will be displayed. When the MODE
DISPLAY button is pressed, operation indicators will
disappear. Press it again to display the indicators.
Returning to the Previous Screen
PressAon the button to select “PREV.
PAGE” and then press Cor Bon the
button to select “SET” to return to the previous
screen.
ITEM
ITEM
S
E
T
S
E
T
PAGE
DATE/TIME
DISPLAY
SELF REC
PREV. PAGE PRESS SET
ON
DATE DATETIME
AUTO
AUTO
OFF
1234
OFF
AUTO NO
CORRECT
STOP WATCH
M
E
N
U
COUNTER
AUTO
Operation
Button
1234
16 : 9
REMOTE
CAM. DISP.
DGTL ZOOM
PREV. PAGE
ITEM
ITEM
S
E
T
S
E
T
PAGE
ON
OFF
OFF
ON
OFF
ON
ON
OFF
1234
PREV. PAGE
ITEM
ITEM
S
E
T
S
E
T
PAGE
PHOTO SNAP
EXTEND ZOOM
SNAP
STILL
1.5
2.5
X
2.0 SNAP
STILL
1.5 2.0 2.5
1234
AREA
DYLT SAVE
SETTING
PREV. PAGE
ITEM
ITEM
S
E
T
S
E
T
PAGE
ON
OFF
ITEM
ITEM
S
E
T
S
E
T
PAGE
DATE/TIME
DISPLAY
SELF REC
PREV. PAGE
ON
DATE DATETIME
AUTO
AUTO
OFF
1234
OFF
ON
DATE DATETIME
AUTO
AUTO OFF
OFF
ON
OFF
ON
OFF
ON
OFF
ON
OFF
ON
OFF
AUTO NO
CORRECT
AUTO NO CORRECT
Press Cor Bon
the button to
change from MENU-
PAGE
1
to
4
.
You can choose from
24 time zones for the
area (see pages
17–20).
You can set the date
and time. (see page
17).
OFF
ON
OFF
ON
ON
OFF
AUTO OFF
ITEM
ITEM
S
E
T
S
E
T
EDIT
PREV. PAGE
AUTO
OFF
OFF
REMOTE
ON
ON
OFF
VCR DISP.
OFF
ON

16
PROV950H/pp. 012-016; 96/5/8/14:00
G. K. Associates, Tokyo
Warning Indicators
The video cassette is defective and should be
removed.
Dew has formed inside the camcorder. Wait for a
few hours until the dew disappears (see page 63).
About ten seconds after this warning appears, the
camcorder and display turn off.
The battery is almost depleted.
Note: Operation of the zoom may interrupt the
camcorder power. Replace the battery pack.
The video heads are clogged and should be
cleaned (see page 63).
There is no tape cassette in the camcorder.
Load a cassette.
The red erasure protect tab in the video cassette
has been slid to the record-protect position, pre-
venting recording.
The tape is about to end. Get ready to load a new
cassette.
The tape has reached its end.
Load a new cassette.
The fluorescent lamp behind the LCD monitor is
close to the end of its service life. Replace it with a
new one (see page 57). The LCD monitor turns off
about one minute after this warning is displayed.
During Self Recording mode, every warning indi-
cator is replaced by a “ ” indicator displayed in
the center of the monitor. To check the meaning of
the warning, rotate the monitor back to the normal
position.
Display after the first
3 seconds Description ofWarning
First-Time Operation
BATTERY IS TOO LOW.
THE TAPE ENDS SOON.
INSERT A CASSETTE.
CASSETTE NOT RECORDABLE.
CHANGE THE CASSETTE.
EJECT THE CASSETTE.
REPLACE THE LAMP.
Note:
•indicates a blinking display.
Display for the first
3 seconds
EJECT THE CASSETTE.
REPLACE THE LAMP.
Table of contents
Other RCA Camcorder manuals

RCA
RCA EZ200 User manual

RCA
RCA CC4391 User manual

RCA
RCA EZ2120BK User manual

RCA
RCA CC6373 User manual

RCA
RCA Small Wonder EZ1010BL Quick start guide

RCA
RCA Small Wonder EZ1100 Series User manual

RCA
RCA EZ207MD User manual

RCA
RCA Small Wonder EZ2050 series User manual

RCA
RCA CC615 User manual

RCA
RCA CC6384/CC6394 User manual

RCA
RCA Small Wonder EZ3100 Series Parts list manual

RCA
RCA Small Wonder EZ201 User manual

RCA
RCA EZ5000R Series User manual

RCA
RCA CC6254 User manual

RCA
RCA Small Wonder EZ1010 Series Instruction Manual

RCA
RCA CC6151 - VHS-C Camcorder User manual

RCA
RCA ProV800C User manual

RCA
RCA CC641 User manual

RCA
RCA PRO808A User manual

RCA
RCA ProV712 User manual