RCA RTS202 User manual

User manual
Manual de usuario
RTS202 E
It is important to read this instruction book prior to using your new product for the first time.
Es importante que lea este libro de instrucciones antes de usar su producto nuevo por
primera vez.

EN
EN
For your safety
The AC power plug is polarized (one blade
iswider than the other) and only fits into AC
power outlets one way.
If the plug won’t go into
the outlet completely, turn
the plug over and try to
insert it the other way. If
it still won’t fit, contact
a qualified electrician to
change the outlet, or use a different one.
Do not attempt to bypass this safety feature.
Caution:
To prevent electric shock, match wide blade
of plug to wide slot of power outlet, then
fully insert.
Removing the power plug is the only way to
completely remove power from your product.
Make sure the power plug remains easily
accessible.
Note:
This unit is designed and manufactured
to respond to the Region Management
Information. If the Region number of a
DVD disc does not correspond to the Region
number of this DVD player, this player cannot
play the disc. The Region number for this DVD
player is Region 1.
This device complies with Part 15 of the FCC
Rules. Operation is subject to the following
two conditions: (1) This device may not cause
harmful interference, and (2) this device must
accept any interference received, including
interference that may cause undesired
operation.
This equipment has been tested and found
to comply with the limits for a Class B digital
device, pursuant to Part 15 of FCC Rules. These
limits are designed to provide reasonable
protection against harmful interference in
a residential installation. This equipment
generates, uses, and can radiate radio
frequency energy and, if not installed and
used in accordance with the instructions,
may cause harmful interference to radio
communications.
However, there is no guarantee that
interference will not occur in a particular
installation. If this equipment does cause
harmful interference to radio or television
reception, which can be determined by
turning the equipment off and on, the user is
encouraged to try to correct the interference
by one or more of the following measures:
• Reorient or relocate the receiving
antenna.
• Increase the separation between the
equipment and receiver.
• Connect the equipment into an outlet on
a circuit different from that to which the
receiver is connected.
• Consult the dealer or an experienced radio/
TV technician for help.
WARNING:
Changes or modifications to this unit not
expressly approved by the party responsible
for compliance could void the user’s authority
to operate the equipment.
Ventilation
You must adequately ventilate the product.
Make sure there is adequate space around the
unit to provide proper air flow for ventilation.
See diagram.
This product complies with DHHS Rules 21
CFR Subchapter J. Applicable at the date of
manufacture.
videotape of very poor picture quality, or
even impossible.
It is forbidden by law to copy, broadcast, show,
broadcast on cable, play in public, or rent
copyrighted material without permission.
This item incorporates copy protection
technology that is protected by U.S. patents
and other intellectual property rights of
Rovi Corporation. Reverse engineering and
disassembly are prohibited.
Important battery information
• Do not mix different types of batteries
or new and old batteries. Do not use
rechargeable batteries.
• In order to avoid any risk of explosion,
observe the polarities indicated inside
the battery compartment. Replace only
with the type of batteries specified. Do
not dispose of them in a fire or recharge
them.
• If you are not using the remote control
for a long period of time, remove the
batteries.
• Battery shall not be exposed to excessive
heat such as sunshine, fire or the like.
Please respect the environment
and prevailing regulations.
Before you dispose of batteries
or accumulators, ask your dealer
whether they are subject to
special recycling and if they will
accept them for disposal.
Illustrations contained in this document are
for representation only.
Caution
• This product utilizes a laser. Use of
controls or adjustments or performance
of procedures other than those specified
herein may result in hazardous radiation
exposure. Do not open covers and do not
repair yourself. Refer servicing to qualified
personnel.
The lightning flash with an arrowhead
symbol, within the equilateral
triangle, is intended to alert the
user to the presence of uninsulated
“dangerous voltage” within the products
enclosure that may be of sufficient magnitude
to cause an electric shock.
The exclamation point within the
equilateral triangle is intended to alert
the user to the presence of important
operating and maintenance (servicing)
instructions in this owner’s manual.
Important Information
FCC Information
This system has earned the
ENERGY STAR.
Caution
Invisible laser radiation when open. Avoid
exposure to beam. Class 1 laser product. This
system must be opened only by qualified
technicians to prevent accidents caused by
the laser beam.
Service information
This product should be serviced only by those
specially trained in appropriate servicing
techniques. For instructions on how to obtain
service, refer to the warranty included in this
Guide.
Main plug is used as the disconnect device,
it shall remain operable and should not
be obstructed during intended use. To be
completely disconnected the apparatus from
supply mains, the main plug of the apparatus
shall be disconnected from the mains socket
outlet completely.
DVD copy protection
In accordance with the DVD standard, your
DVD player is equipped with a Copy Protection
system, which can be switched on and off
by the DVD disc itself, in order to make any
recording of the relevant DVD disc onto a
This Class B digital apparatus complies
with Canadian ICES-003.
Cet appareil numérique de la class B est
conforme à la norme du NMB-003 du
Canada
WARNING
To reduce the risk of fire or electric shock, do
not expose this product to rain or moisture.
No objects filled with liquids, such a vases,
should be placed on the apparatus.

EN
EN
Please read and save for future
reference
Some of the following information may not
apply to your particular product; however,
as with any electronic product, precautions
should be observed during handling and
use.
• Read these instructions.
• Keep these instructions.
• Heed all warnings.
• Follow all instructions.
• Do not use this apparatus near water.
• Clean only with dry cloth.
• Do not block any ventilation openings.
Install in accordance with the manufacturer’s
instructions.
• Do not install near any heat sources such
as radiators,heat registers, stoves, or other
apparatus (including amplifiers) that
produce heat.
• Do not defeat the safety purpose of
the polarized or grounding-type plug. A
polarized plug has two blades with one
wider than the other. A grounding type
plug has two blades and a third grounding
prong. The wide blade or the third prong
is provided for your safety. If the provided
plug does not fit into your outlet, consult
an electrician for replacement of the
obsolete outlet.
• Protect the power cord from being walked
on or pinched particularly at plugs,
convenience receptacles, and the point
where they exit from the apparatus.
• Only use attachments/accessories specied
by the manufacturer.
• Use only with the cart, stand, tripod,
bracket, or table specified by the
manufacturer, or sold with the apparatus.
When a cart is used, use caution when
moving the cart/apparatus combination
to avoid injury from tip-over.
• Unplug this apparatus during lightning
storms or when unused for long periods
of time.
• Refer all servicing to qualified service
personnel. Servicing is required when
the apparatus has been damaged in any
way, such as power-supply cord or plug
is damaged, liquid has been spilled or
objects have fallen into the apparatus,
the apparatus has been exposed to rain
or moisture, does not operate normally,
or has been dropped.
Additional safety information
• Apparatus shall not be exposed to dripping
or splashing and no objects filled with
liquids, such as vases, shall be placed on
the apparatus.
• Always leave sufcient space around the
product for ventilation. Do not place
product in or on a bed, rug, in a bookcase
or cabinet that may prevent air flow
through vent openings.
• Do not place lighted candles, cigarettes,
cigars, etc. on the product.
• Connect power cord only to AC power
source as marked on the product.
• Care should be taken so that objects do
not fall into the product.
• Do not attempt to disassemble the cabinet.
This product does not contain customer
serviceable components.
If your product operates
on batteries, adhere to the
following precautions:
A. Any battery may leak electrolyte if mixed
with a different battery type, if inserted
incorrectly, or if all batteries are not
replaced at the same time.
B. Any battery may leak electrolyte or explode
if disposed of in fire or an attempt is made
to charge a battery not intended to be
recharged.
C. Discard leaky batteries immediately.
Leaking batteries can cause skin burns or
other personal injury. When discarding
batteries, be sure to dispose of them in
the proper manner, according to your state/
provincial and local regulations.
Important Safety Instructions
Portable Cart Warning
Table of Contents
Connections and Setup ........... 2
Connecting the antennas...............................2
Connecting AUDIO from external sources
such as TV (Aux-In) .........................................3
Connecting to your TV ...................................4
Connecting the subwoofer............................5
Positioning the subwoofer ............................5
Other connection options..............................5
Using of wall mount brackets........................5
Installing the Sound Bar to the wall..............5
Overview of Controls ..............6
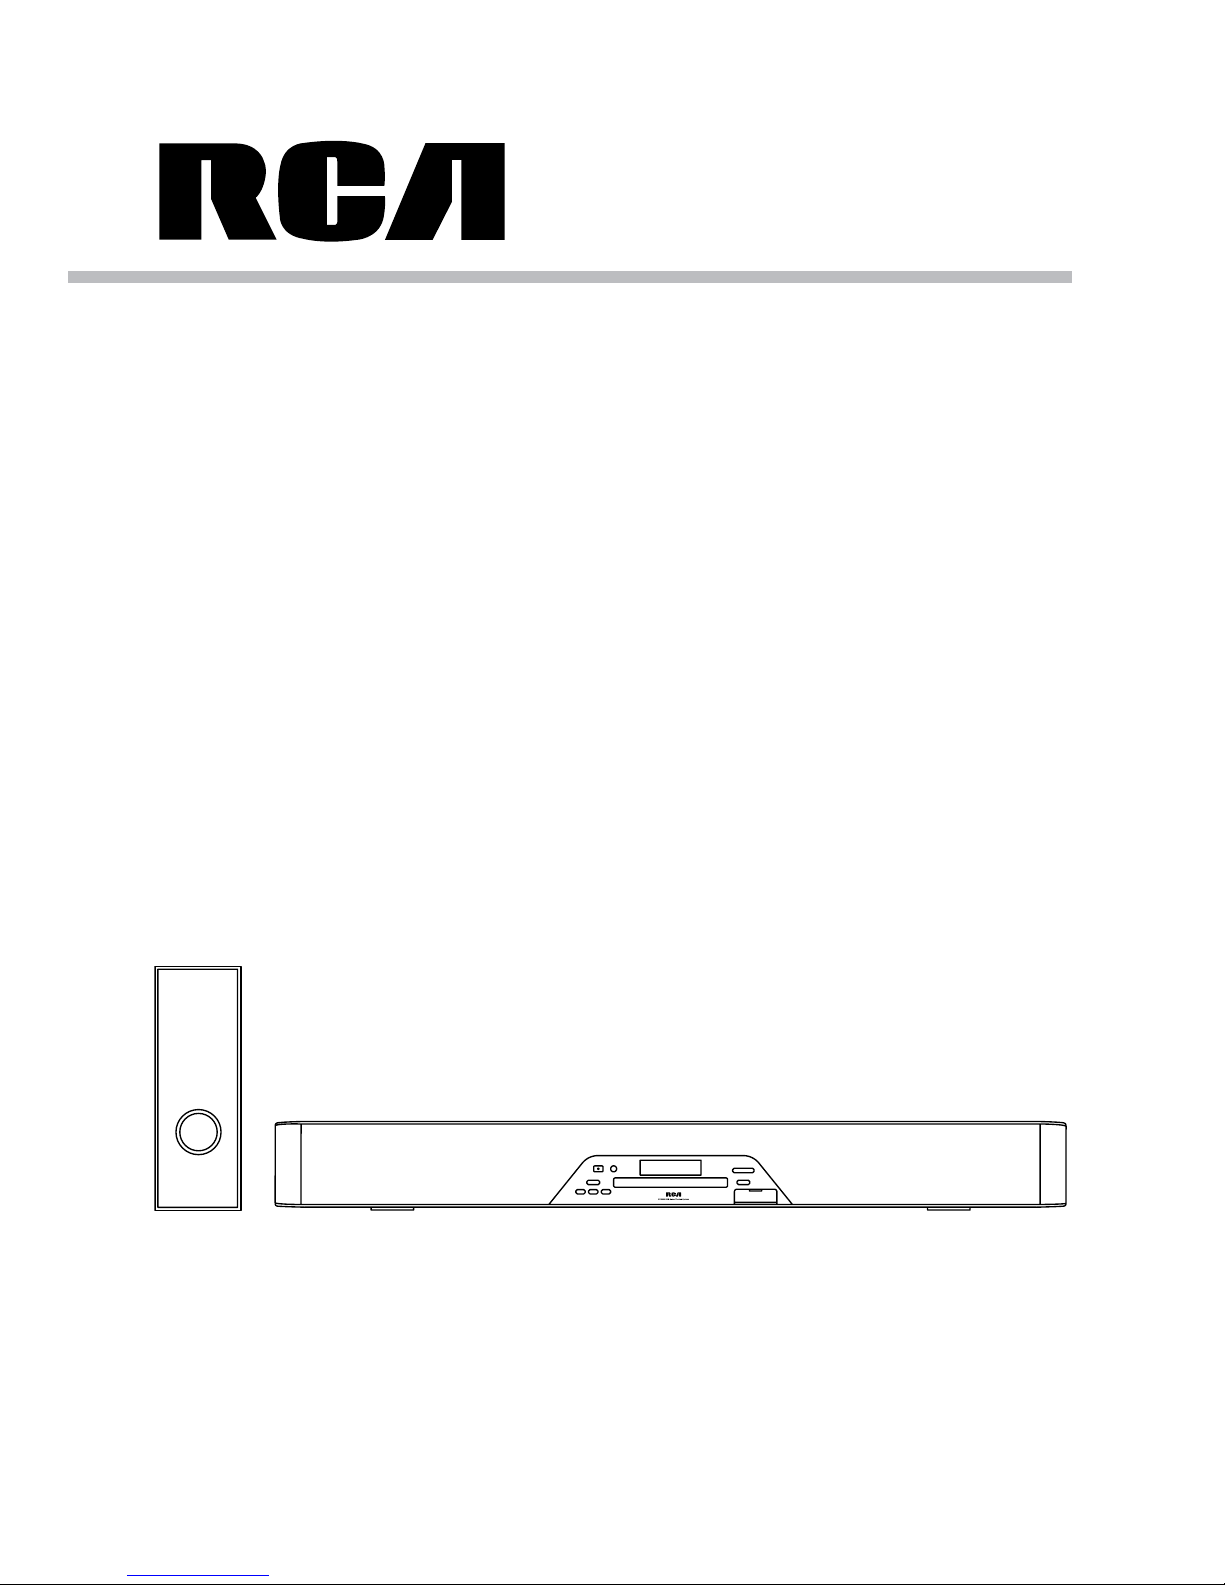
Front panel controls.......................................6
Remote control functions ..............................7
Using remote control to navigate through
the on-screen menus......................................7
Playing Discs -
Basic Functions ........................ 8
Compatible discs.............................................8
Compatible formats .......................................8
Regional coding .............................................8
Operating the Sound Bar...............................8
Loading a disc.................................................8
Basic playback operations..............................8
Types of menus ...............................................9
The Info Menu......................... 9
Using the Info menu ......................................9
Title/chapter (DVD)/track (audio CD)...........10
Time display..................................................10
Audio (DVD) .................................................10
Subtitles (DVD) .............................................10
Camera angle (DVD).....................................10
Play mode (all discs except JPEG).................10
Creating a Program List for Program Play
Mode (Audio CDs and DVD discs)................11
Bookmark (DVD and audio CD)...................11
Sleep..............................................................11
Introscan (CD) ...............................................11
JPEG Files ............................... 12
Displaying JPEG files.....................................12
Aux-in..................................... 12
Connecting auxiliary components...............12
Selecting Aux-In mode .................................12
Sound output in Aux-In mode.....................12
Radio...................................... 13
Manual tuning..............................................13
Storing radio stations...................................13
Automatic preset programming..................13
Manual preset ..............................................13
Retrieving preset stations ............................13
The Setup Menu .................... 13
General Setup...............................................14
Language Setup ...........................................15
Audio Setup..................................................16
Video Setup ..................................................16
Surround Sound Effects ........17
Additional Information......... 17
Troubleshooting ...........................................17
Precautions ...................................................18
Compatible Formats.....................................19
Limited Warranty .................. 20

EN
2
EN
3
• Leave enough space around the unit to
allow adequate ventilation: 10 cm/4 inches
on either side and above the top, and 5
cm/2 inches at the rear.
• The humidity of the room should not
exceed 75%. If you have to use the unit
outdoors, do not expose it to rain or
splashing water. The apparatus should not
be exposed to dripping or splashing and
no objects filled with liquids, such as vases,
should be placed on the apparatus.
• Moving the unit from a cold place to a
warm one can cause condensation on
some components inside the unit. Let the
condensation disappear on its own before
turning the unit on again.
• Before moving the unit, make sure the disc
tray is empty.
• Where the mains plug or an appliance
coupler is used as a disconnect device,
the disconnect device shall remain readily
operable.
• Other important use and cleaning
information at the end of the booklet.
Connecting the antennas
The AM and FM antennas connect to the AM
and FM terminals on the system’s back panel.
They must be hooked up in order to receive
clear reception.
AM Loop Antenna
1. Uncoil the AM Antenna wire.
2. Press down on the Antennas tab to open
the terminal.
3. Make sure the white wire on the AM
loop antenna is inserted into the AM loop
terminal and the other wire is inserted into
the ground loop terminal.
Connections and Setup
Remote control and
2xAAA batteries
External AM
loop antenna
Subwoofer
Accessories provided
Wall Mounting Hardware
Wall-mounting hardware included to
facilitate mounting of sound bar on
wall. It’s recommended that mounting be
carried out by a professional. Additional
or alternative parts may be needed for
attachment to specific types of wall
construction.
FM ANTENNAAM LOOP
GND
Antenna
White
FM Pig-Tail
antenna wire
Composite
Video Cable
Things to consider before you
connect
• Ensure that the mains supply in your
house complies with that indicated on the
identification sticker located on the back
of your unit.
• Install your unit horizontally, away from
any source of heat (fireplace) or appliances
creating strong magnetic or electric fields.
The components of this unit are sensitive to
heat. The maximum ambient temperature
should not exceed 35°C/95°F.
Using AUDIO IN (AUX 1) jacks
Connect the AUDIO IN (AUX 1) jacks from
the rear panel of the unit to the AUDIO
OUT jacks on TV, Set Top Box, VCR or other
component.
Using AUDIO IN (AUX 2) jacks
Connect the AUX IN (AUX 2) jacks on the front
panel of the unit to the AUX OUT (AUDIO
OUT) jacks on VCR, TV, Set Top Box or other
component.
• Audio cables (color-coded in red and white) (not included) are required.
• To listen to the audio input from the connected component, press SOURCE on
the main unit or AUX1/2 on the remote control to select AUX 1 or AUX 2 mode.
• Refer to the owner’s manual of
the connected TV as well.
• When using HDMI cable, set
the HDMI Audio to PCM.
HDMI, the HDMI logo and High-Definition
Multimedia Interface are trademarks or
registered trademarks of HDMI licensing
LLC.
Connecting to your TV
Method 1 (best)
HDMI
• Connect the HDMI OUT jack on the rear
of the unit to the HDMI IN jack on your
TV using a HDMI cable (not included).
• Press the HDMI button on the remote
control to change output signals as follows:
480p, 720p, 1080i and 1080p.
Connecting AUDIO from external sources such as TV (Aux-In)

EN
4
EN
5
• If your television is a high
definition television with an HDMI
input, we highly recommend you
use use the unit’s HDMI output to get
the highest possible video resolution.
• If your television does not have HDMI
input but does support Progressive
Scan, we recommend you use the
unit’s progressive scan output. Set the
Progressive Scan option in the Video
menu to On.
• If one of the devices is not working,
check that all the cables have been
inserted properly into the jacks.
• If your component has only one input
for audio (mono), connect it to the
left (white L/Mono) audio jack on the
TV and don’t connect the right audio
part of the cable.
Connecting the subwoofer
Press down the tab to open the terminal and
insert the subwoofer speaker wire. Release the
tab to lock wire in the terminal.
Note: It is not recommended
to place the subwoofer near
the TV set.
Positioning the subwoofer
A subwoofer is designed to reproduce
powerful low bass effects (explosions, the
rumble of spaceships, etc.).
It can be placed either vertically or horizontally.
For best effects, allow at least two inches of
clear space over the speaker driver and the
port hole.
Use of Rubber Pads
Attach the included rubber pads to the
subwoofer to avoid mechanical vibration
noise, especially when placing the subwoofer
on a hard surface. Attached the rubber pads
to the corners of the subwoofer for maximum
stability.
Other connection options
There are several ways in which you can
incorporate your unit into an Audio-Video
system. This depends on the sockets and
other appliances you have. Sound and image
quality depend to a large extent on the types
of connections used.
1. Coaxial Digital Audio Input
The coaxial digital audio input is compatible
with Dolby Digital (Surround Sound) and
PCM (Digital Stereo) signals when compatible
components are connected. Typical compatible
devices include HDTVs, DVD players, Cable or
Satellite set top boxes.
2. Subwoofer Audio Out
For your convenience, this product is equipped
with a subwoofer preamp output, allowing you
to connect an optional powered subwoofer
(not supplied), if you so desire. Simply use an
RCA cable to connect a powered subwoofer
to the SUBWOOFER AUDIO OUT jack. If you
connect another powered subwoofer, you
must disconnect the supplied subwoofer
speaker to avoid interference.
Using the wall mount bracket
Use the wall mounting hardwares (supplied) to
secure the brackets into your Sound Bar.
Use the 1:1 Wall Mount Template (supplied)
to drill holes in the wall. If attaching to a wall
constructed of drywall and wooden studs, you
must position the Template to ensure the drill
holes align with the centers of the wooden
studs in the wall.
If your wall is of drywall and stud construction,
we recommend you use the following
hardware (not included):
a. 2 pcs. woodscrews, size #8x2”
b. 2 pcs. washers, size #8
wall
1:1 Wall Mount Template
Washer
drill here
Wood screw
• We recommend that
Wall Mounting be carried out
by a professional. Additional
or alternative parts may be
needed for certain type of
wall constructions.
• Before hanging to the
wall, please make all AV
connections.
Method 2 (good)
Component video jacks (Pr, Pb, Y)
• The component video jacks are color-coded
green, blue and red.
• Additional component video cables (not
supplied) are required to provide best
picture quality. They are usually color-
coded green, blue and red.
• Connect the component video OUT jacks on
the unit to the component video IN jacks
on your TV so the video content goes from
the unit to the screen.
Method 3 (basic)
Composite video jack (yellow)
• The basic video jack is color-coded
yellow.
• Video cable (yellow) for the connection
for good picture quality.
• Connect the video OUT jack on the unit to
the IN jack on your TV so the video content
goes from the unit to the screen.
Installing the Sound Bar to the wall

EN
6
EN
7
Overview of Controls
1
6789 10 11
2345
Front panel controls
1. ON / STANDBY – Turns the unit on and
puts it in standby mode.
2. SOURCE – Selects the input sources. Press
repeatedly to select:
DVD – to watch DVD videos
AUX 1 or AUX 2 – to listen to the audio
input from the connected TV, VCR or Set
Top Box.
TUNER – to listen to the radio
COAXIAL – listen to a connected device
(e.g. Set Top Box) with coaxial digital
audio output to enjoy digital audio sound
from the connected device.
3. Display Lens – display unit’s
information.
4. Volume +/- button – adjusts the
volume.
5. Open/close button – open and closes
the disc tray.
6. Play/pause button – starts/pause playing
a disc.
7. Stop button – stops disc playback.
8. REV button – directly accesses the
previous chapter (DVD) or track (CD).
9. FWD button – directly accesses the next
chapter (DVD) or track (CD).
10. Disc tray
11. AUDIO IN (AUX 2) jacks – connects
audio devices.
HDMI
/
/
Remote control functions
ON•OFF – Turns the unit on and puts it in standby mode.
DVD – Selects the DVD mode.
TUNER – Selects the TUNER and selects between FM/AM.
In FM mode, press and hold TUNER to enter into “Auto
Preset Programming”.
COAXIAL – Selects the coaxial mode.
AUX 1/2 – Selects the Auxiliary input (for listening to audio
input from connected TV, VCR or Set Top Box) at front or
rear panel.
0-9 – Number entry.
CLEAR – Quits the current setting manually from the TV
screen without saving change.
INFO – Accesses the Info menu.
TITLE – Accesses the title menu of DVD discs.
DISC MENU – Accesses the disc menu during playback.
OK – Confirms your selection.
– To navigate through the menus. The left and
right arrows also tune the radio frequency in the tuner
mode. When viewing JPG images, use the left/right arrows
to rotate the images. Up arrow rotates image vertically and
down arrow rotates the image horizontally.
MUTE – Mutes and restores the sound.
SETUP – Enters Setup menu.
RETURN – In DVD mode, returns to the previous menu.
VOL +/- – Adjusts the sound volume.
CH +/ , CH –/ – Directly accesses the next or previous
chapter (DVD) or track (CD). Selects programmed stations
in TUNER mode.
REV – Starts reverse accelerated play or reverse slow
motion.
PLAY – Starts playing a disc.
FWD – Starts forward accelerated play or forward slow
motion.
STOP – Stops playback. Press and hold to open the disc
tray.
PAUSE – Freezes frame, accesses frame advance.
SLOW – Accesses slow motion function.
AUDIO – Accesses the audio function; selects between Stereo
and Mono mode for Tuner (FM).
ANGLE – Accesses the camera angle function for DVD
disc.
ZOOM – Accesses the Zoom function.
SUBTITLE – Selects the subtitle languages or turns subtitle
off (if available).
HDMI – Toggles HDMI video output signals modes (480p,
720p, 1080i or 1080p).

EN
8
EN
9
SUBWOOFER – Selects among subwoofer
output levels (soft/balance/strong/powerful).
RANDOM – Turns on/off random playback on
CDDA/JPEG discs.
REPEAT – Accesses the repeat function.
EQ. LEVEL – Toggles channels for different
channel level settings. Adjusts the value using
buttons.
(DOLBY VIRTUAL SPEAKER) – Change
the surround sound setting between Stereo
and Dolby Virtual Speaker settings.
TUNER +/– – Tunes up and down the radio
frequencies.
MEMORY – Stores a station.
Usingremote controlto navigate
through the on-screen menus
Use and OK on the remote control
to navigate through the on-screen displays
(the DVD player’s menu, the Info Display that
appears during playback, or a disc’s menu).
Use on the remote to move through
on-screen menus in the direction of the arrow
button (e.g., to move right, press >). The arrow
buttons are used to highlight an option. Once
highlighted, press OK to select the option that
is highlighted.
Insert 2 “AAA”(“UM-4”/”R03”)
batteries to the remote control
prior to use.
Playing Discs - Basic Functions
Compatible discs
• DVD, DVD-R,DVD-RW
• CD, CD-R, CD-RW
Compatible formats
• DVD, JPEG, CD
Regional coding
Your unit has been designed to process
regional management information stored on
DVD discs. The regional code for your unit is
1. Discs that have a different regional code
will not be played.
Operating the Sound Bar
1. Turn on your television set.
2. Press ON•OFF on the remote or ON/
STANDBY located on the unit’s front panel.
Press DVD on the remote control.
Loading disc
1. Press on the front panel or press and
hold STOP on the remote control to open
the disc tray.
2. Insert a compatible disc into the disc
slot.
3. Press again to close the disc tray.
Basic playback operations
Playback
Switch the unit and the TV set on.
1. After loading a disc, playback starts
automatically, or the disc menu appears.
If the disc menu appears, select the Play
option to begin playback.
2. Press STOP to stop playback.
Accelerated play
While the disc is playing, press REVERSE or
FORWARD one or more times to vary the
speed and direction of the accelerated play.
Press PLAY to resume normal playback.
Pause
While the disc is playing, press PAUSE once for
freeze frame. Press PLAY to resume normal
playback.
Frame advance
1. Press PAUSE twice. FRAME is displayed.
2. Press FWD to move forward one frame at
a time.
3. Press PLAY to resume normal playback.
Variable slow motion
1. While the disc is playing, press PAUSE once.
PAUSE is displayed.
2. Press REV or FWD a number of times to
vary the speed.
3. Press PLAY to resume normal playback.
Changing chapter/track
While the disc is playing, press the CH+/-
button to go immediately to the next or
previous chapter, or to the next or previous
track.
Zoom
1. While a disc is playing, press ZOOM until
you reach the zoom size you want. The
ZOOM button toggles through 2x, 3x, 4x
and then zooms out to 1/2x, 1/3x and 1/4x,
then returns to normal playback.
2. Move from one area to another (pan) using
the arrow buttons.
3. To turn ZOOM off, press ZOOM unitil you
get to the ZOOM OFF option.
Types of menus
• Disc menu — The appearance and contents
of this menu varies according to the type
of disc you have inserted. It is separate
from the Setup menu.
• Info menu — The unit’s Info menu appears
at the top of the screen while the disc is
playing. Press INFO on the remote to switch
the Info menu on or off.
• Setup menu — Press SETUP to access this
menu.
When you press STOP, the unit
stores the point where playback
was interrupted. If you press PLAY again,
playback resumes from this point. To stop
playback completely or to start again from
the beginning, press STOP twice. If the unit
is left in STOP mode for more than five
minutes without any user interaction, a
screen saver is activated. At the end of 30
minutes without any user interaction, the
unit switches off automatically.
The Info Menu
Using the Info menu
1. Press INFO on the remote while a disc
is playing to display the Info menu. The
first banner shows title, chapter, and time
display information.
2. Press INFO again for audio language,
subtitles, and camera angle.
3. Press INFO a third time for play mode,
bookmark and sleep timer.
4. Use the right/left arrow buttons on the
remote to select an icon.
5. Use the up/down buttons to scroll through
the options.
INVALID KEY will be displayed
if the function you select is not
available.
DVD Info Display
CD Info Display

EN
10
EN
11
Title/chapter(DVD) /track(audio CD)
To directly access a title, chapter (DVD) or an
audio CD, press INFO, press OK. Select the
Title(TT), Track(TRK) or Chapter(CH) icon and
enter a number directly with the numeric
buttons. Press OK again to confirm.
Time display
To access the Time Display, press INFO on the
remote. Press the up/down buttons repeatedly
to display:
DVD: Chapter elapsed time, Chapter remaining
time, Title elapsed time and Title remaining
time.
Audio CD: Track elapsed time, track remaining
time, disc elapsed time, disc remaining time.
To directly access a location on the disc which
does not correspond to the start of a title
or chapter, press INFO once and press OK,
highlight the Time Display icon using the
arrow buttons, then enter a time with the
number buttons (hh:mm:ss) and press OK.
Audio (DVD)
Some discs have several audio tracks used
for different languages or different audio
formats.
To change the language or audio format
during playback:
1. Press the INFO button twice.
2. Use the left/right arrow buttons to select
the Audio icon, or press the AUDIO button
on the remote control.
3. Choose a language or an audio format
with the up/down arrow buttons.
This option is only available if the disc offers
dialog languages or audio formats. When you
change the dialog language using the Info
menu, it only changes the dialog language
of the disc being played. When you eject the
disc or switch off the unit, the language will
revert to the one you selected in the Language
Setup menu.
Subtitles (DVD)
Subtitles are turned off by default. Turn on
Subtitles as follows:
1. While the disc is playing, press INFO twice,
then select the Subtitles icon using the left/
right arrow buttons.
2. Select a language using the up/down
arrow buttons.
3. To turn subtitles off, select the Off option
or press SUBTITLE on the remote.
When you change the language of the
subtitles using the Info menu, it only applies
to the disc currently being played. When you
eject the disc and switch off the unit, the
subtitles will default to the subtitle language
you selected in the Languages menu (see
page 15). This function may not be available
on all discs.
Camera angle (DVD)
Some discs offer different camera angles for
specific scenes.
1. To change the camera angle, press the
ANGLE button on the remote or press the
INFO button twice and select the Camera
angle icon with the left/right buttons.
2. Choose the angle with the up/down
arrow buttons.
Play mode (all discs except JPEG)
1. While the disc is playing, press the INFO
button twice for a CD and three times for
a DVD.
2. Select the Play Mode icon using the left/
right arrow buttons.
3. Use the up/down arrow buttons to select
an option.
• DVD play modes: standard, program,
A-B repeat, title repeat, chapter repeat.
Program play mode is only available if a
program list has been created (see below).
Repeat mode is only available with discs
that display elapsed time and remaining
time. To repeat a sequence between points
A and B, choose the A-B repeat option, and
then follow the instructions for entering
the two points.
Many discs only have one title.
Time display function may not
be available on all discs. If the disc was recorded using a
single camera angle, this function
is not available.
• Audio CD play modes: standard, introscan,
random, program, repeat A-B, repeat disc,
repeat track.
4. To stop repeat playback, select the Play
Mode icon and use the up/down arrow
buttons to choose the Standard option.
Creating a Program List for
Program Play Mode
(Audio CDs and DVD discs)
To use program play mode, you must first
create a program list.
1. To create a program list, press the INFO
button twice for CD and three times for
DVD. Highlight the Play Mode option and
press the up arrow to select the Program
option.
2. Press OK. The Program screen is
displayed.
3. The first spot in the list is highlighted. Use
the number buttons on the remote to enter
a track number. As for DVD discs: T stands
for Title while C stands for Chapter.
4. Use the arrow buttons to move to the
next spot in the list. Enter the next track
number.
5. Continue entering tracks until you have
completed your list.
6. Highlight the Play option at the bottom of
the screen and press OK or press PLAY to
start playback. The program list will play
in the order you programmed it.
To stop program play, press STOP or select
Standard from the Play Mode option in the
INFO display.
If you want to cancel the list, repeat steps 1
and 2 to select CLEAR and press OK.
Bookmark (DVD and audio CD)
1. Press INFO twice for CDand three times for
DVD. Select the Bookmark icon with the
left/right buttons, and press OK. A menu
is displayed with five bookmarks.
2. The first bookmark space is highlighted.
Press OK to set the bookmark. The book
mark is saved and is indicated by the
number 1. You can set up to five bookmarks
on a disc.
3. To start playback from a bookmark, press
the PLAY button on the remote.
4. To delete a bookmark, highlight it and
press CLEAR.
Sleep
1. Press INFO twice for CD and three times
for DVD. Select Sleep icon with the left/
right arrow buttons.
2. Select one of the available options using
the OK button: Off, 30, 60, 90 or 120
minutes.
Introscan (CD)
This option plays the first ten seconds of each
track on a CD.
1. Press the INFO button twice, then select
the Playmode icon with the left/right arrow
buttons.
2. Press the up/down arrow buttons to select
the INTRO option and press OK to start
IntroScan.
3. Press STOP to stop Introscan, and press
PLAY to resume normal playback.
This function is only available
with discs whose elapsed time
or remaining time appears in the Info
menu.
This function is not available
in AUX, TUNER and COAXIAL
mode.

EN
12
EN
13
JPEG Files
Displaying JPEG files
1. Open the disc tray.
2. Place the disc with the printed side facing
up and close the disc tray.
The folders on the disc will be listed in
numerical order on the left side of the
screen. When you highlight a folder, the
list of pictures in the folder are listed in
numerical order on the right side of the
screen.
3. Select a folder using the up/down arrow
buttons on the remote, then press the
left arrow button to move to the picture
icons at the bottom of the screen. Use the
left/right arrow buttons to select picture
mode.
4. Press the up arrow button to move to the
file list on the right side of the screen. Use
the up/down arrow buttons to select a le.
Press OK to open a le or press PLAY to
start a slide show.
5. The unit starts the slide show with the
JPEG file you have selected, then displays
all the JPEG files in the same folder, then
all the JPEG files in the subfolders located
in the same folder. You can set the amount
of time a picture remains on the screen in
the General Setup menu.
6. During the slide show you can use the left/
right button to rotate the picture, the up
arrow button to rotate the image vertically,
the down arrow button to rotate the
image horizontally. Use the ZOOM button
to magnify the picture. Use the CH- button
to go back to the previous picture or the
CH+ button to go to the next one, and the
STOP button to interrupt the slide show
and display the disc’s contents.
7. Press INFO to display the Info menu during
playback.
8. When the unit has played all the files, the
slide show stops and the disc’s contents are
displayed again.
9. Press STOP to end playback.
• The time taken for the contents
of the disc to be displayed varies
according to the size and number of
JPEG files on the disc. If nothing is
displayed after a few minutes, the file
sizes may be too large. Reduce the files
resolution and write another disc.
• Before inserting a disc, make sure it is
compatible with the unit.
Aux-in
TV, VCR or Set Top Box can be connected to
AUX input jacks (at front panel and at the
rear panel) of the unit so that sound from the
auxiliary component comes into the unit and
out through the speakers.
Connecting auxiliary components
Refer to “Connecting to external audio
sources (Aux-In)” for details on connecting
the auxiliary components to the unit.
Selecting Aux-In mode
Press either SOURCE on the main unit or
AUX1/2 on the remote control to select AUX
1 or AUX 2 mode.
Sound output in Aux-In mode
• You may toggle between Dolby Virtual
Speaker mode and stereo mode by pressing
“” button on the remote.
• Refer details on Dolby Digital and Dolby
Virtual Speaker.
Radio
The unit has a built-in tuner that allows for FM
radio function. The AM loop antenna allows
for AM radio function.
Manual tuning
1. Connect the FM antenna and the AM loop
antenna at the back of the unit. Rotate
the AM loop for better reception.
2. Press TUNER.
3. Tune a station by pressing TUNER+/-
repeatedly until the desired station is
found. Alternatively, you can press and
hold the same buttons down for about
one second to activate the automatic
search function. In this mode the unit will
automatically tune frequencies until it finds
a station.
4. Repeat step 3 to tune to another radio
station.
5. Press TUNER to toggle between FM and
AM.
Storing radio stations
The unit can store up to 30 radio stations
in its memory. You can enter every single
radio station yourself or the unit can store
all available radio stations automatically in
ascending order.
Automatic preset programming
1. Press TUNER to enter the Tuner mode and
select FM.
2. Press and hold TUNER for a few seconds
to start automatic preset programming.
3. Radio frequencies will be browsed and
radio stations stored automatically. When
all the available radio stations are stored or
all 30 memory locations are full, the auto
preset programming function will stop.
Manual preset
1. Tune to a radio station (see “Manual
tuning” for details).
2. Press MEMORY. While the Program Preset
number is still flashing, input your desired
preset number using the numeric buttons
or press the CH+/- buttons, then press
MEMORY to store it.
Retrieving preset stations
1. Press TUNER to enter the Tuner mode.
2. Press CH +/- to search up or down for the
preset stations or directly press the numeric
buttons.
Tips:
• When the FM station broadcasts
Stereo sound is found, ST is
displayed.
• When you manually tune into a weak FM
station, press AUDIO on remote control
to switch from Stereo to Mono mode.
This will reduce the background noise.
• If there is any interference, change the
antenna’s position until ideal sound
reception is obtained. TV and other
electronic devices could be the cause
of interference, so try to position the
antenna away from them.
• A weak signal can affect the “Automatic
preset programming” function’s
efficiency. Adjust the antenna for better
reception and a more efficient search.
The Setup Menu
There are four options in the main setup
menu: General Setup, Language Setup, Audio
Setup and Video Setup.
Press SETUP to bring up the main menu. Select
one of the menu icons across the top of the
screen using the left/right arrow buttons. The
menu’s options are displayed on the left side
of the screen. Press the Up, Down, Left and
Right arrow button to move to the option’s
choices on the right. Press SETUP if you want
to exit setup.

EN
14
EN
15
General Setup
You can control access to the unit and the
type of discs your family can watch with
the lock function. Locking the unit prevents
playback of DVDs that may not be suitable
for all audiences by using the rating level
encoded on the disc (not all discs are rated).
If the rating level of the disc is higher than
the preset level, playback is prohibited unless
a password is entered.
Password for Locking the Unit
1. To activate locking according to your preset
rating limits, highlight the PASSWORD
option using the up/down arrow buttons
and select LOCK and press OK.
2. You are asked for a new password. Enter
four digits using the number buttons.
3. You are asked for confirmation; enter the
four digits again and press OK.
Password for Unlocking the Unit
1. To unlock the unit or set a new password,
highlight the PASSWORD option using the
up/down arrow buttons, select UNLOCK
and press OK.
2. Enter your password and press OK.
Changing the Password
When you unlock the unit, you must assign
a new password the next time you lock the
unit.
To change the current password, unlock the
unit as described above, and then relock it.
Rating Explanations
• The disc publisher is responsible for coding
scenes according to the rating limits. Below
is an explanation of Ratings.
• To change the rating limit, highlight the
RATING option and press the right arrow
button. Select the rating limit using the
up/down arrow buttons and press OK.
• Rating limits take affect only when the
unit is locked.
1 Kid safe – Kid safe; it is safe even for
kids.
2 G – General Audience; recommended as
acceptable for viewers of all ages.
3 PG – Parental Guidance suggested.
4 PG13 – Material is unsuitable for children
under age 13.
5 PG-R – Parental Guidance-restricted;
recommended that parents restrict children
under age 17 from viewing or allow
children to view only when supervised by
a parent or adult guardian.
6 R – Restricted, under 17 requires
accompanying parent or adult guardian.
7 NC-17 – NO children under age 17; not
recommended viewing for children under
age 17.
8 Adult – Mature material; should be viewed
only by adults, due to graphic sexual
material, violence, or language.
Slide Time
The Slide Time option lets you select the
amount of time a picture is displayed in a slide
show. The choices are 3 seconds, 5 seconds,
or 10 seconds.
• Choose a password that is
easy to remember, or write it
down.
• Use the super password: 9688 if you have
forgotten your password.
HDMI Setup
This lets you select the resolution of the
player’s output according to the connected
TV.
• Supported HD JPEG mode: 480p, 720p,
1080i and 1080p.
HDMI Audio
Select the output sound format corresponding
to your system connection. When making
connection to a TV, or Dolby Surround Pro
Logic or stereo system via the analog audio
jacks, select PCM or RAW.
RAW : Does not have a Dolby Digital
Decode.
PCM : Select when connected to a 2 channel
digital stereo amplifier.
• If apply HDMI connection to TV, make sure
to select PCM, audio signal passing to TV
via HDMI cable.
Default
This option allows you to return the unit’s
settings to the original factory settings. Any
changes you have made to the unit’s settings
will be reverted back to the original settings,
except the password.
Language Setup
With this menu, you can set the language
for unit menus, dialog, subtitles and the disc
menus.
If you chose “English” during initial set-up, any
menus generated by the disc are in English,
and so is the language of the dialogs (if this
language is available on the disc).
1. Select the Language Setup icon in the main
menu using the left/right arrow buttons.
2. Select one of the options using the up/
down arrow buttons.
3. Press the right arrow button to move to
the language choices.
4. Use the up/down arrow buttons to
highlight the language of your choice
and press OK.
Player Menu
Select the language of player menus and
press OK.
Audio
Select the dialog language using up/down
arrow buttons and press OK.
To change the Audio language during
playback, press INFO twice for DVD and use
the left/right arrow buttons to highlight the
Audio icon.
Press the up/down arrow buttons or AUDIO on
the remote control to select audio language.
Subtitles
Select the subtitle language using up/down
arrow buttons and press OK.
To change the language of the subtitles during
playback, press INFO twice for DVD and use
the left/right arrow buttons to highlight the
Subtitle icon. Press the up/down arrow buttons
or the SUBTITLE button on the remote to select
a subtitle language.
Disc Menu
To change the language of the disc menus,
select the language using the up/down arrow
buttons and press OK.
The language you select will only be displayed if
the disc is programmed with that language.
• If the selected language is
not available on a disc, the
disc’s language will be used
instead.
• If the language chosen is available,
it is automatically selected when you
display the subtitles or press SUBTITLE
on the remote control. Otherwise, the
subtitle language indicated on the disc
is selected.

EN
16
EN
17
Audio Setup
You can adapt your unit to other equipment
and access specific functions with the Audio
Setup menu.
1. Select the Audio Setup icon in the main
menu using the left/right arrow buttons.
2. Select an option using the up/down arrow
buttons. Press the right arrow to move to
the option’s choices.
Dynamic Range
You can select the dynamic range as follow:
Full, 6/8, 4/8, 2/8 or off
• When a dynamic range is set, volume may
be low.
Test Tone
This function is used to test the speakers
level.
Select Test Tone, press OK to start, a short
noise comes successively from each speaker
(Front-Left, Center, Front-Right & Subwoofer).
Press OK to exit.
Video Setup
1. Select the Video icon in the main menu
using the left/right arrow buttons.
2. Select a menu option using the up/down
arrow buttons and press OK.
Video
Progressive Function provides high quality
pictures with less flickering. Turn on Progressive
Scan if you used the Component Video jacks
of the unit to connect a TV or monitor
compatible with a progressive scan signal.
Select P-Scan YPbPr and press OK to activate
Progressive Scan.
TV Type
Depending on the format of the DVD disc, you
can choose the picture format (aspect ratio)
best suited to the format of your TV screen:
• 4:3 PS: reproduces a 4:3 picture without
distortion.
• 4:3 LB: gives best reproduction of pictures
recorded in this format (i.e. with horizontal
bands at the top and bottom of the screen)
or in 16:9.
• 16:9 (widescreen): reproduces 16:9 format
lms in full on a 16x9 screen.
Brightness
This option lets you adjust the video brightness
level on a scale of 0 to 12, with 12 being the
brightest.
Contrast
This option lets you to sharpen the picture
quality.
Hue
This option lets you adjust the hue of the
picture.
Saturation
This option lets you adjust the color saturation
of the picture.
IMPORTANT!
Once Progressive Scan has been activated,
an image will only be visible on a progressive
scan TV or monitor. If you choose this option
and you do not have a progressive scan
TV or monitor, you may get a picture with
incorrect color or no color.
Dolby Digital
Dolby Digital is a technology developed by
Dolby Laboratories. Soundtracks encoded in
Dolby Digital can reproduce from one to 5.1
discrete channels of excellent quality audio.
The unit automatically recognizes the Dolby
Digital bitstream and provides a downmix
suitable for two-channel listening.
Dolby Virtual Speaker
This unit is equipped with Dolby ® Virtual
Speaker Technology. This feature simulates
a highly realistic 5.1-speaker surround sound
listening environment without the need
for rear surround speakers. Combined with
Dolby ® Pro Logic II processing and Dolby
Digital technology, this unit delivers a virtual
surround listening experience from any high-
quality audio source.
Surround Sound Effects
Manufactured under
license from Dolby
Laboratories. Dolby, Pro
Logic and the double-D
symbol are trademarks of
Dolby Laboratories.
Additional Information
Troubleshooting
The unit does not switch on.
• Make sure it is plugged in.
• Press the ON•OFF button on the remote
control or the ON/STANDBY button on the
front of the unit.
The device switches off spontaneously.
• The device switches off automatically
when it is in STOP mode for more than
30 minutes without any user intervention.
Switch it on again.
• It might be impossible to read the disc.
• Insert the disc with the printed side facing
up.
• Check that the disc can actually be played
by this device.
• Check that the disc’s regional code matches
the unit’s regional code. This unit’s regional
code is 1.
• Clean the disc.
There is no picture.
• Check you have switched on the TV set.
• Check the connections.
• Select the AV input assigned to the unit
on the TV.
The picture is of poor quality (with snow or
lines).
• Check the connections.
There is no sound or the sound is of poor
quality.
• Check the connections.
• Make sure the MUTE function is not on.
I can’t find my file in the JPEG listing.
• Make sure the lename is valid.
The remote control does not work or works
only intermittently.
• Check that batteries are inserted or change
them.
• Aim the remote control at the unit. The
infrared beam must not be blocked or
interrupted.
• Check that the remote control is congured
to control the device you are trying to
operate with it.
The subtitles do not appear.
• Check that the DVD disc provides
subtitles.
• Refer to the section on how to display
subtitles.
The disc menu language is not the correct
one.
• The disc menu language has not been set
up.
• The language of your choice is not available
on the disc.
You have forgotten your password (Parental
control).
• Use the super password: 9688.

EN
18
EN
19
Precautions
Use
• If your unit has been stored in a cool place
for any length of time, during a journey
for example, wait for about 2 hours before
using it.
• The openings located on the top and
bottom are for ventilation and must not
be obstructed.
• During thunderstorms, we recommend that
you isolate the unit from the electrical
supply so that it is not damaged by
electrical or electromagnetic surges.
• This unit is designed for continuous
use. Switching off the unit to standby
mode does not disconnect it from the
mains supply. To completely isolate the
equipment, remove the plug from the
mains jack as some components remain
connected to the electrical supply.
• If you notice any burning or smoke,
disconnect the unit immediately to avoid
any risk of electrocution.
• Do not attempt to look inside the unit
through the disk tray opening or any
other opening. You may be electrocuted
or exposed to laser radiation.
• This unit is for domestic use only and must
not be used for industrial purposes.
• Total or partial copying of recordings
protected by copyright legislation, without
the explicit permission of the holder of
the rights, contravenes current legislation.
Copying or downloading music files for sale
or any other business purpose constitutes
or could constitute a violation of copyright
law.
Cleaning
• Use a soft, dry, clean cloth. Regularly dust
the vents at the back or sides.
• Using solvents, abrasive or alcohol-based
products risks damaging the unit.
• If an object or liquid enters inside the unit,
unplug it immediately and have it checked
by an authorized servicer or service center.
Handling and caring for discs
• Handle your discs with care. Hold the disc
with your fingers at the edges or through
the hole.
• Insert the disc with the label facing up (for
a single-sided disc).
• Place the disc properly into the tray in the
allotted holder.
• Use a soft cloth to clean discs if necessary,
always wiping from the centre to the
edge.
• Always put discs back in their cases after
use and store in a vertical position.
• Do not close the tray with two discs in it
or with a disc not sitting correctly in the
holder.
• Do not play cracked, chipped or warped
discs nor try to repair them with adhesive
tape or glue.
• Do not write on a disc.
• Do not move the unit when a disc is being
played.
• Do not scratch discs or store them in places
exposed to direct sunlight, high humidity
or high temperatures.
• Do not use aerosol cleaners, benzene,
anti-static liquids or any other solvent for
cleaning discs. When cleaning, wipe gently
with a soft damp (water only) cloth from
the centre to the edge, avoiding circular
motions, which could cause scratches and
interference during playback.
Compatible Formats
In order to ensure playback, discs must
conform with DVD and CD standards. This
unit may not play some recordings or files due
to differences in recording formats, software
used and disc types.
DVD-Video
Digital video discs - 12 cm, single or
double sided, single or dual layer.
DVDs are high density optical discs
on which high quality picture and audio are
recorded by means of digital signals.
DVD-R, DVD-RW
Most DVD-R (one recording only)
and DVD-RW discs (rewritable),
depending on the DVD writer and
discs used. Recordings using DVD-R
and DVD-RW discs must be made in
Video DVD mode.
Audio CDs
Audio CDs (12 cm).
CD-R, CD-RW
Most CD-R (one recording only) and
CD-RW discs (rewritable).
CD-Rs written during a multisession recording
can be played, provided that the session has
ended before the disc is played (depending
on the write software).
However, depending on the condition of the
CD-writer, computer and the disc used, you
may find that not all discs will play. When
playing a CD-R disc, it is normal for the unit
to take up to 20 seconds to recognize the disc
before starting to play.
If the disc is not recognized after a period of 20
seconds, remove the disc, and insert it again.
• Do not use its full capacity.
• CD-Rs should be preferably used instead
of CD-RWs (rewritable CDs) as, in certain
cases, CD-RW playback may be faulty.
• Use reliable, good-quality CD write
software.
• Close all other applications on the computer
to ensure reliable CD-R disc recording.
JPEG files
CD-R and CD-RW with JPEG files. Certain JPEG
files, including progressive JPEG files, cannot
be read by this unit.
The total number of files and folders on the
disc should be less than 650. Make sure that
files have the “.jpg” extension. Files without
the “.jpg” extension will not be able to be
read by the unit — even though the files are
shown as JPEG images on your computer.
DV D+Rewritable
Specifications and external appearance are subject to change without notice.

EN
20
ES
AVC MULTIMEDIA (“AVC”) makes the following limited warranty. This limited warranty extend to the
original consumer purchaser and is limited to non-commercial use of the product.
One Year Parts & Labor Warranty
AVC products purchased in the United States are warranted to be free from defects in materials or
workmanship for a period of one year from the date of their original retail purchase. If the unit fails to
conform to this warranty, we will service the product using new or refurbished parts and products, at
AVC’s sole discretion.
During a period of one year from the effective warranty date, AVC will provide, when needed, service labor
to repair a manufacturing defect at its designated Service Center. To obtain warranty service in the Untied
States, you must first call our Customer Support Center at 1-800-506-5746 or 1-800-252-6123, during
the hours listed in the box below. The determination of service will be made by AVC Customer Support.
PLEASE DO NOT RETURN YOUR UNIT TO AVC WITHOUT PRIOR AUTHORIZATION. New or remanufactured
replacements for defective parts or products will be used for repairs by AVC at its designated Service Center
for one year from the effective warranty date. Such replacement parts or products are warranted for an
additional one year from the date of repair or replacement. The Customer will be required to ship the unit
to the Service Center indicated at the time Customer Support is contacted to make the necessary repairs.
The customer is responsible for all transportation charges to the service facility.
Packaging and Shipping Instruction
When you send the product to the AVC service facility you must use the original carton box and packing
material or an equivalent as designated by AVC.
LIMITED WARRANTY
Your Responsibility
(1) You must retain the original sale receipt to provide proof of purchase.
(2) These warranties are effective only if the product is purchased and operated in the U.S.A. or Canada.
(3) Warranties extend only to defects in material or workmanship, and do not extend to any product or
parts which have been lost or discarded, or damage to product or parts caused by misuse, accident, improper
operation or maintenance, or use in violation of instructions provided with the product, or to product which
has been altered or modified without authorization of AVC, or to products or parts thereof which have
had the serial number removed or changed.
Out of Warranty
In the event your product requires repair after the limited warranty period has expired, please contact
our Customer Support Center at 1-800-506-5746, 1-800-252-6123 or www.RCAav.com
Hours: Monday–Thursday: 9am–7pm, Friday: 9am–5pm, Saturday: 9am–NOON Eastern time.
Important: You are responsible for any transportation, shipping or insurance relative to the return
of product to our Product Returns Center.
All warranties implied by state law, including the implied warranties of merchantability and fitness for a
particular purpose, are expressly limited to the duration of the limited warranties set forth above. With the
exception of any warranties implied by state law as hereby limited, the foregoing warranty is exclusive and
in lieu of all other warranties, guarantees, agreements and similar obligations of manufacturer or seller
with respect to the repair or replacement of any parts. In no event shall AVC be liable for consequential
or incidental damages.
No person, agent, distributor, dealer or company is authorized to change, modify or extend the terms of
these warranties in any manner whatsoever. The time within action must be commenced to enforce any
obligation of AVC arising under the warranty or under any statute, or law of the United States or any state
thereof, is hereby limited to one year from the date of purchase. This limitation does not apply to implied
warranties arising under state law.
This warranty gives you specific legal rights and you may also have other rights, which may vary, from state
to state. Some states do not allow limitation on how long an implied warranty lasts, when an action may
be brought, or the exclusion or limitation of incidental or consequential damages, so the above provisions
may not apply to you.
For more information on other products and services, please visit our web site at
www.RCAav.com.
Important: Also keep your “Bill of Sale” as proof of purchase.
Serial no............................................................................. Invoice no. .................................................................
Date purchased ................................................................. Dealer name..............................................................
FOR SERVICE AND REPAIR, PLEASE VISIT www.RCAav.com
Para su seguridad
En enchufe de CA está polarizado
(una cuchilla es más ancha que la
otra) y sólo encaja de una manera
en los tomacorrientes de CA. Si el
enchufe no entra completamente
en el tomacorriente, voltee el
enchufe y trate de introducirlo de la otra forma.
Si aún no encaja, contacte un electricista calificado
para cambiar el tomacorriente, o use uno diferente.
No intente pasar por alto esta característica de
seguridad.
Cuidado:
Para evitar descargas eléctricas, haga corresponder
la cuchilla del enchufe con la ranura ancha
del tomacorriente, después introdúzcala
completamente.
Retirar el enchufe es la única forma de retirar
completamente la corriente de su producto.
Asegúrese de que el enchufe permanezca fácilmente
accesible.
Nota:
Esta unidad se ha diseñado y fabricado para
responder la Información de Manejo de la Región.
Si el número de Región del disco DVD no se
corresponde con el número de Región de este
reproductor de DVD, este reproductor no podrá
reproducir el disco. El número de región de este
reproductor de DVD es Región 1.
Este dispositivo cumple con la Parte 15 de las
Regulaciones de la FCC. La operación está
sujeta a las siguientes dos condiciones: (1)
Este dispositivo podría no causar interferencia
dañina, y (2) este dispositivo aceptará cualquier
interferencia recibida, incluyendo interferencia
que pueda causar una operación no deseada.
Este equipo se ha probado y se ha encontrado
que cumple con los límites de un dispositivo
digital Clase B, en conformidad con la Parte 15 de
las Regulaciones de la FCC. Estos límites se han
diseñado para suministrar protección razonable
contra interferencia dañina en una instalación
residencial. Este equipo genera, usa y puede
irradiar energía de radiofrecuencia y, si no se
instala de acuerdo a las instrucciones, podría
causar interferencia dañina en la comunicaciones
de radio.
Sin embargo, no se garantiza que la interferencia
no ocurra en una instalación particular. Si este
equipo causa interferencia dañina a la recepción
de radio o televisión, lo que puede determinarse
al encender y apagar el equipo, se exhorta al
usuario a tratar de corregir la interferencia por
medio de una o más de las siguientes medidas:
• Vuelva a orientar o a ubicar la antena
receptora.
• Aumente la separación entre el equipo y el
receptor.
• Conecte el equipo a un enchufe en un circuito
diferente a aquel en el que el receptor está
conectado.
• Consulte el distribuidor o un técnico de radio
/ televisión experimentado.
ADVERTENCIA:
Los cambios o las modificaciones a esta unidad
no aprobados de manera expresa por la parte
responsable del cumplimiento podrían anular la
autoridad del usuario a operar el equipo.
Ventilación
Usted debe ventilar el producto adecuadamente.
Asegúrese de que exista un espacio adecuado
alrededor de la unidad que suministre un flujo de
aire apropiado para ventilación. Ver diagrama.
Este producto cumple con el código 21 de las
Regulaciones del DHHS (Departamento de
Salud y Servicios Humanos) CFR Subcapítulo J.
Aplicable en la fecha de fabricación.
Información Importante
Información de la FCC
Este sistema ha obtenido la
ENERGY STAR.
ADVERTENCIA
Para reducir el riesgo de incendio o de
descarga eléctrica no exponga este producto
a la lluvia o a la humedad. No se debe colocar
objetos llenos de líquido, como es el caso de
floreros, sobre el aparato.

ES
ES
de DVD viene equipado con un sistema de
Protección contra Copias, el cual puede activarse
y desactivarse por medio del disco DVD para
realizar cualquier grabación del disco DVD
relevante en una videocinta con una calidad de
imagen muy pobre o quizás imposible.
Está prohibida por ley la copia, difusión,
exhibición, distribución por cable, emisión
pública o alquiler de material con Copyright sin
autorización previa.
Este artículo trae incorporada tecnología de
protección contra copiado que está protegida
por patentes estadounidenses y por otros
derechos de propiedad intelectual de Rovi
Corporation. Queda prohibida la ingeniería
inversa y el desensamblaje del aparato.
Información importante sobre
las pilas
• No mezcle diferentes tipos de pilas o pilas
nuevas y viejas. No use pilas recargables.
• Para evitar riesgo de explosión, observe
las polaridades indicadas dentro del
compartimiento de las pilas. Remplace sólo
con el tipo de pilas especificadas. No las
deseche en el fuego ni las recargue.
• Si no va a usar el control remoto durante un
tiempo prolongado, saque las pilas.
• Las pilas no deben exponerse al calor excesivo,
como es el caso de la luz solar, el fuego o
similares.
Por favor, respecte las regulaciones
ambientales y prevalecientes.
Antes de desechar las pilas o los
acumuladores, pregunte a su
distribuidor si los mismos están
sujetos a reciclaje especial y si los
aceptarían para desecharlos.
Las ilustraciones contenidas este documento son
meramente representativas.
Cuidado
• Este producto utiliza un láser. El uso
de controles o ajustes o la realización de
procedimientos que no sean los especificados
aquí podrían traer como consecuencia
exposición peligrosa a la radiación. No abra
las cubiertas ni repare usted mismo. Refiera
la reparación a personal calificado.
El símbolo del relámpago terminado
en flecha que se encuentra dentro
de un triángulo equilátero tiene
el propósito de alertar al usuario
acerca de la existencia de “tensión
peligrosa” no aislada dentro de la caja del
producto que puede ser de suficiente magnitud
como para constituir un riesgo de descarga.
El signo de admiración dentro de
un triángulo equilátero tiene como
propósito alertar al usuario acerca
de la presencia de instrucciones
operativas y de mantenimiento
(reparación) importantes en este manual de
usuario.
Cuidado
Radiación láser invisible cuando se abre. Evite
la exposición al rayo. Producto láser Clase
1. Este sistema debe abrirlo sólo técnicos
calificados para evitar accidentes causados
por el rayo láser.
Este aparato digital Clase B cumple con la
normativa ICES-003 canadiense.
Información de Reparación
Este producto debe ser reparado exclusivamente
por aquellos especialmente entrenados en
técnicas de reparación adecuadas. Para
instrucciones respecto a cómo obtener servicios
de reparación, refiérase a la garantía incluida
en esta Guía.
El enchufe se usa como dispositivo de
desconexión, debe permanecer funcional y no
debe obstruirse cuando se le de el uso de lugar.
Para desconectar el aparato completamente
de la fuente de alimentación, el enchufe del
aparato debe desconectarse del tomacorriente
completamente.
Protección contra copias del DVD
De acuerdo con el estándar DVD, su reproductor
Instrucciones de Seguridad Importantes
Por favor léalo y guárdelo para
referencia futura
Parte de la información presentada a
continuación podría no aplicar a su producto
en particular; sin embargo, como es el caso
con cualquier producto electrónico, deben
observarse precauciones durante el manejo
y uso.
• Lea estas instrucciones.
• Guarde estas instrucciones.
• Atienda todas las advertencias.
• Siga todas las instrucciones.
• No use este aparato cerca del agua.
• Limpie usando un paño seco
exclusivamente.
• No bloquee ninguna abertura de
ventilación. Instale en conformidad con
las instrucciones del fabricante.
• No instale cerca de fuentes de calor tales
como radiadores, rejillas de calefacción,
estufas, u otros aparatos (incluyendo
amplificadores) que producen calor.
• No viole el dispositivo de seguridad del
enchufe polarizado o para conexión a
tierra. Un enchufe polarizado tiene dos
cuchillas, una más ancha que la otra. Un
enchufe de conexión a tierra tiene dos
cuchillas y una tercera clavija para conexión
a tierra. La cuchilla más ancha o la tercera
clavija se suministra para su seguridad.
Si el enchufe suministrado no cabe en
su tomacorriente, consulte un electricista
para reemplazar el tomacorriente obsoleto.
Proteja el cable de alimentación de que lo
pisen o de que sea pinzado especialmente
en los enchufes, receptáculos, y en el punto
en el que sale del aparato.
• Use sólo los aditamentos / accesorios
especificados por el fabricante.
• Use sólo con el carrito, base, trípode, soporte
o mesa especificada por el fabricante, o
vendida con el aparato.Cuando se use un
carrito, tenga cuidado cuando mueva la
combinación carrito / aparato para evitar
daños por la inclinación.
• Desconecte este aparato durante tormentas
eléctricas o cuando no se use durante un
período de tiempo prolongado.
• Refiera toda a reparación a personal
calificado. Se necesita reparación cuando
el aparato se daña de cualquier manera,
como en caso de que se dañe el cable de
alimentación o el enchufe, si se derrama
líquido o si caen objetos dentro del
aparato, si el aparato se ha expuesto
a la lluvia o a la humedad, si no opera
normalmente, o si se ha dejado caer.
Información de seguridad
adicional
• El aparato no debe exponerse a goteos o
salpicaduras y no deben colocarse objetos
llenos de líquido, tales como floreros, sobre
el aparato.
• Siempre deje suciente espacio alrededor
del producto para ventilación. No coloque
el producto en o sobre una cama, alfombra,
en un librero o gabinete que pueda
impedir el flujo de aire a través de las
aberturas para ventilación.
• No coloque velas encendidas, cigarrillos,
cigarros, etc. sobre el producto.
• Conecte el cable de alimentación sólo a la
fuente de alimentación de CA indicada en
el producto.
• Debe tener cuidado de que no caigan
objetos dentro del producto.
• No intente desarmar el gabinete.
Este producto no contiene
partes reparables por el cliente.
Si su producto opera con pilas, adhiérase a las
siguientes precauciones:
A. Cualquier pila puede derramar electrolitos
si se mezcla con un tipo de pila diferente,
si se instala incorrectamente, o si todas las
pilas no se remplazan al mismo tiempo.
B. Cualquier pila puede derramar electrolitos
o explotar si se desecha en el fuego o si
se intenta recargar una pila no diseñada
para recargarse.
C.Elimine las pilas con escapes
inmediatamente. Las pilas con escape
pueden causar quemaduras en la piel
u otro daño personal. Cuando deseche
las pilas, asegúrese de desecharlas de
la manera adecuada, de acuerdo a sus
regulaciones estatales / provinciales y
locales.
Advertencia de Carrito Portátil

ES ES
25
Cable en espiral de
la antena FM
Conexiones y Conguración
Puntos a considerar antes de conectar
• Asegúrese de que la fuente de alimentación
de su hogar cumpla con aquella indicada
en la calcomanía de identificación ubicada
en la parte posterior de su unidad.
• Instale su unidad horizontalmente, lejos
de cualquier fuente de calor (hoguera) o
aparatos que creen campos magnéticos
o eléctricos fuertes. Los componentes
de esta unidad son sensibles al calor. La
temperatura ambiente máxima no debe
sobrepasar los 35°C / 95°F.
• Deje suficiente espacio alrededor de la
unidad para permitir una ventilación
Control remoto y 2
baterías AAA
Antena de cuadro
AM externa Cable de video
compuesto
Subwoofer
Accesorios suministrados
Hardware para Instalación en la Pared
Las herramientas viene incluidas para facilitar
el montaje en la pared de la barra de sonido.
Se recomienda que una persona experta lleve
a cabo el montaje. Para poder montar la barra
en un tipo de construcción de pared específica,
puede que se necesiten piezas adicionales o
diferentes.
adecuada: 10 cm/4 pulgadas en cada lado
y encima de la parte superior y 5 cm/2
pulgadas en la parte posterior.
• La humedad de la habitación no debe
sobrepasar un 75%. Si debe usar la unidad
en el exterior, no la exponga a la lluvia o
a la salpicadura de agua.
• El aparato no debe exponerse a goteos o
salpicaduras y no deben colocarse objetos
llenos de líquido, tales como floreros, sobre
el aparato.
• Mover la unidad desde un lugar frío
hasta un lugar caliente puede causar
condensación en algunos componentes
en el interior de la unidad. Permita que
la condensación desaparezca antes de
encender la unidad nuevamente.
• Antes de mover la unidad, asegúrese de
que la bandeja del disco esté vacía.
• Cuando se use un cable o un acoplador
de dispositivos como dispositivo de
desconexión, el dispositivo de desconexión
deberá permanecer listo para usarse.
• Otro uso importante e información sobre
limpieza al final del manual.
Cómo conectar las antenas
Las antenas AM y FM se conectan a los
terminales AM y FM el panel posterior del
sistema. Las mismas deben estar conectadas
para recibir una recepción clara.
Antena de Cuadro AM
1. Desenrolle el cable de la antena AM.
2. Oprima hacia abajo la lengüeta de las
antenas para abrir el terminal.
3. Asegúrese de que el cable blanco de la
antena de cuadro AM esté dentro del
terminal de la antena del cuadro AM y que
el otro cable esté dentro del terminal del
cuadro de conexión a tierra.
FM ANTENNAAM LOOP
GND
ANTENA FM
Blanco
1
Índice
Conexiones y Configuración... 1
Cómo conectar las antenas ............................1
Cómo conectar el AUDIO desde fuentes
externas como es el caso de un televisor
(Aux-In) ...........................................................2
Cómo conectar a su televisor.........................2
Cómo conectar el subwoofer.........................3
Cómo ubicar el subwoofer.............................3
Otras opciones de conexión...........................3
Cómo usar el soporte para instalación en la
pared...............................................................4
Cómo instalar la barra de sonido en
la pared...........................................................4
Descripción de los Controles... 5
Controles del panel frontal............................5
Funciones del control remoto........................6
Cómo usar el control remoto para navegar a
través de los menús en pantalla ....................7
Cómo Reproducir Discos –
Funciones Básicas .................... 7
Discos compatibles .........................................7
Formatos compatibles....................................7
Codificación regional .....................................7
Cómo operar la Barra de Sonido ...................7
Cómo introducir un disco...............................7
Operaciones de reproducción básicas ...........7
Tipos de menús...............................................8
El Menú de Información ......... 8
Cómo usar el Menú de Información..............8
Título / capítulo (DVD) / pista
(CD de audio)..................................................9
Visualización de tiempo.................................9
Audio (DVD) ...................................................9
Subtítulos (DVD).............................................9
Ángulo de cámara (DVD) .............................10
Modo de Reproducción (todos los discos
excepto jpeg)................................................10
Cómo Crear una Lista de Programa para el
Modo de Reproducción Programada (CDs de
Audio y discos DVD) .....................................10
Favoritos (DVD y CD de audio) ....................11
Apagado automático ...................................11
Escaneo de Introducción (CD)......................11
Aux-in..................................... 11
Cómo conectar componentes auxiliares .....11
Cómo seleccionar el modo Aux-In...............11
Salida de sonido en modo Aux-In................11
Archivos JPEG ........................ 12
Visualización de archivos JPEG ....................12
Radio...................................... 13
Sintonización manual ..................................13
Cómo almacenar estaciones de radio..........13
Programación presintonizada programada
Presintonización manual .............................14
Cómo recuperar estaciones
presintonizadas ............................................14
El Menú Configuración ......... 14
Confi. general...............................................14
Confi. idioma ...............................................15
Ajuste audio .................................................15
Video Setup ..................................................16
Efectos de Sonido
Envolvente ............................. 16
Información Adicional .......... 17
Resolución de problemas.............................17
Precauciones.................................................17
Formatos compatibles..................................18
Garantía Limitada ................. 19

ES
2
ES
3
Cómo usar las tomas AUDIO IN (AUX 1)
Conecte las tomas AUDIO IN (AUX 1) del panel
posterior de la unidad a las tomas AUDIO OUT
del VCR, televisor, Caja Decodificadora u otro
componente.
Cómo usar las tomas AUDIO IN (AUX 2)
Conecte las tomas AUDIO IN (AUX 2) del
panel posterior de la unidad a las tomas AUX
OUT (AUDIO OUT) del VCR, televisor, Caja
Decodificadora u otro componente.
•
Se necesitan cables de audio (codificados con los colores rojo y blanco) (no
incluidos).
•
Para escuchar la fuente de audio desde el componente conectado, oprima SOURCE
en la unidad principal o AUX1/2 en el control remoto para seleccionar el modo AUX 1 o
AUX 2.
Método 2 (bueno)
Tomas de video por componentes (Pr,
Pb, Y)
• Las tomas de video por componentes están
codificadas con los colores verde, azul y
rojo.
• Se necesitan cables para video por
componentes adicionales (no incluidos)
para obtener la mejor calidad de imagen.
Generalmente tienen los códigos de colores
verde, azul y rojo.
• Conecte las tomas OUT de video por
componentes del receptor a las tomas IN
del video por componentes de su televisor
de modo que el contenido de video del
receptor se visualice en la pantalla.
Método 3 (básico)
Toma de video compuesto (amarilla)
• La toma básica de video es de color
amarillo.
• El cable de video (Amarilla) se suministra
para conexión con el objetivo de obtener
una buena calidad de imagen.
• Conecte la toma video OUT del receptor a
la toma video IN de su televisor de modo
que el contenido de video del receptor se
visualice en la pantalla.
Método 1 (óptimo)
HDMI
• Conecte el enchufe HDMI OUT ubicado en
la parte posterior de la unidad al enchufe
HDMI IN de su televisor, usando un cable
para HDMI (no viene incluido).
• Oprima el botón HDMI en el control
remoto para cambiar las señales de salida
de la manera siguiente: 480p, 720p, 1080i
y 1080p.
Televisor
Método 1 Método 3 Método 2
cable de
video
cable de video por
componentes
Rojo
Azul
Verde
• Si su televisor es un televisor de
alta definición con entrada para
HDMI, le recomendamos usar el
enchufe de salida de HDMI de la unidad
para obtener la resolución de video más
alta posible.
• Si su televisor no cuenta con un enchufe
de entrada para HDMI pero cuenta
con respaldo para lectura progresiva
Progressive Scan, le recomendamos
usar el enchufe de salida para lectura
progresiva de la unidad. Configure la
opción Progressive Scan del menú de
video en “On” [activado].
• Si uno de los dispositivos no funciona,
verifique que todos los cables se hayan
introducido correctamente en las
tomas.
• Si su componente tiene una sola entrada
de audio (mono), conéctela a la toma
de audio izquierda (blanca L/Mono) del
televisor y no conecte la parte derecha
del cable.
• Reérase también al manual de
usuario del televisor conectado.
• Cuando use un cable HDMI,
configure el audio HDMI en PCM. HDMI, el logo HDMI y el Interfaz de Multimedios
de Alta Definición son marcas registradas de HDMI
licensing LLC.
Cómo conectar el subwoofer
Oprima la lengüeta para abrir el terminal e
introduzca el cable de la bocina del subwoofer
(incluido). Libere la lengüeta para fijar el cable
en el terminal.
Cómo ubicar el subwoofer
Un subwoofer está diseñado para reproducir
efectos potentes de sonidos graves bajos
(explosiones, el estruendo de las naves
espaciales, etc.)
Puede colocarse verticalmente u
horizontalmente. Para los mejores efectos,
permita por lo menos dos pulgadas de espacio
libre encima de la unidad de la bocina y el
hueco del puerto.
Pegue las almohadillas de goma al subwoofer
para evitar el ruido por vibración mecánica,
especialmente cuando se coloque el
subwoofer sobre una superficie dura. Pegue
las almohadillas de goma en las esquinas
del subwoofer para obtener la estabilidad
máxima.
No se recomienda colocar el
subwoofer cerca el televisor.
Cómo conectar el AUDIO desde fuentes externas como es el caso
de un televisor (Aux-In)
Cómo conectar a su televisor

ES
4
ES
5
Otras opciones de conexión
Existen varias formas en las que puede
incorporar su unidad a un sistema de Audio y
Video. Esto dependerá de las tomas y de los
otros aparatos que usted tenga. El sonido
y la calidad de la imagen dependerán, en
gran proporción, a los tipos de conexiones
usadas.
1. Entrada de Audio Digital Coaxial
La entrada para audio digital coaxial es
compatible con el sonido Dolby Digital
(Sonido envolvente) y con las señales PCM
(estéreo digital) cuando se conectan equipos
componentes compatibles. Entre lo aparatos
que son típicamente compatibles se incluyen los
televisores de alta definición, los reproductores
de DVD, y los decodificadores para televisión
por cable o televisión satelital.
2. Enchufe Subwoofer Audio Out
Para su conveniencia, este producto viene
equipado con un enchufe de salida para
un preamplificador del altavoz de graves
(subwoofer), permitiéndole conectar un
altavoz de graves eléctrico opcional (no viene
incluido), si así lo desea. Tan sólo use un cable
para RCA para conectar un altavoz eléctrico de
graves al enchufe SUBWOOFER AUDIO OUT.
Si conecta otro altavoz eléctrico de graves,
usted debe
desconectar
el parlante
del altavoz
de graves que
viene incluido
para evitar
interferencia.
Use el hardware para instalación en la
pared (suministrado) para asegurar los
soportes de su barra de sonido.
Cómo instalar la barra de sonido en la pared
• Le recomendamos que una
persona experta lleve a cabo
el montaje en la pared. Para
ciertos tipos de construcciones de
pared, es posible que se necesiten
piezas adicionales o diferentes.
• Antes de suspender en la pared, por
favor realice todas las conexiones.
en la pared
Plantilla para Instalación en la Pared 1:1
Arandela
taladre aquí
To rnillo para
madera
Descripción de los Controles
1
6789 10 11
2345
Controles del panel frontal
1. ON / STANDBY – Enciende la unidad y
la pone en modo de espera.
2. SOURCE – Selecciona las fuentes de
entrada. Oprima repetidas veces para
seleccionar:
DVD – para observar videos DVD
AUX 1 o AUX 2 – para escuchar la entrada
de audio desde el televisor, VCR o Caja
Decodificadora conectado(a).
TUNER – para escuchar la radio
COAXIAL – escuche un dispositivo
conectado (por ej. Caja Decodificadora)
con una salida de audio digital coaxial
para disfrutar de sonido de audio digital
desde el dispositivo conectado.
3. Lente de la pantalla – muestra
información de unidad.
4. Botón volume +/- – ajusta el volumen.
5. Botón Abrir / Cerrar – abre y cierra la
bandeja del disco.
6. Botón Reproducción / Pausa – inicia /
pausa la reproducción de un disco.
7. Botón Detener – detiene la reproducción
de un disco.
8. Botón REV – accede directamente el
capítulo (DVD) o pista (CD) anterior.
9. Botón FWD – accede directamente el
capítulo (DVD) o pista (CD) siguiente.
10. Bandeja del disco
11. Tomas AUDIO IN (AUX 2) – conecta los
dispositivos de audio.
Use la plantilla de 1:1 para montaje en la pared
(que viene incluida) para perforar los orificios
en la pared. Si el montaje se está llevando a
cabo en una pared de travesaños de tabla roca
y de madera, usted deberá poner la plantilla
de manera de asegurarse que los orificios de
perforación estén alineados con el centro de
los travesaños de madera de la pared.
Si su pared está construida de tabla roca
y travesaños, le recomendamos usar
las herramientas siguientes (no vienen
incluidas):
a. 2 tornillos para madera, tamaño #8x2”
b. 2 arandelas, tamaño #8
Cómo usar el soporte para
instalación en la pared

ES
6
ES
7
HDMI
/
/
Funciones del control remoto
ON•OFF – Enciende la unidad y la pone en modo de
espera.
DVD – Selecciona el modo DVD.
TUNER – Selecciona TUNER y selecciona entre FM/AM. En
modo FM, oprima y sujete TUNER para entrar a “Auto
Preset Programming ”(Programación Presintonizada
Automáticamente).
COAXIAL – Selecciona el modo coaxial.
AUX 1/2 – Selecciona la entrada Auxiliar (para escuchar
la entrada de audio desde el televisor, VCR o Caja
Codificadora conectado) en el panel frontal o posterior.
0-9 – Entrada numérica.
CLEAR – Elimina la configuración manualmente desde la
pantalla del televisor sin guardar los cambios.
INFO – Accede al menú de Información.
TITLE – Accede al menú de títulos de los discos DVD.
DISC MENU – Accede al menú del disco durante la
reproducción.
OK – Confirma su selección.
– Para navegar a través de los menús. Las flechas
izquierda y derecha también sintonizan la frecuencia
radial en el modo sintonizador. Cuando se visualicen las
imágenes JPG, use las flechas hacia la izquierda / derecha
para rotar las imágenes. La flecha hacia arriba rota la
imagen verticalmente, la flecha hacia abajo rota la imagen
horizontalmente.
MUTE – Desactiva y restaura el sonido.
SETUP – Entra al menú de Configuración.
RETURN – En el modo DVD, regresa al menú anterior.
VOL +/- – Ajusta el volumen.
CH +/ , CH –/ – Accede directamente el capítulo (DVD)
o pista (CD) anterior o siguiente. Selecciona las estaciones
programadas en el modo TURNER (SINTONIZADOR).
REV – Inicia la reproducción inversa acelerada o en cámara
lenta.
PLAY – Inicia la reproducción de un disco.
FWD – Inicia la reproducción hacia delante acelerada o
en cámara lenta.
STOP – Detiene la reproducción. Oprima y sujete para abrir
la bandeja del disco.
PAUSE – Congela el cuadro, accede al avance del
cuadro.
SLOW – Accede a la función en cámara lenta.
AUDIO – Accede a la función de audio; selecciona entre el
modo Estéreo y Mono para el Sintonizador (FM).
ANGLE – Accede a la función de ángulo de cámara para
el disco DVD.
ZOOM – Accede a la función de Acercamiento /
Alejamiento.
SUBTITLE – Selecciona el idioma de los
subtítulos o desactiva los subtítulos (si están
disponibles).
HDMI – Alterna los modos de señales de salida
de video HDMI (480p, 720p, 1080i o 1080p).
SUBWOOFER – Selecciona entre los niveles de
salida del subwoofer (soft [suave]/ balanced
[balanceado] / strong [fuerte] /powerful
[potente]).
RANDOM – Activa / desactiva la reproducción
aleatoria en discos CDDA / jpeg.
REPEAT – Accede a la función repetir.
EQ. LEVEL (NIVEL EQ.) – Alterna los canales
para la configuración de los niveles de canal
diferentes.
Ajusta el valor usando los botones .
(DOLBY VIRTUAL SPEAKER) – Cambia
la configuración de sonido envolvente entre
la configuración Estéreo y Dolby Virtual
Speaker.
TUNER +/– – Sintoniza hacia arriba y hacia
abajo las frecuencias radiales.
MEMORY – Almacena una estación.
Cómo usar el control remoto
para navegar a través de los
menús en pantalla
Use y OK en el control remoto
para navegar a través de la visualización en
pantalla (el menú del reproductor de DVD, la
Pantalla de Información que aparece durante
la reproducción, o un menú del disco).
Use en el control remoto para
moverse a través de los menús en pantalla
en la dirección del botón con flecha (Por ej.,
para moverse hacia la derecha, oprima >). Los
botones con flechas se usan para resaltar una
opción. Una vez resaltada, oprima OK para
seleccionar la opción resaltada.
Introduzca 2 pilas “AAA”(“UM-
4”/”R03”) en el control remoto
antes de usarlo.
Cómo Reproducir Discos – Funciones Básicas
Discos compatibles
• DVD, DVD-R,DVD-RW
• CD, CD-R, CD-RW
Formatos compatibles
• DVD, JPEG, CD
Codificación regional
Su unidad se ha diseñado para procesar
información de manejo regional almacenadas
en discos DVD. El código regional de su unidad
es 1. Los discos que tienen un código regional
diferente no se reproducirán.
Cómo operar la Barra de Sonido
1. Encienda su televisor.
2. Oprima ON•OFF en el control remoto u ON
/ STANDBY en el panel frontal de la unidad.
Oprima DVD en el control remoto.
Cómo introducir un disco
1. Oprima en el panel frontal u oprima y
sujete STOP en control remoto para abrir
la bandeja del disco.
2. Introduzca un disco compatible en la
ranura del disco.
3. Oprima nuevamente para cerrar la
bandeja del disco.
Operaciones de reproducción
básicas
Reproducción
Encienda la unidad y el televisor.
1. Después de introducir un disco, la
reproducción iniciará automáticamente
o aparecerá el menú del disco. Si aparece
el menú del disco, seleccione la opción de
Play para iniciar la reproducción.
2. Oprima STOP para detener la
reproducción.
Reproducción acelerada
Mientras el disco se esté reproduciendo,
oprima REVERSE (HACIA ATRÁS) o FORWARD
(HACIA DELANTE) una o más veces para variar
la velocidad y la dirección de la reproducción
acelerada. Oprima PLAY para reanudar la
reproducción normal.
Pausa
Mientras el disco se esté reproduciendo,
oprima PAUSE una vez para congelar el
cuadro. Oprima PLAY para reanudar la
reproducción normal.

ES
8
ES
9
Avance de cuadro
1. Oprima PAUSE dos veces. Se visualizará
FRAME.
2. Oprima FWD para moverse hacia delante
un cuadro a la vez.
3. Oprima PLAY para reanudar la reproducción
normal.
Cámara lenta variable
1. Mientras el disco se esté reproduciendo,
oprima PAUSE una vez. Se visualizará
PAUSE.
2. Oprima REV o FWD unas cuantas veces
para variar la velocidad.
3. Oprima PLAY para reanudar la reproducción
normal.
Cómo cambiar el capítulo / pista
Mientras el disco se esté reproduciendo,
oprima el botón CH +/- para ir inmediatamente
al capítulo siguiente o anterior, o a la pista
siguiente o anterior.
Acercamiento / Alejamiento
1. Mientras un disco se esté reproduciendo,
oprima ZOOM hasta que haya obtenido
el tamaño de acercamiento / alejamiento
que desea. El botón ZOOM alterna entre
2x, 3x, 4x y después aleja hasta 1/2x, 1/3x
y 1/4x, después regresa a la reproducción
normal.
2. Muévase de un área a otra (panorámica)
usando los botones con flechas.
3. Para desactivar ZOOM (Acercamiento /
Alejamiento), oprima ZOOM hasta que
aparezca la opción ZOOM OFF.
Tipos de menús
• Menú de disco — La apariencia y el contenido
de este menú variará dependiendo del tipo
de disco que ha introducido. Es aparte del
menú Setup (Configuración).
• Menú de información — El menú de
información de la unidad aparecerá en
la parte superior de la pantalla mientras
se reproduce el disco. Oprima INFO en el
control remoto para activar o desactivar el
Menú de información.
• Menú de conguración – Oprima SETUP
para
Conf. general
Contraseña
Clasificar
Tiempo
Instal. HDMI
HDMI Audio
De fábrica
Cuando oprima STOP, la unidad
almacenará el punto en el que se
interrumpió la reproducción. Si
oprime PLAY nuevamente, la reproducción
se reanudará a partir de este punto. Para
detener la reproducción completamente
o para iniciar nuevamente desde el inicio,
oprima STOP dos veces. Si la unidad se
deja en modo STOP durante más de cinco
minutos sin ninguna interacción de parte
del usuario, se activará un protector de
pantalla. Al cabo de 30 minutos sin ninguna
interacción de parte del usuario, la unidad
se apagará automáticamente.
El Menú de Información
Cómo usar el Menú de
Información
1. Oprima INFO en el control remoto
mientras se esté reproduciendo un disco
para visualizar el Menú Info (Información).
El primer letrero mostrará información
sobre el título, el capítulo y la hora.
2. Oprima INFO nuevamente para el idioma
del audio, los subtítulos y el ángulo de
cámara.
3. Oprima INFO una tercera vez para el modo
de reproducción, favoritos y temporizador
de apagado.
4. Use los botones con las flechas hacia la
izquierda / derecha del control remoto
para seleccionar un icono.
5. Use los botones hacia arriba / abajo para
deslizarse a través de las opciones.
Se visualizará INVALID KEY si la
función que selecciona no está
disponible.
Pantalla de Información de DVD Pantalla de Información de CD
Título Capítulo Visualización
de tiempo
Idioma de audio Subtítulos Ángulo de
cámara
Modo de
reproducción Favorito
Tiempo de
apagado
Visualización
de tiempo
Modo de
reproducción Favorito
Pista
Tiempo de
apagado
Título / capítulo (DVD) / pista
(CD de audio)
Para acceder directamente a un título, capítulo
(DVD) o a un CD de audio, oprima INFO,
oprima OK. Seleccione el icono Título (TT),
Pista (TRK) o Capítulo (CH) e introduzca un
número directamente usando los botones
numéricos. Oprima OK nuevamente para
confirmar.
Visualización de tiempo
Para acceder a la Visualización de Tiempo,
oprima INFO en el control remoto. Oprima los
botones hacia arriba / abajo repetidas veces
para visualizar:
DVD: Tiempo transcurrido del capítulo, Tiempo
restante del capítulo, Tiempo transcurrido del
título y Tiempo restante del título.
CD de audio: Tiempo transcurrido de la pista,
Tiempo restante de la pista, Tiempo restante
del disco.
Para acceder directamente a una ubicación
del disco que no corresponde con el inicio de
un título o capítulo, oprima INFO una vez y
oprima OK, resalte el icono de Time Display
(Visualización de Tiempo) usando los botones
con flechas, después introduzca un tiempo
usando los botones numéricos (hh:mm:ss) y
después oprima OK.
Audio (DVD)
Algunos discos tienen varias pistas de audio
usadas para idiomas diferentes o diferentes
formatos de audio.
Para cambiar el idioma o el formato de audio
durante la reproducción:
1. Oprima el botón INFO dos veces.
2. Use los botones con flechas hacia la
derecha / izquierda para seleccionar el
icono de Audio, oprima el botón AUDIO
en el control remoto.
3. Elija un idioma o un formato de audio
con los botones con flechas hacia arriba
/ abajo.
La opción sólo estará disponible si el disco
ofrece idiomas de diálogo o formatos de audio.
Cuando cambie el idioma de diálogo usando
el Menú de información, sólo cambiará el
idioma de diálogo del disco que se reproduce.
Cuando expulse el disco o apague la unidad, el
idioma regresará al que seleccionó en el menú
Language Setup (Configuración de Idioma).
Subtítulos (DVD)
Los subtítulos se desactivan de manera
predeterminada. Active los Subtítulos de la
siguiente manera:
1. Mientras el disco se esté reproduciendo,
oprima INFO dos veces, después seleccione
el icono Subtitle (Subtítulos) usando los
botones con echas hacia la izquierda /
derecha.
2. Seleccione un idioma usando los botones
con echas hacia arriba / abajo.
3. Para desactivar los subtítulos, seleccione la
opción Off u oprima SUBTITLE en el control
remoto.
Muchos discos tendrán sólo un
título.
La función de visualización de
tiempo podría no estar disponible
en todos los discos.

ES
10
ES
11
Cuando cambie el idioma de los subtítulos
usando el Menú Info (Información), sólo
aplicará para el disco que se reproduce
actualmente.
Cuando expulse el disco o apague la unidad, los
subtítulos regresarán al idioma de subtítulos
que seleccionó en el Menú Language (Idiomas).
Esta función podría no estar disponible en
todos los discos.
Ángulo de cámara (DVD)
Algunos discos ofrecen diferentes ángulos de
cámara para escenas específicas.
1. Para cambiar el ángulo de cámara, oprima
el botón ANGLE en el control remoto u
oprima el botón INFO dos veces y seleccione
el icono Camera Angle (Ángulo de Cámara)
usando los botones hacia la izquierda /
derecha.
2. Elija el ángulo usando los botones con
echas hacia arriba / abajo.
Modo de Reproducción (todos
los discos excepto JPEG)
1. Mientras el disco se esté reproduciendo,
oprima el botón INFO dos veces en el caso
de un CD y tres veces en el caso de un
DVD.
2. Seleccione el icono Play Mode (Modo de
Reproducción) usando los botones con
echas hacia la izquierda /derecha.
3. Use los botones con echas hacia arriba /
abajo para seleccionar una opción.
• Modos de reproducción del DVD: standard
(estándar), programa (program), A-B
repeat (repetir A-B), title repeat (repetir
título), chapter repeat (repetir capítulo).
La reproducción programada no estará
disponible si se ha creado una lista de
programa (ver abajo). El modo repeat
(repetir) sólo estará disponible en discos
que presenten el tiempo transcurrido
y restante. Para repetir una secuencia
entre los puntos A y B, elija la opción A-B
repeat, y después siga las instrucciones para
introducir los dos puntos.
• Modos de reproducción de CD de Audio:
standard (estándar), introscan (escaneo de
introducción), random (aleatorio), program
(programado), repeat A-B (repetir A-B),
repeat disc (repetir disco), repeat track
(repetir pista).
4. Para detener la reproducción repetida,
seleccione el icono de Play Mode (Modo
de Reproducción) y use los botones con
echas hacia arriba / abajo para elegir la
opción Standard.
Cómo Crear una Lista de
Programa para el Modo de
Reproducción Programada (CDs
de Audio y discos DVD)
Para usar el modo de reproducción
programada, usted debe crear primero una
lista de programa.
1. Para crear una lista de programa, oprima
el botón INFO dos veces en el caso de un
CD y tres veces en el caso de un DVD.
Resalte la opción Play Mode (Modo de
Reproducción) y oprima la flecha hacia
arriba para seleccionar la opción Program
(Programa).
2. Oprima OK. Se visualizará la pantalla
Programa.
3. Se resaltará el primer punto de la lista.
Use los botones numéricos del control
remoto para introducir un número de
pista. En cuanto a los discos DVD: T se
refiere al Título, mientras que C se refiere
al Capítulo.
4. Use los botones con flechas para moverse
al siguiente punto de la lista. Introduzca
el número de pista siguiente.
5. Siga introduciendo pistas hasta que haya
completado su lista.
6. Resalte la opción Play (Reproducir) en la
parte inferior de la pantalla y oprima OK
u oprima PLAY para iniciar la reproducción.
La lista de programa se reproducirá en el
orden en que la programó.
Para detener la reproducción programada,
oprima STOP o seleccione Standard desde la
Opción Play Mode (Modo de Reproducción)
en la pantalla INFO.
Si desea cancelar la lista, repita los pasos 1 y 2
para seleccionar CLEAR y oprima OK.
Si el disco se grabó usando un
ángulo de cámara único, esta
función no estará disponible.
Favoritos (DVD y CD de audio)
1. Oprima INFO dos veces en el caso de un
CD y tres veces en el caso de un DVD.
Seleccione el icono Bookmark (Favoritos)
con los botones hacia la izquierda / derecha,
y oprima OK. Se visualizará un menú con
cinco favoritos.
2. El primer espacio de favoritos estará
resaltado. Oprima OK para congurar el
favorito. El favorito se almacenará y se
indicará por medio del número 1. Usted
puede configurar hasta cinco favoritos en
un disco.
3. Para iniciar la reproducción desde un
favorito, oprima el botón PLAY en el
control remoto.
4. Para borrar un favorito, resáltelo y oprima
CLEAR.
Apagado automático
1. Oprima INFO dos veces en el caso de
un CD y tres veces en el caso de un
DVD. Seleccione el icono Sleep (Apagado
Automático) usando los botones con
echas hacia la izquierda / derecha
2. Seleccione una de las opciones disponibles
usando el botón OK: Off (Desactivado), 30,
60, 90 o 120 minutos.
Escaneo de Introducción (CD)
Esta opción reproduce los primeros diez
segundos de cada pista de un CD.
1. Oprima el botón INFO dos veces, después
seleccione el icono de Playmode (Modo
de Reproducción) usando los botones con
echas hacia la derecha / izquierda.
2. Oprima los botones con flechas hacia arriba
/ abajo para seleccionar la opción INTRO
y oprima OK para iniciar el Escaneo de
Introducción.
3. Oprima STOP para detener el escaneo de
introducción, y oprima PLAY para reanudar
la reproducción normal.
Está función sólo está disponible
en discos cuyo tiempo
transcurrido o restante aparezca
en el Menú Info.
Esta función no está disponible en
modo AUX, TUNER y COAXIAL.
Aux-in
El televisor, VCR o Caja Decodificadora
pueden conectarse a tomas de entrada AUX
(en el panel frontal y en el panel posterior)
de la unidad de modo que el sonido del
componente auxiliar entre a la unidad y salga
a través de las bocinas.
Cómo conectar componentes
auxiliares
Refiérase a “Cómo conectar fuentes de audio
externas (Aux-in)” para detalles acerca de
cómo conectar componentes auxiliares a la
unidad.
Cómo seleccionar el modo Aux-In
Oprima ya sea SOURCE en la unidad principal o
AUX1/2 en el control remoto para seleccionar
el modo AUX1 o AUX2.
Salida de sonido en modo Aux-In
• Usted puede alternar entre modo Dolby
Virtual Speaker y modo estéreo al oprimir
el botón “ ” en el control remoto.
• Reérase a detalles sobre Dolby Digital y
Dolby Virtual Speaker.
Archivos JPEG
Visualización de archivos JPEG
1. Abra la bandeja del disco.
2. Coloque el disco con el lado impreso
hacia arriba y cierre la bandeja del disco.
Las carpetas del disco se enumerarán en
ordenadas numéricamente en el lado
izquierdo de la pantalla. Cuando resalte
una carpeta, la lista de las imágenes
de la carpeta estarán enumeradas en
orden numérico en el lado derecho de la
pantalla.
3. Seleccione una carpeta usando los botones
con flechas hacia arriba / abajo en el
control remoto, después oprima el botón
Other manuals for RTS202
3
This manual suits for next models
3
Table of contents
Languages:
Other RCA Home Theater System manuals