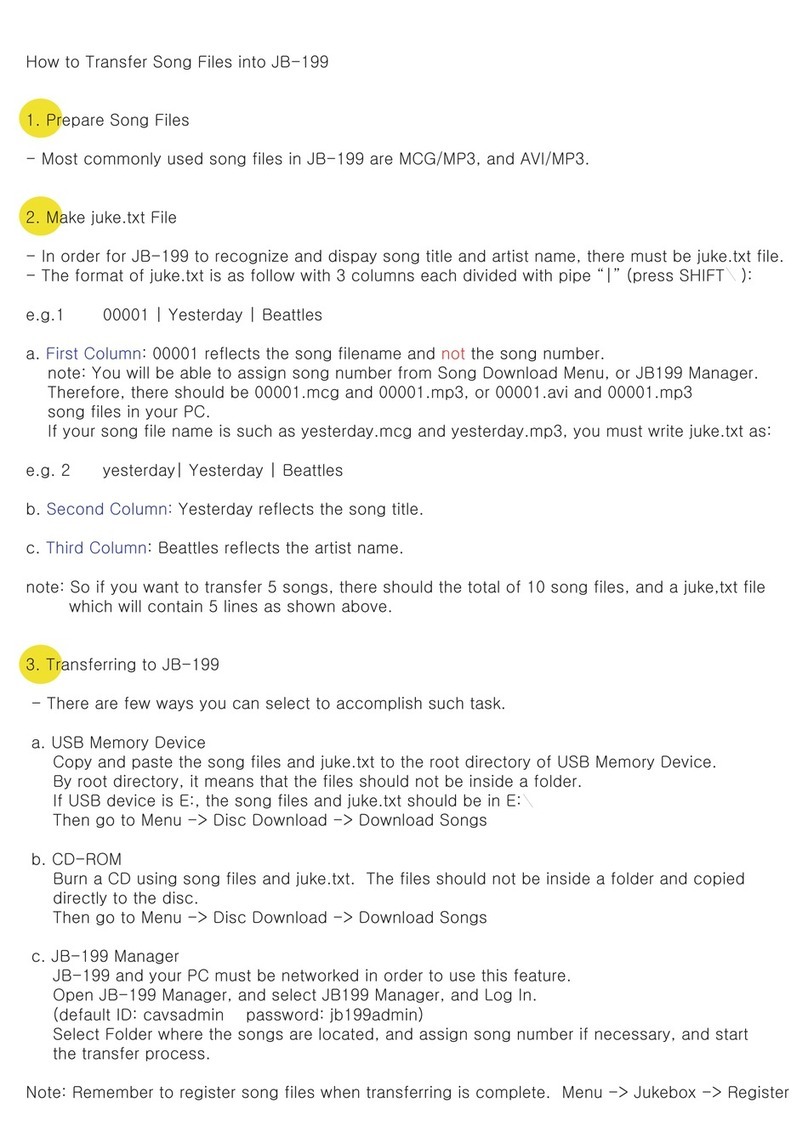
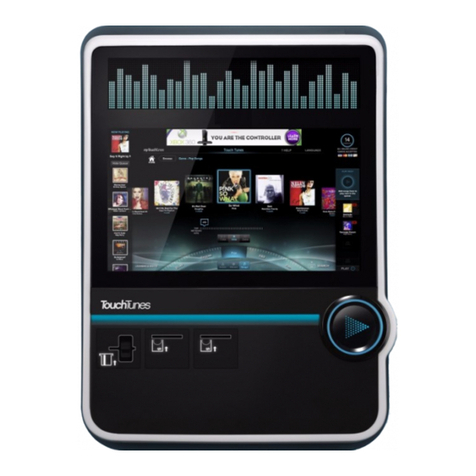
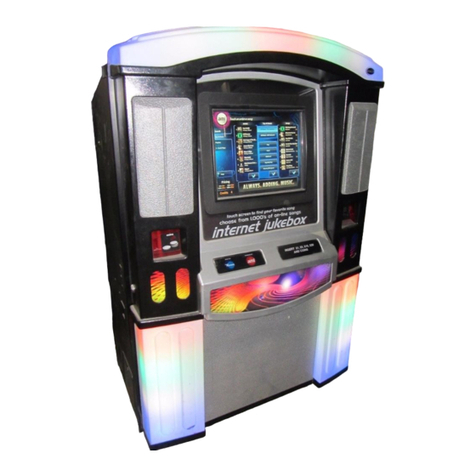
RCA RTD750 User manual

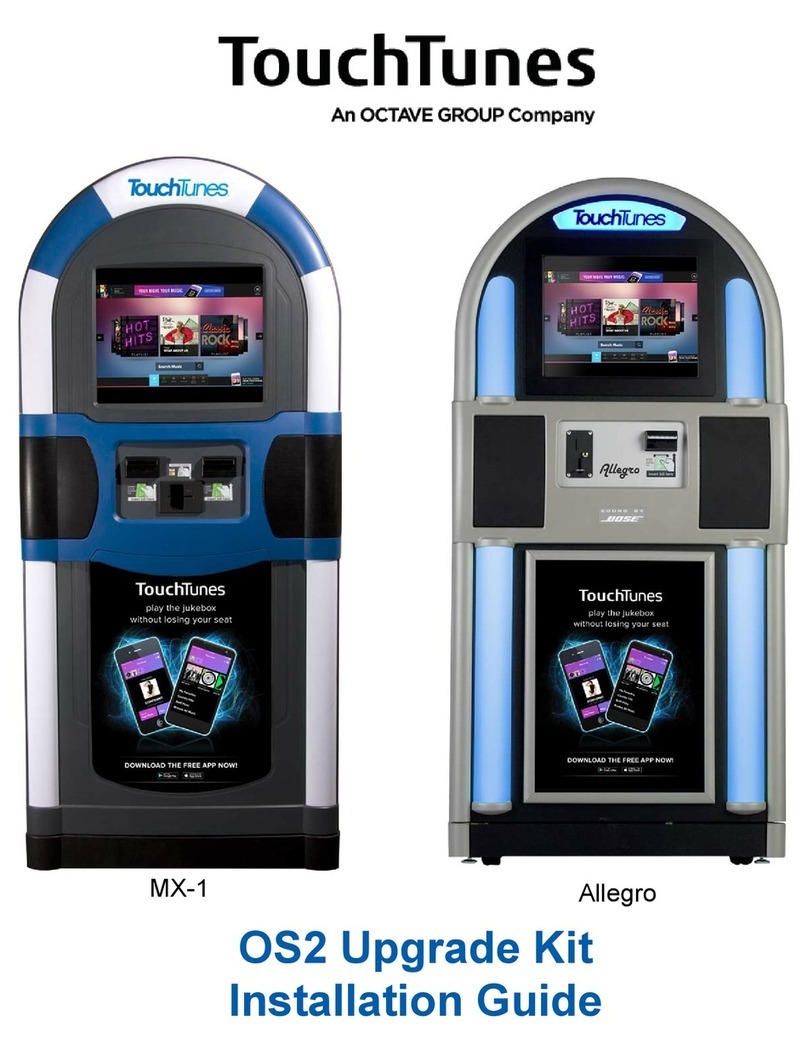
Home Theater
Music Jukebox
User’s Guide
RTD750
Changing Entertainment. Again.

Important Information
CAUTION
THIS PRODUCT UTILIZES A LASER. USE
OF CONTROLS OR ADJUSTMENTS OR
PERFORMANCE OF PROCEDURES
OTHER THAN THOSE SPECIFIED HEREIN
MAY RESULT IN HAZARDOUS
RADIATION EXPOSURE. DO NOT OPEN
COVERS AND DO NOT REPAIR
YOURSELF. REFER SERVICING TO
QUALIFIED PERSONNEL.
This symbol indicates "dangerous voltage"
inside the product that presents a risk of
electric shock or personal injury.
WARNING
To reduce the risk of fire or electric
shock, do not expose this product to
rain or moisture. No objects filled with
liquids, such as vases, shall be placed
on the apparatus.
This symbol indicates important
instructions accompanying the
product.
CAUTION
RISK OF ELECTRIC SHOCK DO
NOT OPEN
Caution: To prevent electric shock, match wide blade of plug to wide slot, fully insert.
Attention: Pour éviter les chocs électriques, introduire la lame la plus large de la fiche dans la borne correspondante de la prise et pousser
jusqú au fond.
Refer to the identification/rating label located on the back panel of your product for its proper operating voltage.
Note:
This DVD player is designed and manufactured to
respond to the Region Management Information. If
the Region number of a DVD disc does not correspond
to the Region number of this DVD player, this player
cannot play the disc. The Region number for this DVD
player is Region No 4.
This symbol indicates that this product incorporates double
insulation between hazardous mains voltage and user
accessible parts. When servicing use only identical
replacement parts.
CLASS 1
LASER
PRODUCT
Product Registration
Please fill out the product registration card (included in this guide) and return it immediately. Registering allows us to contact you if needed.
Product Information
Keep your sales receipt to obtain warranty parts and service and for proof of purchase. Attach it here and record the serial and model numbers in case you need them.
The numbers are located on the back of the product.
Model No.: _______________________________________________________________________
Serial No. ________________________________________________________________________
Purchase Date: ___________________________________________________________________
Dealer/Address/Phone: _____________________________________________________________
CAUTION
FCC Regulations state that
unauthorized changes or
modifications to this equipment
may void the user’s authority to
operate it.

Table of Contents
1
Chapter 1: Connections and Setup
Things to Consider Before Connecting
Components ........................................................ 3
Cables to Connect Components to Your Home
Theater Music Jukebox...................................... 3
Front of the Home Theater Music Jukebox ........... 4
Back of the Home Theater Music Jukebox ............ 5
Connecting your Home Theater Music Jukebox
to a TV................................................................. 6
Positioning your Speakers ....................................... 7
Connecting the Speakers ......................................... 8
Connecting the Antennas ........................................ 8
Connecting the Subwoofer...................................... 8
Put Batteries in the Remote Control...................... 9
Turn on the TV and Home Theater Music
Jukebox ............................................................... 9
Using the Remote Control to Choose On-screen
Menu Items ......................................................... 9
What Is The Setup Process? .................................. 10
Running Quick Start .............................................. 10
Welcome Screen ..................................................10
Completing Quick Start ......................................... 11
Internet................................................................11
Network Access ...................................................11
Dial-up ISP ...........................................................11
Internet Login Info ............................................. 12
IP Address ............................................................12
Static IP Address .................................................. 12
Dialing Preferences .............................................12
The Buttons on the Remote Control ....................13
Chapter 2: Music Features
Playing Music ......................................................... 15
Selecting and Listening to a Music Title ............15
Sorting Music by Artist, Title, Song, or
Alphabetically ...............................................15
Navigating the Music Player Screen .................. 15
Recording Music ..................................................... 16
Music Compression and MP3 Audio Quality .....16
Recording Music from a CD................................16
Recording Music from an External Audio
Device ............................................................16
Managing Music ..................................................... 17
Changing the View Mode .................................. 17
Creating a New Playlist.......................................17
Editing a Playlist..................................................18
Deleting a Playlist ...............................................18
Creating a New Music Group .............................18
Editing a Music Group ........................................18
Deleting a Music Group......................................19
Changing the Play Mode .................................... 19
Deleting Music ....................................................19
Editing the Names of Tracks ............................... 20
Editing Disc Information .................................... 20
Chapter 3: Movie Features
Playing Movies ........................................................ 21
Managing Movies ................................................... 21
Creating a New Movie Group ............................21
Editing a Movie Group .......................................21
Deleting a Movie Group ..................................... 21
Getting Movie Info .............................................22
Editing Movie Disc Info ...................................... 22
Deleting Movies ..................................................22
Chapter 4: Radio Features
AM/FM Radio ......................................................... 23
Playing Music ...................................................... 23
Autotuning AM/FM Stations ..............................23
Adding a New AM/FM Station ...........................23
Editing an AM/FM Station .................................. 24
Deleting a Radio Station ....................................24
Internet Radio ......................................................... 25
Playing Music ...................................................... 25
Getting Internet Radio Info ............................... 25
Adding a New Internet Station..........................25
Editing an Internet Station ................................ 26
Deleting an Internet Station .............................. 26
Creating a New Radio Group .............................26
Editing a Radio Group ........................................26
Deleting a Radio Group......................................27
Transferring Music to a Portable Player .............. 27
(continued on the next page)
2
Table of Contents
Chapter 5: Advanced Features
Advanced Settings.................................................. 29
User Information.................................................29
Network Configuration ......................................30
Preferences ..........................................................31
Audio and Video Settings .................................. 32
Security and Parental Controls...........................34
Utilities ................................................................35
Chapter 6 : Additional Information
Troubleshooting ...................................................... 39
Remote Control Problems ...................................... 39
Care and Cleaning .................................................. 40
Service Information ............................................... 40
Programming the Remote to Operate
Other Components ........................................... 41
Find Out If You Need to Program the
Remote ..........................................................41
Programming the Remote..................................41
How to Use the Remote After You’ve
Programmed It .................................................. 42
Code List ................................................................. 43
Compatible Optional USB Keyboards ...................45
How to Find Your TV’s Video Input Channel .......46
Video Input Channel Variations .........................46
FCC Declaration of Conformity and Industry
Canada Information ......................................... 47

Chapter 1 3
Chapter 1: Connections and Setup
Illustrations contained in this document are for representation only.
Things to Consider Before Connecting Components
Protect Components From Power Surges
•Connect all components before plugging any power cords into the wall outlet.
•Always turn off the TV and other components before you connect or disconnect any cables.
Position Cables to Avoid Audio Hum or Interference
•Insert all cable plugs firmly into their jacks.
•Place any Audio/Video (A/V) cables to the side(s) of the TV’s back panel instead of straight down the back after connecting components.
•Try not to coil any twin-lead cables and keep them away from all A/V cables as much as possible.
•Make sure all antennas and cables are properly grounded. Refer to the Safety Tips sheet packed with your unit for detailed information.
Protect Components From Overheating
•Never block ventilation slots in any component. Arrange the components so that air can circulate freely.
•Do not stack components.
•Allow adequate ventilation when placing components in a stand.
•Place an amplifier or other hot component on the top shelf of a stand so heated air rising from it will not flow around other components.
Modem cable (included)
Cables to Connect Components to Your Home Theater Music Jukebox
The pictures below show the cables that can be used for the connections represented in this book.
Audio/Video cables (included) Component Video (Y•Pb•Pr) cablesS-Video cable (included)
Digital Optical cable

4Chapter 1
Chapter 1: Connections and Setup
Illustrations contained in this document are for representation only.
Front of the Home Theater Music Jukebox
1. POWER indicator —Indicates when the unit is on or in standby.
2. POWER —Toggles the unit between on and standby.
3. PHONES jack —Allows you to connect headphones for private listening.
4. Arrow buttons —Move the on-screen highlight, and enter data such as letters or numbers in certain menus.
5. USB jack —Allows you to connect an optional keyboard or other USB device.
6. SELECT —Selects menu choices when they are highlighted.
7. RECORD —Starts recording MP3s.
8. Reverse and Forward buttons —Search forward or backward during playback.
9. Display
10. Disc tray
11. Eject —Ejects the disc tray.
12. Stop —Stops the current function (record, play, etc.).
13. Play / Pause —Plays or pauses playback.
14. S-Video input jack —Allows you to connect an S-video component.
15. MENU —Displays the on-screen menu system.
16. VCR2 audio/video input jacks —Allows you to connect an external video component, such as a camcorder or video game system.
17. VOLUME —Raises and lowers the volume of the speakers.
18. CLEAR —Removes any menu or display from the screen and returns you to normal viewing. Also clears on-screen menu item entries.
19. SOURCE —Toggles between the available input sources (VCR, satellite, aux, etc.).
20. GUIDE —Displays the Music, Movie, or Radio Guides.
1234 567 811 12 13 14 15 17 18 19
16 20910

Chapter 1 5
Chapter 1: Connections and Setup
Illustrations contained in this document are for representation only.
Back of the Home Theater Music Jukebox
When connecting, make sure you connect Output jacks to Input jacks, Video to Video, Right Audio to Right Audio, etc. A description of each jack
follows.
Description of Jacks
1. ETHERNET —Connects to your home network or router using an Ethernet cable.
2. MODEM —Connects to your home telephone wiring for dial-up access.
3. Component Video Out jacks—If your TV has component video input jacks, connect to your TV for optimum quality.
4. S-VIDEO OUT jacks —If your TV has an S-Video jack, connect to your TV for better picture quality than using the VIDEO jack.
5. S-VIDEO IN jacks —If your TV has an S-Video jack, connect to an S-Video component.
6. VIDEO IN and OUT jacks —Allows you to connect a standard video component and send the signal to your TV.
7. Audio Input jacks (VCR, SAT, TV, AUX) —Connects to your audio input sources.
8. DIGITAL AUDIO IN/OUT jacks —Connects to your digital audio input sources and connects your jukebox to a receiver or decoder with Dolby
Digital capability using a digital connection.
9. ANTENNA jacks —Allow you to connect AM/FM antennas for better radio reception.
10. Speaker jacks
123
45 6 789 10

6Chapter 1
Chapter 1: Connections and Setup
Illustrations contained in this document are for representation only.
Connecting your Home Theater Music Jukebox to a TV
1. Connect the Music Jukebox to the TV
A. Connect audio/video cables to the AUDIO OUT R and L jacks on the back of the Music Jukebox (color coded, red and white), and to the VIDEO
OUT jack (yellow). Connect the other ends of the cables to the corresponding input jacks on the TV (sometimes labeled VIDEO, AUDIO L/MONO,
and AUDIO R).
Note: If your TV has an S-Video input or component video input, we recommend you make the video connection by using these jacks instead. Remember to connect audio
cables for these connections as S-Video and component video only carry the picture signal, not the sound.
2. Connect the telephone line or Ethernet cable to the Music Jukebox.
Connect the telephone line cord or Ethernet cable from the wall jack to the MODEM or ETHERNET jack on your Music Jukebox.
Very Important: You must connect a telephone line or Ethernet cable to use most of the features of this unit. If the Music Jukebox can’t connect to the OpenGlobe server, you
won’t be able to acess artist information, CD cover art, buy CDs from OpenGlobe services, etc.
3. Plug the power cord into the power jack on the back of the Music Jukebox and the other end into an AC outlet.
Go To Page X
TV
VIDEO RL / MONO
S-VIDEO
AUDIO
L
IN
OUT
HOME THEATER
MUSIC JUKEBOX
From Phone Line
1A
The back of your TV might
not look exactly like the one
shown here.
2

Chapter 1 7
Chapter 1: Connections and Setup
Illustrations contained in this document are for representation only.
Positioning your Speakers
Your system is equipped with Dolby Digital & Digital Theatre System, which enable the unit to reproduce sound effects as they were intended.
However, the speakers must be properly positioned and balanced. In order to enjoy Dolby & Digital Theatre System -enhanced sound quality, five
speakers are preferred: One center speaker, left and right main speakers, rear left and right speakers, and an optional subwoofer. However, if your
front speakers are small speakers, then a subwoofer is essential or you will not be able to enjoy enhanced bass effects. Below are a few suggestions for
the set up:
1. The two main speakers should be set between six and ten feet apart. Putting them any closer or farther apart may result in less satisfactory sound.
2. Try to align center speaker and two main speakers, or set the center speaker slightly behind the left and right main speakers, otherwise the surround
effect may be less satisfactory.
3. Aim the rear speakers directly at the two main speakers, matching height to height. If the room is sparsely decorated, slightly tilt the speakers down
to increase sound quality. If the room is densely decorated, face the speakers towards the rear wall at the ceiling. For more information on speaker
setup, please refer to Connecting the Speakers on the next page.
Main
Left Main
Right
Rear
Left Rear
Right
Subwoofer
Center
TV
Here is an example of how you could positon your speakers.
There are many possible options, and you may want to
experiment to find the right balance for you.

8Chapter 1
Chapter 1: Connections and Setup
Illustrations contained in this document are for representation only.
Connecting the Speakers
At least two front speakers (left and right) are required. For better sound quality, Center speaker, rear speak-ers and Subwoofer are pre-ferred. Adding
center and rear speakers will enhance surround effects. Adding a Subwoofer will increase bass response. If you want to enjoy full range of sound
effects, with small speakers, it is a must to use the subwoofer with the speakers to maintain adequate bass signal for the surround sound effect.
Speaker cords, 1 for each speaker, are needed for connection. Twist the stripped ends of speaker cord about 2/3 inch (15 mm). Press down on the tab
to open the terminal and insert the wire. Snap the tab closed. To ease speaker connections, the speaker cords and the terminals are color-coded into:
Red/Black (Main Speakers), Blue/Black (Center Speaker) and Grey/ Black (Rear Speakers). When con-necting the speakers, make sure the colors of
speak-er wires and terminals are matched. If the cords are reversed, the sound will be distorted and will lack bass.
Connecting the Antennas
The AM and FM antennas connect to the AM and FM terminals on the system’s back panel. They must be hooked up in order to receive clear reception.
Uncoil the antenna wires and locate the bare ends. Press down on the tab to open the terminal and insert the wire. Snap the tab closed. After
connecting the antennas, extend them to their full length and adjust their positioning for better reception.
Connecting the Subwoofer
Connect the subwoofer with the audio cord (brown/ black) provided. If you want to connect your own powered subwoofer, a monoaural audio cord
(not supplied) is needed. This receiver offers a high flexibility for user to use a large variety of speakers and subwoofers. For more information please
refer to section “Fine Setting of the Speakers”in “Advanced Sound Control”on page XX.
RIGHT
+-
LEFT
+-
LEFT
+-
RIGHT
+-
MAIN SPEAKERS
SURROUND SOUND SPEAKERS
CENTER
SPEAKER
+
-
SUB WOOFER
+-
SUB WOOFER
CENTER
Blue/Black-colored
j
acks and wires
Red/Black-colored
jacks and wires
Gray/Black-colored
jacks and wires
Brown-colored
jacks and wires

Chapter 1 9
Chapter 1: Connections and Setup
Illustrations contained in this document are for representation only.
Put Batteries in the Remote Control
Insert the batteries matching the polarities (+ and –) on the batteries with the diagram
in the battery compartment.
Important Battery Information
•If you’re not going to use the remote for a month or more, be sure to remove the
batteries because they can leak and cause damage.
•Dispose of batteries in the proper manner, according to federal, state, and local
regulations.
•Any battery may leak electrolyte if mixed with a different battery type, if inserted
incorrectly, if all batteries are not replaced at the same time, if disposed of in fire, or
if an attempt is made to charge a battery not intended to be recharged.
•Discard leaky batteries immediately. Leaking batteries can cause skin burns or other
personal injury
Turn on the TV and Home Theater Music Jukebox
1. Turn on the TV (if the TV you’ve connected to the jukebox is an RCA, GE, or Proscan
TV, press the TV button on the remote packed with your unit).
2. Tune the TV to the correct Video Input Channel.
•If you used audio/video, S-video, or component video cables to connect your
jukebox, tune the TV to its Video Input Channel (see page xx).
Using the Remote Control to Choose On-screen Menu Items
The technical term is “Navigation”–how you move through the on-screen menus. The
theory is the same throughout the menu screens: highlight your choice and select it.
To highlight a menu item, press the arrow buttons on the remote or the keyboard. Use
the up or down arrow button to move up or down. Use the right or left arrow button to
move left or right.
To select the item that you’ve highlighted, press OK•SELECT.
Note: Highlighted means that the menu item stands out from the other menu items on the list
(usually represented by a colored box or circle around the choice).

10 Chapter 1
Chapter 1: Connections and Setup
Illustrations contained in this document are for representation only.
What Is The Setup Process?
To optimize your Home Theater Music Jukebox so that you can enjoy all of its capabilities, you will need to go through a setup procedure.
You will encounter two types of setup procedures. The first type of setup is Quick Start, and occurs automatically the first time you turn on the unit.
The second type of setup is one you can initiate at any time by pressing the SETUP button on your remote or keyboard. This particular setup allows
you to customize user preferences, audio and video settings, changer management, communication port settings, security and parental controls, and
more.
Running Quick Start
Welcome Screen
The Quick Start process begins with a welcome screen, with a description of how to
navigate through the menus. Remember to press the OK/SELECT button on the remote to
advance to the next screen. The next button is already highlighted by default.
If you have an Internet Service Provider (ISP), gather the following information:
•Dialing Number
•Login Name
•Login Password
•Name of ISP
The Music Jukebox has a simple interface menu so that you can easily select and
configure your connection on an existing account. Most other ISPs are supported if they
use standard PPP type connections. If you do not know if your ISP supports this standard
(Point to Point Protocol), simply call the provider and ask. If you do not have an Internet
Service Provider (ISP), please sign up for one before proceeding to step 3. # Press Power
on the unit’s front panel or the MUSIC, MOVIES, or RADIO button on the remote.
Note:
CompuServe, and free Internet Service providers (ISPs) do not use standard, consistent
methods of Internet connectivity and do not open their networks to outside users.
Therefore, these cannot be used with Music Jukebox unless you have a Broadband
connection. Thomson has set up an out of the box offer with our EarthLink and OpenGlobe
partners. You can sign up for EarthLink™s award winning ISP service for only $19.95 per
month and receive the first 30 days free. To receive the offer, call EarthLink at 1-800-327-
8454. You must mention promo code 400065402 to receive this offer. Call OpenGlobe at
877-885-6392 with any questions regarding this offer.

Chapter 1 11
Chapter 1: Connections and Setup
Illustrations contained in this document are for representation only.
Completing Quick Start
Quick Start is a setup procedure that occurs automatically the first time you turn on the unit. You must be connected to the Internet to complete
Quick Start. It is a required procedure which presents a series of screens and menus that enable the Music Jukebox to perform the following:
•get additional information (CD cover art, music information)
•configure Internet Radio stations for your location
Each screen has a button bar at the bottom for accessing the previous or next page.
The arrow buttons on the keyboard or remote are used to highlight the items, while the OK/SELECT button is used to accept them. The default
button on the Quick Start screens is the next button, which allows you to go directly to the next screen if the desired setting is already selected.
The next steps guide you through the Quick Start process.
Internet
This screen asks if you currently have an Internet Service Provider (ISP). If you do, yes is
already highlighted, so just press OK/SELECT. If you don’t have an ISP, highlight no, and
press OK/SELECT. The next screen has information about how to obtain an ISP.
Network Access
Which type of Internet connection do you have? Highlight dial-up modem or Ethernet
and press OK/SELECT.
Dial-up ISP
If you chose dial-up modem for your network connection access in the previous screen,
you will be asked if you use CompuServe or or free ISPs to connect to the Internet. The
Digital Media Manager can’t use these ISPs. Highlight more information for more on
how to obtain an ISP.

12 Chapter 1
Chapter 1: Connections and Setup
Illustrations contained in this document are for representation only.
Internet Login Info
If you are using a dial-up connection, enter the login name, password, and dial-up
number for your ISP account.
The password will appear as visible text when the field is empty AND you are entering
the password. Once you move from the password field or whenever you return to this
screen, the password text is hidden.
Highlight next and press OK/SELECT to continue to the next screen.
Dialing Preferences
This screen allows you to select your dialing preferences, including dialing method,
diailing prefix, and call waiting disable. Choose the desired settings and then highlight
test connection and press OK/SELECT. The test results are displayed.
Highlight next, and press OK/SELECT to continue.
IP Address
If you are using an Ethernet connection, choose what kind of Internet Protocol Address
your ISP supplies, and press OK/SELECT. If you don’t know, choose dynamic.
Static IP Address
If you chose static in the previous screen, enter all of the IP information provided by
your ISP. When finished, highlight next and press OK/SELECT.\
Note: All additional setup options are explained in Chapter 4.

Chapter 1 13
Chapter 1: Connections and Setup
Illustrations contained in this document are for representation only.
The Buttons on the Remote Control
(0-9) Number buttons Selects channels up to 99 by pressing two number buttons.
Selects 3-digit channels by pressing and holding 1 until 1 – – appears on screen. Then
press the other two numbers.
ANGLE Accesses various camera angles that might have been added to the disc when it
was created.
Note: Currently, very few movies provide multiple camera angles.
Arrows Move the on-screen menu highlight, and enter data such as letters or numbers
in certain menus.
AUX Puts the remote in AUX mode. Can also be programmed to operate some
compatible products (TV, audio component, or satellite receiver/cable box).
CH + and –Selects next higher or lower channel in the channel list. Also selects the
next/previous chapter or track when you’re playing a disc.
CLEAR Removes any menu or display from the screen and returns you to normal
viewing. Also clears on-screen menu item entries.
DVD Turns on the unit and puts the remote in DVD mode. Likewise, you can change to
VCR mode by pressing the VCR1 button.
FORWARD Searches forward if pressed during playback. During play-pause mode in
DVD mode, starts slow-motion advance and each press of the button during slow-
motion advance increases the speed incrementally.
GO BACK Returns you to the previous menu.
GUIDE Displays the Music, Movie, or Radio guides. Also displays the channel guide on
some RCA, GE, and Proscan TVs and satellite receivers.
INFO Shows additional information for what is playing. Also, shows the status displays
on screen of the VCR, TV, DVD player, etc. (whichever compatible component is set as the
remote control’s active device).
INPUT In VCR or TV mode, selects between the Video Input Channels and the tuner.
Video Input Channel refers to the signal coming from the component connected to
audio/video input jacks on the Jukebox or TV.
MENU Displays the on-screen menu system.
MOVIES Puts the unit in DVD mode and displays the Movie Guide.
MUSIC Puts the unit in music mode and displays the Music Guide.
MUTE Reduces the volume to a minimum level on some compatible products.
OK•SELECT When a menu is on the screen, selects the highlighted item.
ON•OFF Turns the unit on or off. Also turns other compatible components on or off.
PAUSE Pauses playback or recording modes. Press PAUSE again to return to active
playback or recording.
Note: This remote operates most
RCA, GE, and Proscan products.
VCR1 ON • OFF TV
MOVIES VCR2 AUX SAT•CABLE
CH•PAGE+ RADIOMUSIC
CH•PAGE-
INFO
GUIDE
OK
CLEARMENU
123
456
789
0
INPUT SETUP
REV•DEL PLAY
RECORD PAUSESTOP
GO BACKMUTE
SELECT
MENU SUBTITLE
DVD
ANGLE SURR
VOL
VOL
FWD•SPACE
_/.?' ABC DEF
GHI JKL MNO
PQRS TUV WXYZ
@-*#

14 Chapter 1
Chapter 1: Connections and Setup
Illustrations contained in this document are for representation only.
PLAY Plays a DVD disc.
RADIO Puts the unit in radio mode and displays the Radio Guide.
RECORD Starts record mode on a compatible VCR.
REV•DEL Searches backward if pressed during playback. In DVD mode, searches backward on a DVD. Starts slow motion playback during play-pause
mode with each press of the button decreasing the slow-motion speed.
SAT•CABLE Turns on a compatible RCA, GE, or Proscan satellite receiver, puts the remote in satellite receiver or cable box mode, and can also be
programmed to operate some compatible receivers or cable boxes.
SEARCH In VCR mode, displays Index and Zero Search menus.
STOP Stops the current function (record, playback, rewind, etc).
SUBTITLE In DVD mode, accesses the Subtitle part of the on-screen Info Display, and turns Subtitles on and off (if subtitles are available on the disc
you are playing).
SURR (Surround) Allows you to change the surround sound settings while watching a movie.
TV Turns on a compatible RCA, GE, or Proscan TV and puts the remote in TV mode. Also used with the ON•OFF button to turn on/off a compatible
TV.
VCR1/VCR2 buttons Turn on the unit and put the remote control in VCR mode. Likewise, you can change to DVD mode by pressing the MOVIES
button.
VOL < and > Raises and lowers the volume of some compatible products.
Using the INPUT Button
Use the INPUT button to scroll through the available Video Input Channels (VCR1 and VCR2). The Video Input Channels allow you to view images from
a device connected to the unit (like a camcorder).
1. Make sure that the unit is turned ON.
2. Press the remote control’s INPUT button to tune to the Video Input Channel. VIDEO1 represents the rear
A/V jacks and VIDEO2 represents the front A/V jacks).

Chapter 2 15
Chapter 2: Music Features
Illustrations contained in this document are for representation only.
Playing Music
The Home Theater Music Jukebox puts your entire music collection at your fingertips. In this section you’ll learn how to navigate the Music Player
screen and sort, select, and listen to your favorite music. It’s as simple as cuing up something from your library, or putting in a CD to add something
new to your collection. You’ll learn more about how to record new music to your library in the next chapter, but for now let’s look at how the player
works.
Selecting and Listening to a Music Title
1. Press the MUSIC button on your remote.
2. Press GUIDE. The Music Guide screen appears.
3. Use the left and right arrow buttons to highlight the group of your choice.
4. Use the up and down arrow buttons to highlight the desired music title.
5. Press SELECT or PLAY (the title tracks and cover art appear in the Player screen and the music plays.)
Sorting Music by Artist, Title, Song, or Alphabetically
1. Press the MUSIC button on your remote.
2. Press GUIDE. The Music Guide screen appears.
3. To sort by artist, title, or song, press MENU (the screen toggles through a different view each time you press the key).
4. To sort alphabetically, press the button on the remote or keyboard for the desired letter.
Navigating the Music Player Screen
•Arrow buttons - Use the up and down arrow buttons to move the highlight from one
track to another. The right and left buttons are not used on the Music Player screen.
•OK/SELECT - When a track is highlighted, stops playing the selected track and starts
playing the highlighted track. You can also play the track by pressing the PLAY
button.
•PAGE +, PAGE- - Scroll the music player track list one page at a time. Each page
contains 12 different tracks. On a page that contains less than 12 tracks, the bottom
rows will be empty.
•Number buttons - Enter a track number using the number buttons, then press the
SELECT button.
•INFO - Displays detailed track information (transport status, play mode, elapsed track
time).
•RECORD - Starts recording an MP3. See the next chapter for details.
•PLAY, PAUSE, & STOP - Plays, pauses, or stops music. An onscreen status appears each
time the button is pressed.
•FAST FORWARD & REWIND - Fast forward and rewind a through a track. Both stop
when the beginning or end of a track is reached. An onscreen status appears each
time the button is pressed.
There are a number of ways to play music:
•Open the disc tray and insert an audio CD. The Music Jukebox plays the CD, connects
to the internet to identify the disc, loads the information into the music library,
displays the track list, title artist, and cover art in the Music Player View.
•Use the MUSIC button on the remote. The Music Jukebox displays the Music Guide
View so that you can navigate and select an item.

16 Chapter 2
Chapter 2: Music Features
Illustrations contained in this document are for representation only.
CD icon MP3 icon
Recording Music
Music Compression and MP3 Audio Quality
When you create an MP3 file from a CD song, you compress the information so that it takes up less space on the hard drive. The compression
technology can use varying sample rates of the song, or bit rates, in which it chooses which bits of musical infomation to keep and which to ignore.
At high bit rates, you can match the quality of the song very closely, which should be the goal for the best representation of the music.
The Jukebox’s default bit rate is 128kbps, which is near CD quality. Again, the higher the bit rate, the better the performance, so you’ll want to rip the
song as close to 128kbps as possible. You can choose bit rates anywhere from 96kbps-320kbps. Keep in mind, however, that the higher the bit rate,
the larger the MP3 file becomes and the more space it will use on the hard drive.
Recording Music from a CD
Recording a CD to the Jukebox takes just 3 simple steps.
1. Insert a CD into the CD disc tray.
2. Press the MUSIC button on your remote or keyboard (all tracks appear with a check
mark to the right to indicate they will be recorded).
•To remove any of the tracks, use the up and down arrow buttons to highlight a
track, then press OK/SELECT to remove it.
•To remove or add all tracks, highlight the title of the CD and press GO BACK.
•To exit the Music Record screen, press CLEAR.
3. Press RECORD (all of the selected tracks are recorded to the hard drive).
Note: If a warning appears stating that there isn’t enough space on the hard drive, you will need to
remove some of the songs, or make room on the hard drive.
•To cancel recording, press STOP. All tracks that have been completely “ripped”will
be saved. Tracks that have been partially recorded or have not yet started will be
deleted.
When recording is complete (or cancelled), the Music Guide screen will be displayed,
with the newly recorded title highlighted.
4. Go ahead and record a couple of more tracks of different musical styles. This will be
useful for understanding how to manage your music and find it easily later.
Note: Keep in mind that you may see two icons in the Music Guide screen for the same song/title if a
CD you just rcorded is in the disc tray, one for the CD and one for the MP3 stored on the hard drive.
Once you eject the CD, the CD icon will disappear.
Recording Music from an External Audio Device
This feature lets you record external audio sources (radio, tape, LPs) as MP3 files on the
hard drive.
1. Connect your external device to the Home Theater Music Jukebox using the
instructions in Chapter 1 and play the audio source you want to record.
2. Press RECORD (the unit recognizes the external device and the EXTERNAL RECORD
OPTIONS screen appears).
3. To start recording immediately, press RECORD again, or enter the artist and title
information, etc. You may also want to set the record time (up to 80 minutes). To
session is recorded as a single MP3 track on the hard drive.
When recording is complete (or cancelled), the Music Guide screen will be displayed,
with the newly recorded title highlighted.

Chapter 2 17
Chapter 2: Music Features
Illustrations contained in this document are for representation only.
Managing Music
You can easily manage your music through the Home Theater Music Jukebox’s Music Options feature. This set of screens allows you to create and
manage playlists (lists of songs), look up and edit music information, and transfer or record music to portable players. In addition, Music Options
allows you to adjust settings for random, repeat, audio effects, and speakers.
There are two screens of Music Options. The first screen appears when you press the MENU button while in Music mode. The second screen appears
when you select more in the MUSIC OPTIONS MENU.
Changing the View Mode
You can change how your music library appears in Music Guide. The choices include
cover, track, artist, and title.
1. Press the MUSIC button on your remote or keyboard.
4. Press MENU (the MUSIC OPTIONS MENU appears).
5. Highlight and select view mode (the VIEW MODE menu appears).
6. Highlight and select the view mode you want:
cover —Sorts the list alphabetically by the cover art.
track —Sorts the list alphabetically by track name.
artist-title —Sorts the list alphabetically by artist.
title-artist —Sorts the list alphabetically by title.
7. Highlight and select save to save the setting.
•To cancel and exit this screen without changing the view mode, press CLEAR.
Creating a New Playlist
1. Press the MUSIC button on your remote or keyboard.
2. Press MENU (the MUSIC OPTIONS MENU appears).
3. Highlight and select more (the MORE MUSIC OPTIONS MENU appears).
4. Highlight and select new playlist (a screen appears so you can enter the name for
the new playlist).
5. When you have finished, press OK/SELECT to continue (the Edit Playlist screen
appears).
6. Use the arrow buttons to highlight what songs you want to include in the playlist,
and press OK/SELECT to checkmark them.
7. When finished, press RECORD to save the playlist.
Note: Up to 200 songs can be added to a single playlist or “favorites”playlist. There is no limitation to
the number of playlists.
The MUSIC OPTIONS menu. The MORE MUSIC OPTIONS menu.
The VIEW MODE menu.
The Cover Art view mode.

18 Chapter 2
Chapter 2: Music Features
Illustrations contained in this document are for representation only.
Editing a Playlist
1. Press the MUSIC button on your remote or keyboard.
2. Press GUIDE (the Music Guide screen appears).
3. Use the arrow buttons to highlight the playlist you want to edit.
4. Press MENU (the MUSIC OPTIONS MENU appears).
5. Highlight and select more (the MORE MUSIC OPTIONS MENU appears).
6. Highlight and select edit playlist (a screen appears so you can change the name for
the playlist, if you want You don’t have to change the name of the playlist to edit its
contents).
7. Press OK/SELECT to continue (the EDIT PLAYLIST screen appears).
8. Use the arrow buttons to highlight what songs you want to remove from the playlist,
and press OK/SELECT to uncheck them.
9. When finished, press RECORD to save the updated playlist.
Deleting a Playlist
1. Press the MUSIC button on your remote or keyboard.
2. Press MENU (the MUSIC OPTIONS MENU appears).
3. Highlight and select more (the MORE MUSIC OPTIONS MENU appears).
4. Highlight and select delete playlist (the DELETE PLAYLIST screen appears).
5. Use the arrow buttons to highlight the playlist(s) you want to delete and press OK/
SELECT to checkmark them.
6. Highlight and select delete to delete the selected playlists. Don’t worry, the tracks
won’t be deleted from the hard drive.
•To cancel and exit this screen without deleting any playlists, press CLEAR.
Creating a New Music Group
1. Press the MUSIC button on your remote or keyboard.
2. Press MENU (the MUSIC OPTIONS MENU appears).
3. Highlight and select new group (a screen appears so you can enter the name for the
new group).
4. When you have finished, press OK/SELECT to continue (the Edit Music Group screen
appears).
5. Use the arrow buttons to highlight what songs you want to include in the group,
and press OK/SELECT to checkmark them.
6. When finished, press RECORD to save the group.
Editing a Music Group
1. Press the MUSIC button on your remote or keyboard.
2. Press MENU (the MUSIC OPTIONS MENU appears).
3. Highlight and select edit group (a screen appears so you can change the name for
the group, if you want. You don’t have to change the name of the group to edit its
contents).
4. Press OK/SELECT to continue (the EDIT MUSIC GROUP screen appears).
5. Use the arrow buttons to highlight what songs you want to remove from the group,
and press OK/SELECT to uncheck them.
6. When finished, press RECORD to save the updated group.
The EDIT PLAYLIST screen.
Other manuals for RTD750
1
Table of contents
Other RCA Jukebox manuals

RCA
RCA RTD750 User manual

RCA
RCA RD2765 - Lyra 5 GB Digital Jukebox User manual

RCA
RCA Lyra RD2800 User manual

RCA
RCA RD2840 - Lyra 40 GB Digital Player User manual

RCA
RCA Lyra RD2850 User manual

RCA
RCA RD2763FM - Lyra 5 GB Micro Jukebox User manual

RCA
RCA Lyra AV RD2780 User manual

RCA
RCA Lyra RD2800 User manual

RCA
RCA RD2760 - Lyra 1.5 GB MP3 Player User manual