RCP ADF-B27 User manual

Blood Glucose Meter
Model # ADF-B27/ADF-B27A

Blood Glucose Meter
V1.1 REMOTE CARE PARTNERS PAGE 2
TABLE OF CONTENTS
INTRODUCTION ............................................................... 4
NOTES ON SAFETY ........................................................... 5
INSTALLING THE BATTERIES .............................................. 7
Handling batteries properly ....................................... 7
QUICK START.................................................................... 8
INTRODUCTION ............................................................... 9
Intended Use ............................................................... 9
HOW IT WORKS................................................................ 9
ALTERNATIVE SITE TESTING (AST) ................................... 10
What is AST?............................................................... 10
The Advantage of AST.............................................. 10
When to use AST........................................................ 10
Do NOT use AST if: ..................................................... 11
CONTENTS OF YOUR KIT................................................ 12
PRODUCT OVERVIEW.................................................... 13
The Blood Glucose Meter......................................... 13
The Test Strip .............................................................. 14
The Lancing Device.................................................. 15
SETTING UP THE METER AND DELETING THE MEMORY . 16
Setting the date and time........................................ 16
Clearing the memory ............................................... 17
TAKING A MEASUREMENT............................................. 18
Set Up the Lancing Device ...................................... 18
Insert a test strip into the meter................................ 20

Blood Glucose Meter
V1.1 REMOTE CARE PARTNERS PAGE 3
Fingertip Testing......................................................... 21
Alternative Site Testing.............................................. 21
Transfer blood to the test strip.................................. 22
Reset your meter and lancing device .................... 23
UNDERSTANDING THE RESULTS ..................................... 24
CARE AND STORAGE.................................................... 25
CLEANING AND DISINFECTION .................................... 25
SPECIFICATIONS ............................................................ 26
LIMITATIONS OF USE ...................................................... 27
DISPLAY MESSAGES....................................................... 30
TROUBLESHOOTING ...................................................... 32
TECHNICAL SPECIFICATION.......................................... 34
Measurement Precision ............................................ 34
System Accuracy...................................................... 34
Traceability of the glucose monitoring system ....... 34
User Performance ..................................................... 34
For glucose concentrations<5.55 mmol/L (<100
mg/dL) ....................................................................... 35
For glucose concentrations≥5.55mmol/L (≥100
mg/dL) ....................................................................... 35
ELECTRICAL AND SAFETY STANDARDS ..................... 35
SYMBOLS INDEX............................................................. 36
CONTACT INFORMATION AND NOTICES..................... 37
FCC Compliance Statement ................................... 37

Blood Glucose Meter
V1.1 REMOTE CARE PARTNERS PAGE 4
Model # ADF-B27/ADF-B27A
INSTRUCTION MANUAL
INTRODUCTION
This Blood Glucose Meter is provided to by
Remote Care Partners (RCP), for use exclusively
with the health monitoring program from your
provider.
Please read this manual carefully and keep it
handy for future reference.

Blood Glucose Meter
V1.1 REMOTE CARE PARTNERS PAGE 5
NOTES ON SAFETY
Please read this section carefully to familiarize
yourself with the features and operations before
using the unit.
1. Do not allow other people to use your blood
glucose meter. The meter is specifically
assigned to you and you only. Allowing
other people to use your meter can mislead
your provider.
2. All parts of the kit are considered
biohazardous and can potentially transmit
infectious diseases, even after you have
cleaned and disinfected all parts.
3. Changes or modifications not expressly
approved by the party responsible for
compliance could void the user's authority
to operate the equipment.
4. Do not place the device in liquid or put it
where it could fall into the liquid.
5. Use of this device is only for the intended
use described in this manual.
6. Only use AndesFit testing strips supplied by
RCP.
7. Do not allow the device to contact
surfaces that are too hot to touch.
8. Do not use the device where aerosol sprays
are being used.
(Continued on Next Page)

Blood Glucose Meter
V1.1 REMOTE CARE PARTNERS PAGE 6
9. Do not use the device if it is not working
properly, or if it has been damaged.
10. Read the entire manual before using the
product to test your blood glucose.
11. If this equipment does cause harmful
interference to radio or television reception,
which can be determined by turning the
equipment off and on, the user is
encouraged to try to correct the
interference by one or more of the
following measures:
•Reorient or relocate the receiving antenna.
•Increase the separation between the equipment
and receiver.
•Connect the equipment into an outlet on a
circuit different from that to which the receiver is
connected.
•Consult the dealer or an experienced radio/TV
technician for help.

Blood Glucose Meter
V1.1 REMOTE CARE PARTNERS PAGE 7
INSTALLING THE BATTERIES
1. Open the battery cover on the back of
the meter.
2. If replacing the batteries, remove the
used batteries.
3. Insert 2 new (AAA) batteries with
correct +/- direction.
4. Close the battery cover.
Handling batteries properly
As soon as old batteries run out, replace them
with new batteries.
•Do not use old and new batteries together.
•Align the polarities of batteries correctly.
•When the unit will not be used for more than 3
months, remove the batteries. Otherwise,
batteries may leak and cause damage to the
unit.

Blood Glucose Meter
V1.1 REMOTE CARE PARTNERS PAGE 8
QUICK START
Prepare: Wash your hands with soap and water. Dry
thoroughly.
Gather supplies: Lancing device, lancet, tissue (for
blotting blood from your finger after the puncture).
Prepare the lancing device: Unscrew the cap, push
the lancet firmly into the device, remove the rounded
end of the lancet by turning (save this piece), screw
the cap back on, and adjust the puncture depth
(usually 3).
Prepare the meter: Insert a test strip into the meter.
When looking at the screen of the meter, the blue
side of the strip should be facing you. The arrow on
the strip should be pointing down so that the contact
bars of the test strip are going into the meter. Push the
strip into the meter until it stops and the meter turns
on.
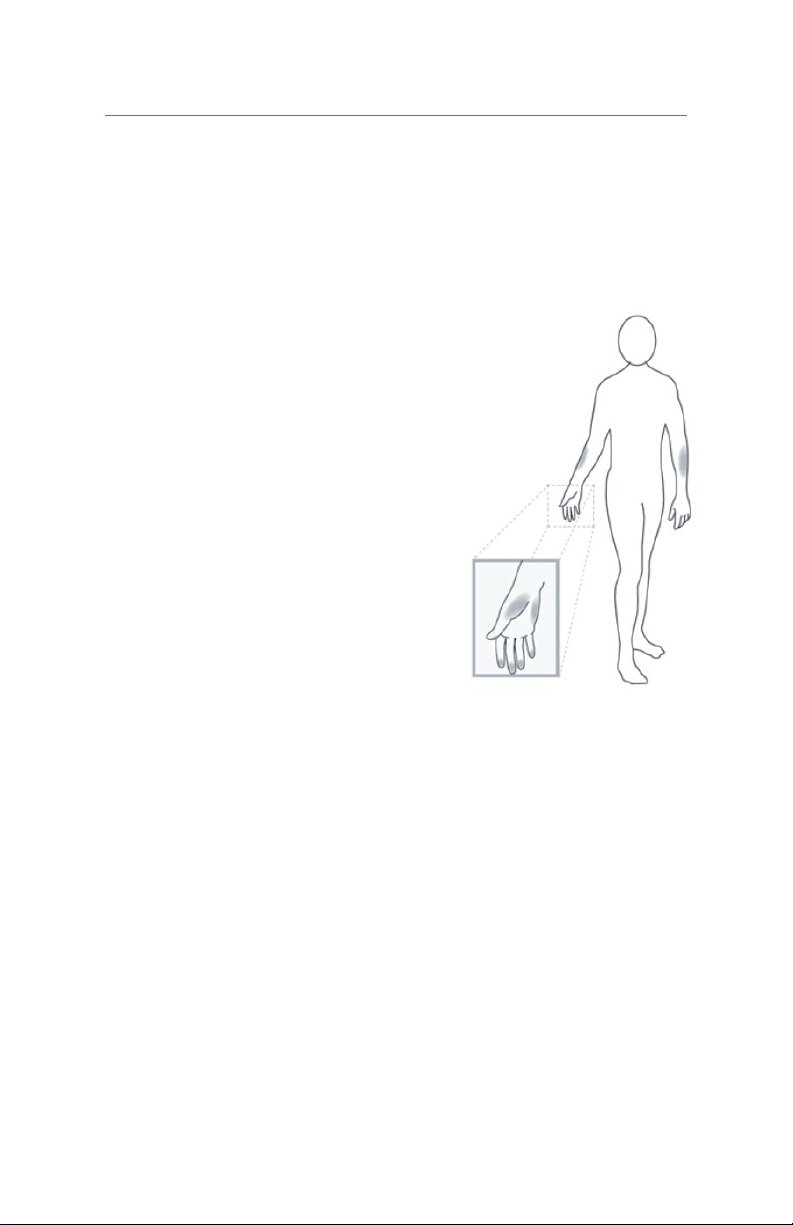
Perform the test: Place the lancet device on the
finger you wish to use and press the blue button.
Place a drop of blood into the absorbent hole of the
test strip. Use the tissue to absorb any extra blood
from your finger. The reading will display in the LCD
window within 5 seconds.
Cleanup up: Unscrew the lancet device cap, use the
long blue slider to eject the lancet into a sharps
container or stab the lancet into the rounded end
piece that was saved in step 3, pull out the testing
strip from the meter and throw it away.

Blood Glucose Meter
V1.1 REMOTE CARE PARTNERS PAGE 9
INTRODUCTION
Intended Use
•This meter is intended for self-testing by
people with diabetes at home as an aid to
monitor the effectiveness of diabetes control.
It should be used only for testing glucose
(sugar) and only with fresh capillary whole
blood samples taken from the finger and the
alternative sites including the palm, the
forearm. It should not be used for the
diagnosis or screening of diabetes. This meter
is not for use with newborns.
•Alternative site testing should be done only
during steady-state times (when glucose is
not changing rapidly).
•The ADF-B27GTS Test Strips are the only strips
to be used with this meter.
HOW IT WORKS
The test is based on the measurement of electrical
current generated by the reaction of glucose with the
reagent of the strip. The meter measures the current
and displays the corresponding blood glucose level.
The strength of the current produced by the reaction
depends on the amount of glucose in the blood
sample.

Blood Glucose Meter
V1.1 REMOTE CARE PARTNERS PAGE 10
ALTERNATIVE SITE TESTING (AST)
AST can be used only during steady-state blood
glucose conditions described in the section of “About
AST”.
Important: There are limitations
for using AST.
Please consult your healthcare
professional before you do AST.
What is AST?
Alternative site testing (AST)
means that people use parts of
the body other than the
fingertips to check their blood
glucose levels. This meter
allows you to test on the palm
or the forearm with the
equivalent results to fingertips
testing.
The Advantage of AST
Fingertips feel pain more readily because they
are full of nerve endings (receptors). At other
body sites, since nerve endings are not so
condensed, you will not feel as much pain as at
the fingertip.
When to use AST
Food, medication, illness, stress, and exercise can
affect blood glucose levels. Capillary blood at
the fingertip reflects these changes faster than
capillary blood at other sites. Therefore, when
testing blood glucose during or immediately after

Blood Glucose Meter
V1.1 REMOTE CARE PARTNERS PAGE 11
a meal, physical exercise, or any other event,
take a blood sample from your finger only.
Perform AST ONLY in the following instances:
▪In a pre-meal or fasting state (more than 2
hours since the last meal).
▪Two hours or more after taking insulin.
▪Two hours or more after exercising.
NOTE:
▪AST should not be used to calibrate
continuous glucose monitoring systems
(CGMs).
▪Results from alternative site testing should
not be used in insulin doses calculations.
Do NOT use AST if:
▪You think your blood glucose is low.
▪You are testing for hypoglycemia (low
blood sugar).
▪You are testing for hyperglycemia (high
blood sugar).
▪Your AST results do not match the way you
feel.
▪Your routine glucose results are often
fluctuating.

Blood Glucose Meter
V1.1 REMOTE CARE PARTNERS PAGE 12
CONTENTS OF YOUR KIT
▪A Meter
▪Storage Bag
▪Lancing Device
▪Sterile lancet (Optional)
NOTES:
▪The Lancing Device can be used several
times however the lancet should be
changed after each use.
▪Sterile lancets are not included in the
standard kit

Blood Glucose Meter
V1.1 REMOTE CARE PARTNERS PAGE 13
PRODUCT OVERVIEW
The Blood Glucose Meter
STRIP PORT
Where you insert the test strip. The meter
will turn on automatically
STRIP EJECTOR
Slide forward to eject the test strip after test
LCD DISPLAY
It guides you through the test using symbols
and simple messages
“M” BUTTON
It is used to turn on the meter, enter the
memory mode
“S” BUTTON
It is used to set up the meter

Blood Glucose Meter
V1.1 REMOTE CARE PARTNERS PAGE 14
The Test Strip
Each strip can be used only once. The test strip
consists of the following parts:

Blood Glucose Meter
V1.1 REMOTE CARE PARTNERS PAGE 15
The Lancing Device
If your lancing device is different from the once
shown here, please refer to the manufacturer’s
manual to ensure proper usage.
To reduce the chance of infection:
Never share a lancet or the lancing device.
Always use a new sterile lancet. Lancets are for single
use only.
Wash your hands thoroughly before handling the
lancing device or a lancet. Avoid getting hand lotion,
oils, or dirt on the lancets.

Blood Glucose Meter
V1.1 REMOTE CARE PARTNERS PAGE 16
SETTING UP THE METER AND DELETING THE
MEMORY
Setting the date and time
Setting the Year
Press and Hold “S” button for 3
seconds, until the last two digits of the
year will flash on the screen. Press “M”
button until the correct year appears.
Press “S”.
Setting the month
With the month flashing, press “M”
until the correct month appears.
Press “S”
Setting the day
With the day flashing, Press “M” until
the correct day appears. Press “S”
Setting AM/PM
With the AM or PM flashing, Press “M”
until the correct one appears. Press
“S”.
Setting the hour
With the hour flashing, Press “M” until
the correct hour appears. Press “S
Setting the minutes
With the minute flashing, Press “M”
until the correct minute appears.
Press “S”.

Blood Glucose Meter
V1.1 REMOTE CARE PARTNERS PAGE 17
Clearing the memory
Press “S”. “dEL” will display along with a flashing “M”.
Press “M” once to confirm that you want to clear
the memory. If you want to cancel the process
at this time, press “S”. To continue and clear the
memory, press “M” again. The meter will then
display “OK” to confirm that the member has
been cleared.
NOTES:
•The set date, set time, and clear memory
functions can only be done when the
meter is in the set-up mode.
•When the meter is in set-up mode, if no
button is pressed within 3 minutes, the
meter will automatically turn off.

Blood Glucose Meter
V1.1 REMOTE CARE PARTNERS PAGE 18
Do not allow other people to use your blood glucose
meter. The meter is specifically assigned to you and
you only. Allowing other people to use your meter
can mislead your provider.
TAKING A MEASUREMENT
Wash your hands thoroughly with soap
and warm water before taking a
measurement
Set Up the Lancing Device
1. Unscrew the cap from the lancing device
2. Push the lancet all the way into the holder

Blood Glucose Meter
V1.1 REMOTE CARE PARTNERS PAGE 19
3. Gently turn and pull the needle cap to remove.
Save the needle cap so that the lancet needle can
be safely capped for disposal after the test.
4. Replace the device cap
5.. Adjust the puncture depts (usually 3)
The lancing device is now ready to use.

Blood Glucose Meter
V1.1 REMOTE CARE PARTNERS PAGE 20
Insert a test strip into the meter
With clean dry hands remove a single test strip
from its vial. Do not bend, cut, or modify the test strips
in any way.
Insert the test strip into the STRIP PORT at the top of the
meter. When looking at the meter, the blue side of
the strip should be facing you and the arrow on the
strip is pointing down. The contact bars of the test strip
are going into the meter. Push the strip into the meter
until it stops and the meter turns on. The “blood drop”
icon will flash at the top of the screen
If the letters “CTL” show below the label “mg/DL” you
have accidentally put the device in a calibration
mode. DO NOT TEST if CTL is shown. Put the device
back in test mode by pressing the “S” button on the
right side of the device. This will clear the letter “CTL”
and return the device to testing mode.
Other manuals for ADF-B27
1
This manual suits for next models
1
Table of contents
Other RCP Blood Glucose Meter manuals