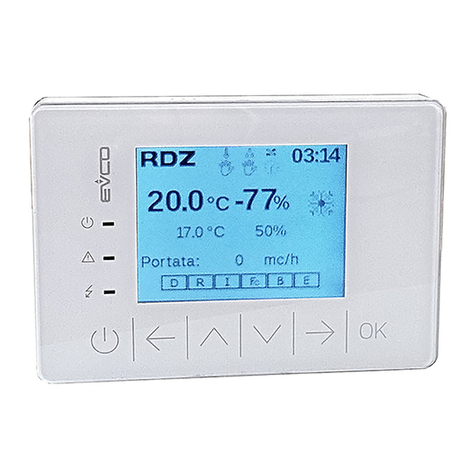
RDZ CORE CRONO TH User manual

1 / 8
Wall-mounted touch device for detecting and controlling room
temperature and humidity (Comfort Index). Designed for the
management of the radiant system and connected Air Handling Unit.
USER SHEET
CORE CRONO TH
Model Code
CoRe CRONO TH 6600153
STANDARD FUNCTIONS
Key Description
SET
TEMPERATURE
summer
24 °C
winter
24 °C
By clicking on the Temperature icon it’s possible to change the value by moving the slider between 16 °C
and 28 °C.
The setting is conrmed when the green LED light will be ashing 3 times, then the device will automatically
return to the Home screen.
It is only possible to change the Set Point with the Manual ( ) or Programming ( ),
operative modes;
in the latter case the Temporary Manual operative mode will be activated ( ) (see page 2 and page 6).
23.5°
26.0°
23.5°
18.0°
Conrmation LED
Detected temperatur
e
Required temperature
SET COMFORT INDEX
By clicking on the Comfort Index icon, you can change the Set Point by moving the cursor between MIN
and MAX.The setting is conrmed when the green LED light ashing 3 times, then the device automatically
returns to the Home screen. It is possible to change the Set Point only when using the Manual operative
mode. ( ) .
Suf
Opt
Detected Index Comfo
rt
Required Index Comfort
Conrmation LED
TKey Icon
From the operative mode“Manual mode”, tap on the Set Temperature and set Comfort Index icons and adjust the values to your needs:
Operative mode
• OFF The device is o
• Away mode (*)
• Schedule mode
• Manual mode
• Manual Temporary mode
T
User menu
• Schedules
• Technical menu
• Informations
• Settings
• Date/Time (*)
• Fancoil Setup (**)
T
Temperature
• Set
• Detected Temperature
T
Dehumidication
Dew Point
Integration
24.0°
Comfort Index
• Set
• Dected Comfort index
T
Season/Antifreeze
Radiant system
HOME SCREEN
(*) The icon appears only if the device is NOT connect to CoRe MCT or CoRe Connect.
(**) The icon is only visible if a fan coil is detected in the CoRe system.

USER SHEET
2 / 8
USER MENU
Options and congurations that can be personalised by the user to adapt the operation of CoRe CRONO TH to their needs.
At the rst switch on, CoRe CRONO TH is set to OFF operative mode. Touch the button and select Programming or Manual operative modes
to use the device.
Key Description
USER MENU
Schedules
Access to settings of hourly/daily programs of the Temperature
Temperatura
.
Acces to settings of hourly/daily programs of the Comfort index
I.Comfort
.
Technical menu
Settings reserved for the service centre or technician; password-protected access.
Informations
Scan the QR-Code to access the device’s web documentation .
Zone Name: device name (assigned with the CoRe Connect app)
SW Vers.: software version
ID: device’s network address
Group: grouping of devices when several AHUs or MCTs are present
Mode: Operating mode set: 0 = O / 1= Manual / 2= Schedules / 3=Away
Season: 0= Winter / 1= Summer
Humidity: detected humidity
Dew Point: current dew point value
List of connected devices: HUB, TRM, AHU, MCT, PRB, MIO
Settings
Touch Tone: On O
Language: IT / EN / ESP
Season: Summer Winter
Standby Auto: automatic screen switch-o for inactivity
Standby theme:Auto light theme active from10:00 to 17:00 / dark theme active from 17:01 to 9:59
Light light theme always active
Dark dark theme always active
Backlight: screen lighting intensity
Standby Backlight: illumination intensity when the screen is switched o for inactivity
Set T. Away Summer: set Temperature in Away mode in the Summer season (0,0 to 39,9 °C)
Set T. Away Winter: set Temperature in Away mode in the Winter season (0,0 to 39,9 °C)
Set I.C. Away Summer: set Comfort Index in Away mode in Summer season (Min to Max / OFF)
Set I.C. Away Winter: set Comfort Index in Away mode in Winter season (Min to Max / OFF)
Da
te/Tim
e
Set Date/Time: click on the icon, select the values for hours, minutes, day, month, year, and use the keys
to change the system values. While editing, the value will be highlighted in grey. Click on the
key to conrm and exit.
Fancoil Setup
Fan Mode: O the fan coil il switched o
Auto the fan coil works at the preset settings
Man manual adjustment settings of the fan coil
Manual Set: with “Fan Mode -> Man” activated, adjust the ventilation percentage value using the buttons
. Click on the key to conrm and exit.
OPERATIVE MODE
Key Description
OFF
OPERATIVE MODE
OFF The device is switched o, but the Anti-Freeze function remains functional.
Away mode is active: the system work to the Set Point Temperature and Comfort Index values established
in the User Menu Settings.
Schedule mode is active: the system works with the activated hourly/daily programs.
Manual mode is active: only manually it is possible to change the setting of the Temperature Set Points
and the Comfort Index.
The Temporary Manual mode is activated only when, in Schedule mode, the Temperature Set Point and
its period of operation are changed manually. Once the set time has elapsed, the device automatically
returns to previeous settings.

USER SHEET
3 / 8
TECHNICAL MENU
Settings reserved for the service centre or technician; password-protected access.
Key Description
Menù Tecnico
TECHNICAL MENU
Calibrations
Allows the sensors in the device to be adjusted if abnormal temperature and humidity values are detected
Ad
vanced Cm
d
Forced Relay: On O Forced activation of the heating or cooling system
Forced Dehumidication: On O Forced activation of the dehumidication
Pairing : pairing of CoRe CRONO Th to the smartphone to connect it to the app
Hard reset : reset to factory settings, all congurations and programmes will be deleted
DewPoint
Limit function Dew Point: On O
Limit set Dew Point: min. 0,0 °C max 30 °C
Limit delay Dew Point: min. 0 minuts max 99 minuts
Temperature
Allows you to determine in which season to set the Temperature request function or switching on the
radiant system and the fan coil:
never active - Winter - Summer - Summer/Winter
Temp. Hysteresis: min. 0,1 °C max 1 °C
Dehumidification
Allows you to determine in which season to set the Dehumidication request function:
never active - Winter - Summer - Summer/Winter
Humidity Hysteresis: min. 0,1 g/kg max 3 g/kg
Integration
Allows you to determine in which season to set the Integration request function:
never active - Winter - Summer - Summer/Winter
Integration Delta: min. 0 °C max 9,9 °C

KITCHEN
LIVING ROOM
BEDROOM
BEDROOM
BEDROOM
BATHROOM
BATHROOM /
LAUNDRY
USER SHEET
4 / 8
GUIDE TO SCHEDULE MODE
In Schedule mode, the device works with the active programme set. Nine time/daily bands are managed: six can be shared between all devices,
and three bands are own for each device. For each band must be dened the days, the programming start and end times, and the Temperature
or Comfort Index Set Point.
PLANNIG OF SCHEDULE
Nine time/daily bands are available: the rst six (called Global 1, Global 2, Global...6) can be shared between all connected devices, while those
from 7 to 9 (called Local 7, Local 8 and Local 9) they can be customised for each device. To use the shared time bands, just dene the settings
on the rst CoRe CRONO Th device, then these will be automatically communicated to the other terminals; now, simply enter in the Schedules
menu of each device and do the activation.
For devices requiring dierent programming, it will be necessary to use time bands 7, 8 and 9 of each device and dene a specic time schedule.
- Time bands are active only when they are enabled with the conrmation check (green tick)
- If shared time bands (1 to 6) are changed, they are automatically updated on all devices
- The enabling or disabling of all time bands (1 to 9) are independent for each device
- If time overlaps occur between the programmed and active time bands, priority will be given to the band with the highest number (9-8-7...)
- In case no programming is scheduled, Away mode will be temporarily activated and the Temperature and Comfort Index set points
established in the User Menu Settings will be operative.
Temperature Comfort Idx
Schedules
User
menu Schedules
Temperature
or Comfort
Index
To access programming:
Shared time bands 1
(Global 1), 2 (Global 2)
and 3 (Global 3)
Global 1
From
From
MonFri
22.0
06 : 30 23 : 00
Setpoint
To
To
Global 2
From
From
MonFri
18.0
08 : 30 17 : 30
Setpoint
To
To
Global 3
From
From
MonFri
18.0
23 : 00 06 : 30
Setpoint
To
To
Shared time bands settings
Custom time band 7 (Local 7)
Program Selection
M T W T F S S
8
7
9
00:00 12:00 24:00
18.0
Local 7
From
From
Mon Sun
18.0
00 : 00 24 : 00
Setpoint
To
To
Program Selection
M T W T F S S
18.0
18.0
22.0
1
2
3
00:00 12:00 24:00
Program Selection
M T W T F S S
18.0
18.0
22.0
1
2
3
00:00 12:00 24:00
Program Selection
M T W T F S S
18.0
18.0
22.0
1
2
3
00:00 12:00 24:00
Program Selection
M T W T F S S
18.0
18.0
22.0
1
2
3
00:00 12:00 24:00
Program Selection
M T W T F S S
18.0
18.0
22.0
1
2
3
00:00 12:00 24:00
Program Selection
M T W T F S S
18.0
18.0
22.0
1
2
3
00:00 12:00 24:00

USER SHEET
5 / 8
SETTING OF THE SCHEDULE MODE
From the main screen it is possible to view the set time-program for
each day of the week. By selecting the day, any active time bands
will be indicated by dierent colours in the daily overview below.
To access to the Program Selection, click on the band in the daily
overview.
The device is supplied with two preset (but not active) time-
programs, highlighted in dierent colours. Click on the rst band to
access the Programming.
EXAMPLE OF HOURLY / DAILY SCHEDULES
The diagram below represents an example of scheduling that will be active from Monday to Friday, with a daily time interval from 08:00
to 18:00; during this period, CoRe CRONO TH will maintain the temperature of 18 °C (Set Point).
To change the data, rst select the value, then use the“Setting”keys
to change it. During the change phase, the selected value
will be highlighted in grey. After completing the settings, press the
key to conrm and return to the previous screen.
To add another hourly schedule (e.g. for evening hours), tap on time band number 2 (step 1) and enter the new programming (step 2).
1
3
Scheduling
M T W T F S S
00:00
06:00 12:0018:00 24:00
18.0
22.0
By accessing the Scheduling screen, for each selected day, it will be
possible to view the corresponding active time bands. Each schedules
is identied with a dierent colours for better reading. For time bands
not included in the schedules (white), the device will operate in Away
mode (see parameters in the User Menu).
6
2
Global 1
From
From
Mon Fri
18.0
08 : 00 18 : 00
Setpoint
To
To
Conrm /
Go back
Conrm /
Go back
2
Global 2
From
From
Mon Fri
22.0
18 : 00 22 : 30
Setpoint
To
To
0
0
8
8
r
30
r
3
o
0
o
19.9
18.0
Program Selection
M T W T F S S
00:00
12:00 24:00
1
2
31
When the scheduling is complete, in the screen of Program Selection,
are shown the coloured bands wich representing the time-programs.
To activate a time-program, touch the box on the right, and a green
tick will be appear. Select the day boxes on the top and for each day
a week, it can see the corresponding schedule.
4
22.0
18.0
Program Selection
M T W T F S S
00:00 12:0
02
4:00
1
2
3
Tick for active
time band
When scheduling of the time bands are complete, return to the
Home screen using the key . Enter the operating mode menu
and activate Schedules mode by touching the icon .
7
Operative
mode
Program Selection
M T W T F S S
00:00 12:0
02
4:00
1
2
322.0
At the end of the operation, all active time bands will be shown. By
selecting a day of the week, the associated band will be coloured.The
green tick without the coloured band indicates that the scheduling
is active on dierent days than the selected one.
5
Activited time
bands but
associated with
other days
Selected day and
corresponding
time band
Scheduling
M T W T F S S
00:00 06:00 12:00 18:0
02
4:00
Daily overview
Days week
22.1
22.0
Program Selection
M T W T F S S
00:00 12:00 24:00
1
2
3
Preset time bands
Activited
Programs
Away
mode
Modify the days, time and Set
Point, using the “Settings” keys
.
Once the settings are complete,
press the key to conrm and
return to the previeus screen.
To scheduling other time bands,
select the next ones and repeat
the operations.
Setting
Setting

USER SHEET
6 / 8
TEMPORARY MANUAL MODE OPERATING
If the device is set in the Schedule operative mode, changing the Set Point directly from the cursor, the Temporary Manual operating mode
is activated. With this function it is possible to regulate the temperature with a dierent Set Point for a pre-set time period, which is dierent
from the time schedule active at that moment.
This mode is regulated by a timer, and at the end of this time, automatically return to the active time schedule.
With this operating mode it is only possible to modify the Set Point of theTemperature; the Set Point of the Comfort Index cannot be modied.
When the Schedule operative mode is active, tap the Temperature
icon on the device’s Home screen.
After changing the Set Point of the Temperature, the timer will
appear and with the cursor it is possible to set the period for which
the new Set Point is to be maintained (max. 7 hours). The setting is
conrmed when the green LED light ashes 3 times, after which the
device automatically returns to the Home screen.
Use the cursor to adjust the temperature between 16 °C and 28 °C.
1
3 4
5
2
Keep 23.5°C for:
Till to 19:00
00h 00 m
23.5°
26.0°
24.0°
Schedule mode
Keep 23.5°C for:
Till to 19:00
00h 30 m
Variable activity
period
On the Home screen, the Temporary Manual operative mode can be
recognised by the icon . At the bottom, the timer indicates the
remaining time and the time when the function will end. When the
time expires, the settings from the active schedules will be restored.
To switch o the Temporary Manual mode, touch on the timer and
move the cursor to the back, for reset the remaining time (00h 00m).
The setting will be conrmed when the green LED light ashes 3
times, then the device will return to the Home screen, restoring to
Schedule operative mode.
24.0°
Till to 19:00

USER SHEET
7 / 8
Operative mode
• OFF The device is o
• Away mode (*)
• Schedule mode
• Manual mode
• Manual Temporary mode
T
User menu
• Schedules
• Technical menu
• Informations
• Settings
• Date/Time (*)
• Fancoil Setup (**)
T
Temperature
• Set
• Detected Temperature
T
Dehumidication
• Not active
• Active
• Dew Point control ( )
GENERAL SUMMARY
Integration
• Not active
• Cooled air supply
• Heated air supply
24.0°
Comfort index
• Set
• Detected Comfort index
T
Season
• Summer: cooled mode
• Winter: heating mode
•
Antifreeze mode ( )
Radiant system
• Not active
• Cooling mode
• Heating mode
TKey Icon Flashing light
(*) The icon appears only if the device is NOT connect to CoRe MCT or CoRe Connect.
(**) The icon is only visible if a fan coil is detected in the CoRe system.
This manual suits for next models
1
Table of contents
Other RDZ Thermostat manuals
Popular Thermostat manuals by other brands

COSA SMART
COSA SMART ALARKO installation guide

Hunter
Hunter 47377 owner's manual

Viessmann
Viessmann Vitotrol 100 UTA operating instructions

Danfoss
Danfoss ECL Comfort 210 instructions

White Rodgers
White Rodgers 1F87-251 Installation and operation instructions

QUBINO
QUBINO FLUSH ON/OFF THERMOSTAT 2 quick start

Kima
Kima ZONE 30 installation manual

Salus
Salus TH-3 instruction manual

Selmo
Selmo Infinity PLUS manual

Emerson
Emerson delmarva power user manual

Lux Products
Lux Products SMART TEMP PSP721U Installation and operating instructions

White Rodgers
White Rodgers 1F97-0671 Installation and operating instructions