Red Line Instruments EZ100J User manual

O
O
OW
W
WN
N
NE
E
ER
R
R'
'
'S
S
S
M
M
MA
A
AN
N
NU
U
UA
A
AL
L
L
R
R
RE
E
ED
D
D
L
L
LI
I
IN
N
NE
E
E
E
E
EZ
Z
Z1
1
10
0
00
0
0J
J
J
e
e
el
l
le
e
ec
c
ct
t
tr
r
ro
o
os
s
st
t
ta
a
at
t
ti
i
ic
c
c
p
p
po
o
ow
w
wd
d
de
e
er
r
r
c
c
co
o
oa
a
at
t
ti
i
in
n
ng
g
g
g
g
gu
u
un
n
n

Packing List:
The RED LINE
EZ100 J
consists of the following:
oPowder spray gun with a round powder deflector fitted at the tip
of the gun.
oWall mounting adaptor (Input 100-260V AC 50-60 Hz; output 12
VDC 1.5 amp rating) with 3 meter (10’) cable and a 3 Meter
(10’) earth (ground) cable with crocodile clip
oTwo additional round powder flow deflectors of different sizes
(12 mm, 19 mm & 25 mm –½”, ¾” and 1”) and a starjet nozzle
o1 cup with a black lid containing a ‘J’ shaped metal pipe and a
screw with washer (ForceFeed Set)
o1 spare cup with lid
oOr 2 spare cups with lids (in Premium model with carry case)
oThis Owner’s Manual
oAll securely packed
Infrastructural requirements:
Electrical power connection: 100 - 260 V AC, 50-60Hz, Single
phase with earth (ground). In case of
fluctuating voltage, please use a voltage
stabilizer with surge and spike protection
Pneumatic connection: Clean & dry compressed air at a
pressure of about 1.5 –2.0 kg/cm2(say
20 –30 psi) –NOT EXCEEDING
3 kg/cm2(say 40 psi)
Performance may vary if there is variation in the electrical power
or pneumatic inputs.

Congratulations on your purchase of the RED LINE
EZ100J
electrostatic
powder coating gun. You could be a serious hobbyist or a first time powder
coater or an industrial coater requiring portability or a powder coater who
simply wants a low-cost powder gun. In any case, you will find its
performance exceedingly satisfactory and closer to higher end
professional models. You have purchased one of the finest and cost-
effective electrostatic powder coating spray guns.
The RED LINE
EZ100J
is designed and built to give you trouble-free
performance.
Before using this equipment, please read this Owner’s Manual completely.
It will save you time, money and unnecessary effort in the future.
I know you will be thoroughly satisfied with your RED LINE
EZ100J
. In
case you require any assistance or information on this machine at any
time, please do not hesitate to contact us directly or call your nearest
Authorized RED LINE Sales & Service Center. It will be our pleasure to
be of assistance to you.
Please do not attempt to break open the gun as there are no user-
serviceable or field-serviceable parts inside the gun. This should be
handled strictly by an authorized and trained RED LINE Service
Representative only.
For further information on the full range of RED LINE powder coating
equipments, systems and complete plants, please visit our website –
www.redlineltd.com or write us or contact your nearest Authorized RED
LINE Sales & Service Center.
We wish you all success.
With regards,
Himanshu Shah, Director
RED LINE INDUSTRIES LIMITED

CAUTION AND CARE:
First and foremost, it is very important for you, as the user, to
understand that although a great deal of attention has been given to
various safety factors and considerations, the ultimate responsibility of
using and treating this machine responsibly and with care lies with you.
This machine generates around 100kV (100,000 electrostatic volts) for
electrostatic use. Always treat this machine with the respect it
deserves.
ALWAYS …
Read this manual completely before starting and feel free to
refer to it as often as you need.
Wear leather footwear and non-insulating gloves (if at all).
Ensure that the equipment, the coating booth/cabin and
everything within a 3 Meter (10’) radius of the machine is
properly earthed (grounded).
Ensure that the gun is triggered only when the tip of the gun
(electrode) is not more than 6 - 8” (15 - 20cm) away from a
earth (ground) point. Optimum distance between object and
gun tip is 10 - 15cm.
Use jigs and jig holders which are clean and bare at their
contact points and which are properly earthed (grounded) to
ensure proper dissipation of electrostatic charge build-up.
Use only compressed air and a clean dry lint-free cloth, to
clean the gun or its parts.
In case of doubt, contact your local dealer or service centre
or us directly
Switch off the main switch and disconnect the plug when the
machine is not in use.

NEVER …
NEVER touch the charging electrode at the tip of the
gun with your bare hands when the machine is ‘ON’. If
required to handle the electrodes, always earth
(ground) the electrode first to dissipate any electrostatic
charge build-up that may have taken place.
NEVER aim the gun away from an earthed object or
point when you trigger it ON
NEVER inhale the powder that is sprayed. If the
powder recovery system is not efficient to suck away all
oversprayed (excess sprayed) powder, either get that
handled or at least ensure that an appropriate air-filter
is made available for the coater to breath in clean air.
NEVER use any kind of solvents to clean any gun or its
parts.
NEVER expose this machine to water or rain
NEVER open the gun. There are no user-serviceable
or field-serviceable parts inside the gun.
AVOID …
AVOID extended triggering of the gun without
compressed air. Compressed air flow assists in
dissipation of charge from near the gun tip as well as
keeps the electronics inside the gun at an optimum
operating temperature. Continued triggering without
compressed air may lead to an electronic failure of the
gun
AVOID using locally produced replacement parts –this
may prove to be cheaper in the short term but may
permanently damage the gun and force higher
expenditure later
AVOID using the equipment in damp or wet areas

Understand various parts of your gun:
a. Gun tip (electrode): This is where the electrostatic charge is
available.
b. Powder flow pattern generators: You can use what suits you –
round or flat (fan) type. These are interchangeable at will
c. Cup-lid Holder: You lock in here the ForceFeed system cup-lid
provided (explained later).
d. ForceFeed system cup-lid (black)
e. Powder flow rate controller.
f. Electrostatic charge (kV) controller
g. Charging Indicator
h. Digital Meter showing the output charging voltage (nominal)
i. Trigger used to switch ON and OFF the coating operation
j. Earthing plates –to ensure that you and the entire system is
earthed (grounded)
k. Power input socket –the power supply unit connects here
l. Compressed Air inlet. The compressed air line connects here
m. Powder cup (500 gm –1 lb capacity)
a
b
c
d
m
l
k
j
i
h
g
f
e

First start up:
The RED LINE
EZ100J
is supplied virtually ready to operate. All you
need to do before you start work is to put together the ForceFeed
system cup assembly before you connect up the compressed air line
and power supply.
Infrastructure required:
[a] A power connection –100 –260V AC 50/60Hz with earth (ground) –
with surge and spike protection
[b] Dry and clean compressed at air pressure of 1.5 –2.0 kg/cm2
(around 20 - 30 psi) pressure –NOT EXCEEDING 3 kg/cm2(42 psi).
Please note that higher pressure may permanently damage the
pneumatic system inside the gun.
1. Carefully remove the equipment from its original packing
2. Check everything that is supposed to be with the set has been
supplied –see the Packing List on the facing page.
3. To assemble the cup with the ForceFeed components to the gun,
first unscrew the ‘black’ lid off of the cup. This cup also contains one
‘J’ shaped metal pipe and a screw (with washer). Press down the
black lid on the cuplid-holder on top of the gun (the rubber ‘O’ rings
will secure the position and ensure that the joint is air-tight) and
align the ‘screw’ hole of the lid with that on the flat cup lid-holder on
the gun. This will also align the 2nd hole (the larger one) of the lid to
a similar hole in the lid-holder.
4. With the screw provided, tighten and lock down this black cup-lid
into place.
5. Now press down the plastic stud of the ‘J’ metal pipe into the 2nd
hole –the rubber ‘O’ rings will hold this pipe in place. Turn the pipe
so that the open end of the pipe is aligned over the small plastic
stud of the lid.
6. Your gun is now assembled.
7. Fill in the desired amount of powder in the powder cup (the powder
cup has a capacity of approx 500 gms) and screw it onto the black
lid of the powder spray gun. You will have to hold the gun upside
down for this. Avoid any spillage of powder. Use of gloves is
recommended when handling powder coatings.
8. Set up your compressed air line to generate around 20-30 psi
pressure and connect it to the base of the handle of the gun. In case
a Quick Release Coupling (QRC) has been provided, then fix the

coupler end of the QRC to the compressed air line hose and plug it
into the adaptor under the gun. Turn the flow-controller counter-
clockwise completely so that it is closed. Please ensure you have
adequate compressed air filters on-line so that clean and dry
compressed air is fed to the powder gun.
9. Plug in the power cord to a 100-260 V AC outlet. Please ensure that
this outlet (or an extension cord, if you are using one) has a good
quality ground. Plug in the output connection (12 VDC) of the
adaptor to the socket at the base of the gun.In case you believe that
your supply voltage is not clean and steady, please install necessary
surge and spike protectors.
10. Connect the crocodile clip of the earth (ground) cable to the ground
of the premises in which you are doing the coating. Or, connect the
ground clip to the metal object being coated. Good quality grounding
is essential not only from a safety standpoint, but improves the
quality of powder coating.
THE RED LINE
EZ100J
IS NOW CONNECTED FOR POWDER COATING.

Operations:
1. Hang the article(s) to be coated in the spray booth or in a safe
enclosure, ensuring that they are properly earthed (grounded).
2. Switch ON the mains power switch to the machine from the wall
power outlet. The indicator (if provided) on the wall-mounting power
adaptor should light up.
3. Switch on the compressed air supply to the machine and set the
pressure at around 20 - 30 psi.
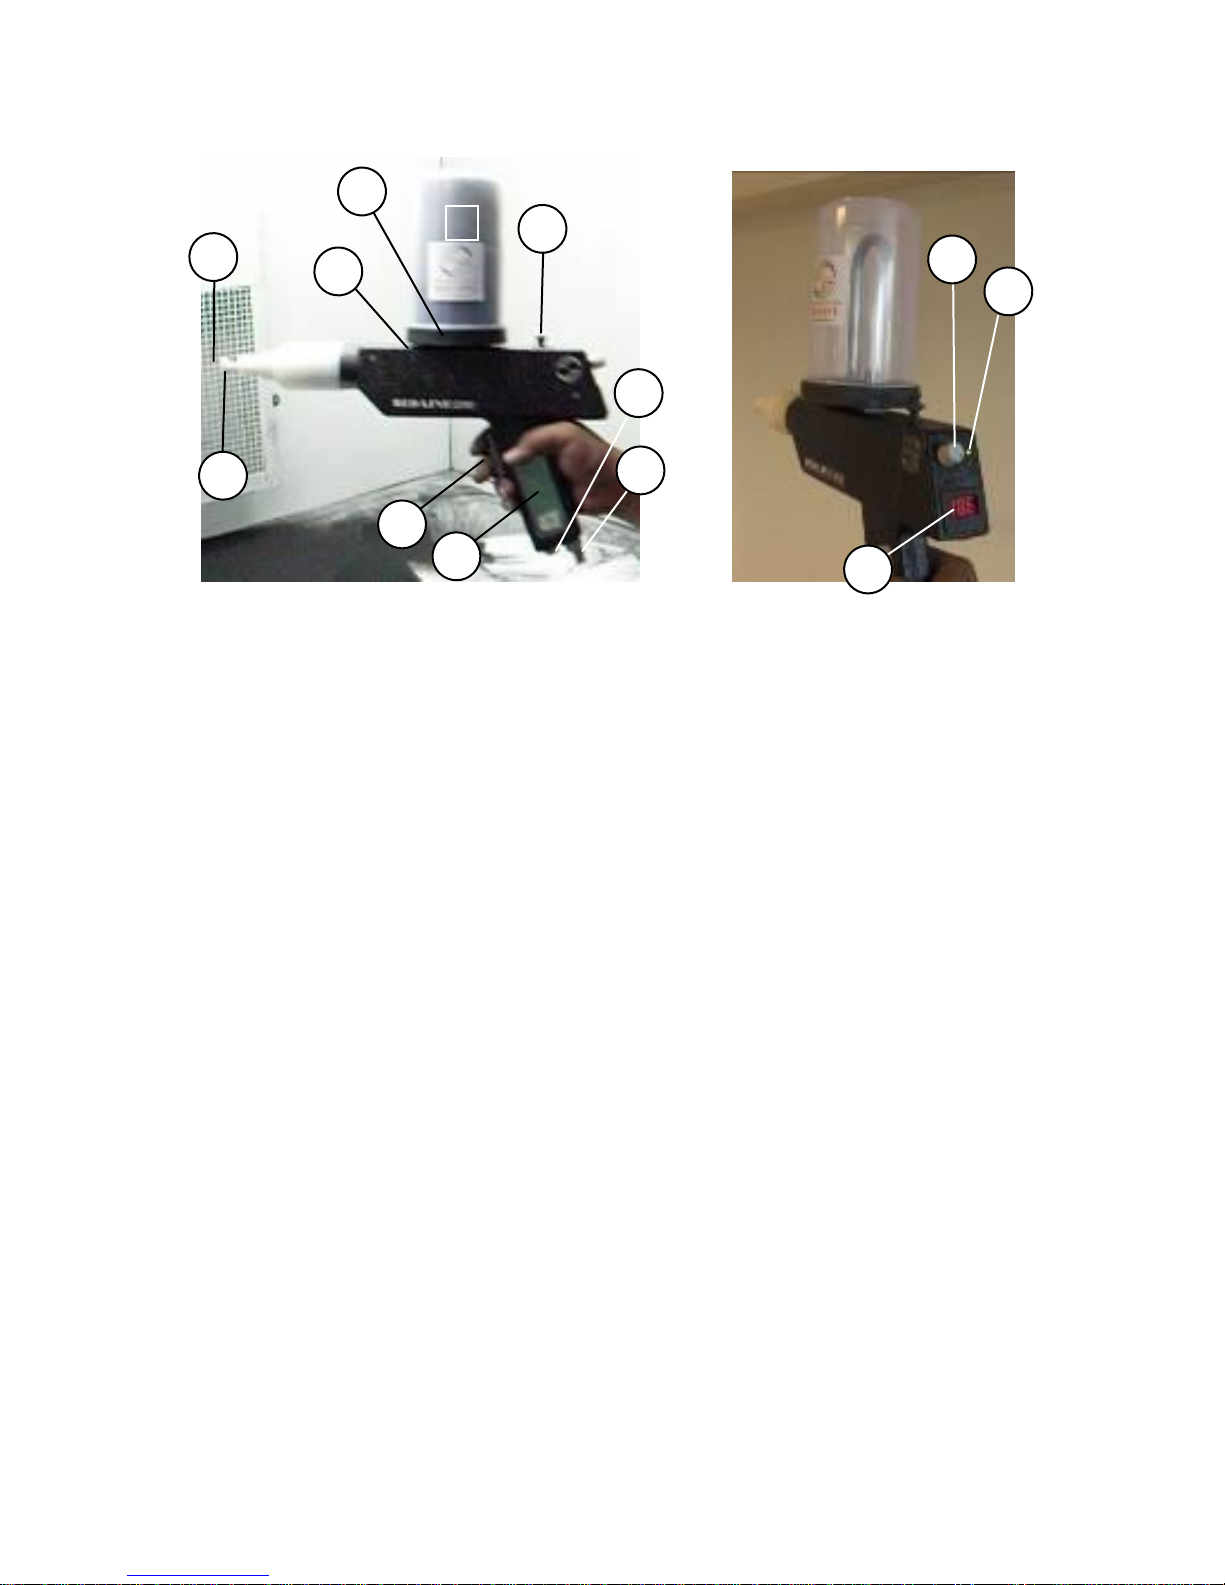
4. Point the gun into the booth towards the grounded articles to be
coated and press the trigger on the spray gun. The indicator at the
back of the gun (yellow) should light up. The Digital Meter will
indicate the (nominal) charging voltage available at the tip of the
gun. Turn the kV controller knob (at the back of the gun) clockwise
to increase the charging voltage to the max –approx 100kV. The
range available is approx from 20kV to 100kV. Turn the flow
controller clockwise till you achieve powder flow at a rate and
density of satisfaction to you.
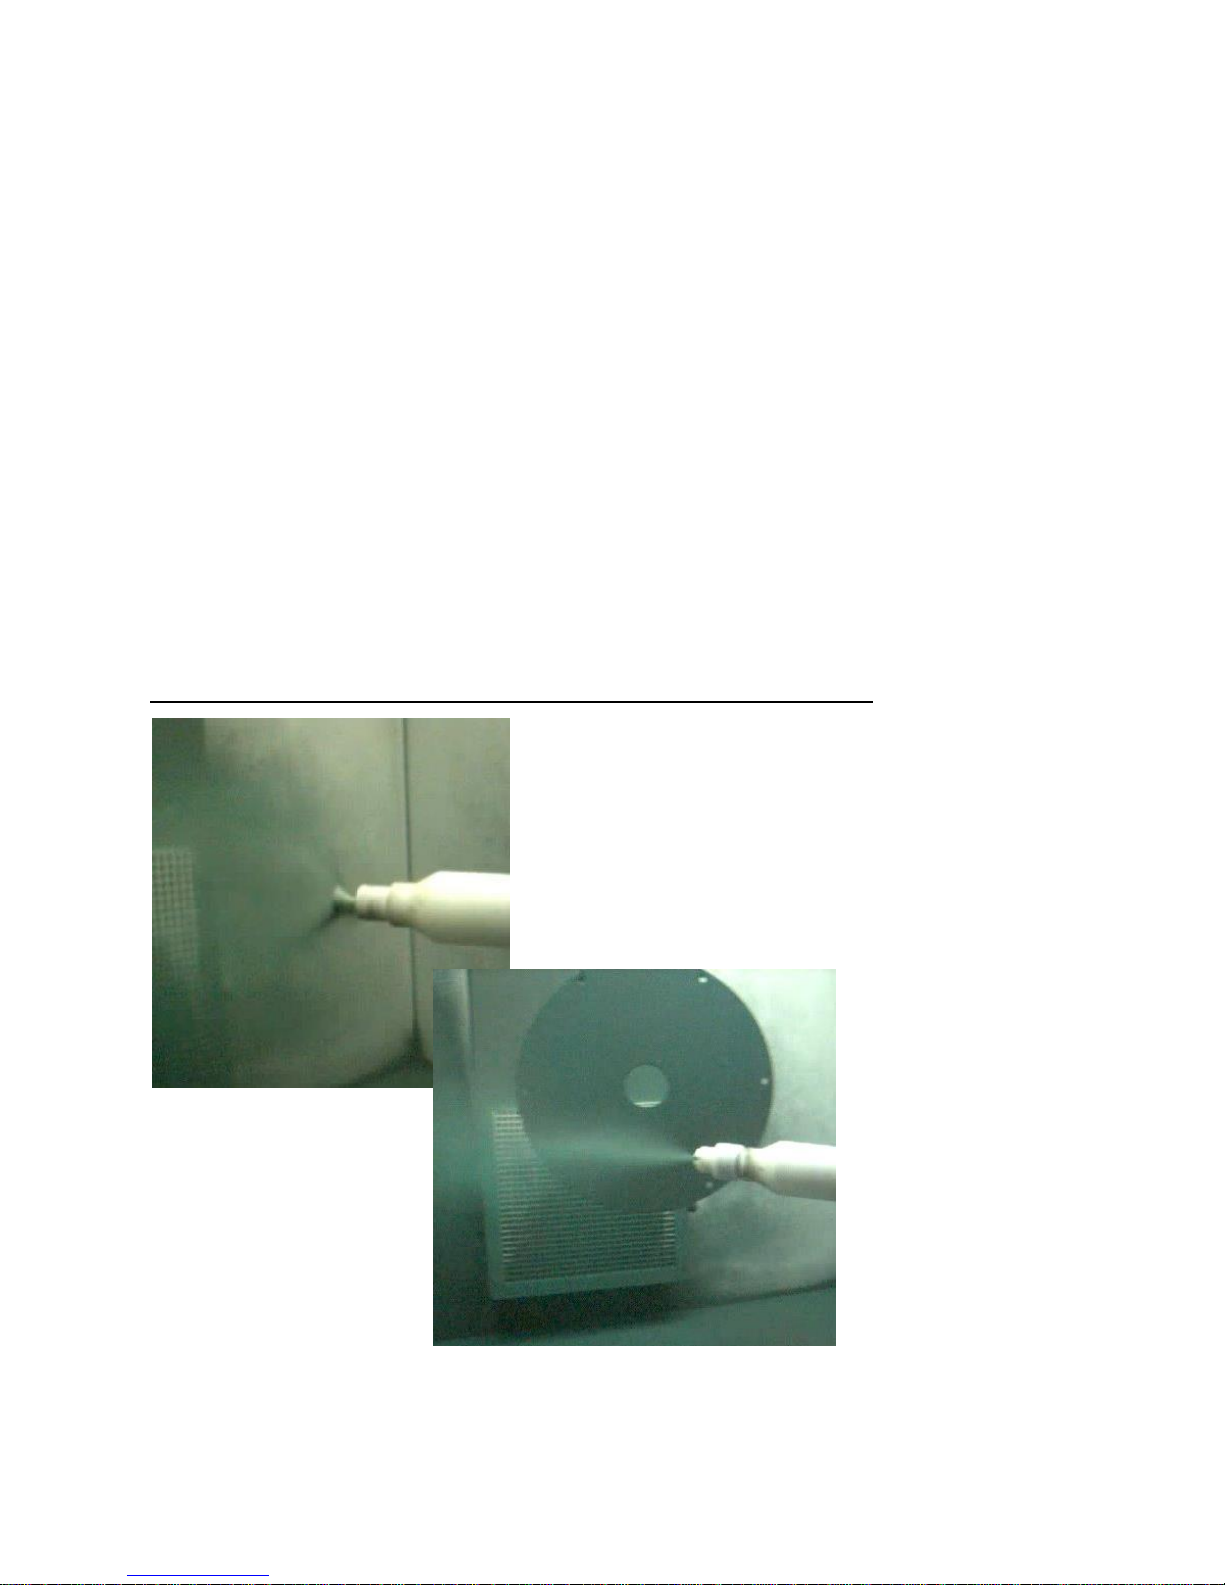
5. Keeping the nozzle of the gun about 10 to 20 cms (4” to 8”) from the
articles being coated, spray powder in smooth horizontal arm
sweeps. Ensure that the part to be coated is completely coated with
powder. Excessive coating may lead to unwanted and unnecessary
thicker coats.
6. Releasing the trigger of the gun switches OFF the powder flow as
well as shuts down the electronics used to generate and control the
high voltage. Please note that your powder spray gun may still
hold electrostatic charge. To prevent any accidents, please touch
the charging tip to a ground point to discharge any residual
electrostatic charge.
7. Place the coated article in the oven which has been preheated to
the required temperature (350 - 390oF / 180 - 200oC). Check the
curing time with the powder manufacturer (this information may be
available on the powder carton or from the powder supplier). Keep
the article in the oven for the desired time. At the end of the curing
period, switch off the oven, open the door of the oven, allow the
parts to cool and remove them. Please note under-curing or over-
curing (temperature or time) could give you unwanted results.
8. Your part is ready, duly powder-coated.

Suggestions for good results:
To change spray pattern nozzles/deflectors: the
EZ100J
comes
fitted with the flat spray pattern nozzle (also known as the fan
pattern nozzle). To replace this with the round deflector: [1]
please pull out the flat pattern nozzle assembly along with the
fan size control ring, [2] screw on the required round deflector
onto the deflector adaptor. To replace the round deflector with
the flat spray nozzle, reverse this process.
Ensure that the surface being coated is clean of all dust, rust or
grease. Remove these contaminants if present on the surface
using sand paper, polish paper, wire brushes or other means.
Moist, dirty or oily compressed air may lead to imperfect
coatings –including lumps of powder in places or splotches in
some places after the part has gone through the oven. If this
should happen, install or replace the compressed air filters
(moisture separator) on your compressor line.
Follow the curing schedule recommended by the powder
manufacturer. Improper curing schedule will lead to less than
good quality finishing. The color may be different from what is
expected (for example, if you over-cure a white, you may end
up with a yellow finish). Or the mechanical properties may not
be as expected –the coat may peel off or scratch off easily. Or
the gloss level may be different from what the powder
manufacturer might have promised. These are the results you
may see with incorrect powder curing time or temperature
setting.

Routine maintenance:
Always keep your RED LINE
EZ100J
system clean.
When the powder coating work is over, ground the gun tip to
the ground point.
Switch off the mains switch at the wall outlet. Unplug the
machine from the wall outlet.
Unscrew the cup and store the excess powder in the cup in a
dry place as this powder can be used next time round.
Clean the inside of the gun using compressed air.
Avoid removing the ForceFeed set of ‘J’ metal pipe and the
black cup-lid unless you intend to store the set away for a
period of time. Repeated screwing on and removing the black
cup-lid may damage the internal threading of the cup lid-holder
Regular cleaning of the powder spray gun and the powder cups is
normally all that is required to ensure that your system always operates
at peak performance levels.
DO NOT USE ANY PETROCHEMICAL SOLVENTS OR OTHER CLEANING AGENTS.
TO CLEAN THE GUN OR ANY PART OF THE MACHINE AS THIS MIGHT DAMAGE
THE GUN OR OTHER COMPONENTS.
If any parts need to be replaced, please call for only genuine parts from
your nearest Authorized RED LINE Service Center. Using locally
procured or unauthorized parts may not only affect the performance of
the system, but may also damage the delicate parts and components of
the machine leading to possible unnecessary additional heavy
expenditures ahead.
CAUTION:
The manufacturer and/or the distributor have provided the part list and
part-diagram for information purposes only. Neither the manufacturer nor
the distributor makes any kind of representation to the buyer in any way
that he/she is qualified or authorized to make any repairs to the equipment
or change any parts in the equipment. The manufacturer and distributor
expressly states herein that any repairs or parts replacement should not
under any circumstances be carried out by the user, but only by the certified
and licensed technician. The buyer alone assumes all risk, responsibility and
liability arising out of his/her repairs to the original equipment or
replacement of any parts in the equipment or all risks, responsibility and
liability arising out of the buyer’s installation of replacement parts in the
equipment.

RED LINE INDUSTRIES LIMITED
An ISO 9001:2008 Company
Sales Office: 7 Kaliandas Udyog Bhavan, Prabhadevi, Mumbai 400025, India
Tel: +91-22-24324737 / 24324787 Fax: +91-22-66466936
Web: www.redlineltd.com email: redline.email@gmail.com
Table of contents