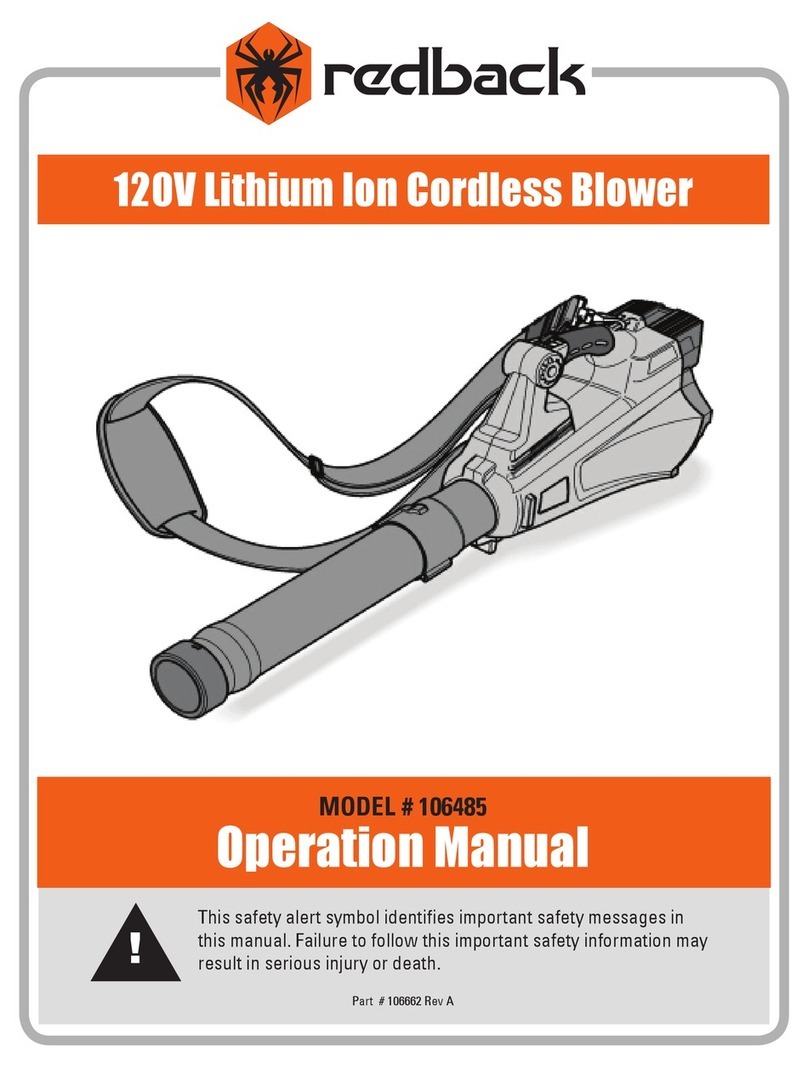
Redback E435C User manual

40V LITHIUM-ION CORDLESS
BLOWER
Model: E435C
Operations Manual
www.redbacktool.com support@redbacktool.com

1
TABLE OF CONTENTS
•Symbols……………………........1
•Safety Instructions………………2
•Maintenance and Care..……….7
•Major Parts of the Blower………8
•Exploded View and Part List…...9
•Product Specifications………….11
•Assembly and Operation……….12
•Battery Charger Function.……..13
•Disposal………………………....14
•Guarantee/Warranty……...…….15
These instructions should be read in
conjunction with the instruction manual
for the battery pack and charger.
SYMBOLS
General Safety Warning
1. When using battery operated tools,
basic safety precautions should always
be followed to reduce the risk of fire,
leaking batteries and personal injury,
including the following.
2. To prevent accidental starting that
could cause serious personal injury,
always remove the battery pack from the
blower before doing anything.
3. This charger can be used with an
input voltage of 120V and an AC
frequency of 60Hz.To avoid the risk of
damage and injury, only use the charger
to recharge REDBACK 40V battery
packs. Never try to recharge non-
rechargeable batteries. If the charger is
plugged in and no LED lights are
illuminated, unplug and check with your
nearest authorized service center. Do not
attempt to use the charger.
4. Do not use water or liquid
detergents.
5. Render redundant garden tools
unusable by removing the power or the
batteries.
Before switching the
power on, read the
operating manual. Read
all safety warnings and all instructions.
Failure to follow the warnings and
instructions may result in electric shock,
fire and/or serious injury
Protective goggles/visor,
protective helmet & hearing
protection.
Do not expose to rain.
Do not throw batteries
and other electrical
products into the
household waste, fire, or water.

2
Safety Instructions
User
This garden tool is not intended for use
by persons (including children) with
reduced physical, sensory or mental
capabilities, or lack of experience and
knowledge, unless they have been
given supervision or instruction
concerning use of the machine by a
person responsible for their safety.
Never allow children or people
unfamiliar with these instructions to use
the garden tool. Supervise children. This
will ensure that children do not play with
the unit.
Intended Use
This garden tool is intended exclusively
- as blower unit for blowing leaves,
grass, paper and the like in the private
sector,
- according to the descriptions and
safety instructions indicated in this
operating manual.
Any other use is not as intended.
Improper use is not covered by the
warranty and the manufacturer will
reject any liability. The user is liable for
all injuries to third parties and damage
to their property.
Operate the unit only in the technical
condition as stipulated and delivered by
the manufacturer.
Arbitrary changes to the unit will exclude
the manufacturer from any liability for
resulting injury and/or damage.
GENERAL SAFETY
WARNING #1!
Training
1. Read the instructions carefully. Be
familiar with the controls and the correct
use of the machine.
2. Never allow the children or people
who are unfamiliar with these
instructions to use the machine. Local
regulations can restrict the age of the
operator.
3. Keep in mind that the operator or user
is responsible for accidents or hazards
that may happen to other people or their
property.
Preparation
1. Obtain ear protection and safety
glasses. Wear them at all times while
operating the machine.
2. While operating the machine always
wear substantial footwear and long
trousers. Do not operate the machine

3
when barefoot or wearing open sandals.
Avoid wearing clothing that is loose
fitting or that has
hanging cords or ties.
3. Do not wear loose clothing or jewelry
that can be drawn into the air inlet. Keep
long hair away from the air inlets.
4. Operate the machine in a
recommended position and only on a
stable level surface.
5. Do not operate the machine on a
paved or gravel surface where ejected
material could cause injury.
6. Before using, always visually inspect
to see that bolts and other fasteners are
secure, the housing is undamaged, and
that guards and screens are in place.
Replace worn or damaged components
in sets to preserve balance. Replace
torn or unreadable labels.
7. Never operate the machine while
people, especially children, or pets are
nearby.
Operation
1. Before starting the machine, ensure
that the feeding chamber is empty.
2. Keep your face and body away from
the feed intake opening.
3. Do not allow hands, any other parts of
the body, or clothing inside the feeding
chamber, discharge chute, or near any
moving part.
4. Keep proper balance and footing at
all times. Do not overreach. Never stand
at a higher level than the base of the
machine when feeding material into it.
5. Always stand clear of the discharge
zone when operating this machine.
6. When feeding material into the
machine, be extremely careful that
pieces of metal, rocks, bottles, cans or
other foreign objects are not included.
7. If the machine should start making
any unusual noise or vibration,
immediately switch it off and allow the
machine to stop. Remove the battery
pack from machine and take the
following steps before restarting and
operating the machine:
a) Inspect for damage.
b) Replace or repair any damaged parts.
c) Check for and tighten any loose parts.
8. Do not allow processed material to
build up in the discharge zone; this may
prevent proper discharge and can result
in kickback of material through the
intake opening.
9. If the machine becomes clogged,
switch it off and remove the battery pack
from machine before cleaning the
debris.
10. Keep the power source clean of
debris and other accumulations to
prevent damage to the power source
and possible fire.

4
11. Do not transport this machine while
the power source is running.
12. Stop the machine and remove the
battery pack from the machine. Make
sure that all moving parts have come to
a complete stop
- whenever you leave the machine,
- before clearing blockages or
unclogging chute,
- before checking, cleaning or working
on the machine.
13. Do not tilt the machine while the
power source is running.
Maintenance and Storage
1. When the machine is stopped for
servicing, inspection, or storage, or
when you need to change an accessory,
switch off the machine, remove battery
pack and make sure that all moving
parts have come to a complete stop.
Allow the machine to cool before making
any inspections, adjustments, etc.
Maintain the machine with care and
keep it clean.
2. Store the machine in a dry place out
of reach of children.
3. Always allow the machine to cool
down before storing it.
4. Replace worn or damaged parts for
safety. Use only genuine replacement
parts and accessories.
General Power Tool
Safety Warnings
The term "power tool" in the warnings
refers to your main-operated (corded)
power tool or battery-operated
(cordless) power tool.
Work Area Safety
1. Keep work area clean and well lit.
Cluttered or dark areas invite accidents.
2. Do not operate power tools in
explosive atmospheres, such as in the
presence of flammable liquids, gases, or
dust. Power tools create sparks which
may ignite the dust or fumes.
3. Keep children and bystanders away
while operating a power tool.
Distractions can cause you to lose
control.
Electrical Safety
1. Power tool plugs must match the
outlet. Never modify the plug in any way.
Do not use any adapter plugs with
earthed (grounded) power tools.
Unmodified plugs and matching outlets
will reduce the risk of electric shock.
2. Avoid body contact with earthed or
grounded surfaces, such as pipes,
radiators, ranges and refrigerators.
There is an increased risk of electric
shock if your body is earthed or

5
grounded.
3. Do not expose power tools to rain or
wet conditions. Water entering a power
tool will increase the risk
of electric shock.
4. Do not abuse the cord. Never use the
cord for carrying, pulling or unplugging
the power tool. Keep the cord away from
heat, oil, sharp edges or moving parts.
Damaged or entangled cords increase
the risk of electric shock.
5. When operating a power tool
outdoors, use an extension cord suitable
for outdoor use. Use of a cord suitable
for outdoor use reduces the risk of
electric shock.
6. If operating a power tool in a damp
location is unavoidable, use a residual
current device (RCD) protected supply.
Use of an RCD reduces the risk of
electric shock.
Personal Safety
1. Stay alert, watch what you are doing
and use common sense when operating
a power tool. Do not use a power tool
while you are tired or under the
influence of drugs, alcohol, or
medication. A moment of inattention
while operating power tools may result
in serious personal injury.
2. Use personal protective equipment.
Always wear eye protection. Protective
equipment such as dust mask, non-skid
safety shoes, hard hat, or hearing
protection used for appropriate
conditions will reduce
the risk of injury.
3. Prevent unintentional starting. Ensure
the switch is in the off-position before
connecting to the power source and/or
battery pack, picking up, or carrying the
tool. Carrying power tools with your
finger on the switch or power tools that
have been turned on invites accidents.
4. Remove any adjusting key or wrench
before turning the power tool on. A
wrench or a key left attached to a
rotating part of the power tool may
increase the risk of injury.
5. Do not overreach. Keep proper
footing and balance at all times. This
enables better control of the power tool
in unexpected situations.
6. Dress properly. Do not wear loose
clothing or jewelry. Keep your hair,
clothing and gloves away from moving
parts. Loose clothes, jewelry or long hair
can be caught by moving parts.
7. If devices are provided for the
connection of dust extraction and
collection facilities, ensure that these
are connected and properly used. Use
of dust collection can reduce dust-
related hazards.

6
Power Tool Use and Care
1. Do not force the power tool. Use the
correct power tool for your application.
The correct power tool will do the job
better and safer at the rate for which it is
designed.
2. Do not use the power tool if it can’t be
turned on and off by its switch. Any
power tool that cannot be controlled with
the switch is dangerous and must be
repaired.
3. Disconnect the plug from the power
source and/or the battery pack from the
power tool before making any
adjustments, changing accessories, or
before storing the power tool. Such
preventive safety measure reduces the
risk of starting the power tool
accidentally.
4. Store idle power tools out of reach of
children and do not allow persons
unfamiliar with the power tool or these
instructions to operate it. Power tools
are dangerous in the hands of untrained
users.
5. Maintain the power tools. Check for
misalignment or binding of moving parts,
breakage of parts and any other
condition that may affect the power
tool’s operation. If damaged, have the
power tool repaired before use. Many
accidents are caused by poorly
maintained power tools.
6. Keep cutting tools sharp and clean.
Properly maintained cutting tools with
sharp cutting edges are less likely to
bind and are easier to control.
7. Use the power tool, accessories and
tool bits etc. in accordance with these
instructions, taking into account the
working conditions and the work to be
performed. Use of the power tool for
operations different from those intended
could result in a hazardous situation.
Battery Tool Use and Care
1. Recharge only with the charger
specified by the manufacturer. A charger
that is suitable for one type of battery
pack may create a risk of fire when used
with another battery pack.
2. Use power tools only with specifically
designated battery packs. Use of any
other battery packs may create a risk of
injury and fire.
3. When battery pack is not in use, keep
it away from other metal objects like
paper clips, coins, keys, nails, screws,
or other small metal objects that can
make a connection from one terminal to
another. Shorting the battery terminals
together may cause burns or fire.
4. Under abusive conditions, liquid may
be ejected from the battery; avoid
contact. If you accidentally contact the
battery liquid, flush it with water. If the
battery liquid contacts the eyes, seek
medical help as soon as possible. Liquid

7
ejected from the battery may cause
irritation or burns.
Service
Have your power tool serviced by a
qualified repair professional using only
the identical replacement parts. This will
ensure that the safety of the power tool
is maintained.
MAINTENANCE AND
CARE
GENERAL SAFETY
WARNING #2!
Cleaning
GENERAL SAFETY
WARNING #4!
1. Remove dirt and dust from the
housing with a paintbrush and dry cloth.
2. Keep the ventilation slots clean
and free of dust.
Storage
1. Store the unit in a dry and frost-free
place (50-77 °F).
2. Store the battery and the unit
separately.
3. Charge the battery before storing the
unit in winter.
4. Keep the leaf blower, in particular its
plastic components, away from
flammable fluids, petroleum
products, penetrating oil, etc. They
contain chemical substances which
may damage, attack or destroy the
plastic components of the leaf
blower.
5. Fertilizers and other garden
chemicals contain substances which
may have a highly corrosive effect on
the metal parts of the leaf blower.
Therefore do not store your leaf blower
near these substances.
Repair
Check the unit for damage. Repairs may
be earned out by an authorized
customer service centre only.

8
MAJOR PARTS OF THE
BLOWER
1. Battery pack
2. Handle
3. Blower housing
4. Blower housing outlet
5. Blower tube
6. Blower tube outlet
7. Speed raising button
8. Start button
9. Speed-reducing button
10. Stop button
11. LED indicator

9
EXPLODED PARTS VIEW

10
PARTS LIST

11
PRODUCT SPECIFICATIONS
Model
E435C
Rated Voltage
40V DC
Max Air Volume
385cmf(11m³/min)
Max Air Speed
121mph (54m/s)
Weight (without EP40 battery pack)
5.5 lbs
Sound pressure level
97 dB(A), K=3.0
Guaranteed sound power level
110 dB(A)
Vibration
Uncertainty K= 1.5m/s2
<2.5m/s2
Battery Pack
Lithium Ion – EP20, EP40 or EP60
Battery Charger
EC20 or EC50 (2.0A or 5.0A)

12
ASSEMBLY AND
OPERATION
Assembling the Blower
Tube
GENERAL SAFETY
WARNING #2
The blower tube can be installed on the
blower without using any tools.
1. Slide the blower tube over the outlet
on the blower housing.
2. Rotate the tube clockwise and match
with the outlet fully.
.
Installing and Removing the
Battery Pack
1. To insert the battery, slide it into the
battery cradle on the blower, aligning
the ribs in the cradle with the slots in the
battery until it latches into place. Check
that the battery is securely locked into
place.
2. To remove the battery, press and
hold the latch on the rear of the battery
pack and slide the battery away from the
blower.
Starting/Stopping the
Blower
1. To start the blower, press the start
button first then, press speed increase
button (7). The blower will start to run in
Low Speed.
2. Press the Speed Increase button
again for Medium Speed, High Speed,
and ‘Turbo’ mode (100% power). The
speed setting is indicated by the LED
lights above the speed buttons.
3. To decrease speed, press the
decrease speed button (9). With each
press of this button the blower will move
from ‘Turbo’ to High Speed, then to
Medium then to Low Speed.
4. Press the stop button (10) to stop the
blower.
5. To conserve battery life, the blower
will only run in ‘Turbo’ mode for 30
seconds before automatically switching

13
to ‘High’ Speed.
Operating the Blower
1. To keep from scattering debris, blow
around the outer edges of a debris pile.
Never blow directly into the center of a
pile.
2. To reduce sound levels, limit the
number of pieces of equipment used at
any one time.
3. Use rakes and brooms to loosen
debris before blowing. In dusty
conditions, slightly dampen surfaces
when water is available.
4. Conserve water by using power
blowers instead of hoses for many lawn
and garden applications including areas
such as gutters, screens, patios, grills,
porches, and gardens.
5. Watch out for children, pets, open
windows, or freshly washed cars, and
blow debris safely away.
6. CLEAN UP after using blowers or
other equipment. Dispose of debris
properly.
Storing the Blower
Clean the blower thoroughly before
storing. Store the blower in a dry, well-
ventilated place that is inaccessible to
children. Keep away from corrosive
agents such as garden chemicals and
de-icing salts.
1. Store and charge your batteries in a
cool area. Temperatures above or below
normal room temperature will shorten
battery pack life.
2. Never store batteries in a discharged
condition. Wait for battery pack to cool
and fully charge immediately.
3. All batteries gradually lose their
charge. The higher the temperature, the
quicker they lose their charge. If you
store your unit for long periods of time
without using it, recharge the batteries
every month or two.
This practice will prolong battery pack
life.
Battery Charger
GENERAL SAFETY
WARNING #3!
Status Indicator Lights
The LED light indicates the operating
status and the state of charge of the
battery.
• LED steady red – The charger is ready
to charge but no battery is connected.
• LED flashes green - Battery is
charging.
• LED steady green - The battery is fully

14
charged and can be removed.
• LED flashes red - Battery fault or
overheat
Charging the Battery
1. Plug the charger into an AC outlet
100-250V (normal household voltage).
2. Insert the battery into the slots of the
charger and slide into place until the
battery locks into place
3. The LED will flash green while the
battery is charging.
- Once the battery is fully charged, the
LED indicator will show a steady green
light.
DISPOSAL
INFORMATION
GENERAL SAFETY
WARNING #5!
For EU countries only:
Do not throw electric power tools into
the household waste! In accordance
with the European Directive 2012/19/EC
on Waste Electrical and Electronic
Equipment and transposition into
national law, used electric power tools
must be collected separately and
recycled in an environmentally friendly
manner, same with devices,
accessories, and packaging. Plastic
parts are identified for recycling
according to material type.
Do not open disused batteries.
Accumuiators/batteries should be
collected, recycled or disposed of in an
environmentally friendly manner, too.
For EU countries only:
In accordance with Directive
2006/66/EC defective or used batteries
must be recycled.
Please ask your dealer about the
disposal
options!
No.
Part No.
Description
QTY
1
7063016
Iron Ring
1
2
2109003
Front Wind Pipe
1
3
2109002
Back Wind Pipe
1
4
60170670
Self-Tapping Screw
20
5
6017082
Self-Tapping Screw
1
6
2068002
Upper Cover of
Motor
1
7
2106028
Left Housing
1
8
2092019
Liner of Left
Housing
1
9
60170190
Self-Tapping Screw
4
10
25040050
Fan Blade
1
11
2042004
Back Cover
1

15
GUARANTEE
/WARRANTY
This product has been manufactured to
the highest quality standards. When a
new product is purchased, it is
guaranteed a 12-month manufacturer’s
warranty which comes into force on the
date the product was purchased.
The guarantee covers only the defects
which can be attributed to a material
and/or production fault as well as non-
performance of warranted
characteristics.
You can extend the warranty by
registering your product online within 30
days of purchase.
When making a claim under the
guarantee, enclose the original sales
receipt with purchase date. Repairs
under the guarantee may be carried out
only by workshops or service centres
authorised by the manufacturer.
A claim may be made under the
guarantee only if the power tool has
been used as intended.
This warranty is invalid where defects
are caused by or result from:
- misuse, abuse or neglect;
- commercial use (industry, craft,
rental)
- repairs attempted by unauthorized
repair centers
- damage caused by external effects,
foreign objects, substances or
accidents.
Website: www.redbacktool.com
Email: support@redbacktool.com
Table of contents
Other Redback Blower manuals
Popular Blower manuals by other brands

Schiller Grounds Care
Schiller Grounds Care STEINER 75-70585B Owner's/operator's manual

Harbor Freight Tools
Harbor Freight Tools Bauer 1916C-B Owner's manual & safety instructions

All-Star Products
All-Star Products RB1 Series Operation & maintenance instructions

Nilfisk-Advance
Nilfisk-Advance SR 1900 troubleshooting manual

Ryobi
Ryobi RBV2400CSV Original instructions

Hyundai power products
Hyundai power products HYB5200 user manual