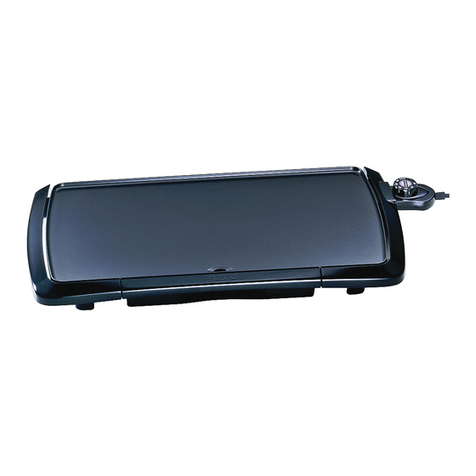
Redfox KDA 33 ED User manual

ELECTRIC
GRIDDLE PLATES
1015-22
KDA 33 ED, KDA 63 ED, KDA 66 ED
www.rmgastro.com
INSTRUCTION FOR INSTALLATION AND USE
DIE GEBRAUCHS UND INSTALLATIONSANWEISUNG
NOTICE D‘INSTALLATION ET D‘EMPLOI
INSTRUCTIE VOOR INSTALLATIE EN GEBRUIK
NÁVOD K OBSLUZE A INSTALACI
INSTRUKCJE MONTAŻU I OBSŁUGI
BRUGS- OG MONTERINGSVEJLEDNING

2023-04-05
CONTENT
Declaration of a standards conformity
Instruction for use
Cleaning and maintenance
6
10
12
INHALT
Die Normenübereinstimmungsdeklaration
Gebrauchsanweisung
Die Reinigung und instandshaltung
13
17
19
CONTENU
Déclaration de conformité
Mode d‘emploi
Nettoyage et entretien
20
24
26
INHOUD
De verklaring van overeenstemming met de normen
Gebruiksaanwijzing
Reiniging en onderhoud
27
33
35
OBSAH
Prohlášení o souladu s normami
Návod k použití
Čistění a údržba
44
48
50
TREŚĆ
Oświadczenie o zgodności z normami
Instrukcja obsługi
Czyszczenie i konserwacja
51
54
55
BRUGERVEJLEDNING
Erklæring om standard kompatibilitet
Brugsvejledning
Rensning og vedligeholdelse
64
67
69


1
2
3
Toto je pouze aretovací přepravní kolík. Před
použitím ho prosím vyjměte dle tohoto návodu
a následně již nepoužívejte.
4

5

DECLARATION OF A STANDARDS CONFORMITY
The producer confi rms that the devices agree with 2014/30/EU, 2014/35/EU standards, rule nr. 117/2016 sb.,
118/2016 sb. and with relevant goverment orders. Instalation must be done with respect to valid standards.
Attention, the producer refuses any responsibility in case of direct or indirect damages which are caused due
to wrong instalation, incorrect intervention or modifi cation, insuffi cient maintenance, incorrect use and also
possibly caused by other reasons presented by items in sale conditions. This appliance is set only for skilled
use and must be operated by qualifi ed persons only. Parts set and secured by the producer or accredited
person must not be rebuilt by user.
TECHNICAL DATA
Label with technical data is placed on the back side of the device. Study the electrical diagram of connection
and all following information before instalation.
MODEL VOLTAGE
(V)
WATTAGE
(KW)
TOP DIMENSIONS
(CM)
DIMENSIONS
(CM)
KDA-33 ED 2x 230 3+3 48x32+40x28 33x70,8x44,2
KDA-63 ED 3x 230 6+3 48x65+40x28 66x70,8x44,2
KDA-66 ED 4x 230 6+3+3 48x65+2x40x28 66x70,8x44,2
6

PACKING AND DEVICE CHECK
The device leaves our stocks properly packed with appropriate symbols and labels. There are also appropriate
instructions for use. In case the packing shows bad handling or damage, it must be reclaimed at transporter
immediately by writing and signing of a damage protocol.
Important notice:
-This product is only intended for use inside.
Never use the appliance if it has a damaged supply cable or plug, if it is not working correctly, has fallen to
the ground and been damaged or fallen into water. In such cases take the appliance to a professional service
in order to verify that it is safe and works correctly.
• only for proffesional use
• this instructing guide must be read properly and carefully because it contains important information about
safety elements, installation, use
• these recommendations refer to this product
• this product corresponds with valid standards
• this guide must be properly deposited for future use
• keep the children away from manipulation with the product
• when selling or moving the product to another place it is necessary top make yourself sure that the staff
or the professional service has got acquainted with control and installation instructions from enclosed guide
• only authorised person can operate the product
• it can not be switched on without supervision
• we recommend to have the product checked by professional service min. once a year
• only original spare parts can be used for repairs
• the product can not be cleaned by the water jet or pressure shower
• by damage or break down disconnect all the feeders (water, gas, electricity) and call professional service
• producer refuses any responsibility in case of damages caused by wrong installation, by disobserving of
above mentioned recommendations or by other use etc.
7

SAFETY MEASURES FROM THE STANDPOINT OF THE FIRE
PROTECTION ACCORDING TO EN 061008 ČL. 21
• only adults can operate the device
• device must be safely used in common surroundings according to EN 332000-4-462; EN 332000-4-42. You
must switch the gas device off under the circumstances leading: to the danger of the temporary rise of the
combustion gas or steam or during works when there is a big possibilityof rise ot the temporary fi re danger
or explosion (for example: to stick linoleum, PVC etc.).
• before you start to instal the device you must get the licence for connection to the gas feeder from the
gasworks
• device must be placed so as to stand or hang on the noncombustible surface which is on each side 10
cm larger than the device. No subjects from combustible materials can be placed directly on the device
or in distance which is shorter than safety distance (the shortestdistance is 50 cm in the direction of the
heat emission and 10 cm in other directions).- safety distances from various materials of different degree of
combustion and information about the degree of comb. of common building materials - see chart:
Chart:
Combustion degree of building materials classifi ed according to the combustion degree of materials and
products (EN 730823)
A noncombustible granit, sandstone, concretes,bricks, ceramic wallfacing tiles, plaster
B uneasily combustible akumine, heraklite, lihnos, itavere
C1 hardly combustible leafy wood, plywood, sirkoklit, rare paper formica
C2 middle combustible fi breboards, solodure, cork boards, rubber,fl oor-coverings
C3 easily combustible wood-fi breboards, polystyrene,polyurethane, PVC
Devices must be instalated in a safe way. When instaling you must respect corresponding project, safety and
hygienic orders according to:
• EN 061008 fi re protection of local devices and sources of heat
• EN 332000 (33 2000-4-482; 33 2000-4-42) surrounding for electric devices ČSN EN 1775 Gas supplying
• Gas fi ttings in the buildings - the highest operational pressure < 5 bar - operation demands
• § 10 law nr. 185/2001 Sb. about waste
CONNECTION OF THE ELECTRIC CABLE TO THE ELECTRICITY
Instalation of electric feeder - This feeder must be separetely protected by a safety fuse according to the
specifi c electric stream which depends on the wattage of the instaled device. Check the wattage on the label
at the back of the device. Connect the device directly to the electricity but you must put the switch between
the device and electric net. The switch must be placed in min. distance 3 mm between the particular contacts
according to the standards and loading. The feeder of grounding (yellow-green) cannot be interrupted by this
switch. In every case feeding cable must be placed so that no point of the cable will reach the temperature
which is 50°C higher than the temperature of the surrounding. Before connecting the device check that:
• safety fuse of the feeder and inner mains can stand the loading of the device (see label of the matrix)
• mains are equipped with effective grounding according to standards (ČSN) and conditions given by law
• socket or switch of the feed is well accessible from device
We refuse any responsibility in case of not respecting above mentioned rules. Before the fi rst use it is
necessary to remove all the protection foil and to clean the device - see chapter „cleaning and maintenance“.
Maintenance: We recommend to have the device checked once a year by the proffesional service. Only
qualifi ed or competent persons can do interventions in the product.
-Do not insert the power cable plug into the el. socket and do not pull it out of the
el. socket with wet hands or by pulling on the cable!
-Do not use extension cables or power strips.
8

TECHNICAL INSTRUCTIONS FOR INSTALATION AND REGULATION
Important:
The manufacturer does not provide warranty for defects caused by improper use, failure to instructions
contained in the attached instructions for use and mistreatment of the appliances.
Installation, adjustment and repair of appliances for kitchens, as well as their removal because of possible
damage to the gas can be carried out only under a maintenance contract, this contract may be signed with an
authorized dealer, and must be complied with regulations and technical standards and regulations regarding
the installation, power supply, gas connection and health & safety system.
These instructions are intended for the qualifi ed technician who must perform the installation, put it into
operation and test the appliance.
Any activity as settings, placement, rebalancing etc, must be made only when is device disconnected from
electricity. If it is necessary to have the device connected to the electricity you must keep the highest attention
to avoid any injuries.
DEVICE INSTALATION
Instalation, setting, rebuilding for another gas type, putting into operation must be done by qualifi ed person
whois competent for this and according to the valid standards. The device can be instalated in good ventilated
room. When it is possible place the device under the fumehood to suck off the products of combustion. Air
needy to the burning is 2m/3/h/kW ot the performance of the instaled device. The device can be instalated
separately or in a set with devices of our production. Min. distance 10 cm from other subjects must be kept.It
is also necessary to prevent our product from contact with combustible materials. In this case you must make
corresponding changes to secure heat izolation of combustible parts (for example:place between the device
and combustible material azbestos plate).
SAFETY MEASURES FROM THE STANDPOINT OF THE FIRE
PROTECTION ACCORDING TO EN 061008 ČL. 21
• only adults can operate the device
• device must be safely used in common surroundings according to EN 332000-4-462; EN 332000-4-42. You
must switch the gas device off under the circumstances leading: to the danger of the temporary rise of the
combustion gas or steam or during works when there is a big possibilityof rise ot the temporary fi re danger
or explosion (for example: to stick linoleum, PVC etc.).
• before you start to instal the device you must get the licence for connection to the gas feeder from the
gasworks
• device must be placed so as to stand or hang on the noncombustible surface which is on each side 10
cm larger than the device. No subjects from combustible materials can be placed directly on the device
or in distance which is shorter than safety distance (the shortestdistance is 50 cm in the direction of the
heat emission and 10 cm in other directions).- safety distances from various materials of different degree of
combustion and information about the degree of comb. of common building materials - see chart:
Chart:
Combustion degree of building materials classifi ed according to the combustion degree of materials and
products (EN 730823)
A noncombustible granit, sandstone, concretes,bricks, ceramic wallfacing tiles, plaster
B uneasily combustible akumine, heraklite, lihnos, itavere
C1 hardly combustible leafy wood, plywood, sirkoklit, rare paper formica
C2 middle combustible fi breboards, solodure, cork boards, rubber,fl oor-coverings
C3 easily combustible wood-fi breboards, polystyrene,polyurethane, PVC
Devices must be instalated in a safe way. When instaling you must respect corresponding project, safety and
hygienic orders according to:
• EN 061008 fi re protection of local devices and sources of heat
• EN 332000 (33 2000-4-482; 33 2000-4-42) surrounding for electric devices ČSN EN 1775 Gas supplying
• Gas fi ttings in the buildings - the highest operational pressure < 5 bar - operation demands
• § 10 law nr. 185/2001 Sb. about waste
9

1) switch on/switch off
Use this button
2) For starting a pre-set cooking cycle
The timer has fi ve pre-set cycle times.
Start these cycles by pressing button
1-5, where button:
Manufacturer’s settings
PROGRAM NUMBER TIME
Program 1 (Button 1) 1:00
Program 2 (Button 2) 1:30
Program 3 (Button 3) 2:00
Program 4 (Button 4) 2:30
Program 5 (Button 5) 3:00
Program 6 (Button 6) user programmable
The following instructions must be followed for programing a cycle in option 6 (button
6):
1. Check that the display on the control panel shows three hyphens “---“
2. Press the button marked “TIME”
3. Use the arrow-up button (button 2) and the arrow-down button (STOP button) to
change the time shown on the display (at 30 second intervals)
4. The selected time will fl ash on the timer.
5. Press and hold the button marked “TIME” to save the selected time.
6. Press button “6” to start the grilling cycle.
If you use programmable option 6 to repeat a user-defi ned cycle, you must proceed
according to steps 5 and 6
The timer will notify yu that the pre-set time has elapsed by sounding a warning signal.
This signal will switch off automatically after one minute, or the operator can switch it
off manually by pressing the STOP button.
The red button for interrupting the pre-set program will be fl ashing on the key-board as
the timer sounds the warning signal at the end of the cycle.
You can interrupt a program under way by pressing the STOP button.
7
Instruction for use for digital timer
The timer does not control the power, it is provides a visual countdown and alarm when a set
cooking time has elapsed.
1) Switching on/off
Use button ON/OFF
2) To start a pre-set time
The timer has 5 basic pre-set times.
These can be started by
pressing buttons 1-5, where:
1- For example time for hamburgers
2- For example time for fish
3- For example time for rare steak
4- For example time for medium rare steak
5- For example time for well done steak
At the end of the set time, the timer alerts with a loud tone.
This tone stops by timer itself after approximately 1 minute,
or it can be stopped by the operator by pressing the STOP button.
Whilst the timer is beeping a small red light flashes in the keyboard.
Interrupting the program
You can interrupt running pre-set program anytime you need by pressing the button STOP.
INSTRUCTION FOR USE
Unpack the device and check for transport damage. Attach the device to the fry top according to the picture
either using the standoffs or standoffs and screws. After this, t the springs on the classic plate for them to hold
it in raised position and at the same time not to lift it spontaneously when the device is lowered.
It is necessary to observe the minimum distance of 10cm from the rest of the items, and prevent contact of the
device with combustible materials. In this case, it is necessary to make appropriate modi cations to ensure
termal insulation of the combustible parts.
Attention!
Before the rst use of the device wash the device with water containing detergent and than dry with the
cleaning
cloth. Never leave the device on without supervision!!!
Drawer for superfl uous fat
You must check the drawer regularly and empty it in time. You must clean the drawer after each switching the
device off.
Switch on by main switch (D), pilot lamp (C) light indicates that the appliance is switched on. Turn the knob (A)
and adjust required performance. Pilot lamps (B) a (C) will light. Pilot lamp (C) lights when the device is
connected to the electricity. Pilot lamp (B) lights when the heating spirals are on. Pilot lamp (B) goes out when
the device reaches adjusted temperature. Switch the (E) timer on by pressing the ON/OFF button. en select
one of the ve pre-set programs and close the clam grill, which will lock in the lowest position. An alarm will
sound when the pre-set time elapses and the clam grill will open automatically. e alarm can be switched off
by pressing the STOP button. Programs under way can be interrupted prematurely by moving the clam grill
handle upwards. e clam grill will open and the program will be interrupted. When the clam grill is closed
again the interrupted program will start from the beginning. Keep the appliance under supervision when using
it. Switch the device off by turning the knob (A) into position „0“ and switch off the main switch (D).
Maintenance
We recommend to have the device checked once a year by the professional service. Only quali ed or
competent
persons can do interventions in the product.
Comments and recommendation
Use the device only under supervision.
A – Control Knob
B – Heating up idicator
C – Switch on indicator
D – Main switch
E – Digital timer
F – Height adjustment of the top plate
C
B
A
D
E
F
D
10

1) switch on/switch off
Use this button
2) For starting a pre-set cooking cycle
The timer has fi ve pre-set cycle times.
Start these cycles by pressing button
1-5, where button:
Manufacturer’s settings
PROGRAM NUMBER TIME
Program 1 (Button 1) 1:00
Program 2 (Button 2) 1:30
Program 3 (Button 3) 2:00
Program 4 (Button 4) 2:30
Program 5 (Button 5) 3:00
Program 6 (Button 6) user programmable
The following instructions must be followed for programing a cycle in option 6 (button
6):
1. Check that the display on the control panel shows three hyphens “---“
2. Press the button marked “TIME”
3. Use the arrow-up button (button 2) and the arrow-down button (STOP button) to
change the time shown on the display (at 30 second intervals)
4. The selected time will fl ash on the timer.
5. Press and hold the button marked “TIME” to save the selected time.
6. Press button “6” to start the grilling cycle.
If you use programmable option 6 to repeat a user-defi ned cycle, you must proceed
according to steps 5 and 6
The timer will notify yu that the pre-set time has elapsed by sounding a warning signal.
This signal will switch off automatically after one minute, or the operator can switch it
off manually by pressing the STOP button.
The red button for interrupting the pre-set program will be fl ashing on the key-board as
the timer sounds the warning signal at the end of the cycle.
You can interrupt a program under way by pressing the STOP button.
7
Instruction for use for digital timer
The timer does not control the power, it is provides a visual countdown and alarm when a set
cooking time has elapsed.
1) Switching on/off
Use button ON/OFF
2) To start a pre-set time
The timer has 5 basic pre-set times.
These can be started by
pressing buttons 1-5, where:
1- For example time for hamburgers
2- For example time for fish
3- For example time for rare steak
4- For example time for medium rare steak
5- For example time for well done steak
At the end of the set time, the timer alerts with a loud tone.
This tone stops by timer itself after approximately 1 minute,
or it can be stopped by the operator by pressing the STOP button.
Whilst the timer is beeping a small red light flashes in the keyboard.
Interrupting the program
You can interrupt running pre-set program anytime you need by pressing the button STOP.
7
Instruction for use for digital timer
The timer does not control the power, it is provides a visual countdown and alarm when a set
cooking time has elapsed.
1) Switching on/off
Use button ON/OFF
2) To start a pre-set time
The timer has 5 basic pre-set times.
These can be started by
pressing buttons 1-5, where:
1- For example time for hamburgers
2- For example time for fish
3- For example time for rare steak
4- For example time for medium rare steak
5- For example time for well done steak
At the end of the set time, the timer alerts with a loud tone.
This tone stops by timer itself after approximately 1 minute,
or it can be stopped by the operator by pressing the STOP button.
Whilst the timer is beeping a small red light flashes in the keyboard.
Interrupting the program
You can interrupt running pre-set program anytime you need by pressing the button STOP.
11

CLEANING AND MAINTENANCE
ATTENTION! The device cannot be cleaned by direct or pressure water. Clean it daily. Daily maintenance
keeps longer useful life and effi ciency of the device. Before cleaning make sure to have disconnected the
device from electricity. Always switch off the main feeder to the device. Stainless parts wash with moist
cleaning cloth and non abrasive detergent than dry it by the cloth. Do not use abrasive and corrosive
detergents. All food residues must be removed from the surface, you can use scraper.
!!! YOU MUST LUBRICATE THE TOP WITH VEGETABLE OIL AFTER EACH CLEANING !!!
WHAT TO DO IN CASE OF BREAK-DOWN
Switch off the electric feeder and call seller´s professional service.
INDICATION
Guarantee does not cover all consumption parts succumable to common wear (rubber seals, bulbs, glass and
plastic parts etc.). The guarantee does not refer to the devices which were not installed in correspondence with
instructions - by qualifi ed worker, in conformity with standards and when somebody handled incompetently
the device (interventions into inner equipment) or the device was operated by non qualifi ed staff or at variance
with instructions for use. Guarantee does not also cover the damages caused due to infl uence of nature or
other outer intervention.
Point for cleaning steel-alloy plate:
• Heat up the device
• Turn of the device
• The plate pull off with scraper
• Apply water to chemistry (RM gril) and clean the plate from residual dirt and sediment
• Apply pure water (The solution is with vinegar or lemon)
• Pull off the water and than to dry the plate with rag
• Turn on the device up to 70 °C and from the plate let evaporate residual humidity
• To smear the grill areas with vegetable oil
Point for cleaning chrome plate:
• Heat up the device
• Turn of the device
• The plate pull off with plastic scraper
• Apply water with a saponate and clean the plate with a sponge
• Apply pure water
• Pull off the water and than to dry the plate with rag
• Turn on the device up to 70 °C and from the plate let evaporate residual humidity
12

DIE NORMENÜBEREINSTIMMUNGSDEKLARATION
DerProduzent erklärt, daß die Geräte ineinerÜbereinstimmungmitden Vorschriften der 2014/35/EU, 2014/30/
EU dem Gesetz Nr. 118/2016 sb., 117/2016 sb. der Sammlung und zugehörigen Regierungsverordnungen
stehen. Die Installation muss mit der Absicht auf geltende Normen durchgeführt werden. Vorsicht, im Falle
einer direkten oder indirekten Beschädigung, die sich auf falsche Installation, unrichtigen Eingriff oder
Anpassungen, ungenügende Instandshaltung, unrichtige Verwendung beziehen, und welche eventuell durch
andere Ursachen, als in Punkten der Verkaufsbedingungen angeführt ist, so verzichtet der Importeur auf
jegliche Verantwortung. Dieses Gerät ist nur für fachliche Verwendung bestimmt und muß durch qualifi zierte
Person bedient werden. Teile, die nach der Einstellung durch den Hersteller oder durch befugte Person
gesichert wurden, dürfen vom Benutzer keineswegs umgestellt werden.
DIE TECHNISCHEN DATEN
Das Schild mit technischen Angaben ist auf der Rückseite des Gerätes angebracht. Studieren sie vor der
Installation das elektrische Schema der Einschließung und alle folgende Informationen durch.
MODEL SPANNUNG
(V)
ANSCHLUSSWERT
(KW)
PLATTEABMESSUNG
(CM)
ABMESSUNG
(CM)
KDA-33 ED 230 3+3 48x32+40x28 33x70,8x44,2
KDA-63 ED 230 6+3 48x65+40x28 66x70,8x44,2
KDA-66 ED 230 6+3+3 48x65+2x40x28 66x70,8x44,2
13

DIE SICHERHEITSVORRICHTUNGEN AUS DER SICHT DES
FEUERSCHUTZES LAUT EN. 061008 ČL. 21
Die Einrichtungsbedienung dürfen nur Erwachsene ausführen
• Das Gerät darf sicher in gewöhnlicher Umgebung laut EN 332000-4-482; EN 332000-4-42
verwendet werden.
• Es ist notwendig das Gerät so platzieren, daß es auf einer unbrennbaren Grundlage steht oder hängt.
• Es dürfen, auf und in eine Entfernung, die kleinerermase als sicher vom Gerät bezeichnet wird, keine
Gegenstände aus brennbaren Materilien (die kleinste Entfernung vom Brennbarem ist 10 cm) aufgestellt
werden.
• Die sicheren Entfernungen von Massen der einzelnen Brenngra
Tabelle:
Baumassefeuerbrenngrad ins Brenngrad (EN) der Massen und Produkte eingegliedert
A Unbrennbar Granit, Sandstein, beton, Ziegel, Keramikbekleidung, Putz
B nicht einfach brennbar Akumin, Heraklit, Lihnos, Itaver
C1 schwer brennbar Holz, Laubbaum, Furnier Sirkoklit, Festpapier, Umakart
C2 mittel brennbar Holzspanplatten, Solodur, Korkplatten, Hartgummi, Bodenbeläge
C3 leicht brennbar Holzfaserplatten, Polystyren, Polyureten, PVC
Die Bedarfsartikel müssen sicher installiert werden und sind mit regulierenbaren Beinchen - zur Ausgleichen
der Höhe und der Unebenheiten eingestattet.
Die Geräte müssen in einer sicheren Weise installiert werden. Bei der Installation müssen weiter betreffende
Projekt-, Sicherheits-, und Hygienevorschriften respektiert werden.
• EN 06 1008 Feuerschutz der örtlichen Geräte und der Wärmquellen
• EN 33 2000 (33 2000-4-482; 33 2000-4-42) Umgebung für elektrische Geräte
Gasversorgung -Gasleitunge in Gebäuden - Höchste Verkehrsdruck ≤ 5 BarVerkehrsansprüche,
• § 10 des Gesetzes Nr.185/2001 Sb., der Abfälle betrifft.
DIE VERPACKUNGS-, UND VORRICHTUNGSKONTROLLE
Die Vorrichtung verlässt unsere Lager in ordentlicher Verpackung, auf deren die entsprechenden Symbole
und Bezeichnungen stehen. In der Verpackung befi ndet sich entsprechende Bedienungsanweisung. Falls die
Verpackung eine schlechte Behandlung oder Anzeichen der Beschädigungen vorweist, muß dieses sofort
beim Transporteur reklamiert werden und zwar durch Unterzeichnung eines Schadensprotokolles.
Wichtige Hinweise
-Das Erzeugnis ist nur zur Verwendung im Innenraum bestimmt.
Verwenden Sie den Verbraucher nie, wenn die Speisezuleitung oder der Stecker beschädigt sind, das Gerät
nicht richtig arbeitet, ist auf den Boden gefallen und hat sich beschädigt oder ist ins Wasser gefallen. Bringen
Sie in solchen Fällen den Verbraucher zu einem Fach-Kundendienst zur Überprüfung seiner Sicherheit und
richtiger Funktion.
• Nur für professionellen Verbrauch geeignet
• Diese Bediennungsanleitung muss ordentlich und bedächtig gelesen werden, weil sie wichtige Informationen
über Sicherheitsmerkmale, Installation und Anwendung beinhaltet
• Diese Empfehlungen beziehen auf diesen Produkt
• Der Produkt entspricht geltenden Normen
• Diese Anleitung muß ordentlich für die zukünftige Verwendung hinterlegt werden
• Hindern Sie den Kinder an Vorrichtungsmanipulation
• Beim Verkauf oder Verlegung ist es notwendig sich zu überzeugen, daß die Bedienstperson oder Fachservis
sich mit der Behherrschung und Installationsanweisung in beiligender Anleitung, anvertraut gemacht haben.
• Das Produkt darf nur eingeschulte Bedienung bedienen
• Das Produkt darf nicht ohne Aufsicht ins Betrieb gesetzt sein
• Es ist empfohlen, minimal einmal pro Jahr eine Fachkontrolle durchführen zu lassen
• Bei eventueller Reparatur der Teilenumtauschungen müssen ausschließlich Originalteile angewendet
werden
• Das Produkt darf nicht durch einen Wasserstrahl oder Druckbrause gereinigt werden
• Schalten Sie alle Leitungen (Wasser, Elektrizität, Gas) bei einer Störung oder beim schlechten Lauf aus und
rufen Sie authorisierten Service an
• Der Hersteller verzichtet auf jegliche Verantwortung bei Störungen, die durch fehlerhafte Installation,
Nichteinhaltung o.a. Empfehlungen, andere Verwendung u.ä, verursacht wurden
DIE PLATZIERUNG
Es ist unbedingt notwendig, zu der Regulation der Gerätetätigkeit, daß das Milieu - der Küche -, wo das Gerät
installiert wird, sehr gut belüftbar ist (im Hinblick darauf: sei der Techniker sich mit geltenden Normen (EN)
richtet). Wenn die Einrichtung so plaziert wird, daß sie im Mobiliarwandkontakt stehen wird, so müssen diese
einer Temperatur von 90°C wiederstehen. Die Installation, Herrichtung, Inbetriebsnahme müssen durch
qualifi zierte Person, die zu solchen Vorkehrungen eine Befugnis hat und dies laut geltenden Normen nach,
durchgeführt werden.
Packen Sie das Gerät aus und kontrollieren Sie , ob sich das Gerät während des Transportes nicht beschädigt
hat. Platzieren Sie das Gerät auf eine waagrechte Fläche (maximalle Unebenheit bis 2°). Stellen Sie das
Gerät unter den Haubenabzug, damit Sie die Wasserdämpfe und den Geruch eliminieren. Das Gerät kann
selbständig oder in einer Reihe mit Geräten unserer Herrstellung installiert werden. Es ist notwendig die
minimale Entfernung von 10 cm zu anderen Gegenständen einzuhalten, so dass die Wärmeisollierung der
brennbaren Teilen gewährleistet wird.
Das Gerät kann selbständig oder in einer Reihe mit Geräten unserer Herrstellung installiert werden. Es
ist notwendig die minimale Entfernung von 10 cm zu anderen Gegenständen einzuhalten, so dass die
Wärmeisollierung der brennbaren Teilen gewährleistet wird.
14

DIE SICHERHEITSVORRICHTUNGEN AUS DER SICHT DES
FEUERSCHUTZES LAUT EN. 061008 ČL. 21
Die Einrichtungsbedienung dürfen nur Erwachsene ausführen
• Das Gerät darf sicher in gewöhnlicher Umgebung laut EN 332000-4-482; EN 332000-4-42
verwendet werden.
• Es ist notwendig das Gerät so platzieren, daß es auf einer unbrennbaren Grundlage steht oder hängt.
• Es dürfen, auf und in eine Entfernung, die kleinerermase als sicher vom Gerät bezeichnet wird, keine
Gegenstände aus brennbaren Materilien (die kleinste Entfernung vom Brennbarem ist 10 cm) aufgestellt
werden.
• Die sicheren Entfernungen von Massen der einzelnen Brenngra
Tabelle:
Baumassefeuerbrenngrad ins Brenngrad (EN) der Massen und Produkte eingegliedert
A Unbrennbar Granit, Sandstein, beton, Ziegel, Keramikbekleidung, Putz
B nicht einfach brennbar Akumin, Heraklit, Lihnos, Itaver
C1 schwer brennbar Holz, Laubbaum, Furnier Sirkoklit, Festpapier, Umakart
C2 mittel brennbar Holzspanplatten, Solodur, Korkplatten, Hartgummi, Bodenbeläge
C3 leicht brennbar Holzfaserplatten, Polystyren, Polyureten, PVC
Die Bedarfsartikel müssen sicher installiert werden und sind mit regulierenbaren Beinchen - zur Ausgleichen
der Höhe und der Unebenheiten eingestattet.
Die Geräte müssen in einer sicheren Weise installiert werden. Bei der Installation müssen weiter betreffende
Projekt-, Sicherheits-, und Hygienevorschriften respektiert werden.
• EN 06 1008 Feuerschutz der örtlichen Geräte und der Wärmquellen
• EN 33 2000 (33 2000-4-482; 33 2000-4-42) Umgebung für elektrische Geräte
Gasversorgung -Gasleitunge in Gebäuden - Höchste Verkehrsdruck ≤ 5 BarVerkehrsansprüche,
• § 10 des Gesetzes Nr.185/2001 Sb., der Abfälle betrifft.
TECHNISCHE HINWEISE ZUR INSTALLATION UND REGELUNG
Wichtig:
Zur Benützung AUSSCHLIEßLICH nur für spezialisierte Techniker
Instruktionen, die folgen, wenden sich an den Techniker, der für die Installation qualifi ziert ist, damit er alle
Operationen mit der korrektesten Weise und laut der gültigen Normen durchführt.
Wichtig
Jeweils irgendeine Tätigkeit, die mit der Regulation verbunden ist u.ä, muß nur mit der aus dem Netz
ausgezogenen und abgeschalteten Einrichtung vollgezogen sein.
Solange das Gerät unter der Spannung notwendig zu halten ist, eine höchste Vorsicht zu beachten vorliegt.
DIE PLATZIERUNG
Es ist unbedingt notwendig, zu der Regulation der Gerätetätigkeit, daß das Milieu - der Küche -, wo das Gerät
installiert wird, sehr gut belüftbar ist (im Hinblick darauf: sei der Techniker sich mit geltenden Normen (EN)
richtet). Wenn die Einrichtung so plaziert wird, daß sie im Mobiliarwandkontakt stehen wird, so müssen diese
einer Temperatur von 90°C wiederstehen. Die Installation, Herrichtung, Inbetriebsnahme müssen durch
qualifi zierte Person, die zu solchen Vorkehrungen eine Befugnis hat und dies laut geltenden Normen nach,
durchgeführt werden.
Packen Sie das Gerät aus und kontrollieren Sie , ob sich das Gerät während des Transportes nicht beschädigt
hat. Platzieren Sie das Gerät auf eine waagrechte Fläche (maximalle Unebenheit bis 2°). Stellen Sie das
Gerät unter den Haubenabzug, damit Sie die Wasserdämpfe und den Geruch eliminieren. Das Gerät kann
selbständig oder in einer Reihe mit Geräten unserer Herrstellung installiert werden. Es ist notwendig die
minimale Entfernung von 10 cm zu anderen Gegenständen einzuhalten, so dass die Wärmeisollierung der
brennbaren Teilen gewährleistet wird.
Das Gerät kann selbständig oder in einer Reihe mit Geräten unserer Herrstellung installiert werden. Es
ist notwendig die minimale Entfernung von 10 cm zu anderen Gegenständen einzuhalten, so dass die
Wärmeisollierung der brennbaren Teilen gewährleistet wird.
15

DER ELEKTRISCHE KABELNETZANSCHLUSS
Die Installation der elektrischen Ankupplung - Diese Zuleitung muß selbstständig gesichert werden. Und das
durch entsprechende Sicherung des Nennstromes in der Abhängigkeit am Anschlußwert des installierten
Gerätes. Kontrollieren sie den Anschlußwert des Apparates auf dem Produktionsschild im Hinterteil des
Gerätes. Schließen Sie das Gerät direkt ans Netz an.
Es ist unbedingt notwendig zwischen das Gerät und das Netz einen Schalter zu legen, der eine minimale
Entfernung von 3mm unter den Einzelkontakten aufweist und der auch den geltenden Normen und
Belastungen entspricht. Die Erdungszuleitung (gelbgrün) darf nicht durch diesen Schalter unterbrochen sein.
Der Zuleitungskabel muß in jedem Fall so angebracht sein, dass er in keinem Punkt einer um 50°C höherer
Temperatur als Umgebungstemperatur nicht erreicht. Eher das Gerät ans Netz angeschlossen wird, versichern
Sie sich, dass:
• die Zuleitungssicherung und die Innenscheidung die Einrichtungsbelastung ertragen (siehe Matrizeschild),
• die Verteilung mit wirksamer Erdung laut Normen (EN) und Gesetzbedingungen ausgestattet ist
WIR VERZICHTEN AUF JEGLICHE VERANTWORTUNG IM FALLE, DASS DIESE NORMEN NICHT
RESPEKTIERT WERDEN UND IM FALLE DER NICHTEINHALTUNG DER OBENERWÄHNTER
GRUNDSÄTZE.
Es ist notwendig die Schutzfollie vor der ersten Benützung zu beseitigen, sowie das Gerät zu reinigen siehe
das Kapitel „Reinigung und Instandshaltung“.
-Führen Sie den Stecker der Speisezuleitung in die el. Steckdose und ziehen ihn aus der el. Steckdose mit
nassen Händen und durch Ziehen der Speisezuleitung nicht!
-Verwenden Sie keine Verlängerungskabel oder Kombisteckdosen.
16

GEBRAUCHSANWEISUNG:
Vorsicht!
Bevor Sie das Gerät verwenden werden, ist es notwendig ihn gut mit feuchtem Waschlappen
abzuwaschen. Lassen Sie nie das Gerät ohne Aufsicht im Betrieb.
Behälter für Ölsammlung
Es ist wichtig den Behälter regelmässig zu kontrollieren und diesen auch beizeitig ausleeren.
Den Behälter müssen nach jeder Gerätausschaltung reinigen. Packen Sie das Gerät aus und
kontrollieren Sie, ob das Gerät beim Transport nicht beschädigt wurde. Befestigen Sie die Anlage an
den Fry-Top gemäß Abbildung entweder mit Hilfe der Füße, oder der Füße und Schrauben. Danach
setzen Sie die Federn so auf die Kontaktplatte auf, dass sie diese in angehobener Stellung halten
und gleichzeitig nicht eigenmächtig anheben, wenn die Anlage nach unten gelassen ist.
Es ist ein Mindestabstand von 10 cm von den übrigen Gegenständen einzuhalten und ein Kontakt des
Geräts mit brennbaren Materialien zu vermeiden. In diesem Fall sind entsprechende Anpassungen
sicherzustellen, um die Wärmeisolierung der brennbaren Teile zu gewährleisten.
Schalten Sie mit dem Hauptschalter (D), die Anzeigeleuchte (C) zeigt das Einschalten des Gerätes
an. Drehen Sie mit dem Beherrschenrädchen (A) und stellen Sie die verlangte Temperatur ein. Die
Kontrollleuchten (B) und (C) werden scheinen. Die Kontrolllampe (C) scheint, wenn das Gerät unter
Elektrostrom steht. Die Kontrolllampe (B) scheint, wenn die Heizkörperspiralen im Gange sind.
Schalter (E) Der Zeitgeber wird durch Betätigen der Taste eingeschaltet. ON/OFF. Dann wählen
wir ein der fünf vorgewählten Programme aus und schließen den Clam-Grill. Dieser sperrt sich in
der unteren Position ab. Nach der Zeitbeendigung erschallt der Alarm und der Clam-Grill öffnet sich
automatisch. Alarm kann durch Betätigen der Taste STOP ausgeschaltet werden.
Das verlaufende Programm kann vorzeitig durchs Verschieben des Clam-Grill-Handgriffs aufwärts
unterbrochen werden. Der Clam-Grill öffnet sich und das Programm wird unterbrochen. Nach
wiederholter Schließung des Clam-Grills startet das unterbrochene Programm von Anfang an.
Benutzen Sie das Gerät nur unter Aufsicht.
Das Gerät schalten Sie so aus, wenn Sie das Beherrschenrädchen (A) in die Lage „0“ umdrehen
und mit dem Hauptschalter (D) ausschalten.
A – Regulierungsknopf
B – Auffheizkontrollampe
C – Power-Anzeige
D – Zentraler schalter
E – Digital thermostat
F – Verstellung der Höhe der oberen Platte
C
B
A
D
E
F
D
DER ELEKTRISCHE KABELNETZANSCHLUSS
Die Installation der elektrischen Ankupplung - Diese Zuleitung muß selbstständig gesichert werden. Und das
durch entsprechende Sicherung des Nennstromes in der Abhängigkeit am Anschlußwert des installierten
Gerätes. Kontrollieren sie den Anschlußwert des Apparates auf dem Produktionsschild im Hinterteil des
Gerätes. Schließen Sie das Gerät direkt ans Netz an.
Es ist unbedingt notwendig zwischen das Gerät und das Netz einen Schalter zu legen, der eine minimale
Entfernung von 3mm unter den Einzelkontakten aufweist und der auch den geltenden Normen und
Belastungen entspricht. Die Erdungszuleitung (gelbgrün) darf nicht durch diesen Schalter unterbrochen sein.
Der Zuleitungskabel muß in jedem Fall so angebracht sein, dass er in keinem Punkt einer um 50°C höherer
Temperatur als Umgebungstemperatur nicht erreicht. Eher das Gerät ans Netz angeschlossen wird, versichern
Sie sich, dass:
• die Zuleitungssicherung und die Innenscheidung die Einrichtungsbelastung ertragen (siehe Matrizeschild),
• die Verteilung mit wirksamer Erdung laut Normen (EN) und Gesetzbedingungen ausgestattet ist
WIR VERZICHTEN AUF JEGLICHE VERANTWORTUNG IM FALLE, DASS DIESE NORMEN NICHT
RESPEKTIERT WERDEN UND IM FALLE DER NICHTEINHALTUNG DER OBENERWÄHNTER
GRUNDSÄTZE.
Es ist notwendig die Schutzfollie vor der ersten Benützung zu beseitigen, sowie das Gerät zu reinigen siehe
das Kapitel „Reinigung und Instandshaltung“.
-Führen Sie den Stecker der Speisezuleitung in die el. Steckdose und ziehen ihn aus der el. Steckdose mit
nassen Händen und durch Ziehen der Speisezuleitung nicht!
-Verwenden Sie keine Verlängerungskabel oder Kombisteckdosen.
17

1) Einschalten / Ausschalten
Benutzen Sie diese Taste
2) Zum Starten der voreingestellten Zeit
Der Zeitgeber hat 5 voreingestellte Zeitabstände.
Diese zeitabstände starten Sie durch Betätigen der Taste
1-5, wo die Taste:
Werkseinstellung
PROGRAMMNUMMER ZEIT
Programm 1 (Taste 1) 1 Min.
Programm 2 (Taste 2) 1:30 Min.
Programm 3 (Taste 3) 2 Min.
Programm 4 (Taste 4) 2:30 Min.
Programm 5 (Taste 5) 3 Min.
Programm 6 (Taste 6) Benutzerprogrammiert
Zum Programmieren des Zyklus in der Option 6 (Taste 6) müssen folgende Anweisungen eingehalten werden:
1. überprüfen Sie, ob das Display der Steuertafel 3 Striche anzeigt „---”
2. betätigen Sie die mit „TIME” gekennzeichnete Taste
3. durch Betätigen der Taste mit aufwärts gerichtetem Pfeil (Taste 2) und abwärts gerichtetem Pfeil (Taste
STOP) ändern Sie die am Display angezeigte Zeit (je 30 Sekunden).
4. Die am Zeitgeber gewählte Zeit wird blinken.
5. Drücken Sie und halten die mit „TIME” gekennzeichnete Taste, damit die gewählte Zeit gespeichert wird.
6. betätigen Sie die Taste „6”, womit der Grillzyklus gestartet wird.
Wenn Sie die programmierbare Option 6 benutzen, damit sich der benutzerdefi nierte Zyklus wiederholt,
müssen Sie entsprechend der Schritte 5 und 6 vorgehen.
Auf das Ende der voreingestellten Zeit weist der Zeitgeber mit akustischem Signal hin. Dieser Ton wird
nach einer Minute automatisch abgeschaltet oder kann ihm die Bedienung durch Betätigen der Taste STOP
ausschalten.
Während der Zeitgeber auf das Prozessende aufmerksam macht, blinkt auf dem Tastenfeld die rote Taste der
Unterbrechung eines voreingestellten Programms.
Sie können das eben laufende Programm durch Betätigen der Taste STOP abbrechen.
7
Instruction for use for digital timer
The timer does not control the power, it is provides a visual countdown and alarm when a set
cooking time has elapsed.
1) Switching on/off
Use button ON/OFF
2) To start a pre-set time
The timer has 5 basic pre-set times.
These can be started by
pressing buttons 1-5, where:
1- For example time for hamburgers
2- For example time for fish
3- For example time for rare steak
4- For example time for medium rare steak
5- For example time for well done steak
At the end of the set time, the timer alerts with a loud tone.
This tone stops by timer itself after approximately 1 minute,
or it can be stopped by the operator by pressing the STOP button.
Whilst the timer is beeping a small red light flashes in the keyboard.
Interrupting the program
You can interrupt running pre-set program anytime you need by pressing the button STOP.
18

INSTANDSHALTUNG
Es ist empfohlen mindestens einmal pro Jahr das Gerät durch einen fachlichen Servicedienst warten zu
lassen. Alle Eingriffe in das Gerät darf nur eine qualifi zierte Person durchführen, die zu solchen Handlungen
eine Befugnis besitzt.
!!! Nach jedem Reinigungsausrüstung nötig ist, die Oberfl äche der Arbeitsplatte mit Pfl anzenöl!!!
Bemerkunge und Empfehlunge
Benützen Sie das Gerär nur unter ständigen Aufsicht.
DIE REINIGUNG UND INSTANDSHALTUNG
ACHTUNG! Die Einrichtung darf nicht mit Direkt-, oder Druckwasserstrahl gereinigt werden. Reinigen Sie
das Gerät täglich. Die Lebensdauer und Gerätewirkung wird durch die tägliche Wartung gewährleistet.
Überzeugen Sie sich, vorm Reinigungsanfang, dass Sie die Einrichtung vom Elektrostrom abgeschaltet haben.
Schalten Sie immer die Gerätehauptzufuhr ab. Waschen Sie die Edelstahteile mit feuchtem Waschlappen,
der im Waschpulver getauft ist und keine grobe Teilchen aufweist. Wischen Sie alles ins Trockene ab.
Verwenden Sie keine abrasive- oder korrosionsreiche Reinigungsmitteln. Alle Speisenreste müssen von der
Arbeitsplatte beiseitigt werden. Sie könnem eine Spachtel benützen. Nach jeder Gerätereinigung müssen
Sie die Grillplatten mit Pfl anzenöl aufreiben.
WIE MAN IM FALLE EINER STÖRUNG VORANGEHEN SOLL
Schalten sie die elektrische Stromleitung ab und rufen die Serviceorganisation des Verkäufers an.
Wie man eine Stahlgrillplatte pfl egen soll:
- die Grillplatte einheizen
- Abschalten
- mit einem Spachtel oder Schäber reinigen
- Wasser mit Reinigungsmittel /z.B. RM Grillreiniger/ auf die Platte eingiessen, Schmutze und Schämme
ordentlich entfernen
- Rein Wasser auf die Grillplatte eingiessen , passend ist auch eine Essig- oder Zitronenlösung
- Rest des Wassers abwischen und die Platte mit dem Tuch abtrocknen
- restliche Nässe abdampfen lassen
- die Grillplatte mit Pfl anzenoil aufstreichen
Wie man eine verchrommte Grillplatte pfl egen soll:
- die Grillplatte einheizen
- abschalten
- Mit einem Kunststoffspachtel oder Schäber reinigen
- Wasser mit Reinigungsmittel auf die Platte eingiessen , Schutze und Schämme mi teinem Schwamm
entfernen
- Rein Wasser auf die Grillplatte eingiessen
- Rest des Wassers abwischen und die Platte mit dem Tuch abtrocknen
- Restliche Nässe abdampfen lassen
HINWEIS
Die Garantie bezieht sich nicht auf alle Vebrauchsteile, die der geläufi ger Abnutzung unterstehen (gesamte
Gummidichtungen, Glühlampen, alle glasernde und plastiche Teile, usw.). Die Garantie bezieht sich nicht
weiterhin auf Einrichtungen, die durch befugte Person laut Anweisung und entsprechender Normen nicht
installiert worden sind und wenn mit dem Gerät unfachmänisch manipuliert wurde (Eingriffe ins Innere) und
auf Beschädigungen durch Natureinfl üsse oder Ausseneingriffe.
19

DÉCLARATION DE CONFORMITÉ
Le fabricant certifi e la conformité des appareils aux normes 2014/30/EU, 2014/35/EU à la loi n° 117/2016
sb., 17/2003 sb. et aux décrets applicables. L‘installation doit être effectuée dans le respect des normes en
vigueur. Attention: le fabricant décline toute responsabilité en cas de dommages, directs ou indirects, causés
par une mauvaise installation, par une utilisation, des interventions ou des modifi cations impropres, par un
entretien insuffi sant, ainsi qu‘en cas de dommages dérivant des causes mentionnées dans les conditions
de vente. L‘appareil objet de la présente notice est prévu pour un usage professionnel, aussi son utilisation
doit-elle être confi ée à un personnel possédant les compétences nécessaires à cet effet. L‘utilisateur ne doit
procéder à aucune intervention ni à aucune modifi cation sur les parties réglées et protégées par le fabricant
ou autre personnel autorisé à cet effet.
CARACTÉRISTIQUES TECHNIQUES
L‘étiquette sur laquelle fi gurent les caractéristiques techniques est apposée sur la partie postérieure de
l‘appareil. Avant de procéder à l‘installation, prendre connaissance du schéma électrique et de toutes les
informations que contient la présente notice.
MODEL TENSION
(V)
PUISSANCE
(KW)
DIMENSIONS PLAQUE
(CM)
DIMENSIONS TOTAL
(CM)
KDA-33 ED 230 3+3 48x32+40x28 33x70,8x44,2
KDA-63 ED 230 6+3 48x65+40x28 66x70,8x44,2
KDA-66 ED 230 6+3+3 48x65+2x40x28 66x70,8x44,2
20
This manual suits for next models
2
Table of contents
Other Redfox Griddle manuals
Popular Griddle manuals by other brands

Lang
Lang 224S Installation and operation instructions

Star Manufacturing International
Star Manufacturing International ULTRA-MAX 824M Installation and operating instructions

Pantheon
Pantheon G1 operating manual

Black Stone
Black Stone Culinary 2023 owner's manual

KRATOS
KRATOS 29Y-004 User manual & installation guide

Le Griddle
Le Griddle GFE40 instruction manual