Regulus WiFi RSW 30 User manual

www.regulus.eu
WiFi RSW 30
WiFi RSW 30
EN
Installation and Operation Manual
WiFi RSW 30 Wireless Room Sensor

│2
1. Description
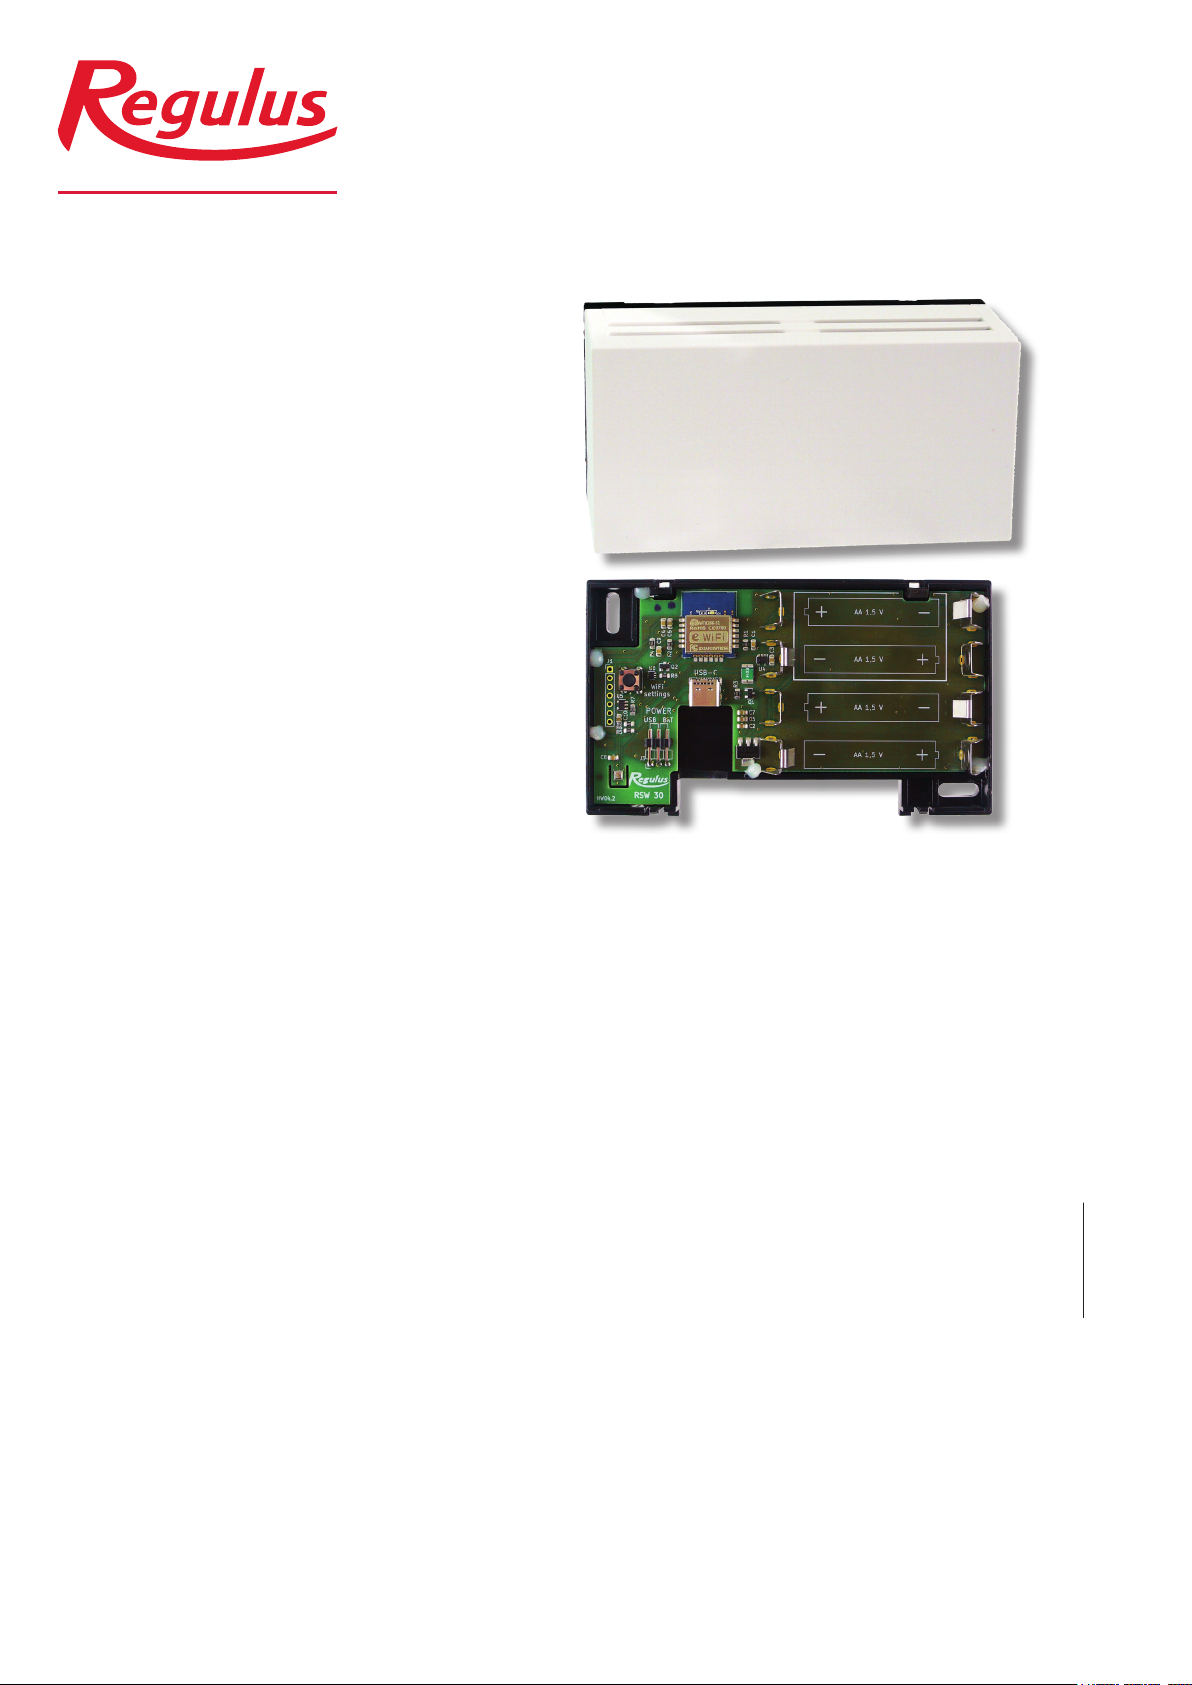
This wireless room sensor is designed to sense room temperature and humidity in a heating zone. The
measured data are transmitted wirelessly via local WiFi network to an IR controller.
The room sensor can be powered either from AA batteries (1.5V) or via a C-type USB port (5V,
100 mA). Installs on a wall using the enclosed screws.
Please read the instructions carefully before installation and follow the instructions provided when
using the device.
1.1. Instructions regarding batteries
• Use only batteries of the specified type.
• Respect the right polarity of the batteries.
• Use alkaline batteries only.
• Do not mix batteries of different age and level of discharge.
• If you know that the device will not be used for a longer time, remove the batteries.
1.2. Instructions regarding installation and operation
• This room sensor is intended for indoor use only.
• Do not place the sensor to rooms where it could be exposed to excess humidity or rain.
• It should be installed on a wall, about 1.5 m above the floor, located where room temperature
changes can be felt thanks to freely circulating air.
• Do not install above a heat source (a TV set, heater, fridge etc.) or to places where it may be
exposed to direct sunshine, draught, radiation from other devices.
• Be careful when connecting the power supply.
The manufacturer disclaims any liability for damage caused by improper installation or use of the
device contrary to the instructions.
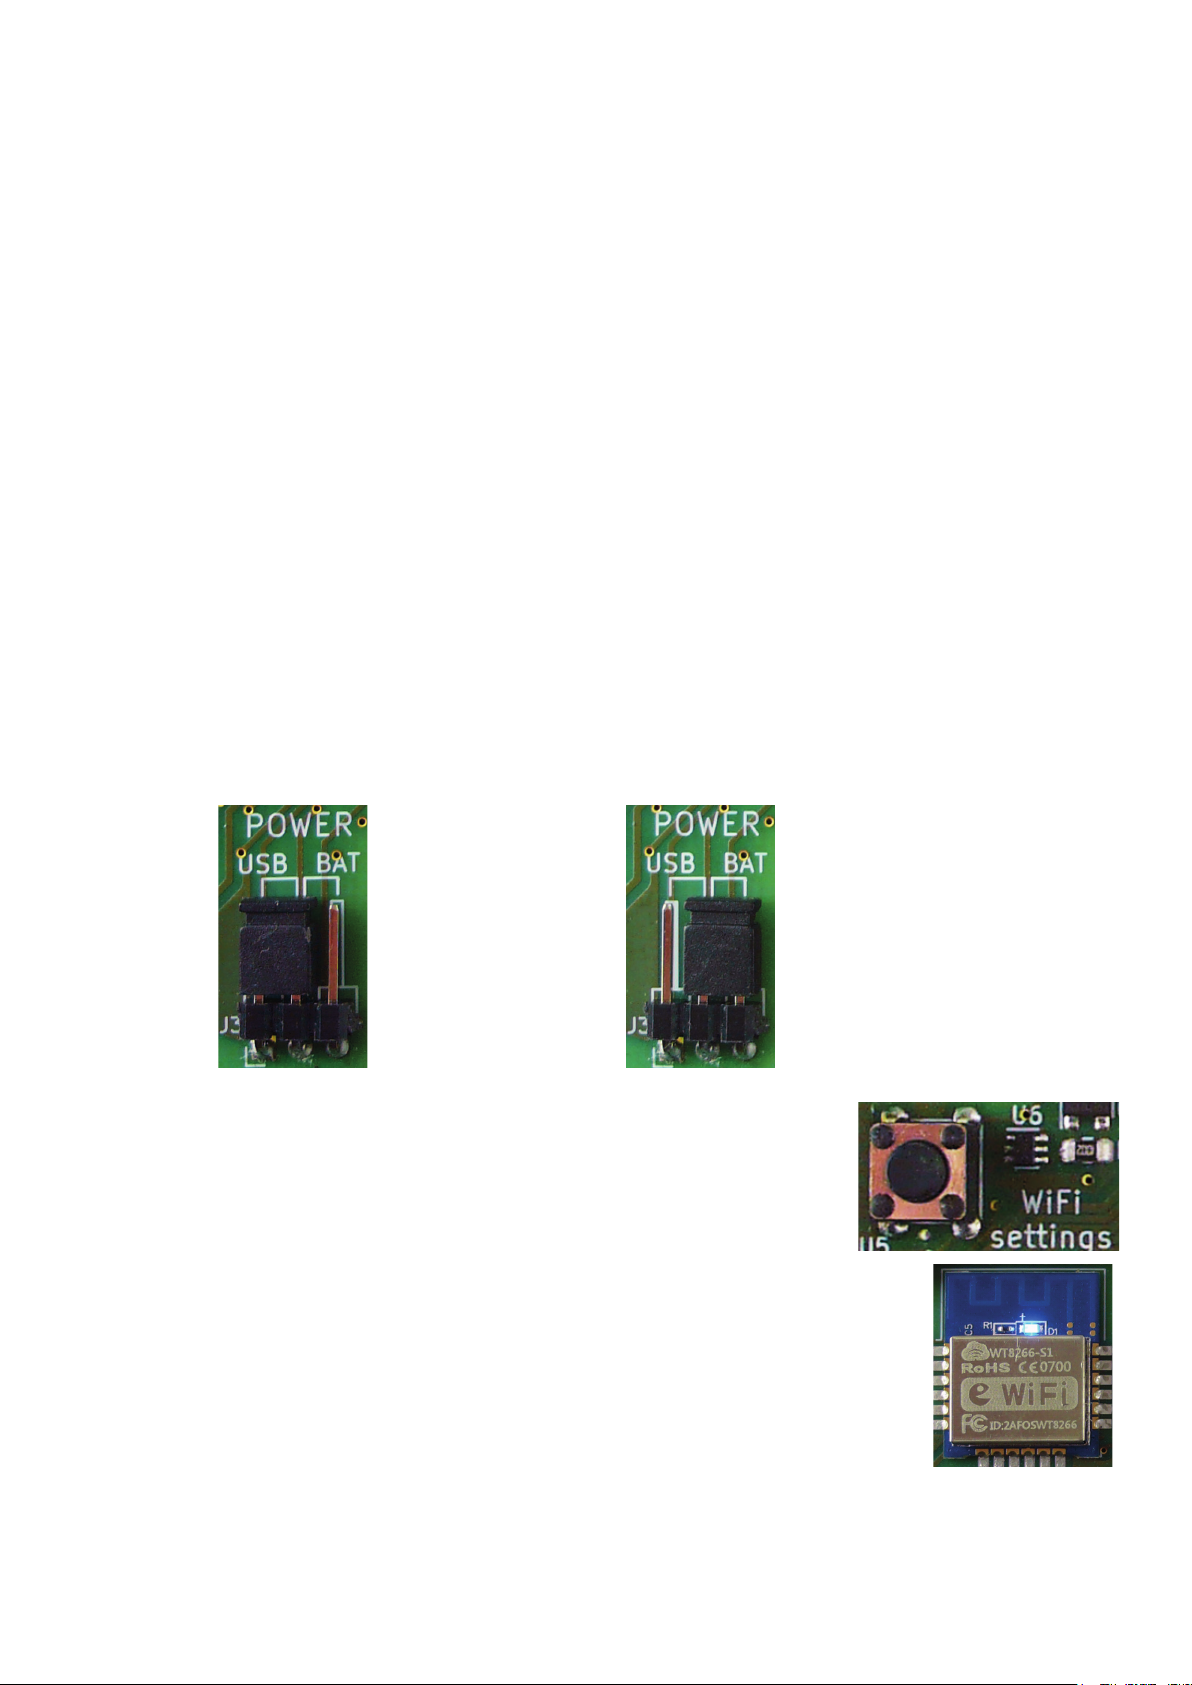
Pushbutton
for WiFi
settings
Power
selection
jumper USB-C port for power supply
Room for
4 AA batteries

3 │
2. Specifications
Code: 18474
Temperature measurement range -10 °C to 50 °C
Temperature tolerance ±1 K
Permissible temperature range -15 °C to 55 °C
Relative humidity measurement range 1 to 80%
Humidity tolerance ±4%
Permissible humidity range 0 to 80% bez kondenzace
Transmission power; WiFi frequency up to +20 dBm; 2.4 GHz
IP rating IP 20
Dimensions (H x W x D) 70 x 121 x 25 mm
Wall mount 2 screws
Compatible controllers IR12 (ver. FW 04.11. or higher)
IR14
RegulusBOX
3. Procedure of putting to operation and connecting to IR
controller
3.1. Power supply
Select the desired power supply manner using the jumper (USB / BAT) and either insert 4 AA batte-
ries or plug the 5V power supply to the USB-C port.
Never connect both the power supply manners (battery & USB) at the same time!
Jumper for
USB-C
power
supply
Jumper for
4 AA batteries
power supply
3.2. Connecting the room sensor using a smartphone
Switch to the configuration mode by pressing the pushbutton for WiFi settings,
which activates the access point and creates a WiFi network named Regulus
RSW 30.
When the configuration mode is active, the blue LED is lit. (It may take several
seconds before it lights up.)
Turn off the data connection on your smartphone, turn on Wifi, search for Regulus
RSW 30 network, enter 12345678 as a password and connect to the sensor. (The
phone usually reports that the Wi-Fi network has no Internet connection, which is OK.)

│4
3.3. Connecting the room sensor to a local WiFi network
To connect to a local Wi-Fi network, click on
„Configuration“ and enter the name and
password of the local Wi-Fi network.
Click the „Scan“ button to view available Wi-Fi
networks.
Click the „Save configuration“ button to save
the settings.
To load the saved settings, always restart to the
configuration screen by clicking on „Reboot“.
Enter the IP address 192.168.4.1 in the address bar of
your Internet browser and confirm it - this will take you
to the device configuration web page.
If the page is displayed in Czech, you can switch the
language by clicking the menu button and selecting
English.

5 │
3.4. Connecting the room sensor via WiFi network to the IR controller
In the „Device configuration“ section below,
enter the zone number and IP address of the IR
controller in the local network.
If it is an IR14 or a newer model or RegulusBOX,
check the option „automatic IR detection“ (entering
the IP address is then not necessary).
To extend battery life, you can extend the data
transmission interval (up to 60 minutes) or check
the „Use low energy mode“ option to limit sen-
ding duplicate data as long as the room tempera-
ture does not change by more than 0.5 °C within
an hour.
Click the „Save configuration“ button to save the
settings.
To load the saved settings, always restart to the
configuration screen by clicking on „Reboot“.
You can verify that the settings are correct by
testing the connection with IR. Before that, howe-
ver, the room sensor shall be assigned to a hea-
ting zone in the IR controller (see the following
chapter).

│6
3.5. Assigning the room sensor to a heating zone in the IR controller
In the selected heating zone, set the „WiFi room sensor“ (code no. 7) as the room temperature
sensor and save the settings.

7 │
4. IMPORTANT INFORMATION ON DISPOSAL IN COMPLIANCE
WITH THE EUROPEAN DIRECTIVE 2002/96/ES
Do not dispose of this product as unsorted municipal waste. Please dispose of this product by
returning it to the point of sale or to your local municipal collection point for recycling.
Respecting these rules will help to preserve, protect and
improve the quality of the environment, protect human
health and utilize natural resources prudently and
rationally.
The crossed out wheeled bin with marking bar, printed
ether in the Manual or on the product itself, identifies that
the product must be disposed of at a recycling collection
site.
The crossed out wheeled bin informs that this product
must not be disposed of as municipal waste. It must be
handed over to a local municipal collection point for
ecologic recycling. WEEE registration number: 02771/07-ECZ

©2022 We reserve the right to errors, changes and improvements without prior notice.
REGULUS spol. s r.o.
E-mail: [email protected]
Web: www.regulus.eu
v1.0-04/2022
This manual suits for next models
1
Table of contents