manuals.online logo
Brands
  1. Home
  2. •
  3. Brands
  4. •
  5. Remington
  6. •
  7. Electric Shaver
  8. •
  9. Remington MB4040AU User manual

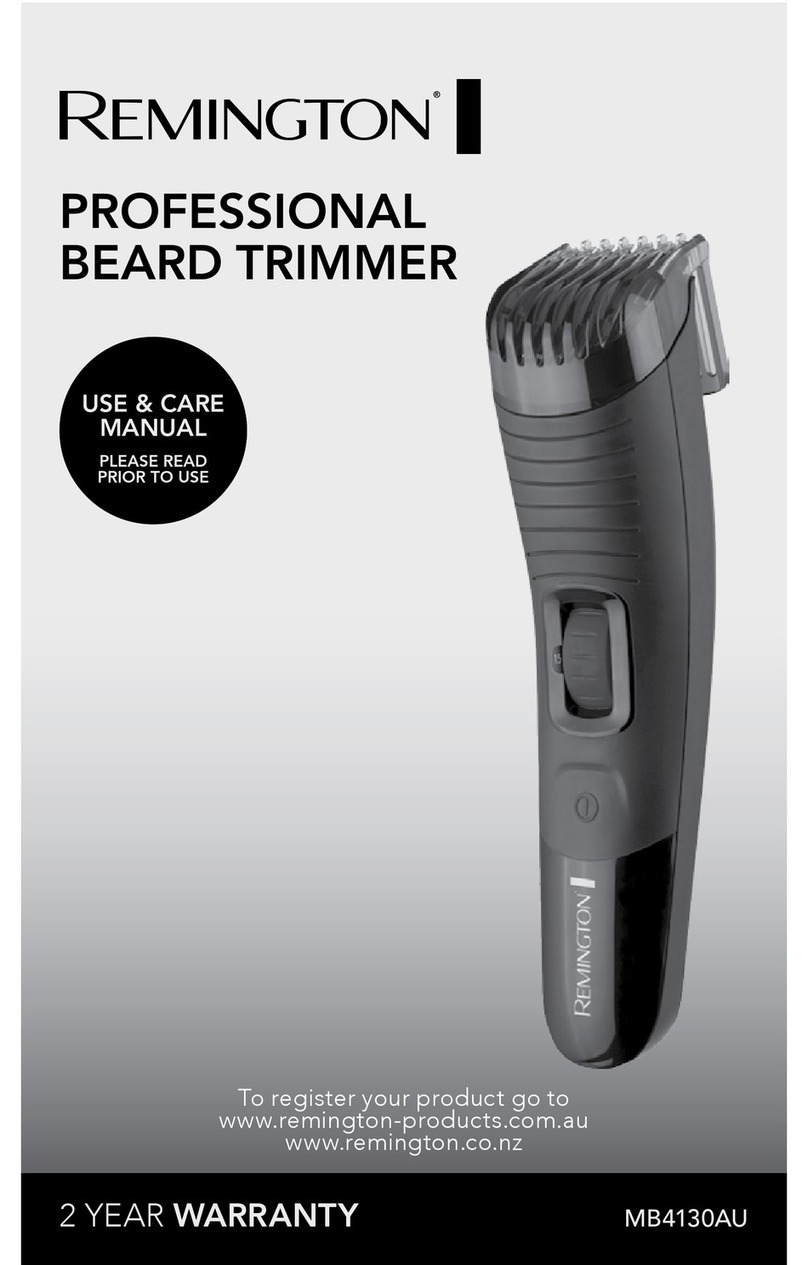
Remington MB4040AU User manual

HOW TO USE YOUR TRIMMER
Here are a few tips for trimming facial hair (guide only).
Tips for best results
• Beard,moustacheandsideburnhairsshouldbedry.
• Avoidusinglotionsbeforeusingyourtrimmer.Combyourhair
in the direction that it grows.
• Removetrimmercombattachmentsifyouare:defining
hairlineedgessuchassideburns,trimmingthenapeofyour
neck,trimmingyourbeardlineonfrontofneck.
Trimming Beards
• Beforeyoubegin,combyourhairinthedirectionthatitgrows
so that the hairs are at their maximum height and facing in the
same direction.
• Determinehowmuchhairyouwishtotrim.Remember,until
youarefamiliarwithusingthetrimmer,itisbettertoselecta
longer hair length setting in order not to trim too much hair.
• Turnthetrimmer’spowerswitchONandbegintrimming.
• Starttrimmingunderyourchin,andfollowingyourjawbone
line.Trimhairsusingadownwardmotionfollowingthe
directionofyourhairgrowthortrimagainstyourhairgrowth,
whicheverispreferred.Worktowardyourearandupperbeard
lineusinganupwardmotion.Allowthehairlengthattachment
to follow the contour of your face.
• Whenfinishedtrimming,turnthepowertoOFF.
To Define the Beard Line
• Startwiththeedgeofthebeardlineandwiththecutting
bladesrestinglightlyagainstyourskin.Usedownward
motionstowardstheedgeofthebeardlinetotrimthe
beardlinetothedesiredshapeinthefacialareasand
around the neck.
To Trim the Edges of a Moustache
• Moustachehairsshouldbedry.
• Useasmallcombtocombthehairsstraightfortrimming.
HoldthetrimmerwiththeGoateetrimmerbladefacingyou.
• Trimhairsusingadownwardmotionfollowingthedirectionof
2 YEAR WARRANTY MB4040AU
yourhairgrowthortrimagainstyourhairgrowth,whichever
is preferred.
NOTE:Sinceallhairsdonotgrowinthesamedirection,youmay
wanttotrydifferenttrimmingmethods(i.e.upwards,downwards
oracross).Practiceisbestforoptimumresults.
• Afterachievingthedesiredlength,useadownwardmotion
toblendmoustachehairs.
• Whenfinishedtrimming,turnthepowertoOFF.
NOTE: Useslowlightpressure.Toomuchpressuremaytrimoff
more hair than desired.
To Trim Sideburns
• Combsideburnsfollowingthedirectionofyourhairgrowth.
• Holdthetrimmerverticallywitheitherofthetrimmerblades
facing you.
• Trimsideburnsusingadownwardmotion.
• Whenfinishedtrimming,turnthepowertoOFF.
Trimming the Nape of Your Neck
NOTE: You will need a hand mirror for this operation if performing
it alone.
• Beforeyoubegin,removetheattachablecombs.
• Useyourfingerstoliftthehairatthebaseofyourheadupoff
theneck.Yourindexfingershouldbecoveringtherootsofthe
hairsyouareliftingtopreventaccidentalremovalbythetrimmer.
• Usingyourotherhand,holdthetrimmertothebaseofyour
neckwiththecuttingunitfacingup,andmovethepersonal
trimmer up the length of the neck until it touches your finger
coveringthehairrootsatthebaseofyourhead.
• Besuretomovetheunitslowlywhenperformingthis
operationandtokeepthehairrootsatthebaseofyourhead
out of the way of the trimmer.
CLEANING AND MAINTAINING YOUR TRIMMER
• Alwayscleanthetrimmingsystemattachmentsregularly
to ensure maximum performance and a proper operating life.
• Unplugadaptorfromwalloutletandensureyourtrimmer
is turned off
• Removetheadjustablecombsbeforecleaning.
1098 11 12
Spectrum Brands Australia Pty Ltd and Spectrum Brands New Zealand Limited
WARRANTY AGAINST DEFECTS
In this warranty:
Australian Consumer Law means the Australian consumer law set out in Schedule 2
to the Competition and Consumer Act 2010;
CGA means the New Zealand Consumer Guarantees Act 1993;
Goods means the product or equipment which was accompanied by this warranty and
purchased in Australia or New Zealand, as the case may be;
Manufacturer, We or us means:
1. for Goods purchased in Australia, Spectrum Brands Australia Pty Ltd
ACN, 007 070 573; or
2. for Goods purchased in New Zealand, Spectrum Brands New Zealand Limited,
as the case may be, contact details as set out at the end of this warranty;
Supplier means the authorised distributor or retailer of the Goods that sold you the Goods
in Australia or in New Zealand; and
You means you, the original end-user purchaser of the Goods.
1. Our goods come with guarantees that cannot be excluded under the Australian
Consumer Law, or the CGA. You are entitled to a replacement or refund for a major failure
and compensation for any other reasonably foreseeable loss or damage. You are also
entitled to have the goods repaired or replaced if the goods fail to be of acceptable
quality and the failure does not amount to a major failure.
2. The benefits provided by this Warranty are in addition to all other rights and remedies in
respect of the Goods which the consumer has under either the Australian Consumer Law
or the CGA. The original purchaser of the Goods is provided with the following Warranty
subject to the Warranty Conditions:
3. We warrant the Goods for all parts defective in workmanship or materials for the period
of two (2) years from the date of purchase (Warranty Period). If the Goods prove
defective within the Warranty Period by reason of improper workmanship or material,
we may, at our own discretion, repair or replace the Goods without charge.
Warranty Conditions
4. The Goods must be used in accordance with the manufacturer’s instructions. This
Warranty does not apply should the defect in or failure of the Goods be attributable to
misuse, abuse, accident or non-observance of manufacturer’s instructions on the part of
the user.As far as the law permits, the manufacturer does not accept liability for any
direct or consequential loss, damage or other expense caused by or arising out of any
failure to use the Goods in accordance with the manufacturer’s instructions.
5. Exhaustible components (such as shaver heads, cutters and foils) of the Goods
are included under this Warranty only where there is a defect in workmanship or
materials used.
6. The warranty granted under clause 3 is limited to repair or replacement only.
7. Any parts of the Goods replaced during repairs or any product replaced remain the
property of the manufacturer. In the event of the Goods being replaced during the
Warranty Period, the warranty on the replacement Goods will expire on the same date
as for the Warranty Period on the original Goods which are replaced.
8. In order to claim under the warranty granted under clause 3 you must:
(a) Retain this warranty with your receipt/proof of purchase; and
(b) Return the Goods to us at the relevant address below or to the Supplier by prepaid
freight within the Warranty Period accompanied with (i) the legible and unmodified
original proof of purchase, which clearly indicates the name and address of the
Supplier, the date and place of purchase, the product name or other product serial
number and (ii) this warranty.
9. This warranty is immediately void if:
(a) Any serial number or appliance plate is removed or defaced;
(b) The Goods have been serviced or otherwise repaired by a person not authorised to
do so by us or where non approved replaced parts are used.
10. The Goods are designed for domestic use only.A limited 90-day Warranty applies to any
industrial or commercial use of the Goods. The Goods must be connected to the electrical
voltage requirements as specified in the ratings label located on the Goods.
11. This warranty does not cover the cost of claiming under the warranty or transport of the
Goods to and from the Supplier or us.
12. This warranty is only valid and enforceable in Australia against Spectrum Brands
Australia Pty Ltd and in New Zealand against Spectrum Brands New Zealand Limited.
Contact us or the Supplier for further details.
Spectrum Brands Australia Pty Ltd
Chifley Business Park
1 Chifley Drive
Mentone, VIC 3194 Australia
Customer service in Australia: 1800 623 118
E-mail: [email protected]
Website: www.remington-products.com.au
Spectrum Brands New Zealand Limited
Building C, Ground Floor
600 Great South Road,
Greenlane, Auckland 1051 New Zealand
Customer service in New Zealand: 0800 736 776
E-mail: [email protected]
Website: www.remington-products.com.au
REMINGTON SERVICE HOTLINE

Australia 1800 623 118 (toll free)

New Zealand 0800 736 776 (toll free)
AUTHORISED REPAIR CENTRES
Visit www.remington-products.com.au for Authorised repair centre details.
® Registered Trade Mark of Spectrum Brands Inc., or one of its subsidiaries
© 2012 SBI
Rev. 05/12
Part No. T22-0000154
USE & CARE
MANUAL
PLEASE READ
PRIOR TO USE
LITHIUM-ION
STUBBLE TRIMMER
DO NOT CLEAN YOUR TRIMMER OR ATTACHMENTS
WITH WATER
NOTE: YourTrimmerattachmentsarepermanentlylubricated,
somustbecleanedwiththebrushprovided.
NOTE: Bladesmustbelubricatedagainwithoilifrinsedunder
water.Add1to2dropsofsewingmachineoiltotheblade.
CLEANING ATTACHMENTS WITH THE CLEANING BRUSH
• Afterremovingattachment,thoroughlybrushandblowout
hairclippingsfromcuttingsystem,attachment,andtop
of trimmer handle.
This product is not suitable to use in a bath or shower.
Thetrimmerconformstoradiofrequency
interferencerequirements.
Anyproductpurchasedandusedcommercially
carriesalimited90DayWarranty.
HT385-K091-01
UsingtheStubblecombyoucancreatethedesignerstubble
look.Thereare9adjustablemicrostubblesettings:
Thestubbleguidecombcanbeadjustedtogiveyousettings
ofbetween1mm–5mm,in.5mmincrements.Toadjust
simplyturnthewheeltothedesiredsetting.Turnthewheel
clockwise for longer length and anticlockwise for shorter
length.Thesettingwillappearonthelengthpositionindicator.
ATTACHING AND REMOVING THE STUBBLE COMB
• Toattachthecomb,withthetrimmerbladefacingawayfrom
you,slidetheguidecombontopofthetrimmerbladeand
clickintopositionbyaligningthenotchesonthesidesand
pushdownonthedialwithyourthumbs.
• Toremovethecomb,withthetrimmerbladefacingawayfrom
you,withboththumbsonthedialcarefullypushtheguide
combforwardawayfromthetrimmerblade
Note:Trimmercombmustbeattachedtotheproductinorder
to use the hair length selector.
Remove the adjustable combs if you are:
• Defininghairlineedgessuchassideburns
• Trimmingthenapeofyourneck
• Trimmingyourbeardlineorfrontofneck
• Orifyouwanttocleanthecutterassembly
To remove the Adjustable Beard Comb:
• BesurethetrimmerisintheOFFposition
• Whileholdingthetrimmerinonehandandholdingthezoom
wheeltopreventitfromturning,gentlypulltheAdjustable
BeardCombawayfromthetrimmer.Thecombcanbe
removedandreplacedonanysetting.
To replace the Adjustable Beard Comb:
• BesurethetrimmerisintheOFFposition
• Whileholdingthetrimmerinonehandandholdingthezoom
wheeltopreventitfromturning,slidethecomboverthetop
ofthetrimmeruntilit‘clicks’intoposition.
Note: TheAdjustableBeardCombcanonlybeplacedonthe
trimmeroneway;ifitdoesnotfitproperly,removeandreverseit.
BEFORE CUTTING HAIR
MB4040AU SPECIFICATIONS
Power System Cordless (Rechargeable)
Initial Charge Time 24 Hours
Full Charge Time 3.5 Hours
Runtime 120 Minutes
Indicators Charging LED
Length Settings
Voltage Type Single
BEFORE USING YOUR TRIMMER
• Beforeusingyourtrimmerforthefirsttime,chargeitfor24
hours for optimal performance.
• Makesureyourfaceandfacialhairarecleananddry.
• DoublecheckthattheAdjustableStubbleComb,orAdjustable
BeardCombissettothedesiredposition.Thecuttinglength
isvisibleontheLengthIndicator.
Charging/Recharging
• Beforeusingyourtrimmerforthefirsttime,chargeitfor24
hours for optimal performance.
• ChecktoensurethatthetrimmerOn/OffswitchisOFF.Insert
theadaptorplugintothePowerPort,thenplugtheadaptor
intoanelectricoutlet.TheChargingLEDIndicatorwill
illuminate to indicate that it is charging.
• Yourtrimmercannotbeovercharged,butitisrecommendthat
chargingbediscontinuedandthetrimmerstoredawayifitwill
notbeusedforanextendedperiodoftime(2-3weeks).
Unplugthechargerandrechargewhenresuminguse.
• Fortheinitialcharge,thetrimmerwillbefullychargedin24hours.
Forrecharging,thetrimmerwillbefullychargedafter3.5hours.
• Yourtrimmeriscordless(rechargeable)andwillrunfor120+
minutesbeforeadditionalchargingisrequired.
• Topreservethelifeoftheinternalbattery,dischargeitby
runningthetrimmeruntilthebladesmoveslowly.Switchoff
andrechargefor24hours.Dothisevery6months.
• Usethetrimmeronlywiththechargingadaptorsupplied.
MB4040AU ULTIMATE STUBBLE TRIMMER, LITHIUM ION
Use and Care Instructions
ThankyouforpurchasingyourRemington®UltimateStubble
Trimmer,LithiumIon.Insidethismanualyouwillfind
instructions on using and caring for your trimmer.
1. Stubble Blade
2. Adjustable Beard Comb
3. Quick Blade Release Button
4. Length Indicator
5. Zoom Wheel
6. On/Off Switch
7. Charging LED Indicator
8. Power Port
9. Beard Blade
10. Goatee Blade
11. Adjustable Stubble Comb
Also Included:
Cleaning Brush, Charging Adaptor
234567
ATTACHING THE GROOMING ATTACHMENTS
NOTE: TheadjustableCombAttachmentshavevariouslength
settings.Whenfirstbecomingfamiliarwiththetrimmer,begin
withahighernumberedsetting.Adjustcuttinglengthas
desired.
TheAdjustableCombsandZoomWheelensureprecise
trimmingandhasvariousadjustablesettings.
Zoom Wheel and Removable Adjustable Beard Comb
Note: AdjustableBeadCombmustbeattachedtothetrimmer
inordertousetheZoomWheel.
WhenusingtheBeardCombensuretheBeardBladeis
attached to the trimmer.
TheAdjustableBeardCombandZoomWheelprovidenine
adjustablesettings:
SETTINGS BEARD STYLE LENGTH
1Stubble 1.5mm
22.5mm
3Short 4mm
4 5.5mm
5Medium 7mm
69mm
711mm
8Long 14mm
918mm
Wheeltowardthetopofthetrimmerforalongerlength,and
towardthebottomofthetrimmerforashorterlength.The
Wheelwillclickintooneofninepositions.
• Begintrimmingatoneofthelongestsettings8or9toavoid
accidentallytrimminghairtooshort.Asyoubecomefamiliar
withthesettings,youcanthenselectyourdesiredlength
setting.
Stubble Comb
WhenusingtheStubbleCombensuretheStubbleBladeis
attached to the trimmer.
IMPORTANT SAFETY INSTRUCTIONS
When using electrical appliances, especially when children are
present, basic safety precautions should always be followed,
including the following.
READ ALL INSTRUCTIONS BEFORE USING
FOR ADDITIONAL PROTECTION, THE INSTALLATION OF
A RESIDUAL CURRENT DEVICE (RCD) HAVING A RATED
RESIDUAL OPERATING CURRENT NOT EXCEEDING 30 MA
IS ADVISABLE IN THE ELECTRICAL CIRCUIT SUPPLYING
THE BATHROOM. ASK YOUR INSTALLER FOR ADVICE.
KEEP AWAY FROM WATER
WARNING - TO REDUCE THE RISK OF BURNS,
ELECTROCUTION AND FIRE OR INJURY TO PERSONS:
DANGER - As with most electrical appliances, electrical
parts are electrically live even when the switch is off.
• Donotplaceorstorethetrimmerorchargingadaptorwhere
it can fall or be knocked into a sink or bath.
• Donotplaceinordropintowateroranyotherliquid.
• Ifanappliancefallsintowater,"unplugit”immediately.Donot
reach into the water.
• Unplugthechargingadaptorfromtheelectricaloutlet
immediatelyafteruse.
• Donotusewhilebathingorintheshower.
• Unplugandswitchoffthisappliancebeforecleaningit.
• Usethistrimmeronlyforitsintendeduseasdescribedinthis
manual.
• DonotuseattachmentsnotrecommendedbyRemington.
• Neverdroporinsertanyobjectintoanyopeningofthistrimmer.
• Keepthecordawayfromheatedsurfaces.
• Donotusethistrimmerwithadamagedorbrokentrimming
unitasinjurymayoccur.
• Alwaysstorethechargingadaptorinamoisture-freelocation.
• Thistrimmerismanufacturedforhomeuseonly.
• Thisappliancecanbeusedbychildrenagedfrom8years
andaboveandpersonswithreducedphysical,sensoryor
mentalcapabilitiesorlackofexperienceandknowledgeif
theyhavebeengivensupervisionorinstructionconcerning
use of the appliance in a safe way and understand the
hazardsinvolved.Childrenshallnotplaywiththeappliance.
Cleaningandusermaintenanceshallnotbemadebychildren
withoutsupervision.
• Donotuseonpeoplewhoareasleep.
• Neveroperatethisapplianceifithasadamagedcordorplug,
if it is not working correctly, if the charging adaptor has been
damagedordroppedintowater.
• Donotuseanextensioncordoravoltageconverterwiththis
appliance.
• Donotwrapthecordaroundtheappliance.
Remington strongly recommends that an approved
Safety Switch (Residual current device) be installed
to protect all bathroom power outlets. Ask an electrical
contractor for advice.
SAVE THESE INSTRUCTIONS
9
9
10
11
4
6
8
5
7
1
2
3

Other Remington Electric Shaver manuals

Remington Titanium PG-350 User manual

Remington

Remington Titanium PG-350 User manual

Remington WSF4812AU GIRLS ON THE GO Installation guide

Remington

Remington WSF4812AU GIRLS ON THE GO Installation guide

Remington MPT-3400 User manual

Remington

Remington MPT-3400 User manual

Remington PowerSeries Aqua PR1340 User manual

Remington

Remington PowerSeries Aqua PR1340 User manual

Remington XF8550AU User manual

Remington

Remington XF8550AU User manual

Remington Smart Edge User manual

Remington

Remington Smart Edge User manual

Remington XR1330 User manual

Remington

Remington XR1330 User manual

Remington MicroFlex 200 R-830 User manual

Remington

Remington MicroFlex 200 R-830 User manual

Remington Business series User manual

Remington

Remington Business series User manual

Remington R4 Style Series User manual

Remington

Remington R4 Style Series User manual

Remington ULTIMATE SERIES ROTARY SHAVER R7 User manual

Remington

Remington ULTIMATE SERIES ROTARY SHAVER R7 User manual

Remington Smart Edge User manual

Remington

Remington Smart Edge User manual

Remington Smooth & Silky WDF-5000 User manual

Remington

Remington Smooth & Silky WDF-5000 User manual

Remington HighPrecision MB-900 User manual

Remington

Remington HighPrecision MB-900 User manual

Remington MB6125AU User manual

Remington

Remington MB6125AU User manual

Remington SmartEdge XF8700 User manual

Remington

Remington SmartEdge XF8700 User manual

Remington SMOOTH AND SILKY WDF-4830 User manual

Remington

Remington SMOOTH AND SILKY WDF-4830 User manual

Remington FUZZ-AWAY User manual

Remington

Remington FUZZ-AWAY User manual

Remington F-3790 User manual

Remington

Remington F-3790 User manual

Remington R2 User manual

Remington

Remington R2 User manual

Remington Pivot & Flex R7150 User manual

Remington

Remington Pivot & Flex R7150 User manual

Remington wpg4035 User manual

Remington

Remington wpg4035 User manual

Remington WSF5060 User manual

Remington

Remington WSF5060 User manual

Remington MicroFlex 600 User manual

Remington

Remington MicroFlex 600 User manual

Popular Electric Shaver manuals by other brands

Braun Syncro 7526 user guide

Braun

Braun Syncro 7526 user guide

Wahl Groomsman Pro operating instructions

Wahl

Wahl Groomsman Pro operating instructions

Vidal Sassoon i-Twin TrimVSM2A user manual

Vidal Sassoon

Vidal Sassoon i-Twin TrimVSM2A user manual

Philips Philishave HS 355 operating instructions

Philips

Philips Philishave HS 355 operating instructions

Philips Cool Skin HQ7782 user manual

Philips

Philips Cool Skin HQ7782 user manual

Braun 8985 user manual

Braun

Braun 8985 user manual

Philips HQ5890/75 Specifications

Philips

Philips HQ5890/75 Specifications

Philips Norelco 5864XL user manual

Philips

Philips Norelco 5864XL user manual

Coline G-245 instruction manual

Coline

Coline G-245 instruction manual

National ES4001 Service manual

National

National ES4001 Service manual
Braun Old Spice 5418 manual

Braun

Braun Old Spice 5418 manual

Trebs Comfortshave 99233 manual

Trebs

Trebs Comfortshave 99233 manual

Braun Silk & Soft LS 5100 manual

Braun

Braun Silk & Soft LS 5100 manual

Philips Norelco 8040X Specifications

Philips

Philips Norelco 8040X Specifications

Hitachi BM-530 user manual

Hitachi

Hitachi BM-530 user manual

Blaupunkt MSR901 owner's manual

Blaupunkt

Blaupunkt MSR901 owner's manual

Braun 5417 manual 

Braun

Braun 5417 manual 

Braun 340s-3 user guide

Braun

Braun 340s-3 user guide

manuals.online logo
manuals.online logoBrands
  • About & Mission
  • Contact us
  • Privacy Policy
  • Terms and Conditions

Copyright 2025 Manuals.Online. All Rights Reserved.