Resco Series 7000 Return version. Step-by-step Installation Guide. August 2014
8
RETURN VERSION
Step 9
Step 8
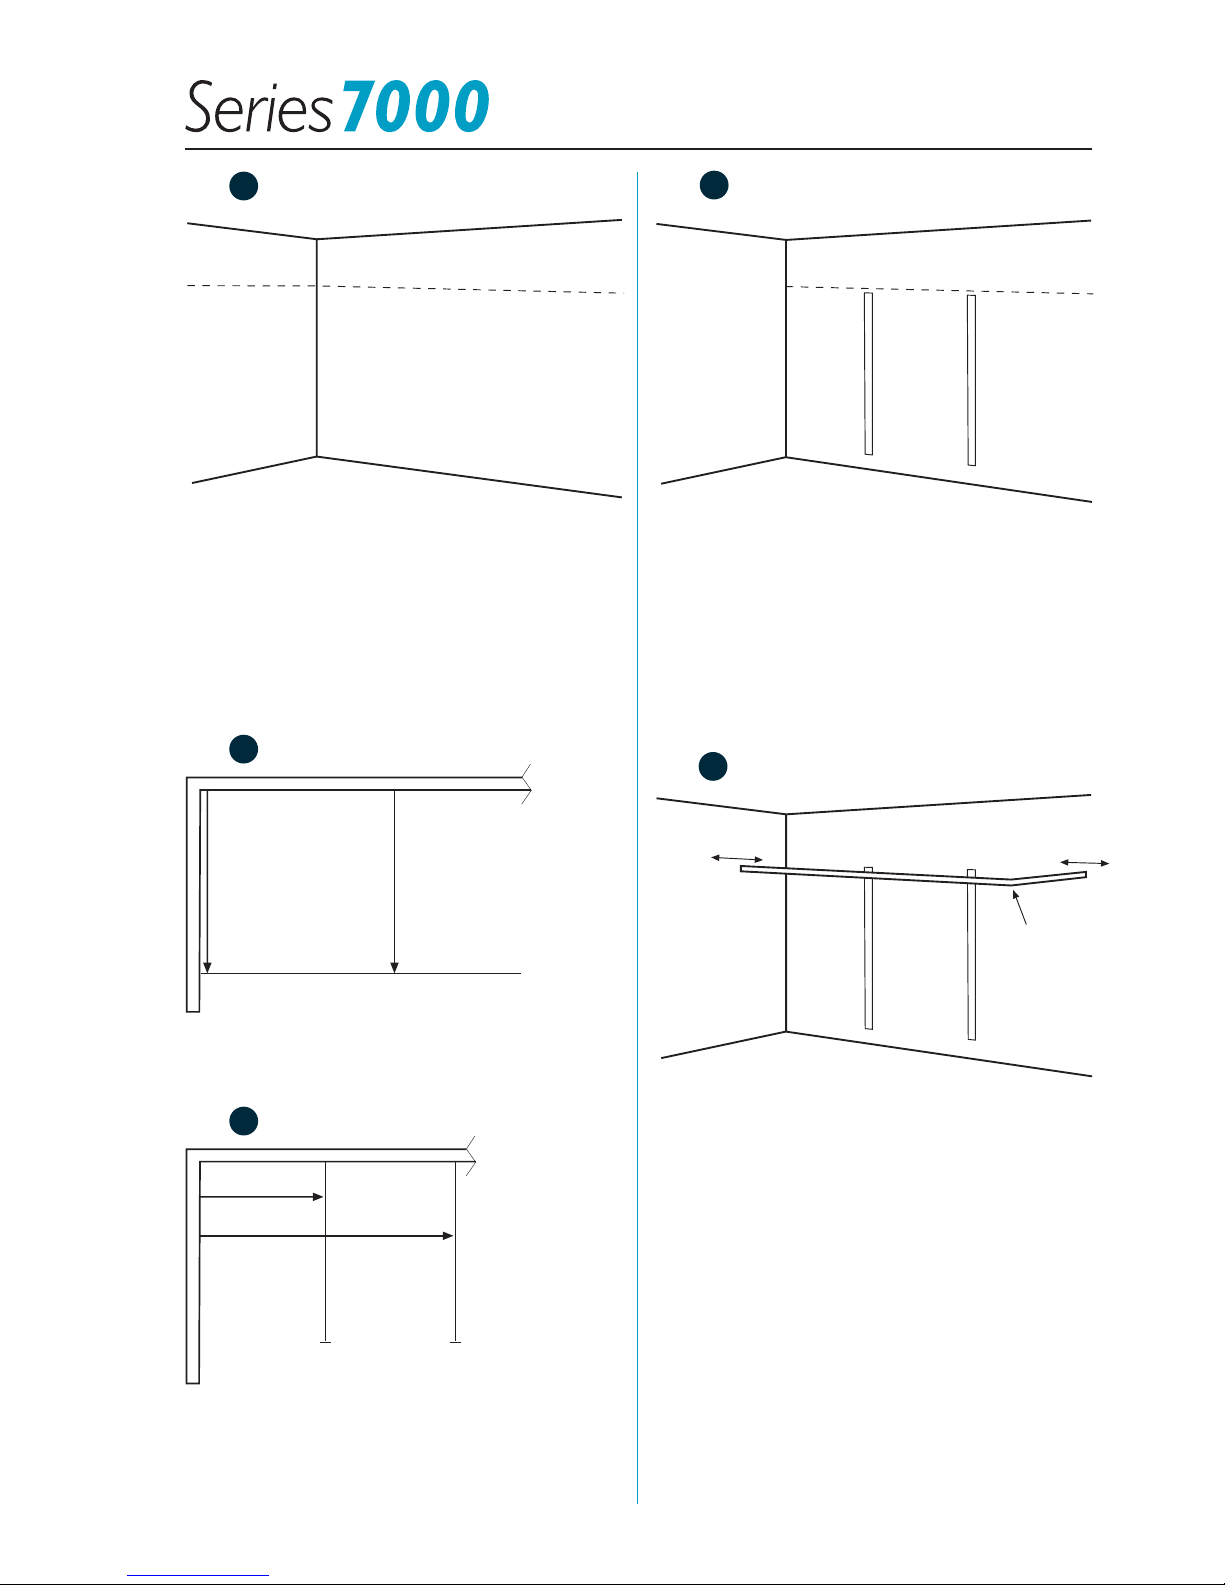
Mark a ‘front face’ chalk line on the floor.
a. Chalk line from the center of the ‘side wall’
½ Stile to the center if the corner channel.
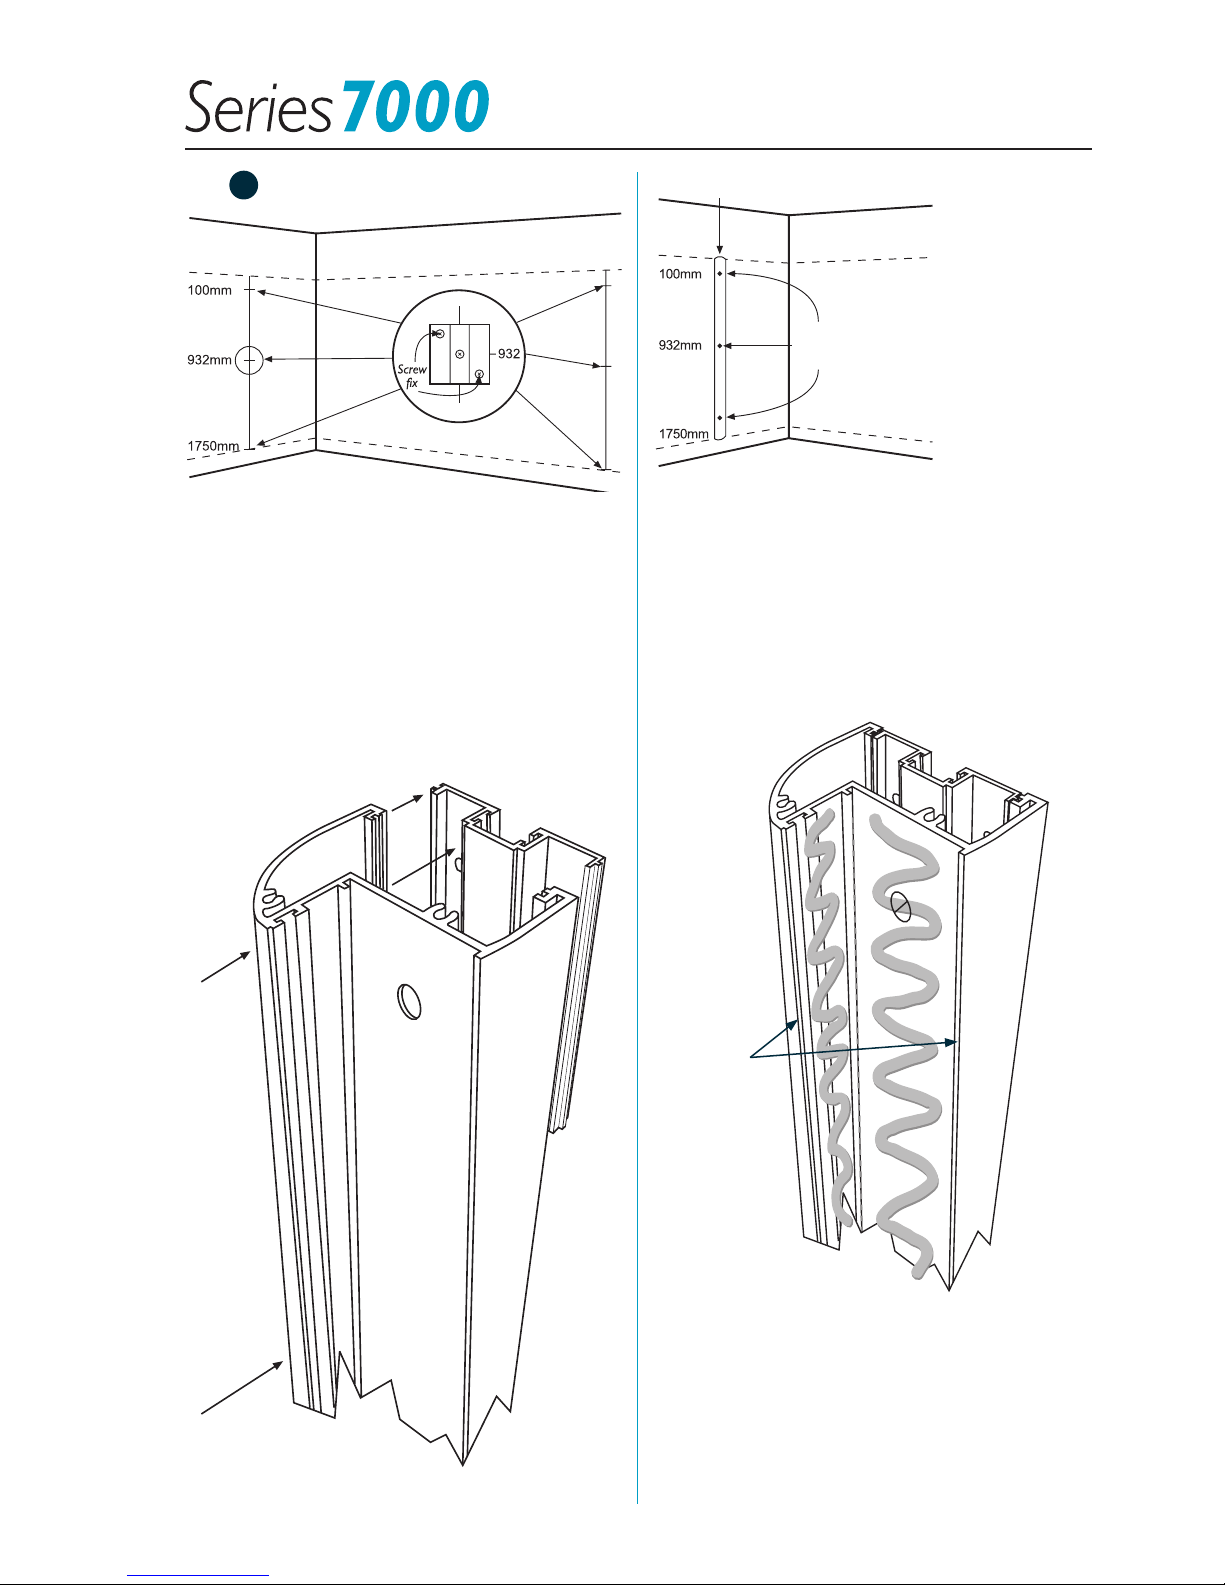
b. Place division panels into rear U-Channels
with 4x2 blocks underneath to make them
level (wedges will be required).
c. Adjust division panels so they are 10mm
from the chalk line and aligned with the top
of the U-Channel then fix.
Rivet through one side use 3.5mm drill bit
with (D) Stainless Steel Pop Rivets.
Note: Sometimes the back wall is not straight.
This can be ok as you can either trim the division
panels as required, or adjust the front face.
Just ensure you remark the chalk line and that it’s
straight, fits and looks good.
From the plans mark the floor Angle Brackets
centers on the chalk line.
Note: Make sure to leave enough pencil mark along
the chalk line to be seen from under the Full-Stile
footprint – this is so you can ensure panels will
be centered.
Drill holes for the floor Angle Brackets.
Use 5mm masonry drill bit in concrete
floor and 3.5mm drill bit in wood floor or
a diamond drill bit for Tiles.
Place (F) plastic anchor in hole.
Secure Angle Bracket with the back facing
AWAY FROM THE DOOR, using (A)
8GA x 32 screws.
Note: If the wall, with a ½ Stile, that has a door
attached, is not straight – there is no way to adjust
it to be perfect.
In order to plumb system, place Headrail in position
and using the predrilled holes in the head rail, use
the laser level to locate the Full-Stiles Angle Bracket
locations. This will mean the rest will be perfect.
Chalk Line