Retevis RB22 User manual

RB22
PROFESSIONAL
DIGITAL TWO-WAY RADIO

Thank you for your interest in our products. This manual will
help you to master the operation and use of the RB22. This
manual should be read and studied to ensure that the user
understands the operation of the RB22. Please read the
Safety Information Manual before use.
This manual applies to the model,
RB22 series digital handheld.
Disclaimer
We strive for the accuracy and completeness of this
manual, but no warranty is given on its content. All the
specifications and designs are subject to change
without prior notice due to continuous technology
development. No part of this manual may be copied,
modified, translated or distributed in any form without
our prior written authorization.
The third-party products referred to in this manual are
property of those third parties. We do not guarantee
their accuracy, validity, timeliness, legality or
completeness.
WARNING:
No two-way radio transceiver including ours shall be
operated including powered on in hazardous areas
such as explosive atmospheres including Inflammable
gas, dust particles, metallic powders, grain dust, etc.
This shall include confined spaces where these
hazards exist, in areas where blasting or blasting
products are in use or stored, and while fueling at
refueling centers. In any of these conditions or where
hazards exist, the transceiver shall be powered off.
USER NOTICES
SAFETY:
The user should be aware of and understand the
general hazards in operating a two-way radio
transceiver. We cannot guarantee the safety and
operation of our transceiver with aftermarket
accessories unless they have been tested and sold by
us.
Our transceiver should be maintained and serviced by
a qualified two-way radio dealer and their technical
staff. Failure to do so may violate our warranty.
NPRECAUTIONS
Observe the following precautions to prevent fire,
personal injury and transceiver damage.
•Do not modify or attempt to adjust this transceiver for
any reason.
•Do not expose the transceiver to direct sunlight for
ong periods, nor place it close to a heat source.
•Do not place the transceiver in a dusty, humid or wet
area, nor place on unstable surface.
•If an abnormal odor or smoke is detected coming
from the transceiver, switch OFF immediately and
remove the battery pack from the transceiver. Contact
your dealer.

How to use this user manual
This manual introduces the basic operation of DMR /
Analog handheld transceiver.
Your dealer or system administrator may have already
preset the features of this radio based on your
operational requirements. Please consult with your
dealer or system administrator about the details.
The icons below are used for distinguishing between
analog and digital features.
This icon indicates the function is only available in
Analog mode.
This icon indicates the function is only available in
Digital mode.

Packing list--------------------------------------------------------------------------------------------
Radio Controls---------------------------------------------------------------------------------------
Preparation for operating the terminal-------------------------------------------------------
Basic operations-------------------------------------------------------------------------------------
PTT call-------------------------------------------------------------------------------------------------
Access menus and operations-----------------------------------------------------------------
Menu items list---------------------------------------------------------------------------------------
General guide for fault handling---------------------------------------------------------------
Maintenance and clean----------------------------------------------------------------------------
Standard accessories------------------------------------------------------------------------------
Optional accessories-------------------------------------------------------------------------------
DE(15-27)
FR(28-40)
IT(41-53)
ES(54-66)
01
01
02
05
05
05
06
07
08
09
09
CONTENT
EU Importer: Germany Retevis Technology GmbH
Address: Uetzenacker 29,38176 wendeburg
or downloading further resources:
Brochures, Software/Firmware, Manual etc, Pls contact your direct reseller first
OR go to website retevis.com and check “support” in the each product link to
download it.

Packing list
The following items are contained in the gift box. If any item is missing or damaged, please contact your dealer.
Radio Controls
Status Icons
Note:
After purchase, please check the items and quantity in the box to ensure everything is correct.
Note:
For convenient use, there are programmable [PF] keys
Item Name
Radio unit
Battery pack
Charger
Power supply
Quantity
1
1
1
1
Item Name
Antenna
Belt clip
Hand strap
User manual
Quantity
1
1
1
1
Part Name
Antenna
PTT key
Side Key (PF1)
Side Key (PF2)
Channel selector
Part Name
Power switch /
Volume control
SP/MIC connector
Up key
MIC
Back /Zone key
NO. NO. NO. NO.Part Name
Programmable key PF3
Down key
LCD display
OK/ Menu key
Programming key PF4
Part Name
Speaker
Belt clip
Battery pack
LED indicator
Battery latck
01

LED Indicators
Preparation for operating the terminal
Install the antenna
Do not hold the antenna with your hand, as this will reduce the radio performance.
1.Screw the threaded end of the antenna into the top antenna port on the main unit
2.Tighten the antenna clockwise.
Install the battery pack
Press the battery pack firmly while pushing it in the forward direction until a "click" sound is heard.
Note:
To remove the battery, turn off the radio, push the bottom battery button down, and then remove the battery in the
backward direction.
Install the belt clip
1.Use a screwdriver to remove the belt clip screw from back housing of the main unit.
2.Align the belt clip mounting holes with the threaded holes on the main unit, insert screws, and tighten the
screws to hold the belt clip.
Install the audio accessories
1.Open the dust cover of the accessory interface.
2.Insert the audio accessory plug into the accessory connector.
Profiles
Current Time
Battery
Zone
TX Power
Current Contact Type
Signal
TX Frequency
RX Frequency
Channel Display Mode
Indicates High Power
Indicates Low Power
Indicates no signal
The more bars indicate stronger signal
The more bars indicates higher battery capacity
Indicates the terminal is monitoring the selected
channel
Indicates VOX is on
Indicates GPS is on
Indicates Scan is on
Indicates the terminal is in Emergency Mode
Indicates the Encryption is on
Indicates CTCSS is on
Indicates DCS is on
Standard Mode
Silent Mode
LED indicator
Green
Red
Fast Flashing Green
Slow Flashing Red
Radio Status
Receiving
Transmitting
Scanning
Low battery
02

Keys and ENC usage and operation
Charge the battery pack
Note:
•Please charge the battery pack with the designated charger.
•Please refer to the charging safety information before charging to obtain the necessary battery safety
information.
When the terminal is used for the first time without charging, there may be a low battery alert. Please turn
it off and charge before use.
Please follow the below steps to charge:
1.Plug the power supply connector into the jack on the back of the charger.
2.Plug the charger power supply into a power outlet.
3.Install the battery or the radio with the battery into the charger.
4.Observe the charging LED indicators to know the current charging status:
Programmable Keys
•Short Press: press and release quickly (programmable range is from 50ms-750ms).
•Long Press: press and hold for programmed time length (programmable range is from 500ms-5000ms).
Programmable Functions
If desired, the following terminal features can be preset for programmable keys:
Charger LED Indicators
Red
Green
Current Status
Charging
Standby (No load) or Fully charged
Features
Radio Revive
Radio Detection
Radio Kill
Remote Monitor
Encryption On/Off
Emergency On/Off
Contacts List
Monitor
Zone Switch
Scan On/Off
VOX On/Off
Backlight On/Off
Keypad Lock
High /Low Power
Man Down On/Off
Squelch Level
Type Description
Revive a target radio that has been remotely disabled
Determine if targeted radio is active
Disable targeted radio remotely
Covert activation of targeted radios transmitter without local indicators.
Turn on/off encryption
Initiate an emergency alarm mode or call based on programmed preset.
Direct access to the programmed contact list
Always monitor the selected channel until disabled.
Changes from selected Zone to new Zone
Turn scanning on/off
Switch between VOX On and Off.
Tum backlight On/Off
Switch between keypad lock and unlock.
Switch transmit power between high and low power
Switch between Man Down alarm On and Off (Optional)
Allows the adjustment of squelch level.
03

The following buttons can be set for the noted functions.
Transmit / Receiving ICONS
The following icon appears on the radio screen to indicate the radio status.
Status
Standby
In Menu Mode
Standby(Channel Mode)
In Menu Mode
Standby (VFO Mode)
Standby
In any status
Standby (VFO Mode)
Standby
Standby
In Menu Mode
Standby
In Menu Mode
Standby
Standby
Standby
In Menu Mode
Edit (SMS)
Operations
Short press
Long press (3S)
Short press
Short press
Short press
Short press
Short press
Long press (3S)
Short press
Short press
Long press (3S)
Short press
Long press (3S)
Short press
Short press
Long press (3S)
Short press
Short press
Long press (3S)
Short press
Long press (3S)
Rotate
Description
Access to Menu
[Lock] or [Unlock]
[Confirm] or [Selections]
Access to Zone list
Return to previous menu
※Edit "VFO" parameters
Function works based on programmed preset
Cancel or Exit current operation mode
※Set the VFO mode, channel space and frequency
according to the icon on the LCD display.
※Switch between Channel display and VFO mode
Upward select channel / frequency
and set other parameters
Turn on Scan: Upward increase scanning
channel / frequency
Select menu and other set parameters
Downward select channel / frequency
and set other parameters
Turn on Scan: Downward decrease
scanning channel / frequency
Select menu and other set parameters
Function works based on programmed preset
※Decrease / Increase to select channel /
frequency and other parameters
※Decrease /Increase to select menu
and other parameters
※Move left and right to select editing characters, etc.
Keys
[MENU]
[BACK]
PF3(Green key)
PF4 (Red key)
Up key
Down key
Side key [PF1]
Side key [PF2]
[ENC] (Selector)
Type
Private call
Group Call
All Call
—
Mode ICON Terminal product status
Sending a private call
Receiving a private call
Sending a group call
Receiving an group call
Sending an All Call
Receiving an All Call
Sending an analog transmission
Receiving an analog transmission
04

Basic operations
Icon Operation instruction
Turn on: turn the [Power/Volume] knob clockwise until you hear "click"
Turn off: turn the [Power/Volume] knob counterclockwise until you hear a click
After power on, rotate the [Power/Volume] knob to increase or decrease the volume
After power on, press [▲] or [▼] to select your desired channel or frequency.
※After power on, rotate [Channel Selector] knob to select your desired channel or frequency.
Note:
The operation item with the symbol " ※" depends on the product model which has the function is valid or
equipped with this part.
PTT call
To ensure an optimal transmission, hold the radio in a vertical position at one to two inches (2.5 to 5.0
centimeters) away from the mouth.
Digital channel call
Digital calls are made as a group call, private call or All Call based on the programming of the radio. An individual
channel may be preset to one of these calling functions.
Analog mode initiating and receiving calls (no signaling)
You can initiate calls to all users on the current analog channel by holding down the [PTT] key.When the call is
initiated, the TFT display displays shows ;The display shows when you receive calls from other
users on the current analog channel.
Access menus and operations
You can access the main menu and sub-menu options of the radio through the following steps, as well as
Call type
Private call
Group call
All call
Operation method
Making call Receiving call
In standby mode, press [PTT] key
to initiate the call.When a call is
initiated, the screen displays:
When initiated a group call, the
screen displays:
When Initiated an all call, the
screen displays:
When a private call received, the screen
displays:
When a group call received, the screen
displays:
When an all call received, the screen
displays:
05

functions such as setting or browsing the parameters and configuration, and viewing and sending short
messages.
Note:
Access to sub-menu:
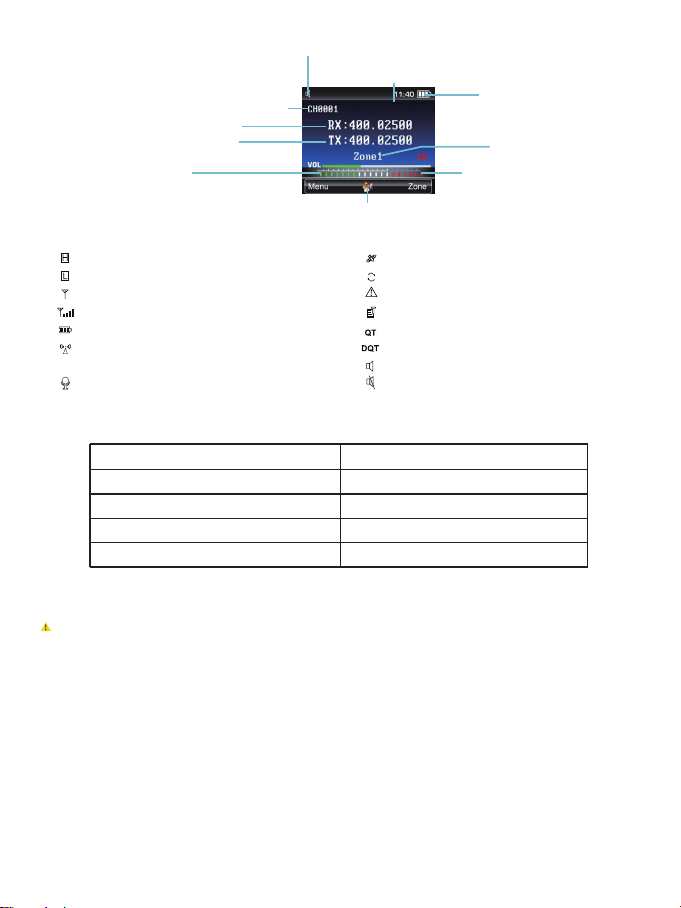
◎Icon “ ” or “ ” refers to ON/OFF.
◎Icon “ ”or “ ” refers to “Selected” and “Set”.
◎Icon “ ” refers to access of the next sub-menu.
Procedures:
When the radio is in standby:
1.Press [MENU] key to access to menu.
2.Press [ ▲ ] or [ ▼ ] key to select a desired setting "main menu", then press [Menu] key to select.
3.Press [ ▲ ] or [ ▼ ] key to a desired "Sub-menu" setting, then press [Menu] to select.
•If necessary, you can set each parameter or turn on/off by pressing the [ ▲ ] or [ ▼] keys, and then press the
[Menu] key to confirm.
OR
Press [Back] key to back to previous menu.
4.Press [ ] key to exit the current menu operation mode,
and the terminal will revert to the standby state.
If necessary, you can continue browsing, viewing, and setting other functions or parameters by performing steps
#2 and #3.
Menu items list
The menu options supported by the radio are shown in the following table. Please refer to the instruction for the
"call" operation of individual call, group call and analog channel call. Other functions require access to the menu
for configuration or implementation. [FP] definable key is the function shortcut key, and the specific function is
preset by the programming software
Main menu items
Contact
Message
Call dialog
Scan
Zone
Settings
Parameter
Prompt tone
Others
Record
Device info
Channel Edit
NO.
1/12
2/12
312
412
5/12
6/12
7/12
8/12
9/12
10/12
11/12
12/12
Optional items and Settings functional description
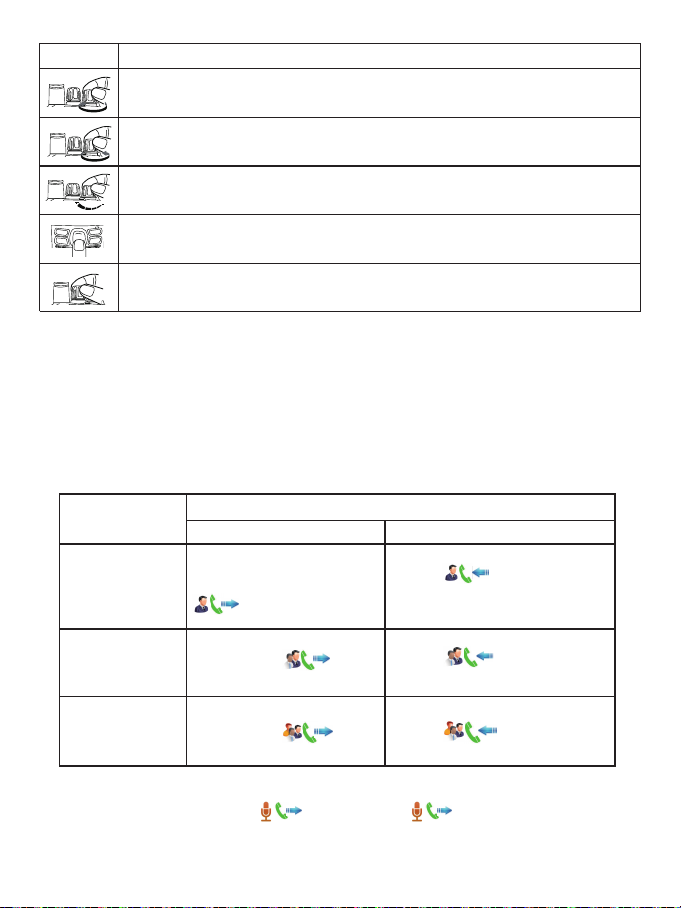
Includes:Contact list, Create contact, Manual dialing;
Includes: Create MSG, Common MSG, Inbox, Outbox, Draft box;
Include: Dialed numbs,Received calls,Missed calls;
Include: Scan switch, scan list, scan mode
Include: Zone list, Channel list, Switching channel,
Editing name, Deleting channel
Includes: Language, Keyboard lock, Backlight, LED indicator,
Display mode, VOX switch, Channel switch, Factory setting;
Includes:TOT, Power setting, Time slot,
Power saving mode, and encryption setting.
Includes: Profiles, Key tone setting, Low power alert,
SMS prompt tone, Private call prompt tone, Group call prompt tone,
Call prompt ring tone;
Includes: ※FM radio, Time setting;
Includes: Recording set, Record list, Clear record, Inquiry space.
Includes: Local radio ID, Receiving group list,Default contact, Version.
Includes: All editing items for receive/transmit
Note
Note:
The operation items with symbol " ※"are model dependent.
Main functions description
06

Function
Zone
Power
Scan
Emergent alarm
Vox
Busy channel
lockout
TOT
Keyboard lock
Power saving
Private call
Group call
All call
Talk around
TDMA direct
mode
Analog channel
call
Squelch ON
Squelch level
Monitor
CTCSS/DCS
Classification Description
A zone is a group of channels.The radio supports 16
zones and contains up to 4000 channels.
The power level is for the transmission power level of the current
channel, which can be set to high or low power.
When the terminal scans a signal on a channel, it will stay on the
channel to listen, so as to understand the current activity status of
the relevant team members.
Emergency alarm has the highest priority.
The radio transmits when voice is detected by the microphone
Busy channel lockout prohibits transmission and prevents i
nterference to other users when the radio is receiving traffic.
When a transmission times out, the terminal will automatically terminate
the transmission and issue a warning sound.
Keyboard lock is used to lock keys to prevent inadvertent key operation.
The radio may be set to automatic or manual lock mode.
Power saving is a preprogrammed function based on time that places
radio into a sleep-wake mode to conserve the battery.
Private call is a one-to-one call.
Group call is a one-to-many call.
All call is a call to all contacts on the current digital channel.
Talk around allows communications on the repeaters output frequency.
TDMA direct mode is used to divide a direct channel (simplex) into
two time slots to allow efficient channel usage. Multiple parties may share
the channel without interference depending on slot setting.
An analog call is a call on an analog channel.
This setting exhibits an open squelch condition where both traffic
and noise can pass to the speaker.
Squelch level allows the manual setting of the squelch from 1 to 9.
This controls at what point that audio can be sent to the speaker.
The default value is 4. The lower the set value, the more chance
of noise and weak signals being heard.
Monitor allows the user to open the receiver squelch manually
to listen to on-channel signals.
CTCSS / DCS are analog signaling methods used in transmit and receive.
They are typically set to the same value for transmit and receive. Only
signals that match the preprogrammed values will pass to the speaker.
Public
Functions
Digital
functions
Analog
functions
DTMF signaling:
Users can set and program the DTMF signaling via PC software to disable or enable some advanced function of
radio.
Note: This option only applies to analog mode.
General guide for fault handling
07

Note:
If the above methods fail to solve your problem, or you confront different malfunctions, please contact your local
dealer or appointed maintenance station.
Maintenance and Clean
To ensure the best performance and prolong working life, please acquaint yourself with the following for
maintenance and cleaning.
Maintenance
◎Please do not scratch or puncture the device with hard or sharp object.
◎Please do not place the device in an environment which can corrode electronic circuits or under direct solar
radiation.
◎Please do not carry the device by its antenna or headset.
◎Please make sure the SP-MIC plug is covered when not in use.
Clean
◎Please clean your device regularly by using a dry clean cloth or soft brush to wipe the dust on the surface and
on the charger contacts;
◎The keypads, control knob and housing of the device may be dirty from use. Please use nonwoven wipes to
clean them. Do not use chemicals to clean it such as detergent, alcohol, spray or petroleum products, on the
device surface or printed labels. Chemicals can damage the housing, display and remove the printing on the
labels. Before power on the radio, please make sure the device is dry completely.
Malfunction Analysis of causes Handling method
Radio fails to power on Battery is installed incorrectly
Move back within range
Change frequency or channel.
Reduce range between users.
Battery power lower than preset value
Bad battery contacts or contacts in dirty.
Battery power gets lower.
Volume control at low value.
Speaker is blocked or damaged.
Out of range of group members
Co-channel user interference
Channel not programmed with correct
signaling
The communication distance is too great
Strong local environmental interference.
Antenna gets loose or antenna frequency
is incorrect.
Using the radio under poor working enviro-
nment or electromagnetic interference
The current working channel frequency or
signaling value is different.
Signals are blocked during to environment
such as buildings and terrain.
Radio lacks optional GPS feature or
satellite view blocked by environment.
The setting of Digital or Analog channel is
incorrect.
Re-install battery
Please change or charge battery.
Check and clear the battery contacts.
Please change or charge battery.
Adjust the volume to be higher.
Power off radio, and re-install antenna, or
change antenna with right frequency.
Try to clear the outer speaker or contact
your dealer.
Change working environment or shift
antenna direction.
Change channel or reset signaling and
frequency to be same as the group
members
Reprogram the current digital or analog
channel.
Reprogram radio to correct signaling or
change signaling to prevent interference.
Reduce range between users or move to
unimpeded line of sight
Move away from interference source.
Add GPS feature; move to open site with
clear view of sky.
Receive signal
decreases, is unclear
or is interrupted.
Unable to communicate
with group members
Noise or unrelated
communications on
current channel
Weak voice traffic with
noise during
communications
Failure to obtain GPS
position (Optional)
08

Standard accessories
AC Adaptor Charger Li-pol Battery
Antenna Belt clip Tie
09

RF ENERGY EXPOSURE AND PRODUCT SAFETYGUIDE FORPORTABLE
TWO-WAY RADIOS
ATTENTION!
This two-way radio uses electromagnetic energy in the radio frequency (RF) spectrum to provide
communications between two or more users over a distance. RF energy, which when used
improperly, can cause biological damage.
All Retevis two-way radios are designed, manufactured, and tested to ensure they meet
government-established RF exposure levels. In addition, manufacturers also recommend specific
operating instructions to users of two-way radios. These instructions are important because they
inform users about RF energy exposure and provide simple procedures on how to control it.
Please refer to the following websites for more information on what RF energy exposure is and
how to control your exposure to assure compliance with established RF exposure limits:http://ww-
w.who.int/en/
Local Government Regulations
When two-way radios are used as a consequence of employment, the Local Government
Regulations requires users to be fully aware of and able to control their exposure to meet
occupational requirements. Exposure awareness can be facilitated by the use of a product label
directing users to specific user awareness information. Your Retevis two-way radio has a RF
Exposure Product Label. Also, your Retevis user manual, or separate safety booklet includes
information and operating instructions required to control your RF exposure and to satisfy
compliance requirements.
Radio License
Governments keep the radios in classification, business two-way radios operate on radio
frequencies that are regulated by the local radio management departments (FCC, ISED, OFCOM,
ANFR, BFTK, Bundesnetzagentur...).To transmit on these frequencies, you are required to have a
license issued by them. The detailed classification and the use of your two radios, please contact
the local government radio management departments.
Use of this radio outside the country where it was intended to be distributed is subject to
government regulations and may be prohibited.
Unauthorized modification and adjustment
Changes or modifications not expressly approved by the party responsible for compliance may void
the user’s authority granted by the local government radio management departments to operate
this radio and should not be made. To comply with the corresponding requirements, transmitter
adjustments should be made only by or under the supervision of a person certified as technically
qualified to perform transmitter maintenance and repairs in the private land mobile and fixed
services as certified by an organization representative of the user of those services.
Replacement of any transmitter component (crystal, semiconductor, etc.) not authorized by the
local government radio management departments equipment authorization for this radio could
violate the rules.
FCC Requirements:
This device complies with part 15 of the FCC Rules. Operation is subject to the condition that this
device does not cause harmful interference. (Licensed radios are applicable);
This device complies with part 15 of the FCC Rules. Operation is subject to the following two
Before using this radio, read this guide which contains important operating
instructions for safe usage and rf energy awareness and control for compliance
with applicable standards and regulations.
10

conditions: (Other devices are applicable)
(1) This device may not cause harmful interference, and
(2) this device must accept any interference received, including interference that may cause
undesired operation.
NOTE:
•(If applicable)This equipment has been tested and found to comply with the limits for a Class A
digital device, pursuant to part 15 of the FCC Rules. These limits are designed to provide
reasonable protection against harmful interference when the equipment is operated in a
commercial environment. This equipment generates, uses, and can radiate radio frequency energy
and, if not installed and used in accordance with the instruction manual, may cause harmful
interference to radio communications. Operation of this equipment in a residential area is likely to
cause harmful interference in which case the user will be required to correct the interference at his
own expense.
•(If applicable)This equipment has been tested and found to comply with the limits for a Class B
digital device, pursuant to part 15 of the FCC Rules. These limits are designed to provide
reasonable protection against harmful interference in a residential installation. This equipment
generates, uses and can radiate radio frequency energy and, if not installed and used in
accordance with the instructions, may cause harmful interference to radio communications.
However, there is no guarantee that interference will not occur in a particular installation. If this
equipment does cause harmful interference to radio or television reception, which can be
determined by turning the equipment off and on, the user is encouraged to try to correct the
interference by one or more of the following measures:
—Reorient or relocate the receiving antenna.
—Increase the separation between the equipment and receiver.
—Connect the equipment into an outlet on a circuit different from that to which the receiver is
connected.
—Consult the dealer or an experienced radio/TV technician for help.
CE Requirements:
•(Simple EU declaration of conformity) Shenzhen Retevis Technology Co., Ltd. declares that the
radio equipment type is in compliance with the essential requirements and other relevant
provisions of RED Directive 2014/53/EU and the ROHS Directive 2011/65/EU and the WEEE
Directive 2012/19/EU; the full text of the EU declaration of conformity is available at the following
internet address: www.retevis.com.
•Restriction Information
This product can be used in EU countries and regions, including: Belgium (BE), Bulgaria (BG),
Czech Republic (CZ), Denmark (DK), Germany (DE), Estonia (EE), Ireland (IE), Greece (EL),
Spain (ES), France (FR), Croatia (HR), Italy (IT), Cyprus (CY), Latvia (LV), Lithuania (LT),
Luxembourg (LU), Hungary (HU), Malta (MT), Netherlands (NL), Austria (AT), Poland (PL),
Portugal (PT), Romania (RO), Slovenia (SI), Slovakia (SK), Finland (FI), Sweden (SE) and United
Kingdom (UK).
For the warning information of the frequency restriction, please refer to the package or manual
section.
•Disposal
The crossed-out wheeled-bin symbol on your product, literature, or packaging reminds you that in
the European Union, all electrical and electronic products, batteries, and accumulators
(rechargeable batteries) must be taken to designated collection locations at the end of
their working life. Do not dispose of these products as unsorted municipal waste. Dispose
of them according to the laws in your area.
11

IC Requirements:
Licence-exempt radio apparatus
This device contains licence-exempt transmitter(s)/receiver(s) that comply with Innovation, Science
and Economic Development Canada’s licence-exempt RSS(s). Operation is subject to the
following two conditions:
(1) This device may not cause interference.
(2) This device must accept any interference, including interference that may cause undesired
operation of the device.
Le présent appareil est conforme aux CNR d’Industrie Canada applicables aux appareils radio
exempts de licence. L’exploitation est autorisée aux deux conditions suivantes :
(1) l’appareil ne doit pas produire de brouillage;
(2) l’utilisateur de l’appareil doit accepter tout brouillage radioélectrique subi, même si le brouillage
est susceptible d’en compromettre le fonctionnement.
RF Exposure Information(if applicable)
•DO NOT operate the radio without a proper antenna attached, as this may damage the radio and
may also cause you to exceed RF exposure limits. A proper antenna is the antenna supplied with
this radio by the manufacturer or an antenna specifically authorized by the manufacturer for use
with this radio, and the antenna gain shall not exceed the specified gain by the manufacturer
declared.
•DO NOT transmit for more than 50% of total radio use time, more than 50% of the time can cause
RF exposure compliance requirements to be exceeded.
•During transmissions, your radio generates RF energy that can possibly cause interference with
other devices or systems. To avoid such interference, turn off the radio in areas where signs are
posted to do so.
•DO NOT operate the transmitter in areas that are sensitive to electromagnetic radiation such as
hospitals, aircraft, and blasting sites.
•Portable Device, this transmitter may operate with the antenna(s) documented in this filing in
Push-to-Talk and body-worn configurations. RF exposure compliance is limited to the specific
belt-clip and accessory configurations as documented in this filing and the separation distance
between user and the device or its antenna shall be at least 2.5 cm.
•Mobile Device, during operation, the separation distance between user and the antenna subjects
to actual regulations, this separation distance will ensure that there is sufficient distance from a
properly installed externally-mounted antenna to satisfy the RF exposure requirements.
•Occupational/Controlled Radio, this radio is designed for and classified as “Occupational/Con-
trolled Use Only”, meaning it must be used only during the course of employment by individuals
aware of the hazards, and the ways to minimize such hazards; NOT intended for use in a General
population/uncontrolled environment.
•General population/uncontrolled Radio, this radio is designed for and classified as “General
population/uncontrolled Use”.
RF Exposure Compliance and Control Guidelines and Operating Instructions
To control your exposure and ensure compliance with the occupational/controlled environment
exposure limits, always adhere to the following procedures.
Guidelines:
•User awareness instructions should accompany the device when transferred to other users.
•Do not use this device if the operational requirements described herein are not met.
Operating Instructions (if applicable):
•Transmit no more than the rated duty factor of 50% of the time. To Transmit (Talk), push the Push
to Talk (PTT) button. To receive calls (listen), release the PTT button. Transmitting 50% of the
12

Small Parts. Not for children under 3 years.
Turn off your radio power in the following
WARNING
time, or less, is important because the radio generates measurable RF energy exposure only when
transmitting in terms of measuring for standards compliance.
•Transmit only when people outside the vehicle are at least the recommended minimum lateral
distance away from a properly installed according to installation instructions, externally mounted
antenna.
•When operating in front of the face, worn on the body, always place the radio in a Retevis
approved clip, holder, holster, case, or body harness for this product. Using approved body-worn
accessories is important because the use of Non-Retevis approved accessories may result in
exposure levels, which exceed the IEEE/ICNIRP RF exposure limits.
Hand-held Mode(if applicable)
• Hold the radio in a vertical position with the microphone (and other parts of the radio including the
antenna) at least 2.5 cm (one inch) away from the nose or lips. The antenna should be
kept away from the eyes. Keeping the radio at a proper distance is important as RF
exposure decreases with increasing distance from the antenna.
Phone Mode(if applicable)
•When placing or receiving a phone call, hold your radio product as you would a wireless
telephone. Speak directly into the microphone.
Electromagnetic Interference/Compatibility
NOTE: Nearly every electronic device is susceptible to electromagnetic interference (EMI) if
inadequately shielded, designed, or otherwise configured for electromagnetic compatibility.
Avoid Choking Hazard
•Turn off your radio before removing (installing) a battery or accessory or when
charging battery.
•Turn off your radio when you are in a potentially hazardous environments: Near
electrical blasting caps, in a blasting area, in explosive atmospheres (inflammable
gas, dust particles, metallic powders, grain powders, etc.).
•Turn off your radio while taking on fuel or while parked at gasoline service stations.
To avoid electromagnetic interference and/or compatibility conflicts
•Turn off your radio in any facility where posted notices instruct you to do so,
hospitals or health care facilities (Pacemakers, Hearing Aids and Other Medical
Devices) may be using equipment that is sensitive to external RF energy.
•Turn off your radio when on board an aircraft. Any use of a radio must be in
accordance with applicable regulations per airline crew instructions.
Protect your hearing:
WARNING
• Use the lowest volume necessary to do your job.
• Turn up the volume only if you are in noisy surroundings.
• Turn down the volume before adding headset or earpiece.
• Limit the amount of time you use headsets or earpieces at high volume.
• When using the radio without a headset or earpiece, do not place the radio's
speaker directly against your ear
• Use careful with the earphone maybe possible excessive sound pressure from
earphones and headphones can cause hearing loss
13

Note: Exposure to loud noises from any source for extended periods
of time may temporarily or permanently affect your hearing. The
louder the radio's volume, the less time is required before your
hearing could be affected. Hearing damage from loud noise
is sometimes undetectable at first and can have a cumulative effect.
Avoid Burns
WARNING
Antennas
•Do not use any portable radio that has a damaged antenna. If a damaged antenna
comes into contact with the skin when the radio is in use, a minor burn can result.
Batteries (If appropriate)
•When the conductive material such as jewelry, keys or chains touch exposed
terminals of the batteries, may complete an electrical circuit (short circuit the battery)
and become hot to cause bodily injury such as burns. Exercise care in handling any
battery, particularly when placing it inside a pocket, purse or other container with
metal objects
Long transmission
•When the transceiver is used for long transmissions, the radiator and chassis will
become hot.
Safety Operation
WARNING
Forbid
•Do not use charger outdoors or in moist environments, use only in dry
locations/conditions.
•Do not disassemble the charger, that may result in risk of electrical shock or fire.
•Do not operate the charger if it has been broken or damaged in any way.
•Do not place a portable radio in the area over an air bag or in the air bag
deployment area. The radio may be propelled with great force and cause serious
injury to occupants of the vehicle when the air bag inflates.
To reduce risk
•Pull by the plug rather than the cord when disconnecting the charger.
•Unplug the charger from the AC outlet before attempting any maintenance or
cleaning.
•Contact Retevis for assistance regarding repairs and service.
•The adapter shall be installed near the equipment and shall be easily accessible
Approved Accessories
WARNING
•This radio meets the RF exposure guidelines when used with the Retevis
accessories supplied or designated for the product. Use of other accessories may
not ensure compliance with the RF exposure guidelines and may violate regulations.
•For a list of Retevis-approved accessories for your radio model, visit the following
website: http://www.Retevis.com
14

Vielen Dank für Ihr Interesse an unseren Produkten. Dieses
Handbuch hilft Ihnen, den Betrieb und die Verwendung des
RB22 zu stärken. Dieses Handbuch sollte gelesen und
untersucht werden, um sicherzustellen, dass der Benutzer
den Betrieb des RB22 versteht. Bitte lesen Sie die
Sicherheitsinformationshandbuch vor dem Gebrauch.
Dieses Handbuch gilt für das
digitale Handheld der RB22-Serie.
Haftungsausschluss
Wir bemühen uns nach der Richtigkeit und
Vollständigkeit dieses Handbuchs, aber für den Inhalt
erfolgt keine Garantie. Alle Spezifikationen und
Designs können aufgrund der kontinuierlichen
Technologieentwicklung ohne vorherige Ankündigung
geändert werden. Kein Teil dieses Handbuchs darf
ohne unsere vorherige schriftliche Genehmigung in
irgendeiner Form kopiert, modifiziert, übersetzt oder
verteilt werden.
Die in diesem Handbuch genannten Drittanbietern
sind Eigentum dieser Dritten. Wir garantieren nicht
ihre Genauigkeit, Gültigkeit, Aktualität, Rechtmäßigkeit
oder Vollständigkeit.
WARNUNG:
Kein zwisch-Radio-Transceiver, einschließlich unserer,
einschließlich unserer, einschließlich in explosions-
gerechter Bereichen wie explosive Atmosphären,
einschließlich brennbarer Gas, Staubpartikel,
metallischen Pulver, Getreidestaub usw.,
einschließlich oder Sprengprodukte werden verwendet
oder gespeichert, und während Sie bei Tankzentren
tanken. Bei einem dieser Bedingungen oder bei denen
Gefahren bestehen, muss der Transceiver
abgeschaltet werden.
Benutzerhinweise
SICHERHEIT:
Der Benutzer sollte sich dessen bewusst sein und die
allgemeinen Gefahren, um einen
Zwei-Wege-Funk-Transceiver zu betreiben. Wir
können nicht die Sicherheit und den Betrieb unseres
Transceivers mit Aftermarket-Zubehör garantieren, es
sei denn, sie wurden von uns getestet und verkauft.
Unser Transceiver sollte von einem qualifizierten
Zwei-Wege-Radiohändler und ihrem technischen
Personal aufrechterhalten und gewartet werden. Das
Versagen, dies zu tun, kann unsere Garantie
verletzen.
VORSICHTSMASSNAHMEN
Beachten Sie die folgenden Vorsichtsmaßnahmen, um
Feuer, Verletzungen und Transceiverschäden zu
vermeiden.
• Ändern Sie nicht, oder versuchen Sie nicht, diesen
Transceiver aus irgendeinem Grund anzupassen.
• Setzen Sie den Transceiver nicht direkter
Sonneneinstrahlung für Ong-Perioden aus, weder in
der Nähe einer Wärmequelle.
• Legen Sie den Transceiver nicht in einen staubigen,
feuchten oder nassen Bereich, oder legen Sie nicht
auf instabile Oberfläche.
• Wenn ein abnormaler Geruch oder Rauch vom
Transceiver entdeckt wird, schalten Sie den Akku aus
dem Transceiver sofort aus und entfernen Sie den
Akku vom Transceiver. Wenden Sie sich an Ihren
Händler.

So verwenden Sie dieses Bedienungsanleitung
Dieses Handbuch führt den grundlegenden Betrieb des
DMR / Analog-Handheld-Transceivers ein.
Ihr Händler- oder Systemadministrator hat möglicher-
weise bereits die Funktionen dieses Funkgeräts anhand
Ihrer operativen Anforderungen voreingestellt. Bitte
konsultieren Sie Ihren Händler- oder Systemadministra-
tor über die Details.
Die untenstehenden Symbole werden zur Unterschei-
dung zwischen analogen und digitalen Funktionen
verwendet.
Dieses Symbol zeigt an, dass die Funktion nur im
analogen Modus verfügbar ist.
Dieses Symbol zeigt an, dass die Funktion nur im
digitalen Modus verfügbar ist.
Table of contents
Languages:
Other Retevis Two-way Radio manuals

Retevis
Retevis RT46 User manual

Retevis
Retevis RT31 User manual

Retevis
Retevis RT38 User manual

Retevis
Retevis RT602 User manual

Retevis
Retevis RT-628 Manual

Retevis
Retevis H-777 User manual

Retevis
Retevis RT30 User manual

Retevis
Retevis RT-35 User manual

Retevis
Retevis RB26 User manual

Retevis
Retevis RT-388 User manual

Retevis
Retevis RT65 User manual

Retevis
Retevis RT78 User manual

Retevis
Retevis RB23 User manual

Retevis
Retevis RT30 User manual

Retevis
Retevis RT32 User manual

Retevis
Retevis RT42 User manual

Retevis
Retevis RT30 User manual

Retevis
Retevis RT56 User manual

Retevis
Retevis RB16 User manual

Retevis
Retevis RT15 User manual