manuals.online logo
Brands
  1. Home
  2. •
  3. Brands
  4. •
  5. Rev-A-Shelf
  6. •
  7. Garbage Disposal
  8. •
  9. Rev-A-Shelf HURV-1512 User manual

Rev-A-Shelf HURV-1512 User manual

This manual suits for next models

13

Popular Garbage Disposal manuals by other brands

Franke CE-50 User and installation manual

Franke

Franke CE-50 User and installation manual

Leafield Environmental Envirobank 140 Installation guidelines

Leafield Environmental

Leafield Environmental Envirobank 140 Installation guidelines

Insinger I-6 brochure

Insinger

Insinger I-6 brochure

KitchenAid KCDB250G2 parts list

KitchenAid

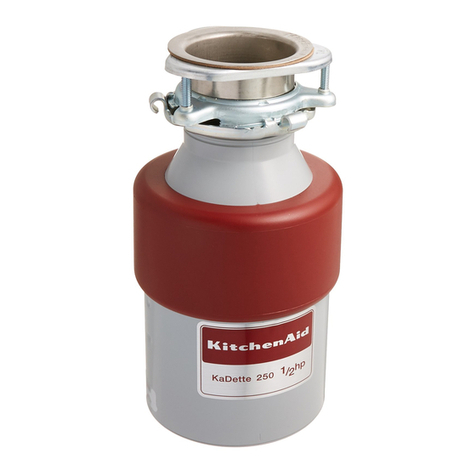
KitchenAid KCDB250G2 parts list

Scheppach HP3000S Translation from the original instruction manual

Scheppach

Scheppach HP3000S Translation from the original instruction manual

Zanussi DU 4400 Instruction booklet

Zanussi

Zanussi DU 4400 Instruction booklet

MULTIQUIP Mikasa series MVH-306D Operation and parts manual

MULTIQUIP

MULTIQUIP Mikasa series MVH-306D Operation and parts manual

Max Maxmatic 4000c operating instructions

Max

Max Maxmatic 4000c operating instructions

KitchenAid KCDB250S0 parts list

KitchenAid

KitchenAid KCDB250S0 parts list

Belle PCX 20/50 Operator's manual

Belle

Belle PCX 20/50 Operator's manual

InSinkErator Model LC-50 installation manual

InSinkErator

InSinkErator Model LC-50 installation manual

Rubbermaid Infinity 9W31 manual

Rubbermaid

Rubbermaid Infinity 9W31 manual

Westinghouse 3/4 HP owner's manual

Westinghouse

Westinghouse 3/4 HP owner's manual

Haigh Quattro Vanguard Original manual

Haigh

Haigh Quattro Vanguard Original manual

Central Machinery 70167 Owner's manual & safety instructions

Central Machinery

Central Machinery 70167 Owner's manual & safety instructions

Teral DSP-125H-AWV Quick start manual

Teral

Teral DSP-125H-AWV Quick start manual

Mistral Ultra 10504 Specifications

Mistral

Mistral Ultra 10504 Specifications

Atlas Copco HC 150 Safety and operating instructions

Atlas Copco

Atlas Copco HC 150 Safety and operating instructions

manuals.online logo
manuals.online logoBrands
  • About & Mission
  • Contact us
  • Privacy Policy
  • Terms and Conditions

Copyright 2025 Manuals.Online. All Rights Reserved.

INSTALLATION INSTRUCTIONS: RV-SERIES WASTE CONTAINERS AND HAMPERS
12400 Earl Jones Way
Louisville, KY 40299
rev-a-shelf.com
Customer Service: 800-626-1126
RV-SERIES WASTE CONTAINERS AND HAMPERS
I-RV-CK-HURV-0320
#2
TOOLS REQUIRED:
15 MIN
ESTIMATED ASSEMBLY TIME:
CARE AND MAINTENANCE:
Clean with a damp cloth and wipe
parts dry.
* Depending on unit purchased
Door Mounting Kit Sold Separately
Part# RV DM KIT
HURV-1512 RV-9PB RV-18PB-2
RV-18PB-1 RV-1216-CK HPRV-1520
PARTS LIST
No. Description Qty.
A Base Unit 1
B Waste Containers/Hamper 1 or 2*
C #8 x 3/4” Truss Head Screws 4
AB C
WATCH VIDEO TUTORIALS OF
PRODUCT INSTALLATIONS
WWW.REV-A-SHELF.COM/VIDEOS
2Customer Service: 800-626-1126 | rev-a-shelf.com
FIG. C-1
FIG. C-3 FIG. C-4
FIG. C-2
#2#2#2
#2#2#2
Note: Your RV series has been
shipped fully assembled for ease
of installation.
First remove the container(s) from
the wire frame. Place the frame
inside of your cabinet. Look to make
sure that there is plenty of clearance
to shut the door and for the waste
containers (See Figure A).
STEP 1
If there is sufcient clearance, install
(2) rear screws (See Figure C-1).
Note: If framework prevents
access to rear screws, remove
framework by pulling out and
lifting frame from slides.
If your product features full
extension slides remove frame by
disengaging release triggers (See
Figure C-2). Press one side up and
the other side down.
Finally, replace the frame
onto the slides then place
your waste containers in the wire
frame and the installation
is complete.
Note: The HPRV hamper includes a
retaining clip which attaches to the
rear of the hamper. Simply slide this
clip onto the hamper on the bottom
row of holes (See Figure C-3).
The HURV utility basket includes a
retaining clip which attaches to the
rear of the basket. Simply center
this clip on the third row from the
bottom and bend retaining clips
down to keep clip in place
(See Figure C-4).
STEP 2
With the frame in a closed
position, insert the front two
screws, making sure that the
framework is square to the front of
the cabinet (See Figure B).
STEP 3
FIG. A
FIG. B
No. Descripción / Description Qty.
AUnidad de base / Unité du bas 1
BContenedores de residuos/Cesto de basura
Contenants à déchets/panier
1 or 2*
CTornillos de cabeza de cruz #8 x 3/4”
Vis à tête bombée # 8 x ¾ po
4
12400 Earl Jones Way
Louisville, KY 40299
rev-a-shelf.com
Customer Service: 800-626-1126
CONTENEDORES Y CESTAS DE BASURA RV-SERIES
RV-GAMME DE CONTENANTS À DÉCHETS ET PANIERS
I-RV-CK-HURV-0320
#2
15 MIN
* Depending on unit purchased
Equipo de montaje para puerta ven-
dido por separado Part# RV DM KIT
Ensemble d’installation sur porte ven-
du séparément. No de pièces pour
ensembles RV DM KIT
HURV-1512 RV-9PB RV-18PB-2
RV-18PB-1 RV-1216-CK HPRV-1520
Lista de partes / Liste des pièces
AB C
INSTRUCCIONES DE INSTALACIÓN / INSTRUCTIONS D’INSTALLATION
INSTRUCCIONES DE INSTALACIÓN: CONTENEDORES Y CESTAS DE BASURA RV-SERIES
INSTRUCTIONS D’INSTALLATION: SYSTÈME DE TIROIRS À DEUX NIVEAUX
Herramientas requeridas:
Outils Requis:
Tiempo estimado de ensamblado:
Durée de l’installation:
Limpie con un paño húmedo y
seque las partes.
Nettoyer avec un chiffon
humide et essuyer pour sécher
complètement.
CUIDADO/ ENTRETIEN:
4Customer Service: 800-626-1126 | rev-a-shelf.com
FIG. C-1 FIG. C-2
Nota: Su RV-Series ha sido enviada completamente
ensamblada para facilitar su instalación.
Primero quite los contenedores del bastidor de
metal. Coloque el marco dentro de su gabinete.
Asegúrese de que haya suciente espacio para
cerrar la puerta y para los contenedores de desechos
(Ver gura A).
Note : Votre gamme RV a été expédiée complètement
assemblée pour permettre une installation facile.
D’abord, enlever le(s) contenants du cadre métallique.
Placez le cadre à l’intérieur de votre armoire. Assurez-
vous qu’il y ait sufsamment d’espace libre pour fermer
la porte et pour le(s) contenant(s) à déchets (voir gure A).
PASO 1 / ÉTAPE 1
Si hay suciente espacio libre, instale (2) tornillos
traseros (Ver gura C-1).
Nota: Si la estructura impide el acceso a los tornillos
traseros, retírela tirando de ella y levantándola de las
correderas.
Si su producto tiene correderas de extensión
completa, retire el bastidor soltando los dispositivos
de bloqueo (Vea gura C-2). Presione un lado hacia
arriba y el otro hacia abajo.
Finalmente, reemplace el bastidor en las correderas,
luego coloque los contenedores de desechos en el
bastidor metálico y la habrá nalizado la instalación.
S’il y a sufsamment d’espace libre, installez les (2) vis
arrière (voir gure C-1).
Note : Si le cadre empêche d’accéder aux vis arrière,
enlevez-le en le tirant et en le levant des côtés.
Si votre produit comporte des glissières pleine
extension, enlevez le cadre en désengageant les
gâchettes (voir gure C-2). Appuyez sur un côté vers le
haut et sur l’autre côté ver le bas.
Puis, replacez le cadre dans les glissières et placez
le(s) contenant(s) à déchet dans le cadre métallique.
L’installation est terminée.
Note: Le Panier HPRV comprend une attache de
soutien qui s’attache à l’arrière du panier. Il faut juste
glisser cette attache sur le panier sur la rangée de
trous du bas. La cesta de utensilios HURV incluye
un clip de retención el cual se sujeta a la parte
trasera de la cesta. Simplemente centre este clip en
la tercera la de la parte inferior y doble el clip de
retención hacia abajo para mantenerlo en posición.
Nota: La cesta HPRV incluye un clip de retención el cual
se sujeta a la parte posterior de la cesta. Simplemente
deslice este clip en la cesta en la parte inferior de la la
con agujeros. Le Panier Utilitaire HURV comprend une
attache de soutien qui s’attache à l’arrière du panier. Il
faut juste centrer cette attache sur la troisième rangée
à partir du bas et plier les attaches de soutien pour les
maintenir en place.
PASO 2 / ÉTAPE 2
Con el marco en posición cerrada, inserte los
dos tornillos frontales, asegurándose de que el
bastidor esté a escuadra con la parte delantera del
gabinete (Ver gura B).
Le cadre en position fermée, insérez les deux vis du
devant en vous assurant que le cadre soit à égalité
avec le devant de l’armoire (voir gure B).
PASO 3 / ÉTAPE 3
FIG. A
FIG. B
FIG. C-3 FIG. C-4