Rheem Comfort Control 2 System User manual

RECORD OF THERMOSTAT OPTIONS SELECTED
OVERVIEWQUICK STARTUSAGE GUIDESETUPPROGRAMMINGDIAGNOSTICS
MANUAL 37-6940A
0830
For your quick reference, below are the options selected by your installing dealer
to optimize your equipment settings and your personal home comfort preferences.
(Contractor to fill in value or check box. N/A = Not Applicable for your equipment or application.)
Factory
Thermostat Options Configuration Menu Setting
On-Demand Dehumidification: Set RH ________% (Relative Humidity) OFF
Continuous Fan Speed: High Medium Low (Fan-On Setting) Medium
Program Days Per Week: 7 Program Days 0/Non-Programmable 7
Continuous Backlight: On Off On
Energy Management Recovery: On Off On
Temperature Offset: _____ (0, 1, 2, 3, 4, 5°) Hi (+) Lo (-) 0°
Temperature Display: °F °C (Fahrenheit/Celsius) °F
Beeper: On Off (Touch Key Input Confirmation) On
Air Filter Maintenance: _____ Hours (System Runtime) Off
UV Lamp Maintenance: _____ Days Off
Humidifier Pad Maintenance: _____ Hours (Continuous Clock) Off
If you need help adjusting the programmed time or temperatures
in your thermostat, please call Homeowner Help Line at 800-284-2925
For All Other Service, Please Call:
Rheem Installing Dealer: ______________________________________________
Phone: ______________________________________________
Date Installed: ______________________________________________

Diagnostics (Fault) Screen
Reset Operation
DIAGNOSTICSWORD TO HOMEOWNER
DIAGNOSTICS
You are now in command of the most sophisticated and easy to use home comfort system
available today. Your Rheem Comfort Control2System™with Serial Communicating
Technology will provide you and your family improved comfort, optimal energy
efficiency, and enhanced reliability and performance. Your Comfort Control2System
Touchscreen Thermostat constantly communicates with your indoor and outdoor
heating and cooling components to reliably and efficiently provide you with the utmost in
home comfort and peace of mind. This system is so smart it even lets you know at the
thermostat when a service call is needed to protect your heating and cooling investment.
Now you can relax in total comfort in your home. Please read on to learn more about
your new Rheem Comfort Control2System.
The system continuously monitors
itself for optimum performance. If it
senses a fault developing, the
touchscreen thermostat Home
Screen Display will indicate
“Call for Service” and CHECK
(Equipment Name) in the scrolling
message area to identify an
equipment fault. When this is
present contact your qualified
service technician.
If a serious fault is detected in any
of the system components, the
system will shut itself down and
indicate a “Call for Service” is
necessary. This active protection is
a safeguard for your heating and
cooling investment.
The Fault Screen and the “Call for
Service” clears itself when faults
have been corrected.
If a voltage spike or a static discharge blanks out the display or causes erratic operation,
you can reset the thermostat.
To reset the thermostat, touch and and the SYSTEM keys at the same time.
The thermostat will go blank and then all segments will be displayed momentarily.
Note: When the thermostat is reset, the Thermostat Options Configuration Menu
settings, time and programming schedule will reset to the factory settings. Refer to the
customized settings for your thermostat and system on the back cover of this book. Use
this Guide to put Menu options back as they were before the thermostat Reset. For your
convenience, Factory Settings are as shown.
Introduction to Rheem Comfort Control2System
The Rheem Comfort Control2System with Serial Communicating Technology consists of your
indoor furnace or air handler, your outdoor air conditioning condensing unit or heat pump, and
your touchscreen thermostat. These devices are linked together and communicate with each
other over a network. The features of the Rheem Comfort Control2System are
auto-configuration of the system, the ability to share information throughout the home comfort
system network and superior temperature control. These features ensure simple, reliable
operation for you and installation for peak performance by your Rheem Dealer.
2 19

PROGRAMMING SETUP USAGE GUIDE QUICK START OVERVIEW
OVERVIEW QUICK START USAGE GUIDE SETUP PROGRAMMING
5. Touch or key to adjust the start
time for period. The time will change in
15 minute increments.
6. Touch FAN to select Auto or Prog.
7. After you have set the time and the
temperature for the period to begin,
touch Set Schedule to advance to the
next program period.
8. Repeat steps 4 through 7 until all of
the program times and temperatures
are set for all program periods for that
day.
9. Use the Copy Key to copy the pro-
gram as described previously or touch
Advance Day to change to the next
day and repeat steps 4 through 9 until
programs for all days are entered.
10.When programming is complete and
all of the times and temperatures
match your desired heating schedule,
touch Run Schedule. The thermostat
will now run your program.
Enter the Cooling Program
1. Touch the SYSTEM key until the Cool
icon appears.
2. Follow Enter Heating Program instruc-
tions for entering cooling times and
temperatures.
18 3
TOUCHSCREEN THERMOSTAT DISPLAY OVERVIEW...... 4
QUICK START GUIDE................................ 7
Set Current Time and Day........................... 7
Choose the System Setting.......................... 8
Energy Saving Factory Pre-program................... 8
USING YOUR THERMOSTAT .......................... 9
SETTING UP YOUR THERMOSTAT OPTIONS .............12
PROGRAMMING YOUR THERMOSTAT ..................16
Planning Your Program . . . . . . . . . . . . . . . . . . . . . . . . . . . . .16
Heating and Cooling Worksheet ......................16
Programming Tips – Copy Program . . . . . . . . . . . . . . . . . . .17
Enter the Heating Program ..........................18
Enter the Cooling Program ..........................18
Programmable Fan . . . . . . . . . . . . . . . . . . . . . . . . . . . . . . . .18
DIAGNOSTICS......................................19
Diagnostics (Fault) Screen ..........................19
Record of Thermostat Options Selected ........ Back Cover
Service Information ........................ Back Cover
Programmable Fan
The indoor fan/blower can be selected
to turn on and off with the cycle of the
system or to run for the entire period
whether the system is on or off. In the Set
Schedule mode, the FAN key is used to
select the fan operation during a program
period. The default state of the FAN key
is FAN Auto. It can be changed to FAN
Prog.
In the Run Schedule mode, during a pro-
gram period that has FAN Prog sched-
uled, the fan will turn on and stay on
during the complete period. The display
will show FAN On Prog. The programma-
ble fan can be overridden by touching the
FAN key to select Auto or On.
Enter the Heating Program
1. Touch the Menu key to display ad-
ditional key choices.
2. Touch the Set Schedule key. The
top of the display will show the day
being programmed. The time and Set
At temperature are also displayed.
“MORNING” will also be displayed to
indicate the period.
3. Touch SYSTEM key to select Heat in
the SYSTEM switch area indicating
the active mode being programmed.
You can change to the other mode by
touching the SYSTEM key at any time.
4. Touch or key to change the tem-
perature to your selected temperature
for the 1st heating period (Morning).
TABLE OF CONTENTS

PROGRAMMING SETUP USAGE GUIDE QUICK START OVERVIEW
OVERVIEW QUICK START USAGE GUIDE SETUP PROGRAMMING
10
9
8
7
6
5
4321
12
13
11
Menu T o uch Key for entering
different modes such as
Cleaning, Configuration, Set
Time and Set Schedule, and
advanced configuration
Temperature
UP/Down Touch Key
used for modifying
setpoint as well as to
navigate the menus
Setpoint Temperature
Time of Day
System
T o uch Key
T o Select
operating
mode
Fan
T o uch Key
to select
fan mode
Indicates when
thermostat is calling
for Heating or Cooling
Day of Week Room
Temperature
Home Screen Display
Touch Keys for Programming
and Configuration Items
TOUCHSCREEN THERMOSTAT DISPLAY OVERVIEW
4 17
3. Touch the Advance Day key until the
day you wish to copy to is flashing and
the day you are copying is on. The
scrolling message will show “COPY
ONE DAY”
4. Touch the Copy key. The scrolling
message will change to “MORNING”.
The day you copied from will disap-
pear and the day you copied to will
remain on.
Cooling
Program
Wake Up
(Morning) FAN
Leave For Work
(Day) FAN
Return Home
(Evening) FAN
Go To Bed
(Night) FAN
MON 6:00 AM 75°F Auto 8:00 AM 83°F Auto 5:00 PM 75°F Auto 10:00 PM 78°F Auto
TUE
WED
THU
FRI
SAT 6:00 AM 75°F Auto 8:00 AM 83°F Auto 5:00 PM 75°F Auto 10:00 PM 78°F Auto
SUN 6:00 AM 75°F Auto 8:00 AM 83°F Auto 5:00 PM 75°F Auto 10:00 PM 78°F Auto
Worksheet for Re-Programming 7 Day Program
Heating
Program
Wake Up
(Morning) FAN
Leave For Work
(Day) FAN
Return Home
(Evening) FAN
Go To Bed
(Night) FAN
MON 6:00 AM 70°F Auto 8:00 AM 62°F Auto 5:00 PM 70°F Auto 10:00 PM 62°F Auto
TUE
WED
THU
FRI
SAT 6:00 AM 70°F Auto 8:00 AM 62°F Auto 5:00 PM 70°F Auto 10:00 PM 62°F Auto
SUN 6:00 AM 70°F Auto 8:00 AM 62°F Auto 5:00 PM 70°F Auto 10:00 PM 62°F Auto
5. If you wish to copy this same program
into other days, touch the Copy key
and repeat steps 3 and 4.
6. Touch the Run Schedule key to return
to normal operation.
Fill in the blank worksheet provided be-
low with your desired times, temperatures
and fan operation:
Display of All Possible Icons and Touch Keys Used by Thermostat

PROGRAMMING SETUP USAGE GUIDE QUICK START OVERVIEW
OVERVIEW QUICK START USAGE GUIDE SETUP PROGRAMMING
16 5
8. and used in programming to
set time and in configuration menu to
change selections (page 12).
9. “Outdoor Temperature” indicates the
outdoor remote temperature sensor is
being accessed. Outdoor temperature
reading will display in time of day
area. Feature only available for heat
pump systems
10. “Hold At” is displayed when the
thermostat is in the Hold mode (page
9). “Temporary Hold At” is displayed
when the thermostat is in a temporary
Hold mode (page 10).
11. “Auxiliary Heat” indicates the
auxiliary heating or emergency
heating is on (page 9). (Heat Pump
system only.)
12. “Advanced” indicates the Advanced
Installer Configuration Menu used by
your contractor during setup.
13. “RH XX%” displays the indoor
humidity (page 12).
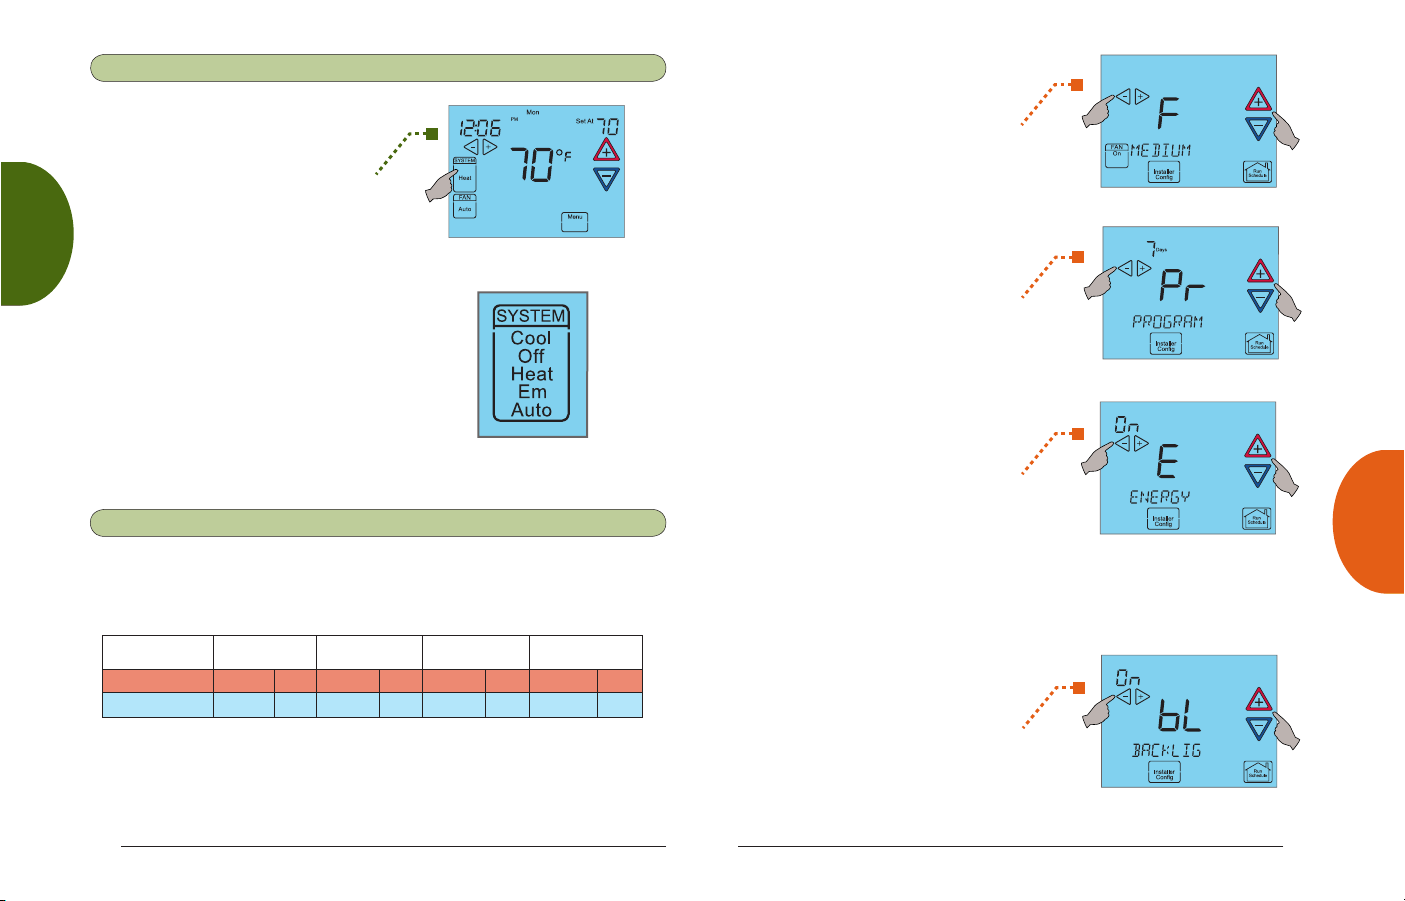
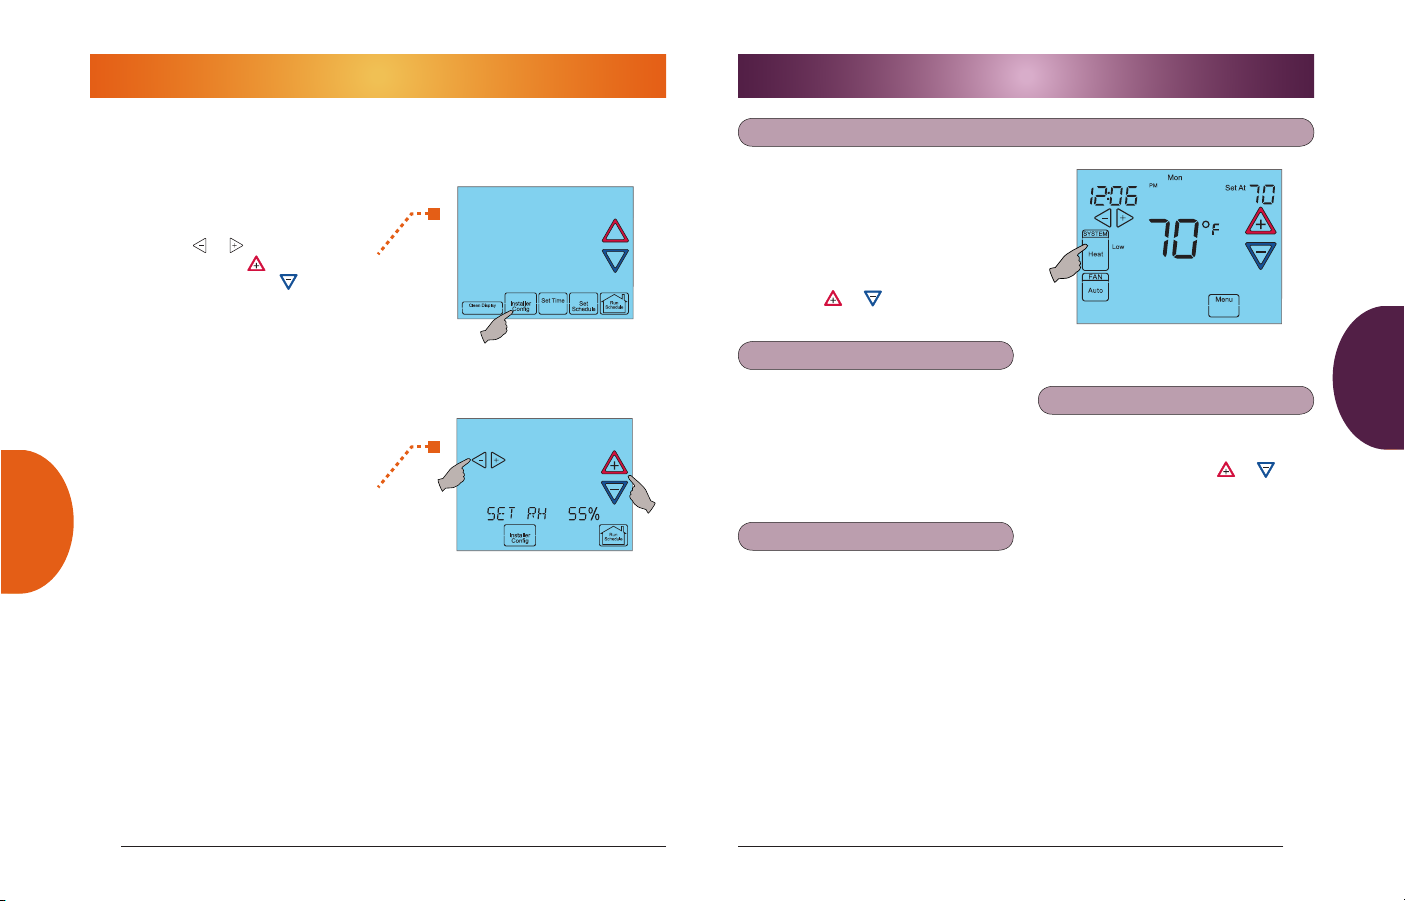
1. Run Schedule touch key to exit
any menu and begin operating the
program.
2. Set Time touch key used for setting
thermostat time (page 7) or Hold
touch key used to permanently
override program temperature (page
10).
3. Copy touch key used to copy
programs (page 16) or Installer
Config touch key used to enter menu
to set thermostat options (page 12).
4. Clean Display touch key allows 30
seconds to wipe off the display. Clean
Display will also reset change filter,
change humidifier pad, and change
UV light (page 11). Advance Day
touch key used for programming
(page 16).
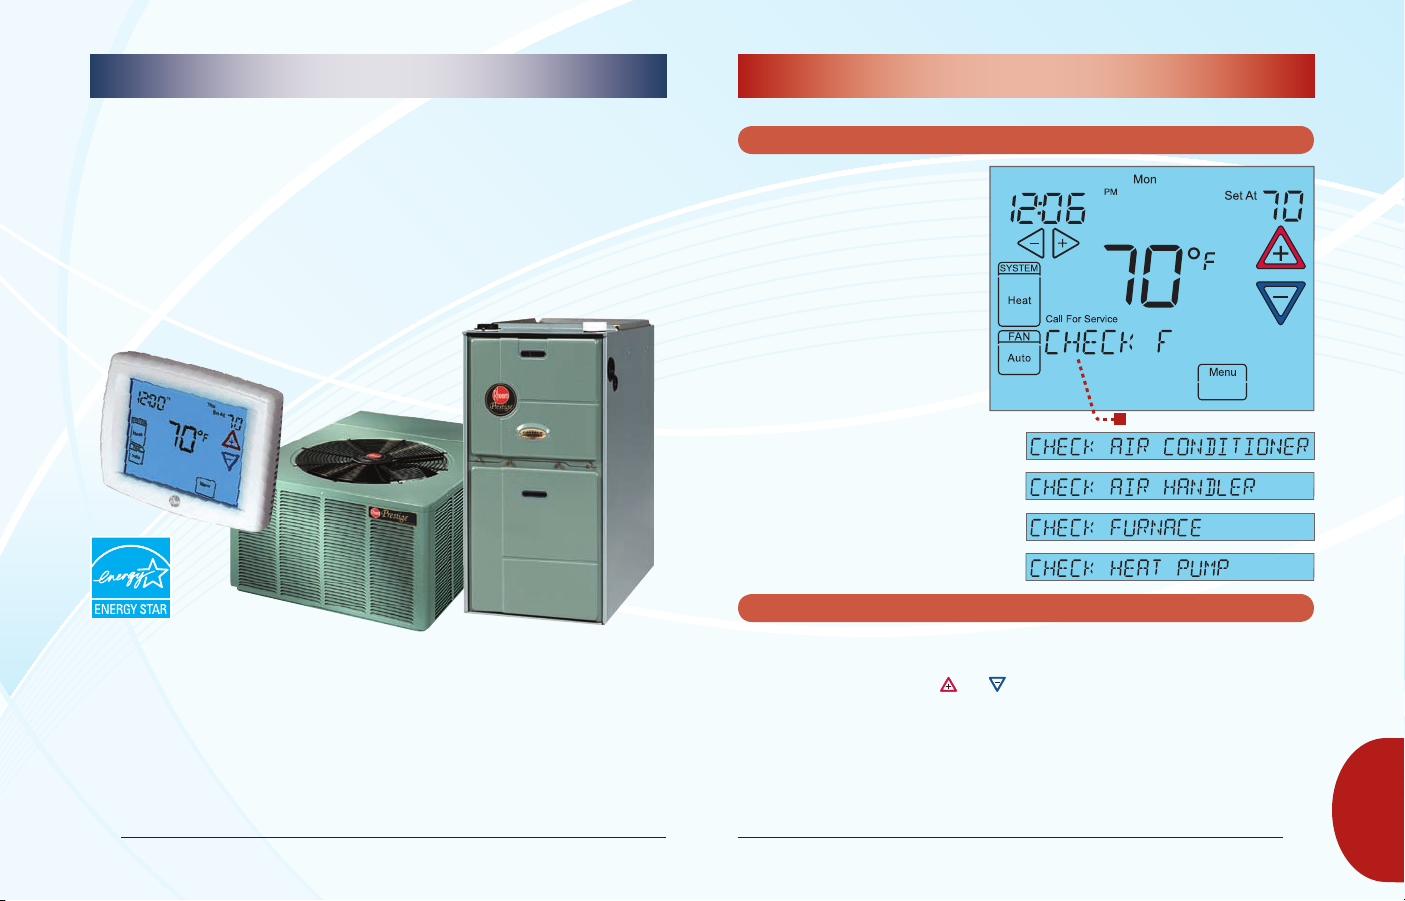
5. SCROLLING MESSAGE CENTER
Displays system information or
maintenance reminder during
thermostat operation. Displays
thermostat information during setup
and programming.
6. “Call For Service” indicates a fault in
the heating or cooling system (page
19). It does not indicate a fault in the
touchscreen thermostat.
7. “Low” indicates when heating or
cooling first stage is called for. “High”
indicates when a second stage is
called for (page 9).
When programming your thermostat, you
may copy the program from one day to
another day or to all six other days.
To copy a program from one day to all
other days:
1. In Set Schedule mode, enter the pro-
gram for the day or select the day you
wish to copy by touching the Advance
Day key.
2. Touch the Copy key. The day of the
week that will be copied is on and the
other days of the week will be flash-
ing. The scrolling message will show
“COPY EVERY DAY”
3. Touch the Copy key again. The scroll-
ing message will change to “MORN-
ING”. The day you copied will remain
on.
4. Touch the Run Schedule key to return
to normal operation.
To copy a program from one day to
another day:
1. In Set Schedule mode, enter the pro-
gram for the day or select the day you
wish to copy by touching the Advance
Day key.
2. Touch the Copy key. The day of the
week that will be copied is on and the
other days of the week will be flash-
ing. The scrolling message will show
“COPY EVERY DAY”
PROGRAMMING YOUR THERMOSTAT
This thermostat is set up for 7 independ-
ent day programming with 4 time/tem-
perature periods per day.
The Heating and Cooling Worksheet on
page 17 allows you to pencil in your own
program times and temperatures. Factory
settings are listed on Monday (for Mon-
day thru Friday), Saturday and Sunday.
If you are re-programming all 7 days, fill
in all lines with the times and tempera-
tures you want. Use this worksheet as a
guide to reprogram the thermostat.
Keep the following guidelines in mind
when planning your program.
• InHeating,lowertemperatureswill
save energy.
• InCooling,highertemperatureswill
save energy.
• IfyouplanonusingAutoChangeover,
do not program the heating tempera-
tures higher than those for cooling.
Planning Your Program –
Important
Programming Tip:
Copy Program

PROGRAMMING SETUP USAGE GUIDE QUICK START OVERVIEW
OVERVIEW QUICK START USAGE GUIDE SETUP PROGRAMMING
6 15
2 “AA” alkaline batteries are included
in the thermostat to keep time during a
power outage. They are also required for
armchair programming.
If “LOW BATTERY” is displayed in the
scrolling message area, the batteries are
low and should be replaced with fresh
batteries. For best results use premium
brand alkaline batteries, such as Dura-
cell®or Energizer®.
To replace batteries, set thermostat
SYSTEM touch key to Off, remove
thermostat from wall by grasping the top
and bottom of the thermostat and pulling
straight away from the wall. The base will
remain on the wall. Install the batteries in
the rear along the top of the thermostat.
Reposition the thermostat over the base
plate and gently snap into place.
Armchair Programming
The thermostat uses 24 Volt AC power
supplied by the system for normal op-
eration. However, with “AA” batteries
installed, the thermostat can be removed
from the wall for convenient program-
ming. Set thermostat SYSTEM touch key
to Off before removing.
System Power Loss
When thermostat loses 24 Volt AC power
supplied by the system, the scrolling
message area will display “Power Fail”.
Battery Location
2 "AA" Batteries
•Select UV lamp maintenance re-
minder. Scrolling message will show
“UV LAMP MAINTENANCE”. Default
is OFF. It can be changed to a setting
from 25 to 1975 days in increments of
25 days to select the amount of time
for the reminder. Setting of 350 days
is an annual reminder.
Based on this setting, the scrolling
message area will show “CHANGE
UV LAMP” to indicate maintenance
is required.
•Select humidifier pad maintenance
reminder. Scrolling message will
show “HUMIDIFIER PAD MAINTE-
NANCE”. Default is OFF. It can be
changed to a setting from 25 to 1975
hours in increments of 25 hours to
select the amount of time for the
reminder. Setting of 100 hours is typi-
cally 6 months of run time.
Based on this setting, the scrolling
message area will show “CHANGE
HUMIDIFIER PAD” to indicate main-
tenance is required.
1
2
1
2
NOTE:
When in the Thermostat Options Configuration Menu, holding the Installer Config key
for 3 seconds again will change the display to the Advanced Installer Configuration
Menu which is used by your contractor. To exit this menu and return to the Thermostat
Options Configuration Menu, press the Menu key, or press Run Schedule to return to
the Home Screen Display.

PROGRAMMING SETUP USAGE GUIDE QUICK START OVERVIEW
OVERVIEW QUICK START USAGE GUIDE SETUP PROGRAMMING
14 7
•Select temperature offset. Scrolling
message will show “TEMPERATURE
ADJUSTMENT”. Your thermostat
was accurately calibrated at the fac-
tory, however this option allows you
to change the display temperature
to match your previous thermostat if
you prefer. Default is 0° with current
temperature. Adjustment can be
made from 5° Lo to 5° HI to change
the displayed temperature.
•Select temperature display as Fahr-
enheit or Celsius. Scrolling message
will show “SELECT TEMPERATURE
DISPLAY”. This option selects the
temperature display as °F or °C.
•Select beeper (audio prompt) Default
is On for the beeper to indicate
a touch key selection. It can be
changed to OFF.
•Select air filter maintenance re-
minder. Scrolling message will show
“AIR FILTER MAINTENANCE”.
Default is OFF. It can be changed
to a setting from 25 to 1975 hours
in increments of 25 hours to select
the amount of time for the reminder.
Consult your contractors for the hours
and type of filter. Setting of 225 hours
is typically 3 months of run time.
When the system has run for the
selected length of time, the scrolling
message area will show “CHANGE
FILTER” to indicate maintenance is
required.
1
2
•Touch Set Time once to display hour
and AM or PM designation in clock
display.
•Touch either the or key until you
reach the correct hour and AM or PM
designation. Then touch Set Time
again to display minutes only in clock
display.
•Touch and hold either the or keys
until you reach the correct minutes.
Then touch Set Time once again to
display the day of the week.
•Touch either the or key until you
reach the correct day.
•Touch Run Schedule to save the Time
and Day settings and return to the
Home Screen Display.
Set Current Time and Day
QUICK START GUIDE
•On Home Screen Display, touch the
Menu key to display additional key
choices.
2
1
2
1
2
1
1
2
1
2
1
2

PROGRAMMING SETUP USAGE GUIDE QUICK START OVERVIEW
OVERVIEW QUICK START USAGE GUIDE SETUP PROGRAMMING
•Select continuous FAN speed. De-
fault is Medium. It can be set to High,
Medium or Low. In High, the fan will
run at the highest speed when FAN
key is selected to On. In Low the fan
speed will be approximately 30% of
High speed and Medium will be 60%
of the high speed.
•Select program days per week.
Scrolling message will show “PRO-
GRAM TYPE”. Default is 7 Days
to indicate individual day program-
ming. It can be changed to 0 Days
to indicate no programs will be run.
When set for 7 Days, the thermostat
will follow the factory program or the
program that you entered.
•Select Energy Management Re-
covery. Scrolling Message will show
“ENERGY MANAGEMENT RECOV-
ERY”. (Will not appear if Program
days per week is set to 0 days.) When
selected On, the thermostat will begin
heating or cooling early to have the
temperature reach the program set-
point at the program period start time.
•Select continuous backlight. Scroll-
ing message will show “BACKLIGHT”.
When bL is selected ON the backlight
will be on continuously. Selecting bL
OFF will allow the backlight to turn
on momentarily when any key is
touched. If system power is off, and
thermostat is operating on battery
only, bL ON, will turn the backlight on
momentarily when a key is touched.
1
2
8 13
Touch the SYSTEM key to select:
Cool: Thermostat controls only the cool-
ing system.
Off: Heating and Cooling systems are
off.
Heat: Thermostat controls only the heat-
ing system.
Em: Thermostat controls emergency
heating only.
Auto: Auto Changeover is used where
both heating and cooling may be re-
quired during the same day. Auto allows
the thermostat to automatically select
heating or cooling depending on the in-
door temperature and the selected heat
and cool temperatures. This thermostat
will not allow you to program a conflict
between Heating and Cooling setpoints.
Energy Saving Factory Pre-Program
This touchscreen thermostat is programmed with the energy saving settings shown in
the table below for all days of the week. If this program suits your needs, simply touch
the Run Schedule key.
Wake Up
(Morning)
Leave For Work
(Day)
Return Home
(Evening)
Go To Bed
(Night)
Heating Program 6:00 AM 70°F 8:00 AM 62°F 5:00 PM 70°F 10:00 PM 62°F
Cooling Program 6:00 AM 75°F 8:00 AM 83°F 5:00 PM 75°F 10:00 PM 78°F
Factory Pre-Programmed heating and cooling schedule for all days of the week
If you wish to set your heating and cooling schedule to something other than the factory
pre-programmed settings, please proceed to the “Programming Your Thermostat”
section.
Choose the System Mode (Cool, Off, Heat, Em, Auto)
1
2
1
2
1
2
Example: The heating program is 65° at night and 70° at 7 AM for the Morning
period. The building temperature is 65°, a difference of 5°. Allowing 5 minutes per
°F rise, the thermostat will begin the system at 6:35 AM to reach 70° at 7 AM.

PROGRAMMING SETUP USAGE GUIDE QUICK START OVERVIEW
OVERVIEW QUICK START USAGE GUIDE SETUP PROGRAMMING
12 9
USING YOUR THERMOSTAT
System Operation
Temporary Program Override
This feature will override the program
temperature setting until the next pro-
gram period begins. Touch or keys
to adjust the temperature. The display will
indicate “Temporary Hold At” to the left
of the setpoint temperature. To cancel the
temporary setting before the next period
begins, touch Run Schedule to return to
the program.
Example: If you turn up the heat during
the Morning program, it will remain at the
new temperature until the time for the
next program period (Day program).
Touch the SYSTEM key to select the
thermostat operating mode desired.
When the system is calling for first stage
heat or cool, “Low” will display on the
touchscreen. When second stage is re-
quired, the display will show “High”. The
setpoint temperature can be changed by
touching the or keys.
Auxiliary Heating
The system automatically activates
Auxiliary Heating when the outside tem-
perature is too cold for the heat pump to
efficiently heat the home. When Auxiliary
Heating is called for, the display will show
“Auxiliary Heat”.
Emergency Heating
Heat pump malfunction is rare, but
should it happen, Emergency Heat can
be manually activated by touching the
SYSTEM key to Em. This will start the
electric or fossil fuel system to provide
heat. The display will show “Auxiliary
Heat”.
SETTING UP YOUR THERMOSTAT OPTIONS
The Thermostat has comfort and performance options that can be selected and ad-
justed. These options are in the Thermostat Options Configuration Menu. On the Home
Screen Display, touch the Menu key to display additional key choices.
•Touch and hold the Installer Config
key for 3 seconds. This displays the
first menu item as shown in the next
step. Touch or to change a
menu option. Touch to advance
to the next menu item or to return
to the previous menu item. Touch
Run Schedule at any time to exit the
menu and return to the Home Screen
Display.
•Select On Demand Dehumidifica-
tion setting. Default is OFF. It can be
set in the range of 40 to 94%. Ideally,
the indoor humidity should be set at
55%.
When On Demand Dehumidification
is selected, the thermostat will indi-
cate the current humidity on the home
screen. The display will show RH with
the humidity %. If the current humidity
is above the selected setting, the
thermostat will send an On Demand
Dehumidification request.
On Demand Dehumidification im-
proves the comfort level in your home
by reducing the humidity level. This
is accomplished by slowing down the
system fan speed and lengthening
the run time. The humidity setting
may not be reached before the call for
cool has been satisfied as the system
priority is to maintain the temperature
in the home.
1
2

PROGRAMMING SETUP USAGE GUIDE QUICK START OVERVIEW
OVERVIEW QUICK START USAGE GUIDE SETUP PROGRAMMING
10 11
A reminder will display in the scrolling
message area when it is time for ac-
cessory maintenance if selected in the
Thermostat Options Configuration Menu.
When a reminder appears, it can be
cleared by touching the Clean Display
key. This will also reset the timer to begin
a new time period for the reminder.
Air Filter Maintenance - When the
system has run for the selected length
of time, the scrolling message area will
show “CHANGE FILTER”
Humidifier Pad Maintenance - Based
on the reminder setting, the scrolling
message area will show “CHANGE
HUMIDIFIER PAD” when maintenance
is required.
UV Lamps Maintenance - Based on the
reminder setting, the scrolling message
area will show “CHANGE UV LAMP”
when maintenance is required.
Maintenance Reminder Message
Permanent Temperature Hold
The Permanent Temperature Hold feature
bypasses the program and allows you
to adjust the temperature manually as
needed. The temperature you set in Hold
will be maintained indefinitely. Touch Run
Schedule to cancel Hold and resume the
programmed schedule.
Touch or keys to adjust the tem-
perature. The Hold key will appear on the
screen. Touch the Hold key to maintain
the new setpoint temperature. “Hold At”
will display to the left of the temperature
setpoint. To cancel the permanent hold
setting at any time and return to the
program, touch Run Schedule.
Example: If you turn up the heat during
the Morning program and touch the Hold
key, it will remain at the new temperature
until you touch Run Schedule or you
manually adjust to another temperature.
Choose the FAN Setting
(Auto or On)
FAN Auto is the most commonly select-
ed setting and runs the fan automatically
when the heating or cooling system is on.
FAN On selection runs the fan continu-
ously for increased air circulation or to
allow additional air cleaning. When FAN
is selected On, it will run at the speed
selected in the Thermostat Options Con-
figuration Menu.
Non-Programmable Mode
If Program days per week is set for 0
days (Non-programmable) in the Ther-
mostat Options Configuration Menu, the
thermostat will not follow any program
periods. Time of day and day of week will
not display. Touch the SYSTEM key to
select Heat or Cool and use the or
buttons to adjust the temperature to your
desired setting.
Auto Mode
In Programmable mode or Non-program-
mable mode, you can touch the SYSTEM
key to select Auto to allow the thermo-
stat to automatically change between
Heat and Cool. When the SYSTEM key
is touched to select Auto the thermostat
will change to Heat or Cool, whichever
ran last. If it switches to heat but you
want cool, or it changes to cool but you
want heat, touch both or keys
simultaneously to change to the other
mode.
Table of contents
Other Rheem Thermostat manuals
Popular Thermostat manuals by other brands

Friedrich
Friedrich WRT1 PTAC Installation and operation instructions

Orbis
Orbis NEO ML+ manual

Lux Products
Lux Products LuxPro EVERYTHING'STAT PSP722E Installation and operating instructions

Honeywell
Honeywell RTH2300 series Quick installation guide

Honeywell
Honeywell CT3500 owner's guide

Azbil
Azbil TY6000Z2000 Specifications & instructions