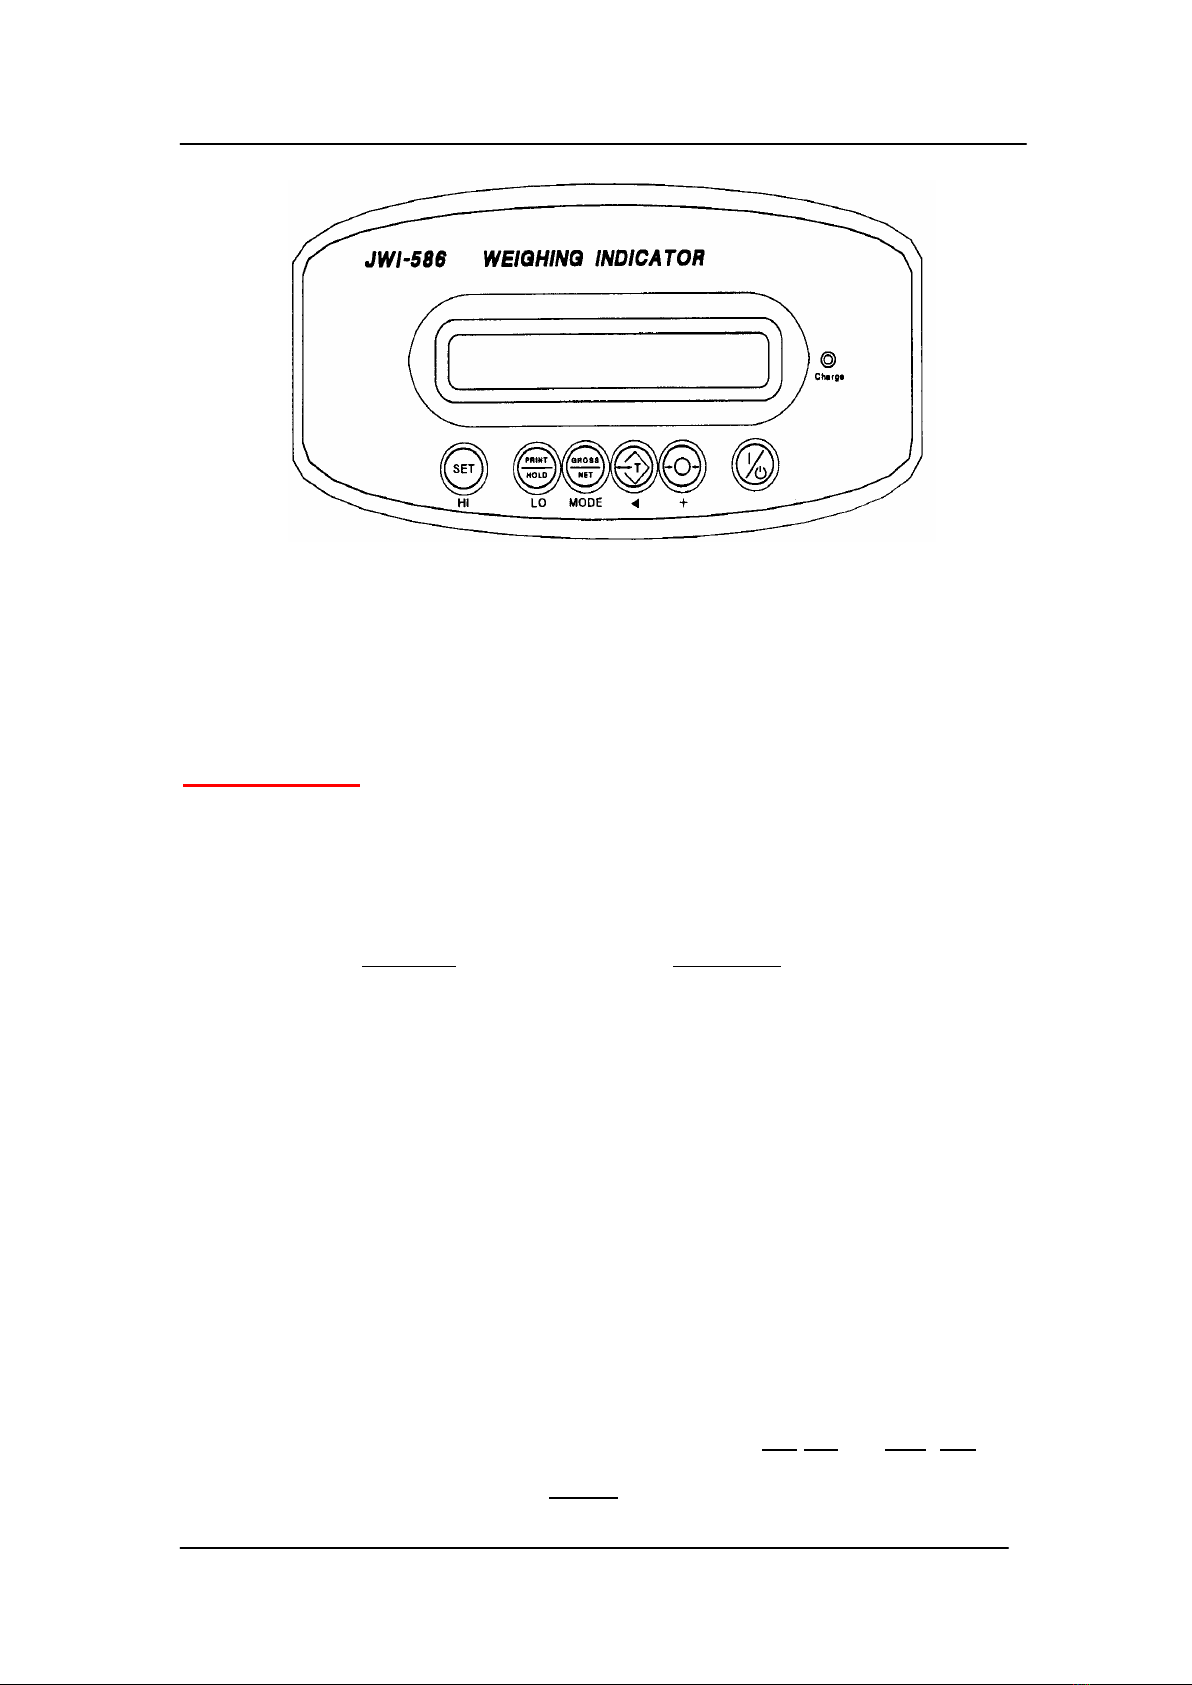
JWI-586 DIGITAL WEIGHING INDICATOR
5
● Initial weight unit / pcs / % setup
One of the weight units / pcs / % which have been enabled in the above
setup can be set as the power on weight unit. Once set, that unit will be the
weight unit each time when the indicator is powered on.
1. Press " SET " key again , the display will show " Init =kg " Init = kg
2. Press " TARE " key repeatedly until the desired unit is shown on the
display.
3. Press " SET " key to complete and leave initial weight unit setup.
♦ The pre-shipment enabled setting for this setup is kg. (lb for U.S.A.)
● Digital filtering setup
This function is provided for weighing vibrating objects or to prevent the
platform from vibration which may affect stability of the displayed readings.
1. Press " TARE " key , the display will show "FIL. X " FiL. 2
2. Press " SET " key to select the approximate level for your application and
leave the digital filtering setup. Each level is a trade-off between reaction
speed and effect to filter vibration. Larger number means slower relation
speed and better effect to filter vibration. (FiL 1 , 2 , 4 , 8)
♦ The pre-shipment enabled setting for this setup is FiL. 2.
● Auto. power- off setup
This feature is provided for power-saving purpose. Once enabled, the
indicator will be automatically turned off when there has been no load on
the platform and indicator is stable at zero position for the setup time.
1. Press " TARE " key, the display will show Aut xx. Aut60
(Aut.no ,5,10,30,60 means auto. power-off time as 5, 10, 30, 60 minutes or
no auto. power-off enabled)
2. Press " SET " to select auto. power-off time and leave the auto. power-off
setup.
♦The pre-shipment enabled setting for this setup is Aut. 60.