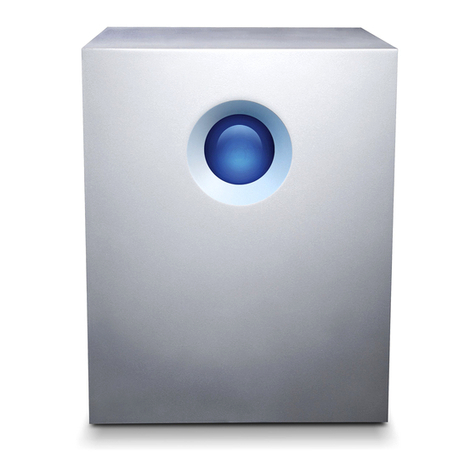
Ricoh e-Sharing Box User manual

Operating Instructions
Operation Guide
For safe and correct use, be sure to read the Safety Information in Read This First before using the machine.


TABLE OF CONTENTS
1. About This Machine
What You Can Do with this Machine............................................................................................................... 5
You Can Easily Manage Files....................................................................................................................... 6
You Can Manipulate Files from a Smart Device..........................................................................................6
You Can Print or Store Files Using Multifunction Peripherals (MFP).......................................................... 7
You Can Access Files from Outside Your Intranet....................................................................................... 7
Basic Information................................................................................................................................................ 8
Operating Environment..................................................................................................................................8
Supported File Types and Sizes..................................................................................................................10
Folder Structure............................................................................................................................................13
What is DocsConnect?................................................................................................................................15
2. Operating from Computers
Accessing from a Computer............................................................................................................................ 17
Web Browser Settings................................................................................................................................. 17
Accessing Using a Web Browser............................................................................................................... 18
How to Use the Top Page........................................................................................................................... 19
Registering a User............................................................................................................................................ 21
Changing a Password................................................................................................................................. 22
Changing User Names and E-mail Addresses..........................................................................................22
Sharing Files with Specified Users.................................................................................................................. 23
Creating a Limited Shared Folder...............................................................................................................23
Deleting a Limited Shared Folder............................................................................................................... 23
Sorting Files Automatically.............................................................................................................................. 25
Sorting Fax Documents................................................................................................................................26
Converting Files Automatically........................................................................................................................27
Using Preset Shared Workflows................................................................................................................. 28
Registering a Workflow...............................................................................................................................29
Executing a Workflow................................................................................................................................. 32
Example 1: Converting Documents to JPEG files...................................................................................... 33
Example 2: Confirming a Received Fax.....................................................................................................36
3. Operating from Smart Devices
How to Use the Main Screen (When Using an iPad)................................................................................... 41
Accessing from Smart Devices........................................................................................................................ 44
1

Connecting to the Machine.........................................................................................................................44
Disconnecting from the Machine................................................................................................................46
Basic Procedures for Using Files..................................................................................................................... 48
Displaying a File List.................................................................................................................................... 48
Creating a New Folder............................................................................................................................... 48
Sorting Files/Folders................................................................................................................................... 49
Searching Files/Folders.............................................................................................................................. 49
Renaming Files............................................................................................................................................. 50
Deleting Files/Folders................................................................................................................................. 50
Adding Files to Favorite...............................................................................................................................51
Uploading Files................................................................................................................................................ 52
Changing the Folder to Upload..................................................................................................................52
Uploading Photographs Taken by a Camera........................................................................................... 52
Uploading Photographs or a Video Stored on a Smart Device.............................................................. 53
Scanning and Uploading from an MFP..................................................................................................... 54
Uploading from Other Applications...........................................................................................................55
Writing Notes in Files.......................................................................................................................................57
Printing Files...................................................................................................................................................... 59
Specifying Printing Conditions.................................................................................................................... 59
Specifying a Printer Using Connecting Codes...........................................................................................60
Specifying a Printer Using an IP Address...................................................................................................61
Selecting a Printer from the List................................................................................................................... 61
Registering a Commonly-Used Printer as "My Printer"............................................................................. 62
Faxing Files....................................................................................................................................................... 63
Projecting Files Using a Projector....................................................................................................................65
Specifying a Projector Using Connecting Codes...................................................................................... 65
Specifying a Projector Using an IP Address.............................................................................................. 67
Selecting a Projector from the List...............................................................................................................68
Registering a Commonly-Used Projector as "My Projector".................................................................... 68
Linking with an Interactive Whiteboard to Display and Store Files..............................................................70
Displaying Files on an Interactive Whiteboard......................................................................................... 70
Storing Pages from an Interactive Whiteboard.........................................................................................70
Accessing from Outside Your Intranet............................................................................................................ 72
2

4. Operating from Multifunction Peripherals (MFPs)
How to Use the Main Screen.......................................................................................................................... 73
Accessing from Multifunction Peripherals (MFPs)..........................................................................................75
Logging in to the Machine from MFPs....................................................................................................... 75
Displaying a Connecting Code on the Control Panel...............................................................................76
Scanning and Sending Originals to the Machine......................................................................................... 77
Scan Settings................................................................................................................................................ 78
Printing Documents Stored on the Machine...................................................................................................80
Print Settings................................................................................................................................................. 81
Using the Address Book in the Machine........................................................................................................ 83
5. Managing the Machine
About @Remote................................................................................................................................................85
About Access Privileges...................................................................................................................................86
Where to Locate the Machine.........................................................................................................................87
Turning the Power On and Off........................................................................................................................89
Starting the Machine................................................................................................................................... 89
Shutting Down and Rebooting the Machine..............................................................................................90
Data Management...........................................................................................................................................91
Backing Up Data..........................................................................................................................................91
Restoring Data..............................................................................................................................................92
Installing Updated Programs Automatically...................................................................................................94
Returning to the Default Conditions................................................................................................................ 95
Enhancing Security...........................................................................................................................................96
Using an Anti-Virus Function....................................................................................................................... 96
Creating Digital Certificates........................................................................................................................96
Managing Registered Smart Devices.........................................................................................................97
Restricting Access to the Machine.............................................................................................................. 97
Monitoring Access to Documents............................................................................................................... 97
Troubleshooting................................................................................................................................................99
Error Notification......................................................................................................................................... 99
Checking Log Information........................................................................................................................... 99
Notification by Lights and Beeps............................................................................................................. 100
When Error Messages Appear................................................................................................................ 102
3

Other Problems..........................................................................................................................................105
Setting Menus................................................................................................................................................ 106
Personal Settings........................................................................................................................................106
System Settings.......................................................................................................................................... 109
Maintenance..............................................................................................................................................120
Device Information.................................................................................................................................... 122
Others.........................................................................................................................................................122
6. Appendix
Specifications................................................................................................................................................. 123
Guide to Components...............................................................................................................................123
Machine's Specifications.......................................................................................................................... 124
Copyrights for Software................................................................................................................................ 127
Trademarks.....................................................................................................................................................128
4

1. About This Machine
This chapter describes what you can do with RICOH e-Sharing Box. It also explains basic information
such as hardware requirements and the folder structures of the machine.
What You Can Do with this Machine
RICOH e-Sharing Box is a file server system that enables you to share and manage files stored on the
machine easily.
Files stored in this machine can be accessed not only by computers, but also by various types of devices,
such as multifunction peripherals (MFPs), smart devices, and interactive whiteboards, so that those data
can be printed or projected.
In addition, if you use a relay server, you can access the files stored in the machine from outside an
intranet that is protected by a firewall.
DJA101
Outside the intranetOutside the intranet
Relay server
IntranetIntranet
FAX
Data conversion
File sorting
Automatic processing
5

You Can Easily Manage Files
File Share
Only user registration is required to share files. Registered users are allowed to access a shared
folder that all users can access, a personal folder that only the registered user can access, and a
network-shared folder that links with external storages. No difficult settings are required to assign
each user the privilege to access shared folders. Also, a limited shared folder that only authorized
users can access is available.
File Search/Sort
By using preset keywords, the machine searches for files that contain the keywords in their titles and
contents. Then, it creates links to the files that are found and stores the links in a specified folder.
You can easily access the files that you want, even though there are many files stored in the
machine. This function is only available on Windows operating systems.
For details, see page 25 "Sorting Files Automatically".
Automatic File Conversion
When you store files in a folder, as specified by the workflow you have created and registered, the
machine automatically converts the files to another format and sends an e-mail to notify you that the
conversion is complete according to the workflow you registered. You can simplify your daily work
by registering routine jobs as a workflow.
For details, see page 27 "Converting Files Automatically".
You Can Manipulate Files from a Smart Device
DocsConnect
You can perform various file operations from a smart device by using DocsConnect, which is an
application designed for RICOH e-Sharing Box. To access RICOH e-Sharing Box from a smart
device, read the connecting code that appears on the display using the smart device's camera.
If you browse MSWord or Excel files that are not supported by the operating system of your smart
device, the machine automatically converts those files to be displayed on the smart device. You do
not need to convert the files to PDF format files using a computer and transfer them to the smart
device.
For details, see page 15 "What is DocsConnect?".
File Upload
You can upload photographs taken by a smart device's camera and photographs stored in a smart
device to RICOH e-Sharing Box using DocsConnect. You can also upload files from other
applications by sending them to DocsConnect.
For details, see page 52 "Uploading Files".
1. About This Machine
6

Easy Connection Using a Connecting Code
You can print files that are opened with DocsConnect by scanning the connecting code displayed
on the control panel of an MFP.
By scanning the connecting code on a projector, you can also project files that are opened with
DocsConnect.
In addition, by scanning the connecting code on an interactive whiteboard, you can display the
files that are opened with DocsConnect on the interactive whiteboard, and upload files displayed
on the interactive whiteboard to RICOH e-Sharing Box using DocsConnect.
For details, see page 60 "Specifying a Printer Using Connecting Codes", page 65 "Specifying
a Projector Using Connecting Codes" and page 70 "Linking with an Interactive Whiteboard to
Display and Store Files".
You Can Print or Store Files Using Multifunction Peripherals (MFP)
Direct Access from MFPs
It is possible to directly access from an MFP on which a browser function is installed to RICOH e-
Sharing Box. You can store files that are scanned by an MFP to a specified folder in the machine or
print files stored in the machine on the MFP. For this, you do not need to use a computer.
For details, see page 75 "Accessing from Multifunction Peripherals (MFPs)".
LDAP Server Function
RICOH e-Sharing Box can be used as a LDAP server.
It is possible to access RICOH e-Sharing Box from an MFP connected to a network, so that user
information and the address book stored in this machine can be referred to. You can manage user
information centrally because there is no need to configure the settings for each MFP.
For details, see page 83 "Using the Address Book in the Machine".
You Can Access Files from Outside Your Intranet
Even if RICOH e-Sharing Box is connected to an intranet that is protected by a firewall, you can access
the machine using a smart device via a relay server. This may be useful when you are outside your office
and want to browse documents on your server.
In addition, if you register a workflow to this machine in advance, you can be notified by e-mail every
time you receive a facsimile and confirm its contents even if you are outside the company.
For details, see page 72 "Accessing from Outside Your Intranet".
What You Can Do with this Machine
7

Basic Information
Operating Environment
RICOH e-Sharing Box can be accessed by various types of devices. Up to 20 devices can access this
machine at the same time.
Computers
You can access this machine using a web browser from a computer that is connected to a network.
Access the machine from a computer to register a workflow or change the default settings. For
details, see page 17 "Accessing from a Computer".
Smart devices
You can access this machine from a smart device using DocsConnect, which is an application
designed for RICOH e-Sharing Box. If you use a smart device to scan a connecting code displayed
on a computer's screen using DocsConnect, it automatically accesses this machine. For details
about DocsConnect, see page 15 "What is DocsConnect?".
MFP
You can access this machine from an MFP on which a browser function is installed. You can
perform file management using this machine from an MFP's control panel. For details, see
page 75 "Accessing from Multifunction Peripherals (MFPs)".
Operations are device-specific. For details, see page 10 "Supported File Types and Sizes".
1. About This Machine
8

Supported devices
Computers
Operating systems Web browsers
Windows XP SP3 (32-bit version)
Windows Vista SP2 (32-bit version)
Windows 7 SP1 (32-bit version, 64-bit
version)
Windows 8 (32-bit version, 64-bit version)
Windows 8.1 (32-bit version, 64-bit version)
Windows Server 2003 (32-bit version)
Windows Server 2008 (32-bit version)
Windows Server 2008 R2 (64-bit version)
Windows Server 2012 (64-bit version)
Windows Server 2012 R2 (64-bit version)
Internet Explorer 8/9/10 (desktop
version)/11 (desktop version)
Chrome 32.0
Firefox 28.0
Mac OS X 10.8.2 to 10.9 Safari 6 to 7
Chrome 32.0
Smart Devices
Supported models iPhone 4, iPhone 4S, iPhone 5, iPhone 5c, iPhone 5s,
iPhone 6, iPhone 6 Plus, iPad 2, iPad (third and fourth
generations), iPad mini, iPad Air
The device used must be equipped with a camera.
Models on which DocsConnect run Galaxy S2, Galaxy Note, ICONIA TAB A500,
Nexus 7 (2013)
The device used must be equipped with a camera on
its back side.
Supported operating systems iOS Ver. 7.0 to 8.1
Android 2.3 to 5.0
MFPs
Supported models Ricoh MFPs on which a browser function or the Smart
Operation Panel is installed.
Basic Information
9

Projectors
Supported models Ricoh network projectors supported by RICOH e-
Sharing Box.
Interactive whiteboards
Supported models Ricoh interactive whiteboards supported by RICOH e-
Sharing Box.
• To link this machine with other devices such as MFPs and projectors, open port 80 or 443 on your
firewall.
• For updates about compatible models of MFPs, projectors, and interactive whiteboards, see the
Ricoh website.
• For updates about supported operating systems, see the Ricoh website.
• A Browser unit is required to use a browser function. Extended JavaScript also needs to be
installed. For details, see the Ricoh website.
• Up to 4 network-attached storages (NAS) can be registered to the machine. Register in advance
the information of the NAS to be connected under "Network Share Connection Management" in
"System Settings".
Supported File Types and Sizes
The following file types and sizes are supported:
Supported file types
File type File name extension
Document files*1 .doc, .docx, .rtf, .xls, .xlsx, .ppt, .pptx
PDF files (ver.1.3 or later)*2 .pdf
Text files*3, *4 .txt
Image files .jpg, .jpeg, .tif, .tiff, .png, .bmp
Movie files*5, *6 .m4v, .mov, .mp4, .mpv, .3gp
*1 Only Microsoft Office files created by Microsoft Office for Windows are supported.
*2 Pages in an interactive whiteboard are saved as PDF files.
1. About This Machine
10

*3 Supported character encodings are ISO 8859-1, Shift-JIS, and Unicode (UTF-8, UTF-16LE, and
UTF-16BE).
*4 The maximum size of a text file is 10 MB.
*5 Movie files cannot be played on an MFP.
*6 H.264 Baseline Profile Level 3.0 (up to 640 × 480 at 30 ftps) or MPEG-4 Part2 movie files are
supported.
Supported File Sizes
Computers Smart
Devices MFPs Maximum File
Size
File list 100 MB*1
File list (preview) 100 MB*1
Creating/deleting files × –
Updating files × × –
Moving files × × –
Renaming files × –
Sorting files (registering) × 100 MB
Workflow (registering) × × –
Workflow (executing) 100 MB
Uploading photographs stored in a
smart device × ×
iOS smart
devices: 10 MB
Android smart
devices: 500
MB
Uploading photographs taken by a
smart device's camera × × 500 MB*2
Scanning and uploading files × 500 MB*2
Writing notes to files*3 × × –
Printing files ×*4 100 MB
Faxing files*5 × × 100 MB
Projecting files × × 100 MB
Basic Information
11

Computers Smart
Devices MFPs Maximum File
Size
Displaying files on an interactive
whiteboard*6 × × 100 MB
Storing pages on an interactive
whiteboard × × –
Configuring system settings × × –
Configuring personal settings × × –
Registering user accounts × × –
LDAP function × × –
: Available, ×: Unavailable
*1 When you access this machine using a computer, the maximum file size you can manage is 500 MB.
*2 When you access this machine via a relay server, the maximum file size you can manage is 100 MB.
*3 You can write a maximum of 100 pages of notes.
*4 You can print documents from the application that was used to create the documents.
*5 You can fax up to 100 pages at a time.
*6 You can send up to 100 pages of a file to an interactive whiteboard at one time.
• Operations may take time depending on the machine's operational status.
• Files protected by passwords cannot be displayed.
• You first need to configure page or print settings for jobs using Excel spreadsheet to view or print
the Excel files or to convert them to files in other format.
• Download the hot-fix package from the Microsoft website and install it on your computer if you are
using Excel 2007 or Excel 2010. For details, see the Microsoft website.
1. About This Machine
12

Folder Structure
DJA102
AllUsers
BackupFile
BackupFile Error Error
"Registered user name"
Other folders you can create
Other folders you can create
Personal folders
Personal folders
Limited shared folders
Limited shared folders
Shared folders
Shared folders
AllUsers
BackupFile
BackupFile Error Error
"Registered user name"
Favorite
Favorite
1.Files
1.Files
2.KeywordSearch
2.KeywordSearch
3.Workflows
3.Workflows
4.NAS
4.NAS
1.Files
1.Files
"Limited shared folder name"
"Limited shared folder name”
1.Files
1.Files
2.KeywordSearch
2.KeywordSearch
3.Workflows
3.Workflows
"AllUsers" folder, personal folders, limited shared folders, and a favorite folder are under the root
directory of RICOH e-Sharing Box.
The "AllUsers" folder and personal folders have the following subfolders.
AllUsers folder
• 1.Files folder
• 2.KeywordSearch folder
• 3.Workflows folder
• 4.NAS folder*1
*1 This folder appears only when you access this machine using a smart device or an MFP.
Personal Folder
• 1.Files folder
• 2.KeywordSearch folder
• 3.Workflows folder
Types of Folders
Folder name Description
AllUsers This is a shared folder.
All users registered to the machine can access these folders.
Basic Information
13

Folder name Description
"Registered user name" This is a personal folder.
When a user is registered, a folder named with registered user's name is
automatically created. Only the registered user can access this folder.
"Limited shared folder
name"
This is a limited shared folder that only authorized users can access.
1.Files These folders are created under the "AllUsers" folder, a personal folder,
and a limited shared folder.
You can store any files and create subfolders in these folders.
If you store files in the "1.Files" folder under the "AllUsers" folder, all users
can access the files.
2.KeywordSearch These folders are created under the "AllUsers" folder and personal folders.
To search for and sort files, create subfolders under this folder. The names
of the subfolders are used as keywords to search for files.
If files stored in the "1.Files" folder contain keywords, the machine creates
links to those files and stores them in corresponding subfolders.
You cannot store files in these folders.
3.Workflows These folders are created under the "AllUsers" folder and personal folders.
Files to be converted by workflows are stored here. If you use a shared
workflow, store the files in the "3.Workflows" folder under the "AllUsers"
folder. If you use a personal workflow, store the files in this folder under the
personal folder.
Do not create subfolders under the "3.Workflows" folder.
4.NAS These folders appear under the "AllUsers" folder when you access the
machine using a smart device or an MFP.
You can access external storages and shared folders on a network via the
machine.
9.Trash This folder appears when you access the machine using a smart device.
If you delete files on DocsConnect, the deleted files are moved to this
folder. Deleted files in this folder are deleted automatically after a certain
period of time.
1. About This Machine
14

Folder name Description
Favorite Files added to Favorite are stored in this folder. This folder is displayed
when you enable the Favorite function in "System Settings" and access the
machine using DocsConnect.
Each user has his/her own Favorite folder, and only the login user can
access his or her "Favorite" folder.
• Files added to Favorite are stored in the "Favorite" folder in your smart device. To prevent
information leakage by losing your smart device, we recommend that you protect your smart
device using passwords if you use the Favorite function.
• You can configure the machine to automatically delete all the files added to Favorite after a certain
period of time since you opened the "Favorite" folder or added files to Favorite.
What is DocsConnect?
DocsConnect is an application for accessing RICOH e-Sharing Box using a smart device.
When you display, print, or project the files stored in RICOH e-Sharing Box using DocsConnect,
selected files are stored in a smart device temporarily. When you close DocsConnect, temporarily stored
files are deleted automatically from the smart device.
Because the files are not stored in the smart device, the risk of information leakage is reduced even if the
smart device is lost.
You can download DocsConnect for iOS-based smart devices from the App Store, and for Android-
based smart devices from Google play.
For details about available devices and operations for DocsConnect, see page 9 "Supported devices".
DocsConnect provides the following functions;
• Displaying files that are stored in the machine
• Printing files that are stored in the machine
• Projecting files that are stored in the machine
• Displaying files that are stored in the machine on an interactive whiteboard
• Storing in the machine the information that is displayed on an interactive whiteboard
• Faxing files that are stored in the machine
• Uploading the files that are stored on a smart device to the machine
For detailed procedures, see page 44 "Accessing from Smart Devices".
Basic Information
15

• For details about quality and restrictions on communication lines, contact your carriers.
1. About This Machine
16

2. Operating from Computers
This chapter explains how to access RICOH e-Sharing Box and register users from a computer. It also
explains the procedures for registering workflows to convert files into those in other formats or searching
and sorting files stored in this machine automatically.
Accessing from a Computer
You can access RICOH e-Sharing Box using a web browser on a computer that is connected to a
network.
Web Browser Settings
The first time you access RICOH e-Sharing Box, register the machine's address as a trusted site. The
procedure to register the machine using Internet Explorer 8 is shown below as an example.
1. Launch your web browser.
2. Click [Internet Options] under [Tools].
3. Click the [Security] tab.
4. Select [Trusted sites], and then click [Sites].
5. Enter "http://(IP address of the machine)" in the text box of "Add this website to the
zone", and then click [Add].
6. Click [Close].
7. Click [Custom level].
8. Select [Prompt] or [Enable] for [Initialize and script ActiveX controls not marked as safe
for scripting].
9. Click [OK].
10. Click [Yes] on the confirmation screen.
11. Click [OK].
• If you do not use SSL, clear the "Require server verification (https:) for all sites in this zone" check
box in Step 5.
• If you select [Prompt] in Step 8, a confirmation screen appears when you access folders in the
machine. If this happens, click [Yes].
• If you access the machine using Windows Server 2012/2012 R2, a blank white screen may
appear. If this happens, change the web browser settings. See page 18 "Web browser settings
on Windows Server 2012/2012 R2".
17

Web browser settings on Windows Server 2012/2012 R2
If you access the machine using Windows Server 2012/2012 R2, a blank white screen may appear.
Change the web browser settings according to the procedures below.
1. Click [Internet options] under [Tools].
2. Confirm the [General] tab is selected.
3. Click [Tabs].
4. Select [Always open pop-ups in a new window] or [Always open pop-ups in a new tab]
for "When a pop-up is encountered".
5. Click [OK] twice.
Accessing Using a Web Browser
1. Launch your web browser.
2. Enter "http://(IP address or host name of the machine)/home/" in the address bar.
3. Press the [Enter] key.
The login screen appears.
4. Enter your user ID and password, and then click [Log In].
The top page appears.
2. Operating from Computers
18
Table of contents

