Riego
Los Angeles, California
Toll Free: 1-866-684-2314
www.riego.co
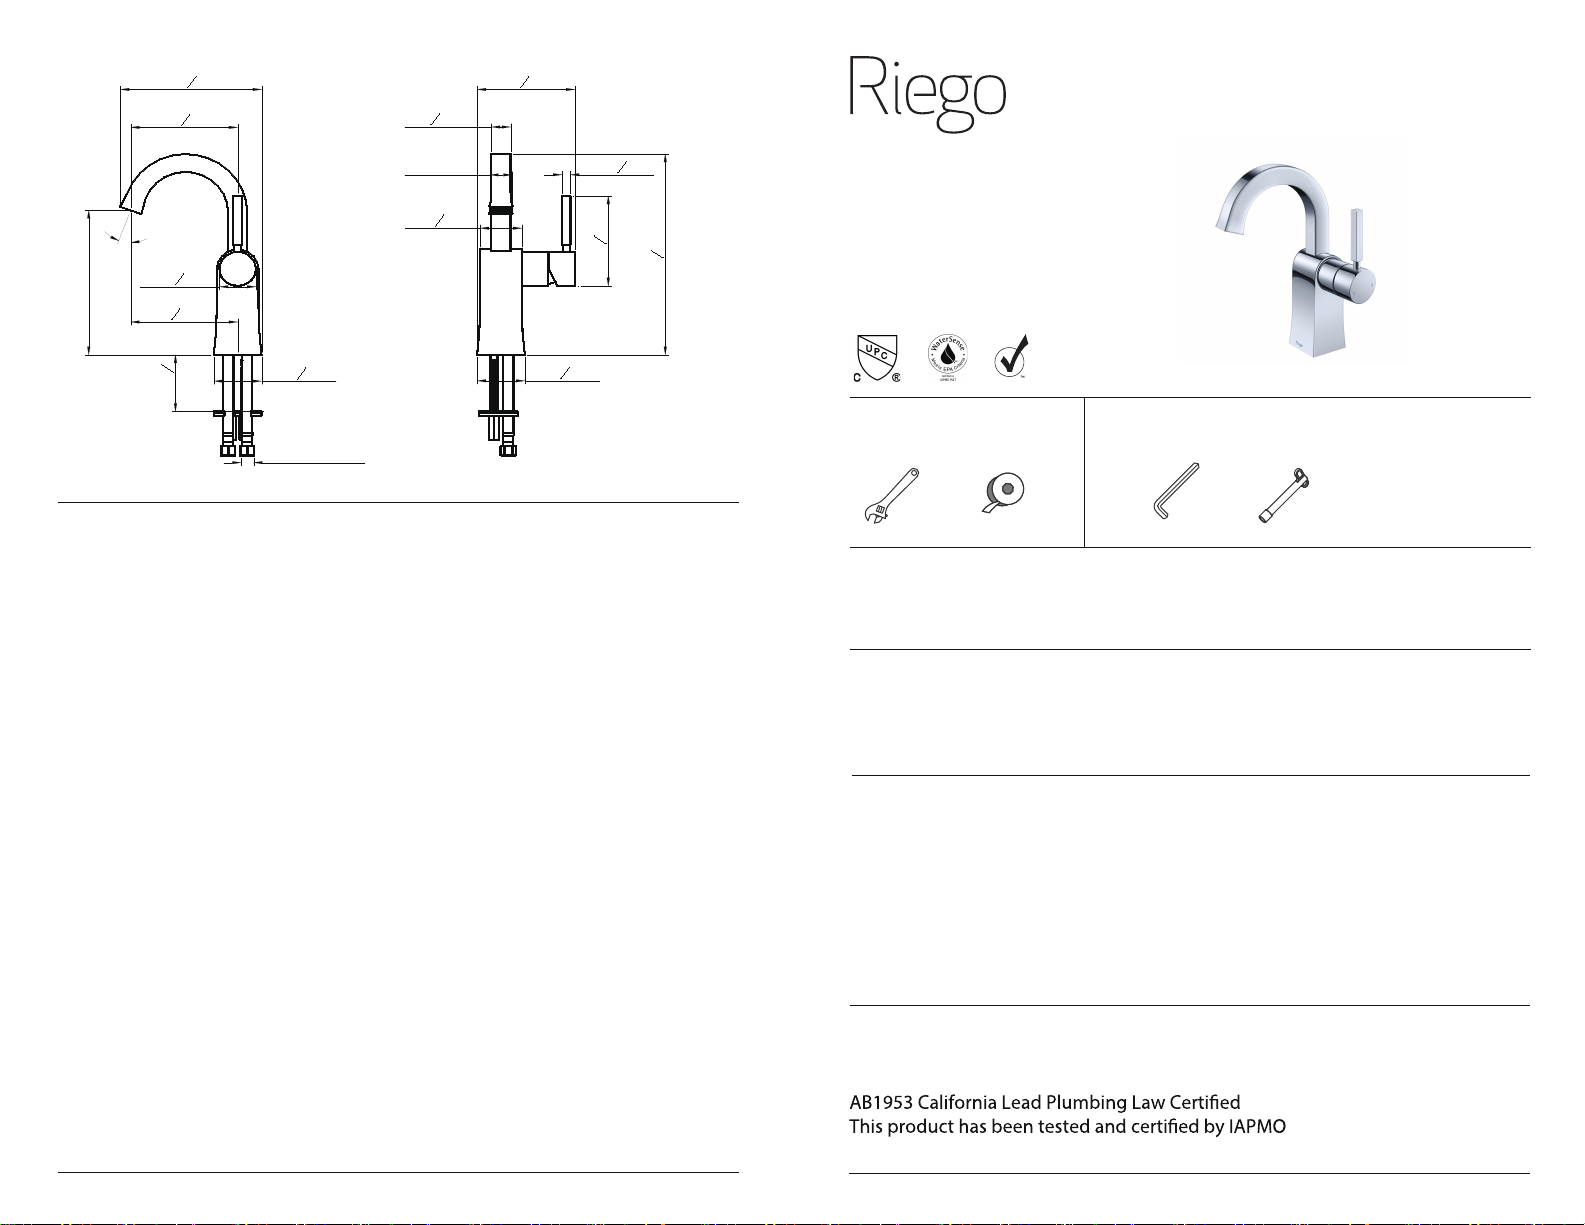
Model L92001
J Series Lavatory Faucet
Single Handle Lavatory Faucet
w/ Waste Drain
Tools Required Tools Supplied with Faucet
For proper and easy installation of your Riego faucet you will need:
- To READ ALL instructions completely before beginning.
- To READ ALL warnings, care and maintenance information.
NOTICE TO INSTALLER: CAUTION! As the installer of this product, it is your
responsibility to properly install this product per the instructions given.
Leave this instruction sheet and the supplied tools with the owner/user for
future use.
This faucet meets or exceeds the following standards:
ASME A112.18.1 / CSA B125.1
NSF 61-9 / EPA WaterSense
1
4Rev.0
If you have any questions regarding this product, please contact us at:
4
78
"
[123.2mm]
6
38
"
[162.7mm]
7"
[178.1mm]
Max:2
34
"
[70.0mm]
4
78
"
[123.2mm]
9
34
"
[247.4mm]
4
38
"
[110.8mm]
□
38
"
[10.0mm]
1
78
"
[48.0mm]
1"
[25.8mm]
78
"
[22.0mm]
4
716
"
[112.6mm]
2
316
"
[55.0mm]
2
316
"
[55.0mm]
3/8"COMP
9/16"-24UNEF
20°±7°
Φ1
58
"
[42.0mm]
Limited Lifetime Faucet Warranty
* Two year warranty on commercial applications.
** Never use cleaners containing abrasive cleansers, ammonia, bleach, acids, waxes,
alcohol, solvents or other products not recommended for surface nishes. This will
void the warranty.
Riego warrants its faucets to be free from defects in material and workmanship for
as long as the original consumer purchaser owns his or her home.* This warranty
applies only in the original installation location. If a defect is found in normal resi-
-dential use, Riego will, at its election, repair, provideareplacementpart or product,
or make an appropriate adjustment. Riego reserves the right to examine the product
in question and its installation prior to replacement. This warranty is limited to replace-
-mentofdefective parts only. Damage to aproductcaused by accident, improper
installation, misuse, or abuse is not covered by this warranty. Improper care and clean-
-ing will void the warranty.** Replacement parts can be obtained from your local
dealer or directly from the Riego warehouse. Dated proof of purchase from an
authorized reseller must accompany all warranty claims. This warranty applies only
to Riego faucets installed in the United States ofAmerica, Canada or Mexico (North
America).
Riego recommends using a certied plumber for faucet installation and repair.
Incidental and consequential damages, labor charges, shipping costs, repair or
replacementcosts are expressly excluded. In no event shall the liability ofRiego
exceed purchase price of the faucet. Some states and provinces donot allow the
exclusion or limitation of incidental or consequential damages, so the above limitation
may not apply to you. This warranty gives you specic legal rights which vary from
state/province to state/province. If you nd any such problem with your product,
please immediately contact your nearest Riego dealer or sales representative.
™
™
™
™
™
™
™
™
™
™


