Riotoro RPOD CLASSIC User manual

True Wireless Earbuds
RPOD CLASSIC

1
Note: This manual is a guide for the RPOD CLASSIC rpods. For instructions on installing consoles, PC, mobile devices and other devices,
please refer to their documentation.
Thank you for purchasing the RPOD CLASSIC!
Welcome to RIOTORO
Enjoy your favorite games with the RPOD CLASSIC true wireless earbuds
enabled with DSP Noise Cancellation.
The 6.0mm drivers enrich your listening experience with high-fidelity sound, and
onboard touch controls let you manage your RPOD CLASSIC with a tap.
The RPODS CLASSIC earbuds include a charging case that extends battery life
to up to 9 hours of listening per charge and up to 27 hours in total. Using
Bluetooth 5.0 it allows seamless pairing with your Bluetooth-enabled device and
long range connectivity to enable you to move freely.

RPOD CLASSIC TWS RPODS
4
5
6
7
Before You Begin
- Exploded view
- What is in the box
- Precautions
- Requirements
1
2Ready, Setup, Go
- Specifications
- Choose your ear tips
- How to remove and attache ear tips
- How to turn on
- How to turn off
- How to pair
- Automatic pairing / disconnecting
- How to wear
- Using for calls
- Using for audio
- How to charge with USB Type-C
- How to charge wirelessly
- Restoring to factory settings
- How to control volume
3Top / Front Panel Assembly
- General Maintenance
- Important Safety Information
- Limited product warranty ("Limited Warranty")
- Troubleshooting your new RPOD CLASSIC
- Recommended parts
24
25
26
27
28
9
10
11
12
13
14
15
16
17
18
19
20
21
22
2
CONTENTS

Before You Begin
1
www.riotoro.com/headphones

RPOD CLASSIC TWS RPODS
Exploded view
Before You Begin 4
1. Charging indicator
2. Charging slot
3. Type-C charging port
4. Wireless charging area
5. Microphone
6. LED indicator
7. Removable ear tips
8. Multifunction button (MFB)
9. Charging thimble
10. Light sensor
7
10
1 432
65
8 9

1
6Textured ear tips Secure fit
1Case Charge your rpods
6Smooth ear tips Comfort fit
RPOD CLASSIC TWS RPODS
WHAT’S IN THE BOX
QTY
ITEM IMAGE USEDESCRIPTION
RPOD CLASSIC
TWS RPODS
1
2
3
4
Before You Begin 5
Enjoy your gaming
experience

RPOD CLASSIC TWS RPODS
Please take the following precautions:
- Handle your rpods with care.
- Do not try to open the rpods as you might damage its components.
- To avoid damaging components by electrostatic discharge, periodically
ground yourself by touching an unpainted metal surface or by using a
wrist grounding strap.
Before You Begin 6
PRECAUTIONS

RPOD CLASSIC TWS RPODS
Before You Begin 7
REQUIREMENTS
In order to configure the RPOD CLASSIC you will need:
1. A flat working area (e.g. desk or table)
with sufficient space
2. Bluetooth enabled devise

Ready, Setup, Go
2
www.riotoro.com/headphones

RPOD CLASSIC TWS RPODS
SPECIFICATIONS
Chapter 2 9
GENERAL
Qualcom 3020
ABS + PC
Black / White
Yes, DSP Noise Cancellation
Stereo
Wireless
Bluetooth
Yes
32.8 ft / 10.0 m
Yes
Yes
In-Ear
Yes, Secure Fit and Comfort Fit
55mAh
350mAh
1 in rpods; two in charging case
5
Call, track selection, volume
7.5 hours
up to 27 hours Yes, DSP Noise Cancellation
1.5 hrs
65.0 hrs
True Wireless In-Ear
Bluetooth 5.0
<5%,200Hz-3kHz
16 Ohms ±15%
6.0 mm
95±3dB
20Hz - 20KHz
-20~60℃
HFP/HSP/A2DP/AVRCP
Yes
5v
- Chip:
- Material:
- Color:
- Noise Canceling:
- Sound Mode:
- Connection Type:
- Wireless Connectivity:
- True Wireless:
- Maximum Wireless Range:
- Water Resistant:
- Built-In Microphone:
- Headphone Fit:
- Ear Tips:
- Ear Bud Battery Capacity:
- Charging Case Battery Capacity:
- Number of Charges:
- IPX Level:
- Controls:
- Maximum Talk Time:
- Battery Life:
- Full Charge Time:
- Standby Time:
- Headphone Type:
- Connection Type:
- THD:
- Impedance:
- Driver Diameter:
- Sound Pressure Level:
- Frequency Response:
- Working Temperature:
- Profile:
- Wireless Charging:
- Charging Voltage:
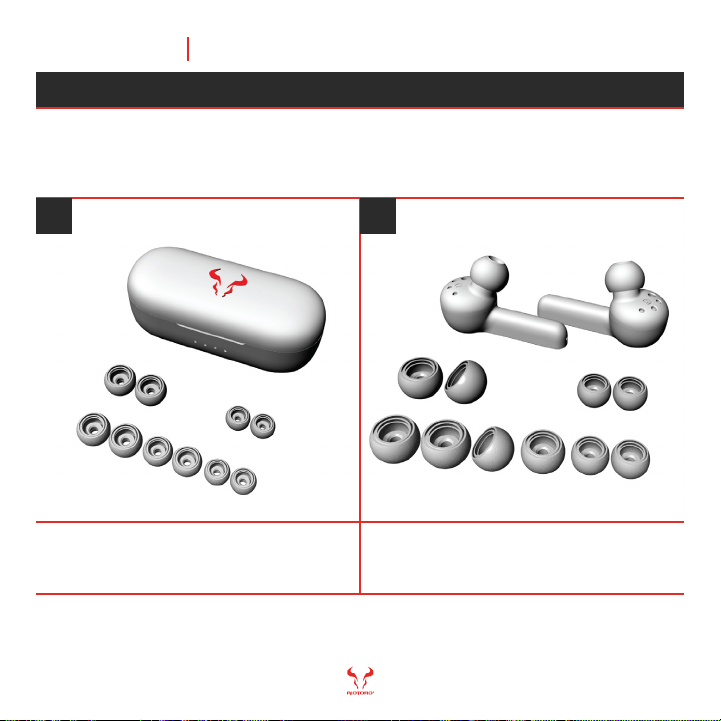
Your RPODS come with two sets (Secure fit / Comfort fit) of small, medium, and
large silicone ear tips. Choose the size or combination of sizes that best fits your
ear.
RPOD CLASSIC TWS RPODS
1 2
Chapter 1 10
CHOOSE YOUR EAR TIPS
Note: RPOD CLASSIC com come with pre-installed medium size ear tips, try using the medium-sized ear tips in your ears, if you
can’t get a good seal, try adjusting the RPOD or switch to a different sized ear tip.
Take the rpods and accessory box out of the
packaging and lay them (up side down) on a flat
surface.
Have a feel of each type of ear tip and choose the
one you like best. Secure fit are recommended for
activities with movement and Comfort fit for
relaxing moments.
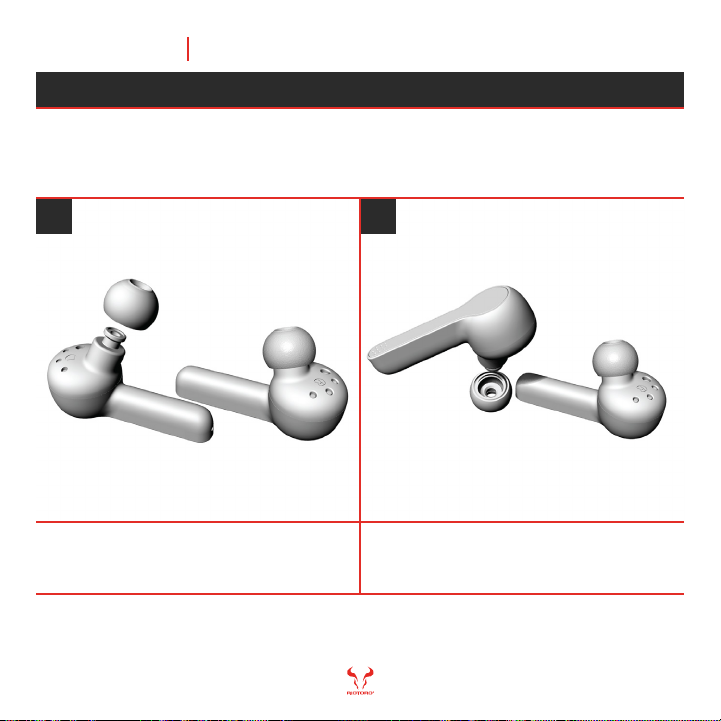
If you need to change the pre-installed medium-sized ear tip, choose the fit and
size you want from the provided options.
To remove an ear tip, pull firmly with your fingers at
the base of the ear tip, where the ear tip is
attached to the RPOD.
To attach an ear tip, align the ear tip with the
connector on the RPOD. Push the ear tip onto the
connector until you hear it click into place.
RPOD CLASSIC TWS RPODS
1 2
Chapter 1 11
HOW TO REMOVE AND ATTACH EAR TIPS

Note: rpods make a double ding sound and green light in on for 2 seconds.
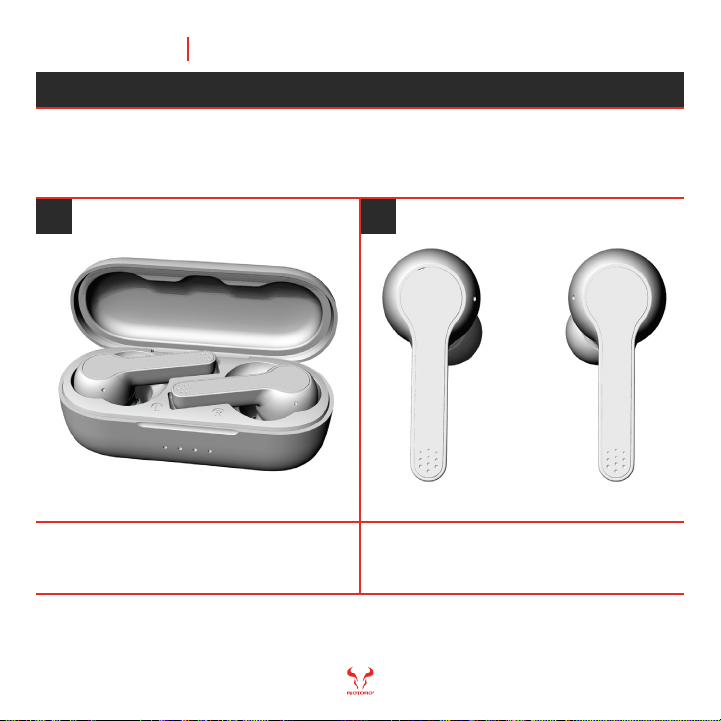
Turning on your RPODS is quick and easy
Hold the multi-function button in both rpods for 3
seconds.
Take out both rpods from the charging box and
they will power on.
1 2
RPOD CLASSIC TWS RPODS
Chapter 1 12
HOW TO TURN ON
Note: rpods make a double ding sound and red light in on for 2 seconds.
Turning off your RPODS is quick and easy
Place rpods into the charging case, they will start
to charge and power off. Make sure both rpods are
in the charging box or else none will power off.
Hold the multi-function button in both rpods for 3
seconds.
1 2
HOW TO TURN OFF
Chapter 2
RPOD CLASSIC TWS RPODS
13

Settings Bluetooth
Bluetooth
MY DEVICES
SPITFIRE X1S PLUS Connected i
OTHER DEVISES
RPOD CLASSIC
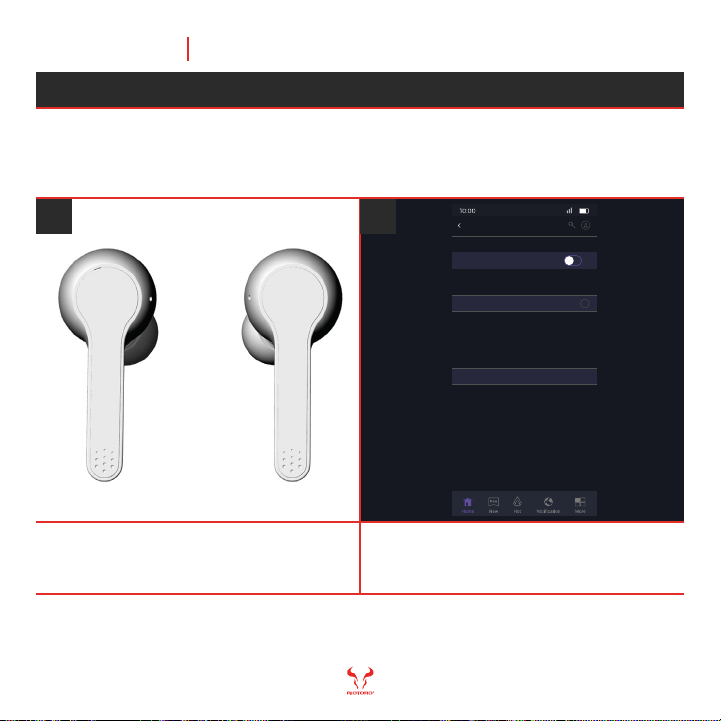
Note: rpods make a triple ding sound and flash red and green lights during pairing mode. Once paired both rpods make double
ding sounds and the light flashes slowly in green.
Make sure the RPODS and Bluetooth enabled device are in close proximity
to each other (no more than 3 feet apart).
Take both rpods out of the charging case, the LED
indicator light will flash repeatedly red and green
indicating they are ready to pair.
Make sue the Bluetooth is turned on in your devise
and select RPOD CLASSIC. Once paired the green
light will flash slowly to indicate connection.
1 2
HOW TO PAIR
Chapter 2
RPOD CLASSIC TWS RPODS
14
Settings Bluetooth
Bluetooth
MY DEVICES
SPITFIRE X1S PLUS Connected i
OTHER DEVISES
RPOD CLASSIC
Note: rpods make a triple ding sound and rapid red and green lights will flash to indicate it is ready to pair.
The RPODS are design to remember the last connected devise.
The RPODS automatically reconnect to the last
paired devise. If they fail to reconnect within 3-5
seconds, they will automatically enter to pairing
mode.
If automatic reconnect does not work, turn off the
Bluetooth, disconnect or forget the RPODS on
your device. They will automatically enter to
pairing mode.
1 2
AUTOMATIC PAIRING / DISCONNECTING
Chapter 2
RPOD CLASSIC TWS RPODS
15

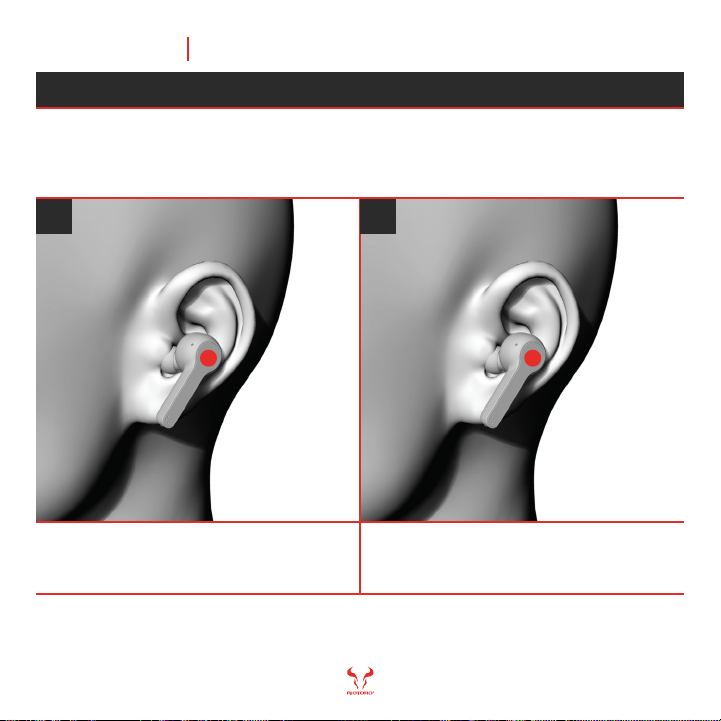
Once you have paired your RPODS you are ready to wear.
Insert the RPODS into your ear and gently make it
fit comfortably.
The ear tips should make a good seal with your ear
canal. When the fit is right, you experience better
noise cancellation and sound.
1 2
HOW TO WEAR
Chapter 2
RPOD CLASSIC TWS RPODS
16

Note: When rpods are low on power they will ding prompt 4 times and red lights will flash every 10 seconds until they are
recharged or turn off. Automatic power down will happen if rpods are not charged.
The RPODS are capable of making and receiving calls from the paired devise.
A triple ding prompt will let you know of incoming
calls. On either RPOD, answer or hang up calls by
tapping the multi-function button once, to reject a
call hold the button for 2 seconds and release.
In order to enable your digital assistant simply
triple tap the multi-function button and wait for
your digital assistant prompt.
1 2
Chapter 2
RPOD CLASSIC TWS RPODS
17
USING FOR CALLS
tap tap
Note: When rpods are low on power they will ding prompt 4 times and red lights will flash every 10 seconds until they are
recharged or turn off. Automatic power down will happen if rpods are not charged.
The RPODS are the perfect peripheral for all your audio needs.
To play / pause, double tap the multi-function
button on either RPOD.
To choose next track, tap the multi-function button
for 2 seconds on the left RPOD. For the previous
track do it on the right RPOD. A single ding prompt
as confirmation.
1 2
USING FOR AUDIO
Chapter 2 18
RPOD CLASSIC TWS RPODS
tap tap

Note: repeat the process until you reach the desired level
You are able to change volume directly on your RPODS.
To increase volume, gently slide your finger from
the multi-function button to the bottom of the right
rpod.
To decrease volume, gently slide your finger from
the multi-function button to the bottom of the Left
rpod.
1 2
HOW TO CONTROL VOLUME
Chapter 2 19
RPOD CLASSIC TWS RPODS
Slide Slide
Table of contents
Other Riotoro Headphones manuals


