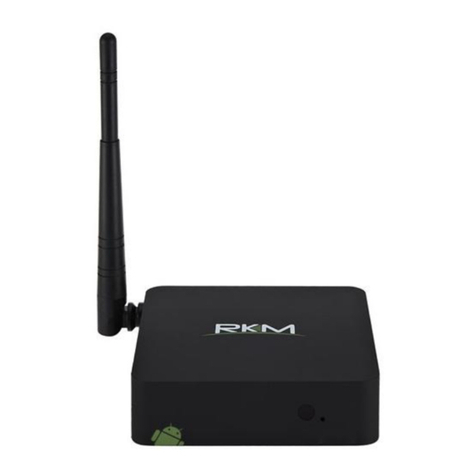
RKM MK902 User manual

RKM MK902 User Manual
Shenzhen Rikomagic Tech Corp.,Ltd

RKM MK902 User Manual
Page1
Table of Contents
Declaration.............................................................................................................................................................................. 2
1. MK902 hardware introduction......................................................................................................................................... 3
1.1 Connector................................................................................................................................................................. 3
1.2 Device connection Instruction............................................................................................................................... 3
2. Boot state............................................................................................................................................................................ 4
3 Main Screen Introduction.................................................................................................................................................. 4
3.1 Move/Delete desktop icon..................................................................................................................................... 5
3.2 Function column...................................................................................................................................................... 6
3.3 Status bar................................................................................................................................................................. 7
3.4 Application................................................................................................................................................................ 7
4. Settings............................................................................................................................................................................... 9
4.1 WIFI Setting..............................................................................................................................................................9
4.2 Ethernet Setting.......................................................................................................................................................9
4.3 Portable host pot..................................................................................................................................................... 9
4.4 Bluetooth .............................................................................................................................................................. 10
4.5 PPPOE Setting...................................................................................................................................................... 10
4.6 USB ....................................................................................................................................................................... 10
4.7 Sound......................................................................................................................................................................10
4.8 Display.................................................................................................................................................................... 10
4.9 Screen.....................................................................................................................................................................10
4.10 Storage................................................................................................................................................................. 11
4.11 Apps....................................................................................................................................................................... 11
4.12 Security................................................................................................................................................................. 11
4.13 Language & input................................................................................................................................................ 11
4.14 Backup & reset.................................................................................................................................................... 12
4.15 Date & time.......................................................................................................................................................... 12
4.16 Developer options...............................................................................................................................................12
4.17 About device........................................................................................................................................................ 12
5. Browse /Copy Files......................................................................................................................................................... 12
6. Install/Uninstall Apps.......................................................................................................................................................13
6.1 Online installation..................................................................................................................................................13
6.2 Local installation....................................................................................................................................................13
6.3 Uninstall Apps........................................................................................................................................................ 13
7. DLNA................................................................................................................................................................................. 13
8. Web Browsing..................................................................................................................................................................14
9. Local audio & video playback........................................................................................................................................14
10. Use virtual keyboard.....................................................................................................................................................14
11. Switch input methods....................................................................................................................................................14
12. System recovery/update.............................................................................................................................................. 15
12.1 Recovery/update on Windows XP system..................................................................................................... 15
12.2 Recovery/update on Windows WIN7 system................................................................................................ 19

RKM MK902 User Manual
Page2
Declaration
The user manual includes all the information of safe and correct operation instruction. To
avoid accident and product damaged, please make sure go through all the content
carefully before using the product.
Please keep the product away from high temperature, humid and dusty environment.
Do not drop or crash the product.
Do not cut off the device when it is formatting, or upgrading, otherwise it will cause
operation system error.
Do not dismantle the device. Do not clean it by alcohol, thinner and Benzene.
We keep the right to upgrade and modify the product.
Disclaimer: we only take the responsibility to provide the warranty and after service. The
users have to take care of their data in the device by themselves. We do not responsible
for any data or related lost.
The product is not waterproof.
All the pictures in the instruction are just for reference.

RKM MK902 User Manual
Page3
1.MK902 hardware introduction
1.1 Connector
1. AV output; 2. HDMI output 3. Optical output
4. RJ45 Ethernet connector 5. DC in 6. USB Host
7. USB Slave 8. Micro SD card slot
1.2 Device connection Instruction
a) Take out the device insert into your TV HDMI port through HDMI cable, make sure TV
setting is HDMI input mode.(Refer to TV set user manual).
b) Charge MK902 by power adapter.
c) Suggest using 2.4G wireless keyboard or mouse. Plug 2.4G receiver on USB Host
connector, if only mouse plugged, the device will provide soft keyboard during operation;
If the device detected the physical keyboard, the soft keyboard will be hidden
automatically.
d) Mouse left button for “ok”, right button for “return”, rolling for page up and page down,

RKM MK902 User Manual
Page4
Keep holding left button to drag icon or copy/paste file.
2. Boot state
After powered around 10 seconds, the boot image will appear first then access to boot animation.
After around 30 seconds, device would access to main screen.
3. Main Screen Introduction

RKM MK902 User Manual
Page5
3.1 Move/Delete desktop icon
Long-press any icon on the main menu, you could put it in any position as you like, at the same time you
could put the other apps shortcut to the desktop.
Long press the icon and move it to the right above “×” and loosen to delete.
Move the cursor to any space and drag towards left or right for page rolling. Also you can use the mouse
wheel for rolling page.

RKM MK902 User Manual
Page6
3.2 Function column
Return button: click to return to previous directory;
Homepage button: click it anytime to return to main menu;
Program button: Click to check all the running program;
Volume decrease button: Click to decrease volume;
Volume increase button: Click to increase volume;
Properties button: in different apps, it shows different contents. It′s equivalent to Windows
properties button;
Soft turn off button.

RKM MK902 User Manual
Page7
Hide icon: click for hide this function bar.
Search button: Located in the top left corner of the main menu, click this icon to pop up webpage
screen, user can input any website here.
Program tools button: Located in the right top corner of the desktop, click this icon to pop up all the
apps which has been installed.
3.3 Status bar
Located on the right bottom, display T-Flash Card, USB connection, Time, WiFi and Download
status.
Click status bar, the hide menu will pop up:
3.4 Application
Click to pop up all the installed APP and setup tools icon.

RKM MK902 User Manual
Page8
1) If the preloaded APP is beyond the first page, drag the page towards right or rolling the
mouse roller to the second page to find other Apps;
2) If you want, you can long-press the APP and drag onto the desktop.
Click to access widgets, long press any widgets to produce corresponding
shortcut on the desktop.

RKM MK902 User Manual
Page9
4. Settings
In the system user can setup according to their own requirements, such as network connection,
language, input methods, Video output resolution, Sound output and check storage space.
Access to setting to pop up below screen.
4.1 WIFI Setting
Once turn on WiFi, the MK902 will auto search available wireless router within 20 meters, user
just choose a router and input correct password to connected network.
4.2 Ethernet Setting
If there is no WIFI in the house, suggest to connect a USB LAN adapter (please select right
matched USB LAN adapter) to setting Ethernet.
Setting method: Click “setting”
“More”
“Ethernet”
tick “Use Ethernet”, then the Ethernet
setting finished.
4.3 Portable host pot
If connected the device with Ethernet (not WiFi ), then open portable host pot function, you could

RKM MK902 User Manual
Page10
regard MK902 as an wireless AP.
4.4 Bluetooth
Open Bluetooth settings--> Scan and search equipment>select a device, input Bluetooth wireless
password (if required)-->confirm. Then complete the Bluetooth pairing.
Notice:
Some equipment, for example, Bluetooth headset maybe have a fixed password (like 000), then
you must input corresponding password.
4.5 PPPOE Setting
If the network need dial-up, then click PPPOE Settings and input account and password.
Click “Setting
“More”
“PPPOE Settings”
input account and password.
4.6 USB
For exchange data between the MK902 and PC.
Operation steps:
Equipment connection: Connect with computer through USB cable, please note you MUST plug
into USB Slave port of the MK902, which is for computer connecting.
4.7 Sound
This is for Sound settings;
Volume: Control volume level;
Operate prompt tone: Setting prompt tone during operating;
Screen saver sound: Setting screen saver sound.
4.8 Display
Font size: Setting font size according to your favorite.
4.9 Screen
This is for Screen settings:
1. Screen ratio: Used for adjusting screen ratio.
2. Output Interface: Default HDMI
3. HDMI mode: User can setting corresponding output resolution according to the TV.
Normally system will auto detective.

RKM MK902 User Manual
Page11
4.10 Storage
In this option, user could view local storage space and external storage space, besides, user
even can uninstall or format storage equipment.
Notice: System divided the whole storage into seven partitions, only two partitions visible, the
other five partition has been occupied by Android system.
The balance space is equal to the sum of two partitions.
4.11 Apps
In this option, user could view installed and running Apps, at same time could check DDR
parameters.
4.12 Security
User can set password according to their request.
4.13 Language & input
1. Setting menu language here, there are more than 60 languages build in already.
2. Setting IME(Input Method Editor),There are only Chinese and English IME build in, if need
other language IME, pls search corresponding IME from APP store and install by yourself.
3. Setting keyboard, mouse cursor speed & simulated mouse step length here.

RKM MK902 User Manual
Page12
4.14 Backup & reset
Backup: Avoid lost some important APPs during reset or update/recovery system, t’s better
chose this function for backup.
Reset: Reset to factory settings.(Pls backup data first before reset)
4.15 Date & time
Since there is no battery inside, date and time set by manual can′t be saved, Suggest setting to
network synchronization time, as long as the network connected, the date and time will be with
the network synchronization.
4.16 Developer options
USB debugging: During connecting with PC to exchange data, please open this option;
4.17 About device
User can check system info here.
5. Browse /Copy Files
5.1 Open file Explorer on the desktop
Internal Flash: Check internal storage space

RKM MK902 User Manual
Page13
SD Card: If TF card inside, icon will be highlight
USB: If USB device (HDD, U-disk) connected, the icon will be highlight.
Network Places: Through this option, user can access to other PC to find files and playback.
5.2. File Copy
Long-press a file or folder to pop-up a menu, including: Copy, Delete, Move, Paste, Rename
options, if no need execute operation, just click “cancel”.
6. Install/Uninstall Apps
MK902 supports many commonly used third-party Apps. You can install or uninstall Apps freely;
there are two methods available for installing Apps.
6.1 Online installation
Please login Google Play store or other Android marketing to download Apps (User should have
Gmail account if download from Google play store); after download system will remind you to
install the Apps, just click install according to the system prompt.
6.2 Local installation
User also can copy Apps from computer to USB Flash or TF card, insert the USB Flash or TF
card to your device, just click the APK icon to install according to the system prompt.
6.3 Uninstall Apps
Click Settings
Apps, click an Apps you want to uninstall, the uninstall window will pop up click
uninstall to uninstall. If you don′t want to uninstall just exit.
7. DLNA
DLNA : Through some special APP(such as iMediaShare Lite.), all the multimedia files can be
pushed from smart phone or Android tablet PC to big screen, user can share those
pictures/music/videos with family or friends freely.

RKM MK902 User Manual
Page14
8. Web Browsing
After connected network, user can access the webpage screen through the system browser.
New opened webpage will be shown on the screen as tag, click “+” to add new webpage, click
“x“ to close the webpage.
9. Local audio & video playback
Through the file manager, user can browse & playback those contents of TF card, USB flash or
USB HDD.
10. Use virtual keyboard
If just connect USB mouse only, then the virtual keyboard will pop up;
If connect with physical keyboard, system will hidden the virtual keyboard.
11. Switch input methods
Click the keyboard icon at the bottom status bar from desktop;
From below screen, select corresponding favorite IME(Input method editor)

RKM MK902 User Manual
Page15
12. System recovery/update
If your MK902 has following issues, please solve these issues by recovery/update methods.
1. If you need update to the latest firmware,
2. After boot, there is no signal;
3. There is only boot screen;
4. System running very slow, crashing;
5. Can’t find the wireless network equipment, or can’t connect wireless;
6. When installation Apps, player loss power unexpected and cant boot up.
7. TF card update failed and can’t boot again etc.
12.1 Recovery/update on Windows XP system
12.1.1 Download recovery tool Batch Tool, driver and recovery firmware,(img file) from
official website.
Download, decompression the folder and find “RKBatch Tool” to double click, below screen will
pop out, then add img file.

RKM MK902 User Manual
Page16
12.1.2 Connect MK902 with computer.
1. Prepare USB cable and plug into PC USB port first(don't connect with USB slave now)
2. Prepare a thin metal stick, press the recover button by the stick according below method.
3. Don’t loose the stick, at same time, plug the USB cable to USB slave port of the MK902, after
3-5s,loose the stick.

RKM MK902 User Manual
Page17
12.1.3 USB driver installation.
There will pop up a guide window to install new driver.
Select “next”
Choose the options as picture display, click “Browse”, find out “USB Driver”, click “Next” to install.
If installation finished, computer will pop up below window, click “Finish” to finish.

RKM MK902 User Manual
Page18
12.1.4 How to recovery/update by RKBatch Tool
After installation, the “connect device” icon on the “batch tool” will changed to green, as below:
Then Click “restore” (the third button of below picture) for recovery, as below.

RKM MK902 User Manual
Page19
This procedure will take around 3minutes, please wait patiently, during recovery/upgrade, don’t
remove the USB cable.Till below screen appeared, means recovery is successful.
12.2 Recovery/update on Windows WIN7 system
12.2.1 Download FW and RKBatch Tool
Pls refer to 12.1.1.
Table of contents
Other RKM Network Hardware manuals
