RKR BMX Installation instructions


RKR is very different from other mini bike brands on the market; It was
designed by riders, for riders and is the product of many years experience
in the BMX industry. This means it’s tough, VERY tough and it works.
A large number of our colourways are created by fans of RKR, making
RKR truly owned by the people who ride it. Everyone has the
opportunity to be involved, so please go to our social media for more
information. Don’t forget to subscribe!
Before you start to get to grips with assembling your new RKR BMX,
please take the time to read this instruction manual carefully. If you are
not proficient with tools and assembling bikes, we suggest you ask
someone who is, to give you a hand.
Tools required for basic assembly/checking
... and for choosing RKR BMX, you have
chosen wisely!
First up: the tools you need to assemble your RKR mini BMX.
• Knife/ scissors
• 5mm + 6mm Allen keys
• 15mm (irok+) or 19mm (R3+) ring/ open spanner
• Pump with Schrader attachment (normal BMX/ car valve)

Carefully cut any straps from
around the box, pop open the
staples (WARNING! These staples
can be very sharp, take great care).
Open the box and lay out the con-
tents. It should look something like
the picture below.
Now carefully remove all foam,
card and plastic packaging using a
knife/scissors. Please be extremely
careful not to damage your new
paintwork. Once all packaging has
been removed, lay out the main
RKR assembly and loose
components and have a visual
check for any significant shipping
damage.
Please note: There may be minor scratches as a result of the courier’s heavy handedness, this is a
fact of mail order that sadly cannot be avoided. Therefore, please note we cannot replace bikes/parts as
a result of minor scratches. Touch up paint is available.
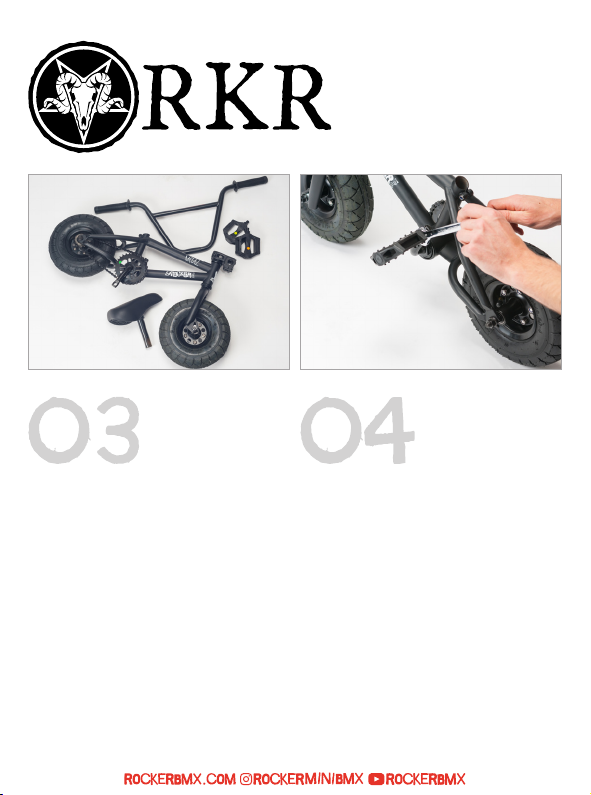
You should now have the main RKR
BMX assembly, some bars with pre
installed grips, a pair of pedals (one
stickered ‘L’, the other stickered ‘R’)
and a seat/post unit. If anything is
missing, now is the time to let us
know.
To make life easier, we are going
to install the pedals first. Thread
the left pedal (stickered ‘L’) into the
crank arm using the 15mm spanner.
Please note, to tighten a left (L)
pedal you must turn anti clockwise
NOT clockwise. Be careful not to
cross thread your crank arm or
pedal axle and make sure the pedal
is done up nice and tight. Running
loose pedals destroys threads very
quickly!

With the left pedal installed you can
now stand the bike up using the
pedal as a bike stand. This makes
the job a lot easier. Now install the
right hand pedal (marked ‘R’), this
time the pedal is turned clockwise
to tighten. Again be careful not to
cross thread the pedal and make
sure the pedal is done up nice and
tight.
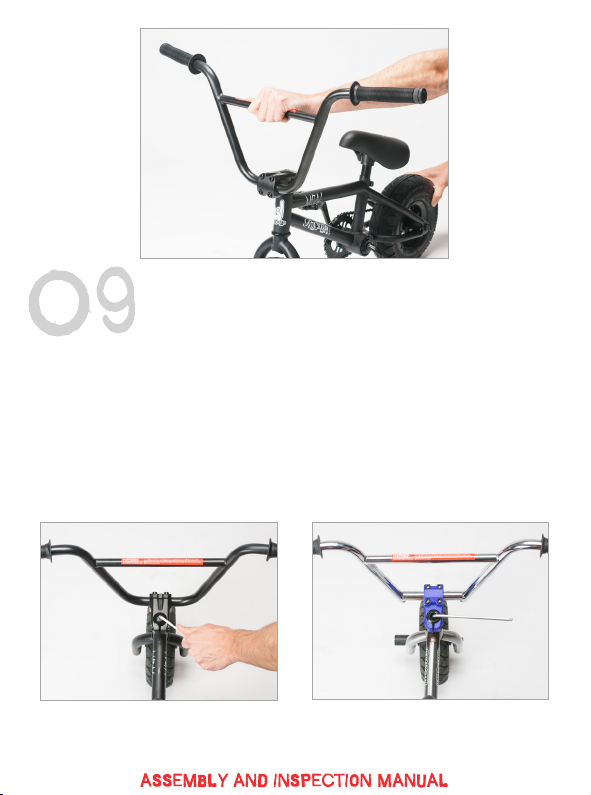
You can now pop the seat in, set to
your desired height & tighten with a
5mm Allen key.
Now, carefully remove the stem
faceplate bolts (X4) with a 6mm
Allen key (their location is indicated
in the above image). If the bolts are
stiff to undo, try using a longer allen
key for more leverage. Ensuring
the correct orientation, hang the
handlebars in the stem bar recess
and carefully replace the stem face-
plate. Be very careful to ensure the
faceplate is tightened evenly and
there is an even gap at the top and
bottom of the faceplate.

Once the faceplate starts to bite
on the bars, spin them up into your
desired position and finally clamp
down the faceplate nice and tight.
Make sure you tighten the bolts in a
cross formation and that the gap at
the top and bottom of the faceplate
is equal to ensure even clamping.
If you find your bars move (later
when riding) you can try applying a
little grease to your faceplate bolts
(threads) which will allow you to
tighten them further still. If you do
apply more grease be sure not to
get any on the clamping area.
Check the front wheel alignment
and adjust as necessary (your stem
rear pinch bolts should still be loose
at this stage. If they are not, loosen
them, their location is indicated in
the above image). When you’re hap-
py that your front wheel is aligned,
nip up the rear bolts then grab your
bars and check for excessive play in
the headset bearings.
If there is excessive play, you can remove it by lightly tightening your
headset pre load bolt (stem pinch bolts MUST be loose during this
operation then re-tightened to check for headset play).
Irok+ and RKR 3+ pre-load bolts differ from each other. You will be able to
clearly see the hex for the Irok+ pre-load bolt after removing the dust cap.
The RKR 3+ features a hidden hex key for a smooth, clean look. This is
situated at the bottom of the recessed area of the pre-load bolt. You will
be able to reach it with a long 6mm Allen key.
Once any ‘rock’ has been dialled out from the headset, check your bars
turn freely left to right, then tighten your stem pinch bolts nice and tight.
irok+ R3+

If you have purchased an Irok+
Coaster or a RKR 3+/Reggie then
your bike has come fitted with a
free coaster. We suggest, for the
first few rides while you get used
too it, that you set the free-coaster
to the shortest engagement (la-
belled 1). This is done through the
access hole in the rear hub. If you
need further help please refer to the
instructional video on our website
and official youtube channel.
Irok+ models come fitted with a
freewheel from factory.
9t drive rear wheels are available
from our website.
Now check your bottom bracket/
crank assembly. If you have an
Irok+ model turn the cranks & look
at the locking nut and cone to make
sure they are not cross threaded.
If you find that they are please use
suitable tools to loosen, re-align
and then pre-load your crank
bearings. (This is very rare - please
call us if you require professional
assistance in such a case).
RKR 3+ models use a 3 piece crank
system with a sealed mid bottom
bracket (BB). Check the crank arm
pinch bolts on either side are tight.
Along with the crank axle bolts and
sprocket bolt on the reverse of the
right hand crank arm. If your cranks
become lose you can tighten them
by loosening the pinch bolts on the
crank arms and tightening the axle
bolts. (The pinch bolts on the crank
arm MUST be loosened before
tightening the axle bolts, otherwise
you will strip the thread from your
bolt and possibly the axle).
Irok+ models use a USA BB as
standard, we manufacture after
market 3 piece cranks and
conversion BB’s with fully sealed
cartridge bearings (USA to 19mm).
Please see our website for details
www.rockerbmx.com should you
wish to upgrade your cranks.
Whilst turning your cranks make
sure that the sprocket has been
installed correctly and runs straight
and true. Tight spots in your chain
will indicate incorrect centering of
your drive sprocket.

Check the rear wheel alignment
and correct as necessary using a
19mm (RKR 3+ and Irok+ coaster)
or 15mm spanner (Irok+) to loosen
the rear wheel nuts. Make sure
you re-tighten your rear wheel nuts
prior to riding your RKR BMX. At
the same time ensure you have the
correct chain tension. Irok+ models
use a freewheel and thus the chain
should NOT be as tight as it would
be on a normal BMX with a ‘driver’.
This will significantly slow down
your rear wheels free spin. Please
see photo, the chain should be
slightly loose but not flapping.
Once you are happy that everything
is aligned and the chain tension is
correct, fully tighten down all axle
nuts on the rear wheel.


