Road Xpedition I-4500 User manual
- 1 -
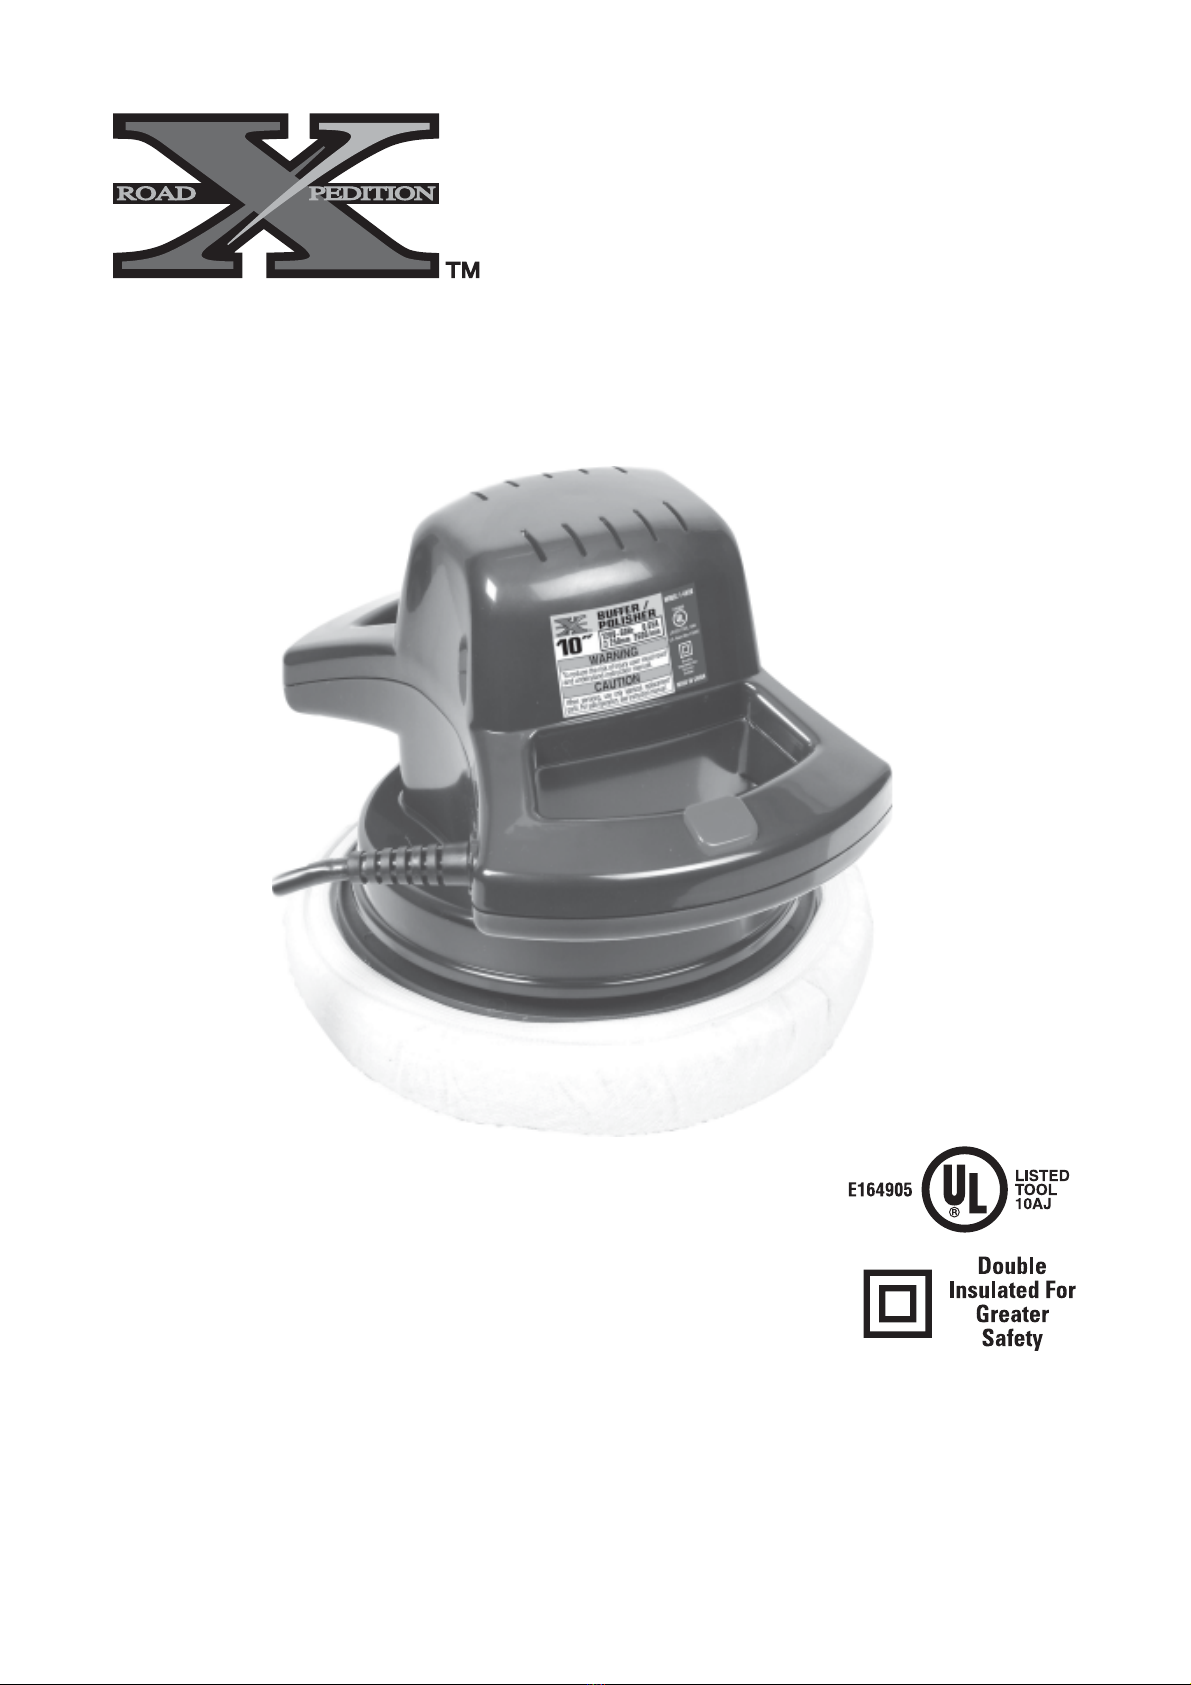
MODEL: I-4500
120Volt 60Hz
• PROFESSIONAL • POWERFUL • PORTABLE
10-In. EXTRA LARGE
AUTOMOTIVE
Buffer/Polisher
Patent. Des. NP. 378,002
Shinn Fu Company of America, Inc. © 2004
10939 N. Pomona Ave.
Kansas City, MO 64153
Phone (816)891-6390, fax (816)891-6599 Printed in China
WARNING:
Carefully Read Instructions and procedures for Safe Operation

- 2 -
WARNING:
When using electric tools, basic safety precautions should always be followed to reduce the risk of
fire, electric shock, and personal injury, including the following:
READ ALL INSTRUCTIONS
For All Grounded Tools:
1. Grounding Instructions – This tool should be grounded while in use to protect the operator from
electric shock. The tool is equipped with a 3-conductor cord and 3-prong grounding type plug to fit
the proper grounding type receptacle. The green (or green and yellow) conductor in the cord is
the grounding wire. Never connect the green (or green and yellow) wire to a live terminal. If your
unit is for use on less than 150 V, it has a plug that looks like that shown in sketch (A) in figure
below. If it is for use on 150 to 250 V, it has a plug that looks like that shown in sketch (A) type
plugs to 2-prong receptacles. The green-colored rigid ear, lug or the like, extending from the
adapter must be connected to a permanent ground, such as a property grounded outlet box. No
adapter is available for a plug as shown in sketch (D).
GROUNDING METHODS
2. Extension Cords – Use only 3-wire extension cords that have 3-prong grounding type plugs and
3-pole receptacles that accept the fool’s plug. Replace or repair damaged cords.
FOR ALL TOOLS:
1. Keep Work Area Clean - Cluttered areas invite injuries.
2. Consider Work Area Environment -
- Don’t expose auto polisher to rain.
- Don’t use auto polisher in damp or wet locations.
- Keep work area well lit.
- Do not use auto polisher in presence or flammable liquids or gases.
2a. Guard Against Electric Shock - Prevent body contact with grounded surfaces. For examples:
pipes, radiators, ranges, refrigerator enclosures.
3. Keep Children Away - Do not let people or pets, especially children, contact auto polisher or
extension cord. Only properly trained individuals should be allowed in and around the work area.
4. Store Auto Polisher -When not in use, store Polisher in a clean, dry environment. Ensure polisher
is out of reach of children AT ALL TIMES.
5. Don’t Force Auto Polisher - It will do the job better and safer at the rate for which it was intended.
6. Use Right Tool - Don’t force small tool or attachment to do the job of a heavy-duty tool.
(A) (B) (C) (D)
Adapter
Grounding
Blade
Cover of Grounded
Outlet Box
Grounding
Means
Grounding
Blade

- 3 -
7. Dress Properly - Do not wear loose clothing or jewelry. They can be caught in moving parts.
Rubber gloves and non-skid footwear are recommended when working outdoors. Wear protective
hair covering to contain long hair.
8. Use Safety Glasses - Also use face or dust mask if operation is dusty.
9. Don’t Abuse Cord - Never carry auto polisher by cord or yank it to disconnect from receptacle.
Keep cord from heat, oil, and sharp edges.
10. Don’t Overreach - Keep proper footing and balance at all times.
11. Maintain Auto Polisher With Care - Keep auto polisher clean for better and safer performance.
Inspect auto polisher cords periodically and if damaged, have repaired by authorized service
facility. Inspect extension cords periodically and replace if damaged. Keep handles dry, clean,
and free from oil and grease.
12. Disconnect Auto Polisher - When not in use, before servicing, when changing pad cover.
13. Remove Adjusting Keys and Wrenches - Form habit of checking to see that keys and adjusting
wrenches are removed from tool before turning it on.
14. Avoid Unintentional Starting - Don’t carry plugged-in auto polisher with finger on switch. Be
sure switch is off when plugged in.
15. Outdoor Use Extension Cords - When auto polisher is used outdoors, use only extension cords
intended for use outdoors and so marked.
16. Stay Alert - Watch what you are doing. Use common sense. Do not operate auto polisher when
you are tired.
17. Check Damaged Parts - Before further use of the auto polisher, a guard or other part that is
damaged should be carefully checked to determine that it will operate properly and perform its
intended function. Check for alignment of moving parts, binding of moving parts, breakage of
parts, mounting, and any other conditions that may affect its operation. A guard or other part that
is damaged should be properly repaired or replaced by an authorized service center unless
otherwise indicated elsewhere in this instruction manual.
Have defective switches replaced by authorized service center.
Do not use auto polisher if switch does not turn it on and off.
Do not put fingers or any objects between the skirt and buffer pad while polisher is on.
Do not allow the auto polisher to operate without it being held to or against a stationary surface.
The freewheeling buffer pad can throw off the pad cover.
18. Double insulated tools are equipped with a polarized plug (one blade is wider than the other). This
plug will fit in a polarized outlet only one way. If the plug does not fit fully in the outlet, reverse the
plug. If it still does not fit, contact a qualified electrician to install a polarized outlet. Do not change
the plug in any way.
SAVE THESE INSTRUCTIONS
CARE AND MAINTENANCE OF YOUR POLISHER
1. Pad cover can be machine-washed in cold water with a small amount of detergent on a few
minute cycle; then machine-dried at medium heat. However, hand washing and air drying is
recommended for longer pad cover life.
2. To prolong pad life and shape, store polisher with pad face up.
3. Remove pad cover from pad when polisher is not in use so that pad can dry out and retain its
original shape.
4. Grip the polisher firmly but without downward pressure. Pressing too hard will slow down the
machine’s movement and affect the quality of the work.

WAXING SYSTEM INSTRUCTIONS
Before you begin, make sure your car is clean and dry. The work area should be dry also.
1. Place clean pad cover securely on pad as shown (A). Do not apply synthetic wool pad cover for
waxing.
2. Spread about a heaping teaspoonful of wax, evenly over the entire surface of the pad cover (B).
3. Apply about twice that quantity of Cleaner / Glaze over wax on pad cover (C). Do not apply
directly to car. This first application should do 1/3 of the car. For the second and third applications
of wax and cleaner/glaze, use half the quantity stated above. Pad cover will not absorb as much
when reloading.
4. Always start and stop polisher on or against the car surface. (D).
Hold extension cord over shoulder and do flat surfaces first-hood, trunk and roof. Cover areas
quickly with broad, sweeping strokes in a criss-cross pattern. Do not press down on polisher. The
machine’s action, not pressure, does the best job.
5. Finally, remove pad cover and hand polish all hard-to-reach surfaces; under the bumpers, around
the door handles, etc. Put a clean pad cover on the polisher. Remove chemicals in the same
order they were applied. Synthetic wool pad may have better work result. Use long, sweeping
strokes in a criss-cross pattern. Do not press hard. Let the polisher do the work.
- 4 -
5. The most common error, however, is applying too much wax and cleaner/glaze. If pad absorbs
too much chemical, it will not last as long. And polishing is more difficult and takes longer.
6. If pad cover continually comes off pad, you may be using too much wax and cleaner/glaze.
7. If wax seems difficult to buff, you may have used too much wax.
8. Use only mild soap and damp sponge to clean polisher. Do not immerse any part in liquid. If
polisher needs repair, use only identical replacement parts as listed in the following.
ITEM
45001 TOP HOUSING
45002 BOTTOM HOUSING
45006 PAD HOLDER
45007 PAD
45008 PAD COVER
SPECIFICATION
120 VOLT AC, 60 HZ
RPM: 2600
RATED CURRENT: 0.65 AMPS
WEIGHT: 2.35KG
A B C D

- 5 -
TO REMOVE PAD
Insert a screwdriver of any type, between polisher and
pad as shown. Use a flat bladed screwdriver to remove
and install pad. Turn clockwise to remove, counter
clockwise to install.
PARTS LIST
DESCRIPTION ITEM NO.
1. TOP HOUSING 45001
2. BOTTOM HOUSING 45002
4. PAD HOLDER 45006
5. PAD 45007
6. PAD COVER 45008
1
2
3
4
5

- 6 -
90 DAY LIMITED WARRANTY
For a period of ninety (90) days from date of purchase, Shinn Fu Co. of America, Inc. will
repair or replace, at its option, without charge, any of its products which fails due to a defect in
material or workmanship, or which fails to conform to any implied warranty not excluded hereby.
Performance of any obligation under this warranty may be obtained by returning the warranted product,
freight prepaid, to Shinn Fu Co. of America, Inc. Warranty Service Department, 10939 N. Pomona
Ave., Kansas City, MO 64153.
Except where such limitations and exclusions are specifically prohibited by applicable law,
(1) the CONSUMER'S SOLE AND EXCLUSIVE REMEDY SHALL BE THE REPAIR OR
REPLACEMENT OF DEFECTIVE PRODUCTS AS DESCRIBED ABOVE, and (2) Shinn Fu Co. of
America, Inc. SHALL NOT BE LIABLE FOR ANY CONSEQUENTIAL OR INCIDENTAL DAMAGE
OR LOSS WHATSOEVER, and (3) THE DURATION OF ANY AND ALL EXPRESSED AND IMPLIED
WARRANTIES, INCLUDING WITHOUT LIMITATION, ANY WARRANTIES OF MERCHANTABILITY
AND FITNESS FOR A PARTICULAR PURPOSE, IS LIMITED TO A PERIOD OF NINETY (90) DAYS
FROM DATE OF PURCHASE.
Some states do not allow limitations on how long an implied warranty lasts, so the above
limitation may not apply to you. Some states do not allow the exclusion or limitation of incidental or
consequential damages, so the above limitation or exclusion may not apply to you. This warranty
gives you specific legal rights, and you may also have other rights which vary from state to state.
Table of contents
Other Road Xpedition Sander manuals

Popular Sander manuals by other brands


Feider Machines
Feider Machines FPG750LED Original instructions

Powermatic
Powermatic WB-37 Operating instructions and parts manual

Tornador
Tornador T-21 Operator's safety & operating instruction manual

Fein
Fein MSf 636-1 Specification sheet

Parkside
Parkside PAHS 12 B2 instruction manual

Benchmark
Benchmark 1262-200 manual