Roadstar CD-900USMPNC User manual

R
Double DIN Car Stereo CD/USB/SD/MMC
MP3 with MW/FM Stereo Radio, Radio Data
System and Detachable Front Panel System
Instructionmanual
Bedienungsanleitung
Manueld’instructions
Manualed’istruzioni
Manualdeinstrucciones
Manualdeinstruções
CD-900USMPNC
R
AUTO-HIFI
This product meets the essential requirements laid down by EEC Directive 89/336
and has been built in accordance with European standards EN50013, EN50020.
Dieses Produkt entspricht den Mindestanforderungen laut EU-Richtlinie 89/336 und
wurde gemäß den Normen EN50013, EN50020.
Se produit répond aux critères minima prévus par la directive 89/336/CEE et il a été
construit conformément aux normes EN50013, EN50020.
Questo prodotto soddisfa i requisiti minimi previsti dalla direttiva 89/336/CEE ed é
stato costruito in conformitá alle norme EN50013, EN50020.
Este producto cumple con todos los requisitos dispuestos por la directiva 89/336/EEC
y ha sido fabricado conformemente con las normas EN50013, EN50020.
O produto satisfaz os requisitos minimos previstos pela directiva 89/336/CEE e foi
fabricado em conformidade com as normas EN50013, EN50020.
R
AUTO-HIFI
is a registered Trademark of Roadstar S.A. - Switzerland All rights reserved

English Page 1
Deutsch Seite 13
Français Page 25
Italiano Pagina 37
Español Página 49
Portuguès Pagina 61
INDEX CD-900USMPNC
Fig.
Fig.
• Your new unit was manufactured and assembled
under strict ROADSTAR quality control.
Thank-you for purchasing our product for your
music enjoyment.
Before operating the unit, please read this in-
struction manual carefully. Keep it also handy for
further future references.
• Ihr neues Gerät wurde unter Beachtung der
strengen ROADSTAR-Qualitätsvorschriften
gefertigt.
WirdankenIhnenfürdenKaufunseresProduktes
und wünschen Ihnen optimalen Hörgenuss. Bitte
lesen Sie diese Bedienungsanleitung durch, und
heben Sie sie auf, um jederzeit darin
nachschlagen zu können.
• Votre nouvel appareil a été fabriqué et monté en
étant soumis aux nombreaux tests ROADSTAR.
Nous espérons que cet appareil vous donnera
entière satisfaction.
Avant de vous adonner à ces activités, veuillez
lire attentivement ce manuel d’instructions.
Conservez-le à portée de main à fin de référence
ultérieure.
• Il vostro nuovo apparecchio è stato prodotto ed
assemblato sotto lo stretto controllo di qualità
ROADSTAR.
Vi ringraziamo di aver acquistato un nostro
prodotto per il vostro piacere d’ascolto.
Prima di procedere all'utilizzo dell'apparecchio,
leggete attentamente il manuale d’istruzioni e
tenetelo sempre a portata di mano per futuri
riferimenti.
• Vuestro nuevo sistema ha sido construido según
las normas estrictas de control de calidad
ROADSTAR.
Le felicitamos y le damos las gracias por su
eleccióndeesteaparado. Porfavorleerelmanual
antes de poner en funcionamiento el equipo y
guardar esta documentación en case de que se
necesite nuevamente.
• Seu novo aparelho foi construido e montado sob
o estrito controle de qualidade da ROADSTAR.
Agradecemos por ter comprado nosso produto
para a sua diversão.
Antes de usar esta unidade é necessário ler
com atençâo este manual de instruçâes pare
que possa ser usada apropriadamente;
mantenha o manual ao seu alcance para outras
informaçâes.
12 2114310
7624
16
23
1
5
14
26
9
8
21
22
13 15
25
SD
17 18 19 20

DeutschDeutsch
CAUTION
RISK OF ELECTRIC
SHOCK
DO NOT OPEN
13 14
CD-900USMPNC
Auto-CD/CD-R/CD-RW/MP3-Spieler mit USB/SD, PLL-UKW/Stereo-Radio
Radio-Daten-System mit PTY und abnehmbares Bedienteil.
BEDIENUNGSANLEITUNG
Bitte lesen Sie aufmerksam diese Bedienungsanleitung, um sich mit Ihrem neuen Autoradio
vertraut zu machen, bevor Sie es zum ersten Mal in Betrieb nehmen. Bitte bewahren Sie diese
Anleitung auf, um später jederzeit nachschlagen zu können.
INHALTSVERZEICHNIS
• Lage der Bedienungselemente
• Merkmale
• Installation
• Vorsichtsmaßnahmen und Wartung
• Anschlüsse
• Funktionsanleitungen
• Technische Daten
LAGEDERBEDIENUNGSELEMENTE
1. Netztaste EIN/AUS
2. Automatisches Anhoren beim Scannen (SCN)
3. Lautstärkeregelung AB /AUF (+,- Bässe/Höhen/Balance/Fader)
4. Vorwahl-Tasten (1,2,3,4,5,6)
5. AF-Taste
6. TA-Taste
7. PTY-Taste
8. Bedienteil-öffnen-taste
9. Modus-Taste (MODE)
10. Band-Taste/ LOUD / ENTER
11. Auto/Manuell-Suchlauf AB (<<)/ Suchlauf AUF (>>)/CD-Spuren
12. Auto-Suchlauf-Taste (AS)
13. LCD-Anzeige
14. Bedienteil-Entriegelungstaste
15. CD-Schublade
16. CD-Auswurf-Taste
17. CD / USB / SD-Pause-Taste
SICHERHEITSHINWEISE
Das Ausrufszeichen im Dreieck weist den Benutzer auf wichtige
Bedienungs- und Wartungsanweisungen (Service) in diesem Handbuch
hin, die unbedingt zu befolgen sind.
Das Blitzsymbol im Dreieck weist den Benutzer auf “gefährliche
Spannungen” an einigen freiliegenden Bauteilen im Innem des Gerätes
hin.
Um die Gefahr elektrischer Schläge auszuschliessen, Gehäuse auf keinen
Fall abnehmen. Im Innem befinden sich keine vom Benutzer selbst
instandsetz-barenTeile. Reparaturen dürfen nur von einer autorisierten
Fachwerkstatt durchgeführt werden.
Dunkelstrahlung bei geöffneten Geräten und defektem Verschluss.
Bedienung oder Regulierung der technischen Eigenschaften oder
sonstige nicht spezifierte Prozeduren auf dieser manuellen Betriebsart
können zurAusetzung gefährlicher Laserstrahlen führen.
Setzen Sie das Gerät weder Feuchtigkeit noch Regen aus.
Stellen Sie das Gerät so auf, dass immer eine ungestörte Frischluftzufuhr
sichergestellt ist.
Setzen Sie das Gerät weder direkter Sonneneinstrahlung noch
Wärmequellen aus.
Korrekte Entsorgung dieses Produkts (Elektromüll)
Die Kennzeichnung auf dem Produkt bzw. auf der dazugehörigen
Literatur gibt an, dass es nach seiner Lebensdauer nicht zusammen
mit dem normalen HaushaltsmüIl entsorgt werden darf. Entsorgen Sie
dieses Gerat bitte getrennt von anderen Abfallen, um der Umwelt bzw.
der menschlichen Gesundheit nicht durch unkontrollierte
Müllbeseitigung zu schaden. Recyceln Sie das Gerät, um die
nachhaltige Wiederverwertung von stofflichen Ressourcen zu fördern.
Private Nutzer sollten den Händler, bei dem das Produkt gekauft wurde,
oder die zuständigen Behörden kontaktieren, um in Erfahrung zu
bringen, wie sie das Gerät auf umweltfreundliche Weise recyceln
können.
Gewerbliche Nutzer sollten sich an Ihren Lieferanten wenden und die
Bedingungen des Verkaufsvertrags konsultieren. Dieses Produkt darf
nicht zusammen mit anderem Gewerbemüll entsorgt werden.

DeutschDeutsch 15 16
18. CD / USB / SD-Intro-Taste (CD SCAN)
19. CD / USB / SD-Wiederhol-Taste (REPEAT)
20. CD / USB / SD-Zufallswiedergabe-Taste (SHUFFLE)
21. USB-Porte
22. FERNBEDIENUNG IR-Sensor
23. FRONTBEDIENTEILS
24. MUTE-Taste
25.RESET-Taste
26. AUX-IN AUDIO
MERKMALE
Dieses Gerät ist mit einem abnehmbaren Frontbedienteil, AM / UKW-Stereo und einem CD/
CD-R/CD-RW/MP3-USB / SD / Kassette Spieler mit den folgenden Merkmalen ausgestattet:
• Elektronische Lautstärke-, Tiefen- Höhen-, Fader- und Balance-Regler.
• Genaues elektronisches Abstimmen durch den Phasenkuppelungsring (P.L.L.)-Schaltkreis.
• 30 programm. Stationsspeicher (6AM1 / 6AM2 / 6UKW 1/ 6UKW2 / 6UKW3)
• Loudness-Regler
• Leicht zu betätigende Netztaste Ein/Aus
• Manueller/Automatischer (Seek)/Abstimmknopf Auf und Ab
• Bandwahlschalter (BND) zur Wahl von AM1, AM2, UKW1-UKW2 oder UKW3
• Display-Funktionen (Frequenz, Stationsname, Programmtyp, Uhr)
• Uhr-Funktion in RDS
• CD- und MP3-Spieler
• Vorverstärkte-Ausgang (RCA, rückseitig) zum Anschluß eines Leistungsverstärkers
• Abnehmbares Frontbedienteil zum Schutz gegen Diebstahl
• Beleuchtungssystem
• RDS-Funktion: PI (Programm-Identifikation) TA (Verkehrsdurchsage)
PS (Programmdienstname) PTY (Programmtyp)
AF (List der Alternativfrequenzen) TP (Traffic Program)
INSTALLATION
VORSICHTSMASSNAHMEN
• Wählen Sie sorgfältig, wo Sie Ihr Autoradio einbauen möchten, damit das Gerät nicht
die normale Fahrtätigkeit des Fahrers beeinflußt.
• Vermeiden Sie, das Gerät dort zu installieren, wo es hohen Temperaturen, wie dem
direkten Sonnenlicht oder Heißluft vom Heizer, oder wo es Staub, Schmutz oder
übermäßigen Schwingungen ausgesetzt werden könnte.
• Verwenden Sie nur das mitgelieferte Montagematerial, um eine sichere Installation
zu garantieren.
• Bevor Sie das Gerät installieren, entfernen Sie das Frontbedienteil.
RegulierungdesMontagewinkels
Der Montagewinkel muß kleiner als 20º sein.
Montagebeispiel
EinbauinsArmaturenbrett

DeutschDeutsch 17 18
AbnehmenundAnbringendesFrontbedienteils
Das Frontbedienteil dieses Gerätes kann abgenommen werden, um Diebstahl vorzubeugen.
ABNEHMENDESFRONTBEDIENTEILS
Bevor Sie das Frontbedienteil abnehmen, drücken Sie zuerst die POWER-Taste (1).
Dann drücken Sie die ENTRIEGELUNGSTASTE-Taste (14) und nehmen das Bedienteil ab,
indem Sie es herausziehen, wie in der Abbildung gezeigt .
ANBRINGEN DES FRONTBEDIENTEILS
Nehmen Sie die rechte Seite des Frontbedienteils und setzen Sie es auf das Gerät, wie in
der Abbildung gezeigt, und drücken Sie, bis es einrastet.
Bitte beachten Sie, dabei keinen Druck auf das Display oder die Bedienungstasten
auszuüben.
Hinweise:
• Vergewissern Sie sich, daß Sie das Frontbedienteil richtig herum auf das Gerät
aufsetzen.
• Drücken Sie das Frontbedienteil nicht zu stark gegen das Gerät, wenn Sie es
aufsetzen. Es kann einfach angebracht werden, indem Sie es leicht gegen das Gerät
drücken. Wenn Sie das Frontbedienteil mit sich nehmen, legen Sie es in die
mitgelieferte Schutzhülle.
• Drücken Sie nicht zu stark oder mit übermäßiger Kraft auf das Display-Fenster des
Frontbedienteils, wenn Sie es am Gerät anbringen.
BUILD-IN ISO-ANSCHLUSSTEIL
ANSCHLUSSTEILA
1.
2.
3.
4. SPEICHER +12V
5. AUTOANTENNENAUSGANG
6.
7. +12V (AN DEN ZÜNDSCHLÜSSEL)
8. ERDUNG
Hinweis:
Der +12V Draht (Anschlußteil A Nr.7) muß an die Autozündung angeschlossen werden, um
zu vermeiden, daß die Autobatterie entladen wird, wenn das Auto längere Zeit nicht benutzt
wird.
ANSCHLUSSTEILB
1. HINTERER RECHTER LAUTSPRECHER (+)
2. HINTERER RECHTER LAUTSPRECHER (-)
3. VORDERER RECHTER LAUTSPRECHER (+)
4. VORDERER RECHTER LAUTSPRECHER (-)
5. VORDERER LINKER LAUTSPRECHER (+)
6. VORDERER LINKER LAUTSPRECHER (-)
7. HINTERER LINKER LAUTSPRECHER (+)
8. HINTERER LINKER LAUTSPRECHER (-)
Wartung
ERSETZEN DERSICHERUNG
Wenn die Sicherung durchgebrannt ist, überprüfen Sie den Netzanschluß und ersetzen Sie
die Sicherung. Wenn die Sicherung nach dem Ersetzen erneut durchbrennt, könnte ein
internes Funktionsproblem vorliegen. In diesem Falle wenden Sie sich an Ihr nächstes
Kundendienstzentrum.
Achtung
Verwenden Sie für jedes Kabel die vorgeschriebene Amperestärke. Wenn Sie eine Sicherung
mit höherer Amperestärke verwenden, könnte das ernsthafte Schäden verursachen.
FUNKTIONSANWEISUNGEN
1.NETZTASTEEIN/AUS (POWER)
Setzen Sie das Frontbedienteil auf das Gerät auf und drücken Sie die Netztaste, um das Gerät
einzuschalten. Drücken Sie erneut die POWER-Taste, um das Gerät auszuschalten und
drücken Sie die ENTRIEGELUNGS-Taste (14), um das Frontbedienteil freizugeben.
Hinweis: Entriegeln Sie das Frontbedienteil niemals, wenn das Gerät eingeschaltet ist.
Strom fließt auch, wenn das Autoradio ausgeschaltet ist.
2.AUTOMATISCHESANH–RENBEIMSCANNEN(SCN)
Diese Taste hat die Funktion RADIO SCANNEN. Diese Funktion ist der normalen
automatischen Suche -hnlich, aber der abgestimmte Senderwird 5 Sekunden lang angehirt.
3.WAHL-TASTE(ENTER)/LAUTSTÄRKEREGELUNG
Der Knopf VOLUME reguliert die LAUTSTÄRKE. Um andere Funktionen zu wählen, drücken
Sie kurz die WAHL-Taste, bis die gewünschte Funktion auf dem Display erscheint. In der
Abbildung 1 wird gezeigt, wie die Kontrollfunktionen gewählt werden, wenn Sie die WAHL-
Taste drücken.

DeutschDeutsch
1. Abbildung der Klangfunktionen
1. LAUTSTÄRKE (Knopf drehen)
2. WAHL (SEL) (drücken)
3. BÄSSE
4. HÖHEN
5. BALANCE
6. FADER
7. EQUALIZER
3.LAUTSTÄRKEREGELUNG
Erhöhung und Erniedrigung der Lautstärke ist durch den VOLUME-Regler möglich. Dieser
Knopf hat die gleiche Funktion auch bei Bässen, Höhen, Balance und Fader, wenn sie durch
die WAHL-Taste (3) gewählt sind.
4.VORAUSWAHLEN(1,2,3,4,5,6)
(A)BETRIEBRADIO:
Durch einen leichten Druck auf diese Tasten kann man direkt einen vorher ausgewählten
Sender anwählen. Wird die Taste länger als 1 Sekunde gedrückt, wird der gerade eingestellte
Sender gespeichert. Ist der PTY Modus aktiv, wird die PTY Taste wie folgt unterteilt:
PTY Gruppe Musik ----- PTY Gruppe gesprochen ----- AUS
MUSK GESPROCHEN
1.POP Musik, ROCK Musik 1.NACHRICHTEN, WIRTSCHAFT, INFOS
2.UNTERHALTUNGS Musik 2.SPORT, ERZIEHUNG, DRAMEN
3.KLASSIK, ANDERE Musik 3.KULTUR, WISSENSCHAFT, VERSCHIEDENES
4.JAZZ,COUNTRY 4.WETTERVORHERSAGEN, FINANZEN, KINDER
5.NATION M, OLDIES 5.SOZIALES, RELIGION, TELEFON
6.VOLKS Musik 6.REISEN, UNTERHALTUNG, DOKUMENTATIONEN
(B)BETRIEBCD/MP3PLAYER:
1. PAUSE 2. INTRO 3. WIEDERHOLEN 4. ZUFÄLLIG
DIERDSFUNKTION.WASBEDEUTETRDSSYSTEM?
RDS (Radio Data System) ist die Abkürzung für ein digitales Radio-Informations-System,das
19 20
von EBU (European Broadcasting Union) entwickelt und auf dem Markt eingeführt wurde.
Über die normalen FM Übertragungssender ausgestrahlt, bietet RDS eine Reihe Informationen
wie z.B. den Sendernamen, das Programm, Verkehrsnachrichten und nützliche Funktionen
wie die automatische Abstimmung der besten im gewählten Programm zur Verfügung
stehenden Signale.
5.AF/REG‘Funktion(ALTERNATIVEFREQUENZEN)
Mit einem leichten Tastendruck wählt man den AF/REG Modus.
Wenn der AF/REG ausgewählt wird, kontrolliert das Radio ständig das AF Signal. Drückt
man die Taste länger als 2 Sekunden, wird der Modus Regional EIN/AUS aktiviert.
–ModusRegionalEIN:
Die AF Umschaltung oder die PI SEEK Suche ist auf all die Sender ausgeweitet, die den
gleichen PI Code des momentan eingestellten Senders haben. Es erscheint die Schrift
REG auf dem Display.
–ModusRegionalAUS
Der Regionalcode im PI Format wird ignoriert, wenn die AF Umschaltung oder die PI SEEK
Suche auf alle Sender ausgeweitet ist.
6.‘TA’FUNKTION(VERKEHRSFUNK)
Bei leichtem Tastendruck wird der Modus TA ein oder aus gewählt.
Wenn der TA Modus ausgewählt und eine Verkehrsnachricht übertragen wird
– Wenn das Gerät auf der Betriebsart CD/USB/SD-MP3 steht, wird zeitweilig auf Radio
umgeschaltet.
– Ist nur eine geringe und nicht gut hörbare Lautstärke eingestellt, wird diese auf ein gut
hörbares Niveau erhöht.
7.‚PTY‘Funktion(PROGRAMMTYP)
PTY MUSIK ----- PTY GESRPOCHEN ----- PTY AUS
Wählt man PTY, hängt das Programm wie vorher beschrieben von den Vorauswahltasten ab.
Wenn man PTY wählt, beginnt das Radio mit der Suche nach entsprechenden PTY- Infor-
mationen und stoppt mit der Suche, wenn die entsprechende PTY Information gefunden wird.
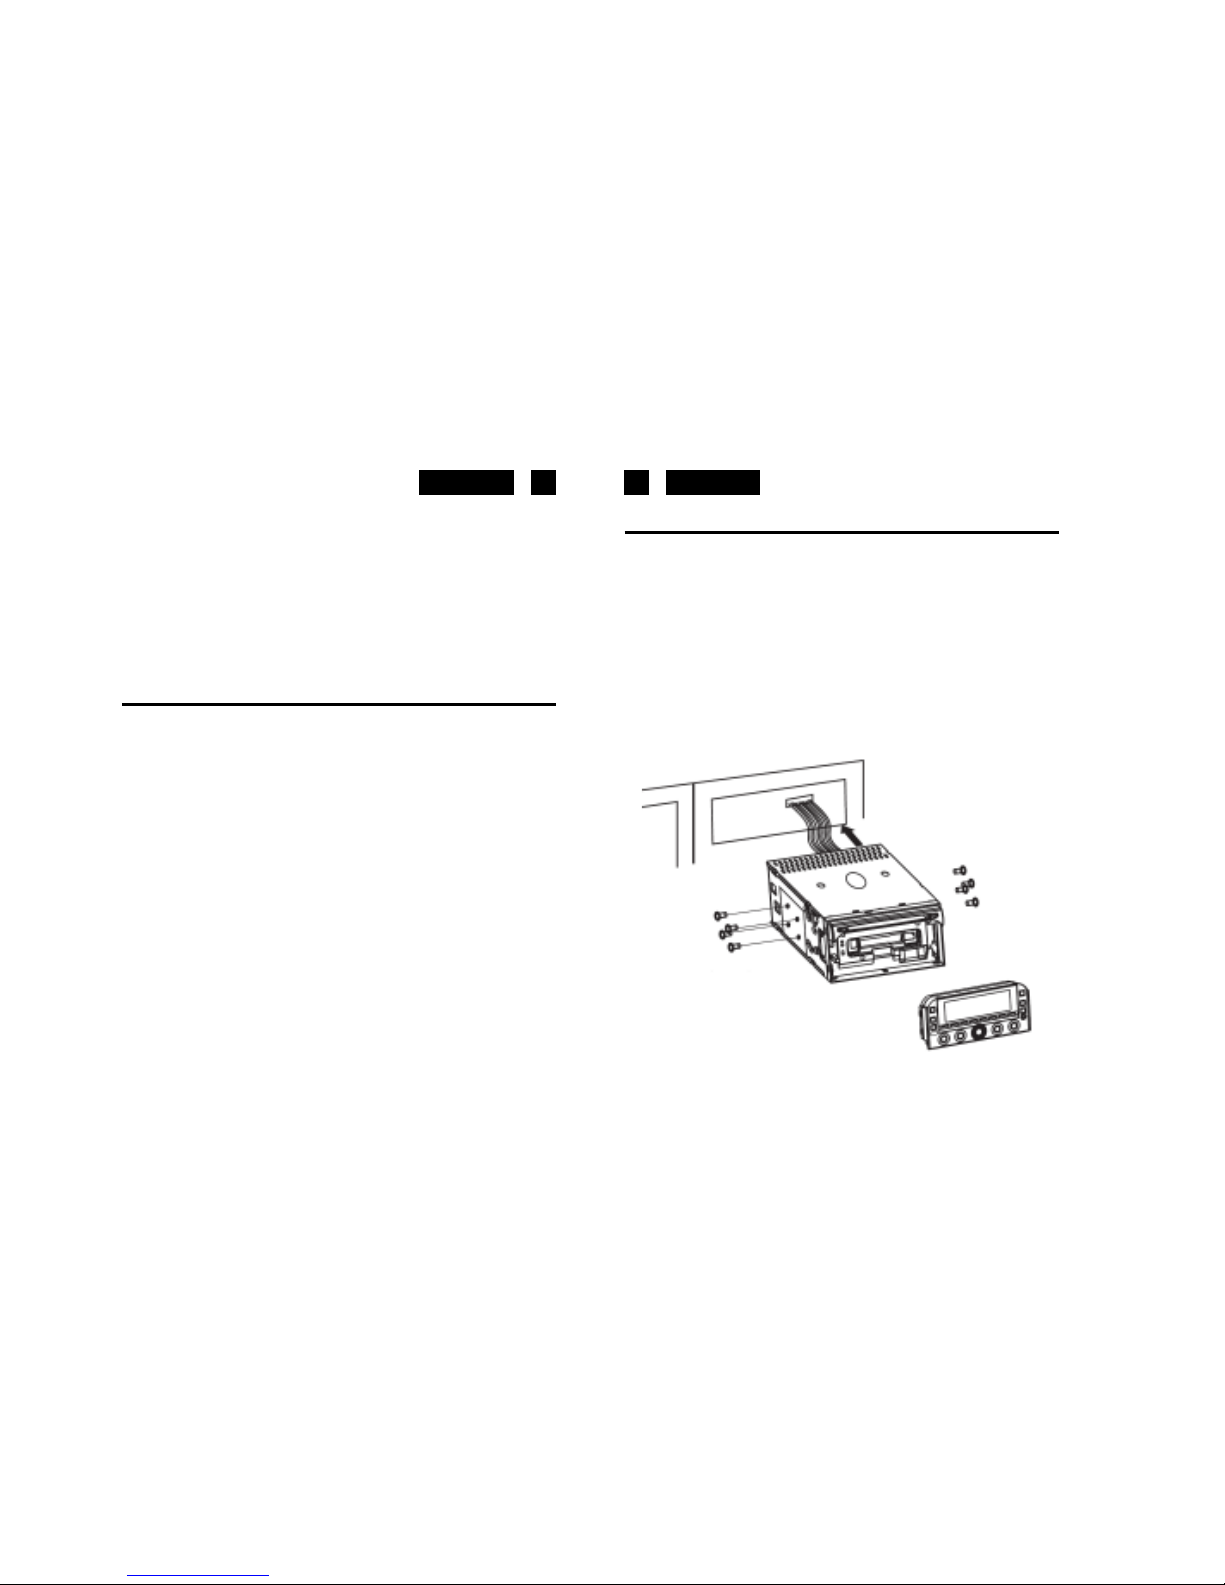
8.BEDIENTEIL-Entriegelungstaste
9.MODETASTE(MODE)
Durch Drücken dieser Taste kann der Bediener wählen zwischen
Betrieb des RADIOS / CD / USB / SD / AUX-IN Players .

DeutschDeutsch 2221
10.BANDTASTE(BAND)/LOUD
Jedes Frequenzband wird durch das hintereinander abfolgende Drücken dieser Taste
umgeschaltet AM1---AM2--- FM1---FM2---FM3.
LOUDNESS-EINSTELLUNGEN(2)
Wenn die LOUD-Taste länger als 2 Sek. gedrückt wird, wird die Funktion LOUD ON aktiviert.
Die Bässe und Höhen zunehmen.
11.AUTOMATISCHEODERMANUELLEABSTIMMUNG(FREQ AUF >> ODER FREQ AB <<)
(A)BETRIEBDESRADIOS
Bei leichtem Druck fungieren diese Tasten zur manuellen Suche.
Drückt man länger als 1 Sekunde, wird die automatische Suche aktiviert (SEEK)
(B)BETRIEBDESCD/MP3PLAYERS
Bei leichtem Druck fungieren diese Tasten als LIEDER ÜBERSPRINGEN HOCH oder
RUNTER.
Werden diese Tasten kürzer als 3 Sekunden lang gedrückt, wird die SUCHE VORWÄRTS
oder RÜCKWÄRTS aktiviert.
LIED-SUCHE-TASTE
VORWÄRTS- UND RÜCKWÄRTSSUCHE DER LIEDER (oder Wechsel der
musikalischen „Album“ Blöcke)
Beim Abspielen die SKIP Taste (<< oder >>) betätigen, um zum gewünschten Lied zu
wechseln. <<....ZURÜCK >>....VOR
Beim Abspielen die SKIP Taste (<< oder >>) drücken und gedrückt halten, um auf der CD
eine Schnellsuche zu starten. Wenn der gesuchte Musikabschnitt gefunden wird, die Taste
loslassen. Man kehrt zur normalen Wiedergabe zurück.
Ist das Abspielen der CD/MP3 beendet, schaltet die Betriebsart CD/MP3 automatisch aufs
Radio um.
12.AUTOMATISCHEABSTIMMUNG(AUTOSEEKSEARCH)(AS)
Bei leichtem Druck stimmt das Radio jeden der vorgewählten Sender ab (Preset Scan).
Ist das Signal stärker als die Abstimmungsschwelle, bleibt das Radio 5 Sekunden lang auf
diesem Sender und nimmt die Lautstärke einen Moment lang weg, um dann wieder mit der
Suche nach einem anderen Sender zu starten.
Drückt man die Taste länger als 1 Sekunde, werden die sechs stärksten Sender in der
entsprechenden Position der Vorwahltasten gespeichert.
Ist die AUTOMATISCHE SUCHE (AS) beendet, geht das Radio zum Scannen/Anhören
der gespeicherten Sender über.
13.LCDDISPLAY
Der Flüssigkristalldisplay zeigt den momentanen Empfang und die Operationen an.
14. ENTRIEGELUNGSTASTE-Taste
Dann dr.cken Sie die ENTRIEGELUNGSTASTE-Taste und nehmendas Bedienteil ab, indem
Sie es herausziehen, wie in der Abbildunggezeigt.
STEUERUNGDESCDPLAYERS
15.CDFACH
16.CDAUSWURFTASTE
Zum Entnehmen der CD die Auswurftaste drücken.
17.PAUSENTASTECD/USB/SD
Beim Abspielen die Taste PAUSE (17) ‘PAUSE’ betätigen, um das Abspielen kurzfristig
anzuhalten. Erneut drücken, um zum normalen Abspielen zurückzukehren.
18.INTROTASTE(CDSCAN)CD/USB/SD
Nach Drücken dieser Taste erscheint die Anzeige ‘SCN’ auf dem Display und die ersten
10 Sekunden jeden Liedes werden abgespielt.
19.REPEATTASTE‚REPEAT‘CD/USB/SD
Wird diese Taste gedrückt, erscheint die Anzeige ‘RPT’ auf dem Display und das aktuelle
Lied wird solange abgespielt, bis die ‘RPT’ Taste erneut betätigt wird.
Wird diese Taste in der Betriebsart MP3 länger als eine Sekunde lang gedrückt, erscheint
die Anzeige ‘D-RPT’ und die mit den Tasten Auf/Ab ausgewählten Lieder des laufenden
Albums werden abgespielt.
20.RANDOMTASTE‚SHUFFLE‘(ZUFÄLLIG)CD/USB/SD
Wird diese Taste betätigt, erscheint die Aufschrift ‘SHF’ und jedes Lied wird in zufälliger
Reihenfolge und nicht in der normalen Reihenfolge abgespielt. Um diesen Modus zu
löschen, erneut die Taste ‘SHUFFLE’ (20) betätigen.

DeutschDeutsch 2423
21.USB-port
22.FERNBEDIENUNGIR-Sensor
23.FRONTBEDIENTEILS
24. MUTE-TASTE
Zum Tonabschalten drücken SIE die MUTE-Taste. Wird die Taste erneut gedrückt,
spielt die Anlage mit der bisherigen Lautstärke weiter.
25.RESET-TASTE
Die Reset-Taste (25) befindet sich auf der Innenseite.
Die Reset-Taste ist aus einem der folgenden Gründe zu drücken:
• Erste installation des Gerätes, wenn alle Kabel angeschlossen sin.
• Keine der vorhandenen Tasten funktioniert.
• Fehlersymbol auf dem Display.
26.AUDIOAUXINJACK
Legen Sie Ihren tragbaren Spieler in die Buchse, in irgendeinenAbspielmodus ein, damit
der Klang durch die Autolautsprecher zu hören.
WIEDIESUCHENACHDENMP3LIEDERNABLÄUFT
A. Direkt Lied-Suchen
Drücken Sie die Taste PS/AS (12) einmal, an der Anzeige erscheint “MP3 *”: wählen Sie
die MP3-Spur durch Nummer:
drehen Sie den Lautstärkeknopf (3).
Dann drücken Sie VOLUME/ENTER (3) zu bestätigen.
B. Suchen durch Album- oder Titel-Name
Drücken Sie die Taste AS/PS (12) zweimal, an der Anzeige erscheint “*”, treten Sie die
Buchstabe ein. Das Gerät sucht Titel und Alben mit der gleiche eingetretene
Buchstabe. Drehen Sie die knopf VOLUME UP / DOWN (3) um die Titel und Alben zu
wählen . Wenn der gewünschte Name ist ein Album, drücken Sie die VOLUME/
ENTER, dann drehen Sie die knopf VOLUME UP / DOWN (3). drücken Sie die VOLUME/
ENTER, um das gewählte Lied abzuspielen
Die Wahl der alphabetischen Buchstaben ist wie folgt.
Drehen Sie den Lautstärkeknopf (3) in beiden Richtungen, um die Buchstaben anzusehen
(alfanumerisch). Dann drücken Sie knopf VOLUME/ENTER (3) zu bestätigen.
C. Suchen durch Album
Suchen Sie das Album mit der knopf VOLUME UP / DOWN (3).
Drücken Sie die Taste AS/PS (12) dreimal. Erscheint die erste Album-Name. Drehen
Sie knopf VOLUME UP / DOWN (3), um in der Liste der Alben zu bewegen, dann drücken Sie
die knopf VOLUME/ENTER, um das gewünschte Album zu wählen. An der Anzeige erscheint
“ \\ “. Um die Lieder in diem Album zu wählen, drehen Sie knopf VOLUME UP / DOWN (3)
dann drücken Sie VOLUME/ENTER, um zu bestätigen,oder drehen Sie den Lautstärkeknopf
(3) in beiden Richtungen, um die Buchstaben anzusehen (alphanumerisch). Dann drücken
Sie VOLUME/ENTER (3) zu bestätigen.
ID3 Tag
Drücken Sie die Taste CLK (fernbedienung) wiederholt um die Information ID3 TAG
anzuzeigen. Wenn der MP3-Dokument mit ID3 TAG erforderlich ist, durch Drücken der Taste
CLK erscheint die folgende Information in der Folge:
LIED-TITEL > SÄNGER>ALBUM-TITEL > JAHR > BEMERKUNGEN
Wenn eines des MP3-Dokuments mit ID3 TAG nicht erforderlich ist, durch Drücken
der Taste DISPLAY erscheint die folgende Information in der Folge:
UNKNOWN SONGNAME> UNKNOWN ARTIST> NO ALBUM TITLE > UNKNOWN
YEAR > NO COMMENTS
Wenn das MP3-Dokument ohne ID3 TAG ist, durch Drücken der Taste CLK
erscheint “NO ID3 TAG”.
Der Lied-Name und die Spur-Nummer des MP3-Dokuments läuft kontinuierlich auf der
Anzeige währen der Wiedergabe.
TECHNISCHEDATEN
CD/MP3-SPIELERTEIL
Rauschabstand: > 70 dB
Kanaltrennung: > 50 dB (1kHz)
Frequenzgang: 20Hz - 20 kHz
UKW-TUNER
Empfindlichkeit: 2 dBμ
Stereo-Trennung: 35 dB
Rauschabstand: 55 dB
Frequenzbereich: 87.5 – 108MHz
Kanal-Stufe: 50 kHz
IF-Frequenz: 10.7MHz
AUSGANGSLEITUNG
Ausgang: MAX. 350mV
Impedanz: 10 kOhm

EnglishEnglish
WARNINGS
CAUTION
RISK OF ELECTRIC
SHOCK
DO NOT OPEN
The exclamation point within the triangle is a warning sign alert-
ing the user of important instructions accompanying the
product.
The lightening flash with arrowhead symbol within the triangle
is a warning sign alerting the user of “dangerous voltage” inside
the unit.
To reduce the risk of electric shock, do not remove the cover. No
user serviceable parts inside the unit. Refer all servicing to
qualified personnel.
Invisible laser radiation when the unit is opened or interlocks
defeated. Avoid exposure to laser beam. Use of controls,
adjustments or procedures other than those specified herein
may result in hazardous radiation exposure.
This unit must not be exposed to moisture or rain.
This unit should be positioned so that it is properly ventilated.
Do not expose this unit to direct sunlight or heat radiating
sources.
12
CD-900USMPNC
Car Stereo Compact Disc CD/CD-R/CD-RW/MP3 Player with USB-SD, PLL FM
Stereo Radio
Radio Data System, Cassette, Detachable Front Panel.
INSTRUCTIONMANUAL
Please read this instruction manual carefully and familiarize yourself with your new Radio
CD before using it for the first time. Please retain this manual for future reference.
TABLE OF CONTENTS
• Location of Controls
• Features
• Installation
• Precautions and Maintenance
• Operating Instructions
• Specifications
LOCATIONS OF CONTROLS
1. POWER ON/OFF
2. SCAN function (AM / FM Radio)
3. VOL UP/VOL DOWN FOR BASS/TREBLE/BALANCE/FADER + ENTER
4. PRESET STATIONS (1,2,3,4,5,6)
5. 'AF' function (ALTERNATIVE FREQUENCIES)
6. 'TA' function (TRAFFICANNOUNCEMENT)
7. 'PTY' function (PROGRAM TYPE)
8. PANEL OPEN BUTTON
9. MODE BUTTON (MODE)
10. BAND BUTTON (BND) / LOUD
11. AUTOMATIC OR MANUALTUNING (FREQ UP >> OR FREQ DOWN << /
CD TRACK/SEARCH BUTTON
12. AUTO SEEK SEARCH TUNING (AS)
13. LCD DISPLAY
14. PANEL RELEASE BUTTON
15. CD SLOT
16. CD EJECT BUTTON
17. CD / USB / SD-PAUSE BUTTON
18. INTRO BUTTON (CD SCAN) CD / USB / SD
19. REPEAT BUTTON (REPEAT) CD / USB / SD
20. RANDOM BUTTON (SHUFFLE) CD / USB / SD
21. USB PORT
Correct Disposal of This Product
(Waste Electrical & Electronic Equipment)
This marking shown on the product or its literature, indicates that it
should not be disposed with other household wastes at the end of its
working life. To prevent possible harm to the environment or human
health from uncontrolled waste disposal, please separate this from
other types of wastes and recycle it responsibly to promote the
sustainable reuse of material resources.
Household users should contact either the retailer where they
purchased this product, or their local government office, for details of
where and how they can take this item for environmentally safe recycling.
Business users should contact their supplier and check the terms and
conditions of the purchase contract. This product should not be mixed
with other commercial wastes for disposal.

EnglishEnglish 34
22. INFRARED REMOTE SENSOR
23. FRONT PANEL
24. MUTE BUTTON
25. RESET BUTTON (on main unit)
26. AUX-INAUDIO
FEATURES
The unit features a detachable front control panel, AM/FM/FM stereo-RDS, CD/MP3 player
the following features:
• The best stations memory automatically memorizes the best (strongest) station in the
order of their strength (AS).
• USB / SD Card Reader
• Electronic Volume, Bass, Treble, Fader, Balance and Equalizer control.
• Precision electronic tuning with phase-lock loop (P.L.L.) circuitry.
• Programmable 30 preset memory tuning (6 each for AM1 / AM2 / FM1/ FM2 / FM3)
• Loudness control
• Manual / Auto (Seek) / up and down tuning control
• Band selector for AM1 / AM2 / FM1/ FM2 / FM3
• Display control (Frequency, Station Name, Program Type, Clock)
• Clock Function in RDS
• CD / USB / SD Repeat Function
• CD - MP3 files on CD/CD-R/CD-RW / USB / SD player function
• Preamplified Line-out
• Detachable front panel protects against theft
• Lighting system
• RDS Function: PI (Program Identification) TA (Traffic Announcement)
PS (Program Service Name) PTY (Program Type)
AF (List of Alternative Frequencies)
TP (Traffic Program)
INSTALLATION
PRECAUTIONS
• Choose the mounting location carefully so that the unit will not interfere with the normal
driving functions of the driver.
• Avoid installing the unit where it would be subject to high temperatures, such as from
direct sunlight or hot air from the heater, or where it would be subject to dust, dirt or
excessive vibration.
• Use only the supplied mounting hardware for a safe and secure installation.
• Be sure to remove the front panel before installing the unit.
Mounting angle adjustment
Adjust the mounting angle to less than 20o.
MOUNTINGEXAMPLE
Installation in the dashboard

EnglishEnglish 56
4. FRONT RIGHT SPEAKER (-)
5. FRONT LEFT SPEAKER (+)
6. FRONT LEFT SPEAKER (-)
7. REAR LEFT SPEAKER (+)
8. REAR LEFT SPEAKER (-)
Maintenance
FUSEREPLACEMENT
If the fuse blows, check the power connecton and replace the fuse. If the fuse blows again
after the replacement, there may be an internal malfunction. In this case, consult your
nearest repairing centre.
Warning
Use the specified amperage fuse for each lead. Use of a higher amperage fuse may cause
serious damage.
OPERATING INSTRUCTIONS
1.POWER ON/OFF
Insert the front panel in the unit and push Power button in order to switch on the unit. Push
PWR button newly in order to switch off the unit and push REL button (14) to release the
front panel.
Note: Never release the front panel when the unit is on. Power remains on even when car
radio is off.
2.SCAN
Press this button to scan the stored programs of the Radio.
3.VOLUME UP/DOWN/ENTER
Rotate the VOLUME Knob (3) to control the VOLUME. To select other functions, press the
VOLUME (3) button shortly until the desired functions is shown on the display. Figure 1
shows how control functions are selected by pressing VOLUME button.
Fig. 1 Selection of sound control functions
1. VOLUME (rotate knob)
Detaching and attaching the front panel
The front panel of this unit can be detached in order to prevent the unit from being stolen.
DETACHINGTHE FRONTPANEL
Before detaching the front panel (14), be sure to press the POWER button (1) To Off first.
Pull out the panel towards you in order to detach completely the panel from the main unit.
ATTACHINGTHE FRONTPANEL
Make sure the front panel is the right way up when attaching it to the unit as it cannot be
attached upside down. Bring side B of panel to side A of main unit.
Insert the panel in and push until it clicks.
Notes:
• Do not press the front panel hard against the unit when attaching it. It can be easily
attached by pressing it lightly against the unit.
• When you carry the front panel with you, put it in the supplied front panel case.
• Do not press hard or give excessive pressure to the display window of the front panel
when attaching it to the unit.
BUILT-IN ISO CONNECTOR
CONNECTORA
1.
2.
3.
4. MEMORY +12V
5. AUTO ANTENNA OUTPUT
6.
7. +12V (TO IGNITION KEY)
8. GROUND
Note: 12 V wire (connector A no. 7) must be connected by car ignition key in order to avoid
that car battery becomes weak when the car will be not used for long period.
CONNECTORB
1. REAR RIGHT SPEAKER (+)
2. REAR RIGHT SPEAKER (-)
3. FRONT RIGHT SPEAKER (+)

EnglishEnglish
2. SELECT (push down)
3. BASS
4. TREBLE
5. BALANCE
6. FADER
7. EQUALIZER
Rotate the VOLUME knob to increase or decrease the volume. This knob can be used to
adjust the BASS, TREBLE, BALANCE, FADER and EQUALIZER.
4. PRESET STATIONS(1,2,3,4,5,6)
(A) RADIO MODE:
When pressed short, these keys select a preset station directly. When pressed longer
than 1 sec., current station is stored in preset memory bank. When PTY mode is
selected, the PTY switch is shared as follows:
PTY music group ---- PTY speech group ---- OFF
MUSIC SPEECH
1. POP M, ROCK M 1. NEWS,AFFAIRS, INFO
2. M.O.R. M, LIGHT M 2. SPORT, EDUCATE, DRAMA
3. CLASSICS, OTHER M 3. CULTURE, SCIENCE, VARIED
4. JAZZ, COUNTRY 4. WEATHER, FINANCE, CHILDREN
5. NATION M, OLDIES 5. SOCIAL, RELIGION, PHONE IN
6. FOLK M 6. TRAVEL, HOBBIES, DOCUMENT
(B) CD/MP3 PLAYER MODE:
1. PAUSE 2. INTRO 3. REPEAT 4. RANDOM
USINGTHERDSFUNCTION
What is RDS?
The RDS (Radio Data System) is a digital information system developed by the EBU
(European Broadcast Union). Piggy-backed on normal FM broadcasts, RDS offers a variety
of information services and automatic retuning functions for RDS-compatible car stereos.
In 1988, RDS became available in the United Kingdom, France, West Germany, Ireland
and Sweden. Test transmissions are being conducted in many other european countries.
It is expected that RDS will be available in most western european countries in the near
future.
5. 'AF/REG'function(ALTERNATIVEFREQUENCIES)
When pressed short, AF/REG switchig mode is selected.
78
When AF/REG switching mode is selected, the radio checks the signal strength of the AF
all the time. When pressed long, it is activated as regional mode ON/OFF.
– Regional mode ON:
AF switching or PI SEEK is implemented to the station which have all PI codes same as
current station. REG segment is turned on, in LCD display.
– Regional mode OFF
The regional code in the format of PI code is ignored when AF switching or PI SEEK is
implemented.
6. 'TA'function(TRAFFICANNOUNCEMENT)
When pressed short, it is activated as TA mode ON or OFF
When TA mode is on and traffic announcement is transmitted
– When the unit is it CD/MP3 mode, it will switch to radiomode temporarily.
– If the volume level was under the threshold point, it will be raised to the threshold point.
– When TP station is received, TP segment is turned on in LCD display.
7. 'PTY' function(PROGRAMTYPE)
PTY MUSIC ---- PTY SPEECH ---- PTY OFF
While selecting PTY type, its selection is impremented by preset buttons as described
in preset key. When PTY is selected, the radio starts to search corresponding PTY
information, and stops if the corresponding PTY information, is detected.
8. OPENPANEL
Press this button to fold down the front panel.
9. MODE BUTTON(MODE)
By pressing this key, user can select: RADIO / CD / USB / SD / AUX-IN mode.
10.BAND BUTTON(BAND) /LOUDNESS
Each band is toggled cyclically by pressing this key AM1 / AM2 / FM1/ FM2 / FM3.
LOUDNESSCONTROLS
When press the button BAND for more than 2 seconds, LOUD ON mode is selected.
The bass and treble response will be boosted.
11. AUTOMATICOR MANUALTUNING (FREQUP>> ORFREQDOWN<<)
(A) RADIO MODE
When pressed short, these keys are operated as MANUAL tuning mode.
When pressed longer than 1 sec., they are operated as SEEK tuning mode.
(B) CD/MP3 PLAYER MODE
When pressed short, they are operated as TRACK UP or TRACK DOWN mode.
When pressed longer than 1 sec., they are operated as CUE or REVIEW mode.

EnglishEnglish 109
20.RANDOM BUTTON'SHUFFLE' CD/ USB/ SD
When this button is pressed, ‘SHF’ indication is displayed and each track of the disc are
played in random instead of normal progression. To cancel RANDOM mode, press
‘SHF’ button (20) again.
21.USBPORT
22.REMOTE CONTROLSENSOR
23.FRONTPANEL
24. MUTEBUTTON
Press this buttton to mute the sound. Press it again to resume listening.
25. RESETBUTTON
Reset button (25) is placed on the housing.
The reset button is to be activated for the following reason:
• Initial installation of the unit when all wiring is completed.
• All the function buttons do not operate properly.
• Error symbol on the display.
26.AUX-IN
Use this input to connect Discman or other external devices with Audio output.
HOWTO SELECT MP3FILES
A. Searching Track directly
Press the AS/PS Button (12) once, the displays shows “MP3 *”: select the MP3 track by
number with the following method:
rotate the Volume knob (3) to scroll through the numbers.
Then press VOLUME (ENTER,10) to confirm.
B. Searching by Directory or Track name
Press AS/PS twice, the displays shows “*”. Enter the character directly. The unit searches
files and directories which have the same character which is inputted by the user. The
unit shows these sorted files and directories by VOLUME (3) Knob. If the selected name
is directory, the user can go into the selected directory by press AS / PS BUTTON (12)
and continue to search the directory or file name in the directory by VOLUME. The selected
file can be played by pressing (3) VOLUME/Enter Button.
CD/ USB/ SDTRACK/SEARCH BUTTON
FORWARDAND REVERSETRACK SEARCH(or changingsongs)
Press the SKIP button (TUN<< or TUN>>) during play to go to the desired track(song).
TUN<<....REVERSE TUN>>....FORWARD
Press and hold the SKIP button (TUN<< or TUN>>) during play to scan the disc at high
speed. When the desired music section of the disc is found, release the button. Normal play
will resume.
When CD/MP3 play is finished, CD/MP3 mode automatically changes to radio mode.
12.AUTO SEEK/ PRESETSCAN
By pressing shortly, the radio searches for each preset station (Preset Scan).
When field strength level is bigger than the threshold level of stop level, the radio is
holding at that preset number for 5 sec. with releasing mute, and than searches again.
By pressing longer than 1 sec, and then 6 strongest stations are preset to the corre-
sponding preset number.
When AS operation is finished, the radio executes the preset scan.
13.LCD DISPLAY
The Liquid Crystal Display will display the current state of the unit.
14.FRONT PANELRELEASEBUTTON
CDCONTROL LOCATIONOFPARTS
15.CD SLOT-IN
16.CDEJECTBUTTON
Press the EJECT button to remove the CD.
17.PAUSE BUTTONCD/USB /SD
During “PLAY”, press (17) ‘PAUSE’ button to “PAUSE”. Press it again to resume play.
18.INTROBUTTON(CD SCAN)CD /USB/ SD
When this button is pressed, ‘SCN’ indication is displayed and the first several seconds
of each track of the disc are played. Press again to stop intro and listen to track.
19.REPEAT BUTTON'REPEAT'CD/ USB/SD
When this button is pressed, ‘RPT’ indication is displayed and play of the selected track
will be continually repeated until the Track repeat mode is cancelled by pressing ‘RPT’
button again.

EnglishEnglish 1211
C. Searching from Directory
SEARCH DIRECTORY BY USING VOLUME UP / DOWN KNOB (3).
Under MP3 play mode, press AS/PS BUTTON (12) three times. Then the first Directory
name is shown. Rotate VOLUME UP/DOWN to navigate through the directory list, press
VOLUME/ENTER BUTTON (3) to select the desired directory. The display will show “ \\ “.
To select the tracks under the selected directory, rotate VOLUME UP / DOWN then press
VOLUME/ENTER (3) to confirm when desired track is found.
Rotate the Volume knob (3) in both directions to scroll through the characters
(alphanumerical). Then press VOLUME/ENTER (10) to confirm.
ID3 Tag
Press CLK button on Remote Control repeatedly to Display ID3 TAG information.
If the MP3 file is available with ID3 TAG, pressing the CLK button repeatedly will show
information in the following sequence:
SONG TITLE > ARTIST>ALBUM TITLE > YEAR> COMMENTS
If any of the ID3-TAG information is not available, pressing the DISPLAY button re
peatedly will show information in the following sequence:
UNKNOWN SONGNAME> UNKNOWN ARTIST> NOALBUM TITLE > UNKNOWN
YEAR > NO COMMENTS
If the MP3 file is without ID3 TAG, pressing the CLK button, “NO ID3 TAG” will be
displayed.
The file name & track number of the MP3 file will scroll repeatedly through the display
during the playing of the MP3 file.
SPECIFICATIONS
CD/ USB /SD MP3 PLAYER SECTION
Signal to Noise Ratio > 70dB
Channel Separation > 50 dB (1kHz)
Frequency Response 20Hz - 20 kHz
TUNER
Sensitivity 2 dBμ
Stereo separation 35 dB
Signal to noise radio 55 dB
Frequency range FM 87.5-108 MHz
AM 522-1620 KHz
Channel step 50 kHz
Intermediate frequency 10.7 MHz
LINE-OUT
Output 350mV max.
Impedance 10kOhm
GENERAL
Power Supply 13.8V DC
(10.8-15.6V allowable)
Speaker impedance 4 or 8 ohm
Output power 25W RMS x 4CH
Note: Specifications and the design are subject to possible modification without notice due
to improvement.
Table of contents
Languages:
Other Roadstar Car Stereo System manuals

Roadstar
Roadstar CD-240MPR/512 User manual

Roadstar
Roadstar CD-302MP/FM User manual

Roadstar
Roadstar CD-750 User manual

Roadstar
Roadstar CD-808MP/FM User manual

Roadstar
Roadstar CD-808MP/FM User manual

Roadstar
Roadstar CD-804MPBT User manual

Roadstar
Roadstar RU-200PLL User manual

Roadstar
Roadstar CD-652USMP/FM User manual

Roadstar
Roadstar CD-810BT User manual

Roadstar
Roadstar CDR-485US/BK User manual