EnglishEnglish 34
POWER SUPPLY
Use with rechargeable batteries
1. Disconnect the AC/DC adaptor from the wall outlet if it is being connected to the unit.
2. Open the battery compartment door, located on the bottom of the unit, by sliding the door
and lift it up. (Do not remove the battery door).
3. Insert the supplied 2 x 1.2V /Ni-MH (Rectangular type) batteries, following the correct
polarity, as indicated on the unit.
4. Close the battery compartment door.
5. Insert the DC plug, at the end of theAC/DC adaptor cord, into the DC 4,5 V INPUT socket
located on the back of the unit.
6. Connect the AC/DC adaptor into a 230V ~ 50Hz AC power outlet.
7. Move the CHARGE SWITCH (15) to ON to start recharging function. The red CHARGE
indicator (16) will light indicating that the rechargeable batteries are being charged.
8. After 15 hours of charging unplug the AC/DC adaptor from the wall outlet.
Use with AC/DC adaptor (included)
1. Insert the DC plug, at the end of theAC/DC adaptor cord, into the DC 4,5 V INPUT socket
located on the back of the unit.
2. Connect the AC/DC adaptor into a 230V ~ 50Hz AC power outlet.
Notes:
• Use only the supplied AC/DC adaptor. Using other types of adaptor may damage the
unit.
• Make sure that the AC/DC adaptor matches with your household voltage before
connecting it into the wall outlet.
• When not using AC power, disconnect the AC/DC adaptor from the wall outlet.
• Do not touch the AC/DC adaptor with wet hands.
Cautions:
• DO NOT charge continuously for 24 hours or more, otherwise it will deteriorate the
performance of the rechargeable batteries.
Notes:
• If the rechargeable batteries are being charged for the first time, it will take approximately
15 hours to be fully charged.
• If the operating time decreases drastically even when the rechargeable batteries are
properly recharged, purchase a new set of rechargeable batteries.
CONNECTIONS
External Audio System
Connect the stereo connection cable into the LINE OUT jack (10) of the unit and the CD/AUX
of the audio system. (Do not connect it to the amplifier phono jack.)
Note: Always switch off the power before making any connections between the CD player
and other audio system.
• If the CD player interference with the TV or radio reception, move the CD player away
from TV set or radio receiver.
EARPHONES
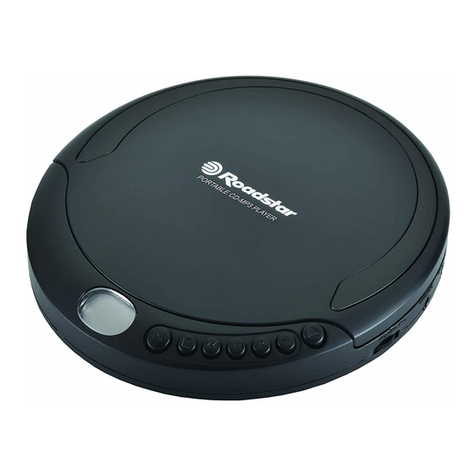
Connect the stereo earphones (included) to the Phones jack (11).
CDPLAYBACK
1. Connect the earphones (included) or optional headphones into the Phones jack.
2. Press the Door Open button (8) to open the CD compartment door.
3. Insert a disc with the label side facing up.
4. Close the CD compartment door until a click is heard.
5. Set the VOLUME control to minimum.
6. Press the PLAY/PAUSE ( >II ) button (6), the unit power will turn on automatically and
starts playback. The total number of tracks and playing time appears on the display.
During playback, the track number and the elapsed playing time will be displayed.
7. Adjust the VOLUME control to your desired listening level.
8. To stop playback temporarily, press the PLAY/PAUSE ( >II ) button (6) once. The elapsed
time and track number will flash on the display. Press the PLAY/PAUSE ( >II ) button
again to resume playback.
9. To stop playback, press the STOP (5) button once.
10. To turn the unit off, press the STOP (5) twice.
Notes:
• When the CD door is accidentally opened during playback, "OPEN" will appear on the display.
• Wait until the disc is fully stopped before pressing the OPEN button.
• This unit can play 3" (8cm) single CDs without an adaptor.

