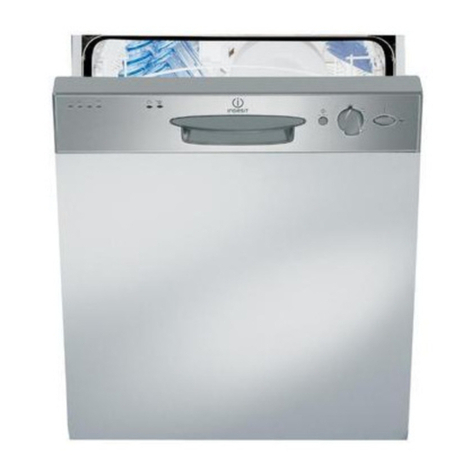
Robam WQP15-W651 B User manual

�OBAM
User Manual
WQP15-W651 S
Dishwasher
WQP15-W651 B


CONTENTS
1.SAFETY INSTRUCTIONS ................................................................................................ 1
2.INSLLION ................................................................................................................. 6
3.TECHNICAL SPECIFICIONS ....................................................................................... 8
4.BEFORE USING THE APPLIANCE ............................................................................... ..9
5.LOADING YOUR DISHWASHER ................................................................................... 10
6.PROGRAMME BLE .................................................................................................... 14
7.THE CONTROL NEL .................................................................................................. 15
8.CLEANING AND MAINTENANCE ................................................................................. 17
9. TROUBLESHOOTING .................................................................................................... 18
1 0.PRACTICAL INFORMION ........................................................................................ 20


&
RECYCLING
EN-4
。
厅
叫
巾
RECYCLING
•Some machine components and packaging consist of
recyclable materials.
•Plastics are marked with the international abbreviations:
(>PE<, >PP<, etc. )
•The cardboard parts consist of recycled paper. They can
be put into waste paper containers for recycling.
•Material unsuitable for domestic waste must be disposed
of at recycling centres.
•Contact a relevant recycling centre to obtain information
about disposal of different materials.
•Packaging materials protect your machine from
damage that may occur during transportation. The
packaging materials are environmentally friendly
as they are recyclable. The use of recycled
material reduces raw material consumption and
therefore decreases waste production.

EN - 5
CE Declaration of Conformity
We declare that our products meet the applicable
European Directives, Decisions and Regulations and
the requirements listed in the standards referenced.
Disposal of your old machine
The symbol on the product or on its packaging indicates
that this product may not be treated as household waste.
Instead, it shall be handed over to the applicable
collection point for the recycling of electrical and
electronic equipment. By ensuring this product is
disposed of correctly, you will help prevent potential
negative ,
consequences for the environment and human health,
which could otherwise be caused by inappropriate waste
handling of this product. For more detailed information
about recycling of this productplease contact your local
city office, your household waste disposal service or the
shop where the product was purchased.

2. INSTALLATION
°
.�
u
o
.
EN-6

EN-7 EN-7
2.5. Electrical connection
WARNING: Your machine is set to
operate at 220-240 V. If the mains
voltage supply to your machine is 110
V, connect a transformer of 110/220 V and
3000 W between the electrical connection.
The earthed plug of the
machine must be connected to an
earthed outlet supplied by suitable
voltage and current.
In the absence of earthing
installation, an authorised
electrician should carry out an
earthing installation. In the case of use
without earthing installed, we will not be
responsible for any loss of use that may
occur.
The indoor fuse current value
should be 10-16 A.
2.6. Fitting the machine undercounter
If you wish to fit your machine undercounter,
there must be sufficient space to do so and
the wiring-plumbing must be suitable to do
so (1). If the space under the countertop is
suitable for fitting your machine, remove the
worktop as shown in the illustration (2).
WARNING: The countertop, of which
the machine will be placed under, must be
stable in order to prevent imbalance.
The top panel of the dishwasher must
be removed to fit the machine under the
countertop.
To remove the top panel, remove the
screws that hold it on, located at the rear
of the machine. Then, push the panel 1 cm
from the front towards the rear and lift it.
Adjust the machine feet according to the
slope of the floor (3).
Fit your machine by pushing it under the
counter taking care not to crush or bend the
hoses (4).
WARNING: After removing the top
panel of your dishwasher, the machine
should be placed in a space of the
dimensions shown in the figure below.
H1: min A
H2: min B1
H3: min B2
A B
All
Products B1B2
Product’s Height
(±2 mm) 820 mm 830 mm 835 mm
A: If there is no felt on the top of the
product; you should take into account this
product’s height.
B1: If there is felt on the top of the product
with 2nd basket; you should take into
account this product’s height.
B2: If there is felt on the top of the product
with 3rd basket; you should take into
account this product’s height.
Worktop 1: upper
table(only for
WQP15-W651 B
WQP15-W651S
H

3. TECHNICAL SPECIFICATIONS
EN-8
12
3.1. General appearance
1
2
4
6
7
8
9
10
11
3
5
1. Worktop 1: upper
table(only for WQP15-W65B&WQP15W651S)
2. Upper basket with racks
3. Upper spray arm
4. Lower basket
5. Lower spray arm
6. Filters
7. Rating plate
8. Control panel
9. Detergent and rinse-aid dispenser
10. Upper basket track latch
11. Upper Cutlery Basket
12. Turbo Drying Unit: This system provides
better drying performance for your dishes.
3.2. Technical specifications
Capacity 15 place
settings
Dimensions (mm)
Height
Width
Depth
845 (mm)
598(mm)
598(mm)
Net weight 56 kg
Operating
voltage /
frequency
220-240V 50 Hz,
Total current (A) 10(A)
Total power (W) 1900(W)
Water supply
pressure
Maximum: 1
(Mpa) Minimum:
0.03 (Mpa)

4. BEFORE USING THE
APPLIANCE
4.1. Detergent usage
4.2. Filling the detergent
4.3. Using combined detergents
4. 4 . Rinse-aid usage
4. 5 . Filling the rinse-aid and setting
EN -
9

Level Brightener Dose lndicator
&
&
EN - 1
0

EN -11
Upper Basket
Height Adjust
m
e
n
t
The upper basket includes a mechanism
which enables the height of the basket to be
adjusted up (1) or down (2) without having
to remove the basket. Hold the basket on
both sides and pull it up or push it down,
ensuring both sides of the upper basket are
in the same position.
Height Adjustable Rack (peg type)
The foldable racks in the upper basket
enable the placement of large items such
as pots and pans. Each section can be
folded separately. The foldable racks
can be either raised up or lded down.
Bottle Rack
The bottle rack can be used to wash large
open containers, such as bowls, pans, or
tupperware, as well as items that are tall, such
as jugs. The bottle rack can be pulled out in
the direction of the arrow, as shown
below.
Height Adjustable Rack (peg type)
The height adjustable racks enable glasses
and cups to be placed on or under the
racks. The racks can be adjusted to 2
dierent heights. Cutlery and utensils can
also be placed on the racks horizontally.

Four Folding Racks
Upper Cutlery Basket
WARNING:
EN -1
2

EN - 13
5.2Alternative Basket Loads
Lower Basket
Top basket
Incorrect loads

EN -1
4
6. PROGRAMME TABLE
NOTE: PROGRAMME DURATION MAY CHANGE ACCORDING TO THE AMOUNT
OF DISHES, TAP WATER, AMBIENT TEMPERATURE AND SELECTED ADDITIONAL
FUNCTIONS.
• Only use powder detergent in short programmes.
• Short programmes do not include a drying step.
• To assist drying, we recommend partially opening the door after the programme has
finished.
Programme Duration
(min) Description
Jetwash 14 Fast programme intended for recently used dishes which are lightly soiled. Suitable
for 4 place settings.
Quick 30’ 30 Quick wash programme for lightly soiled dishes.
Eco
(Reference) 138 Standard programme for dishes which are used daily but are not heavily soiled.
Dual Pro Wash 113 For both lightly soiled delicate glassware and heavily soiled crockery at the same
time.
Super 50’ 50 A faster programme for dishes which are used daily but are not heavily soiled.
Hygiene 123 For heavily soiled dishes which require hygienic washing.
Auto Delicate 69-92Automatic programme for delicate dishes which are not heavily soiled.
Auto Intensive 111-179 Automatic programme for heavily soiled dishes.

4.
5.
EN -1
5
7. THE CONTROL PANEL
PPPPPPPP
3 4 5678
1 2
N
9
10
11 12 1314
15
16
17
18
13.a 13.b 13.c 13.d

e
e
.
7. THE CONTROL PANEL
EN -1
6
7.3.Switching Off the Machine
When the End symbol illuminates,
switch off your machine using the On/
Off button.
-Disconnect the plug and turn o f the
water tap.
NOTE: Do not open the door before
the End symbol illuminates.
NOTE: Leave the door of your
machine slightly open at the end of a
wash programme to speed up drying.
NOTE: If the door of the machine
is opened or the power is cut during
operation, the programme will continue
when the door is closed or the power
returns.

8. CLEANING AND
MAINTENANCE
a) b)
c)
o
�-
o
(4).
EN -1
7
This manual suits for next models
1
Table of contents
Other Robam Dishwasher manuals
