Robomaid RM-770 User manual

RM-770 ROBOT VACUUM CLEANER

Thank you for purchasing the Robomaid RM-770 Robot Vacuum Cleaner.
Please read this manual carefully before using this product.
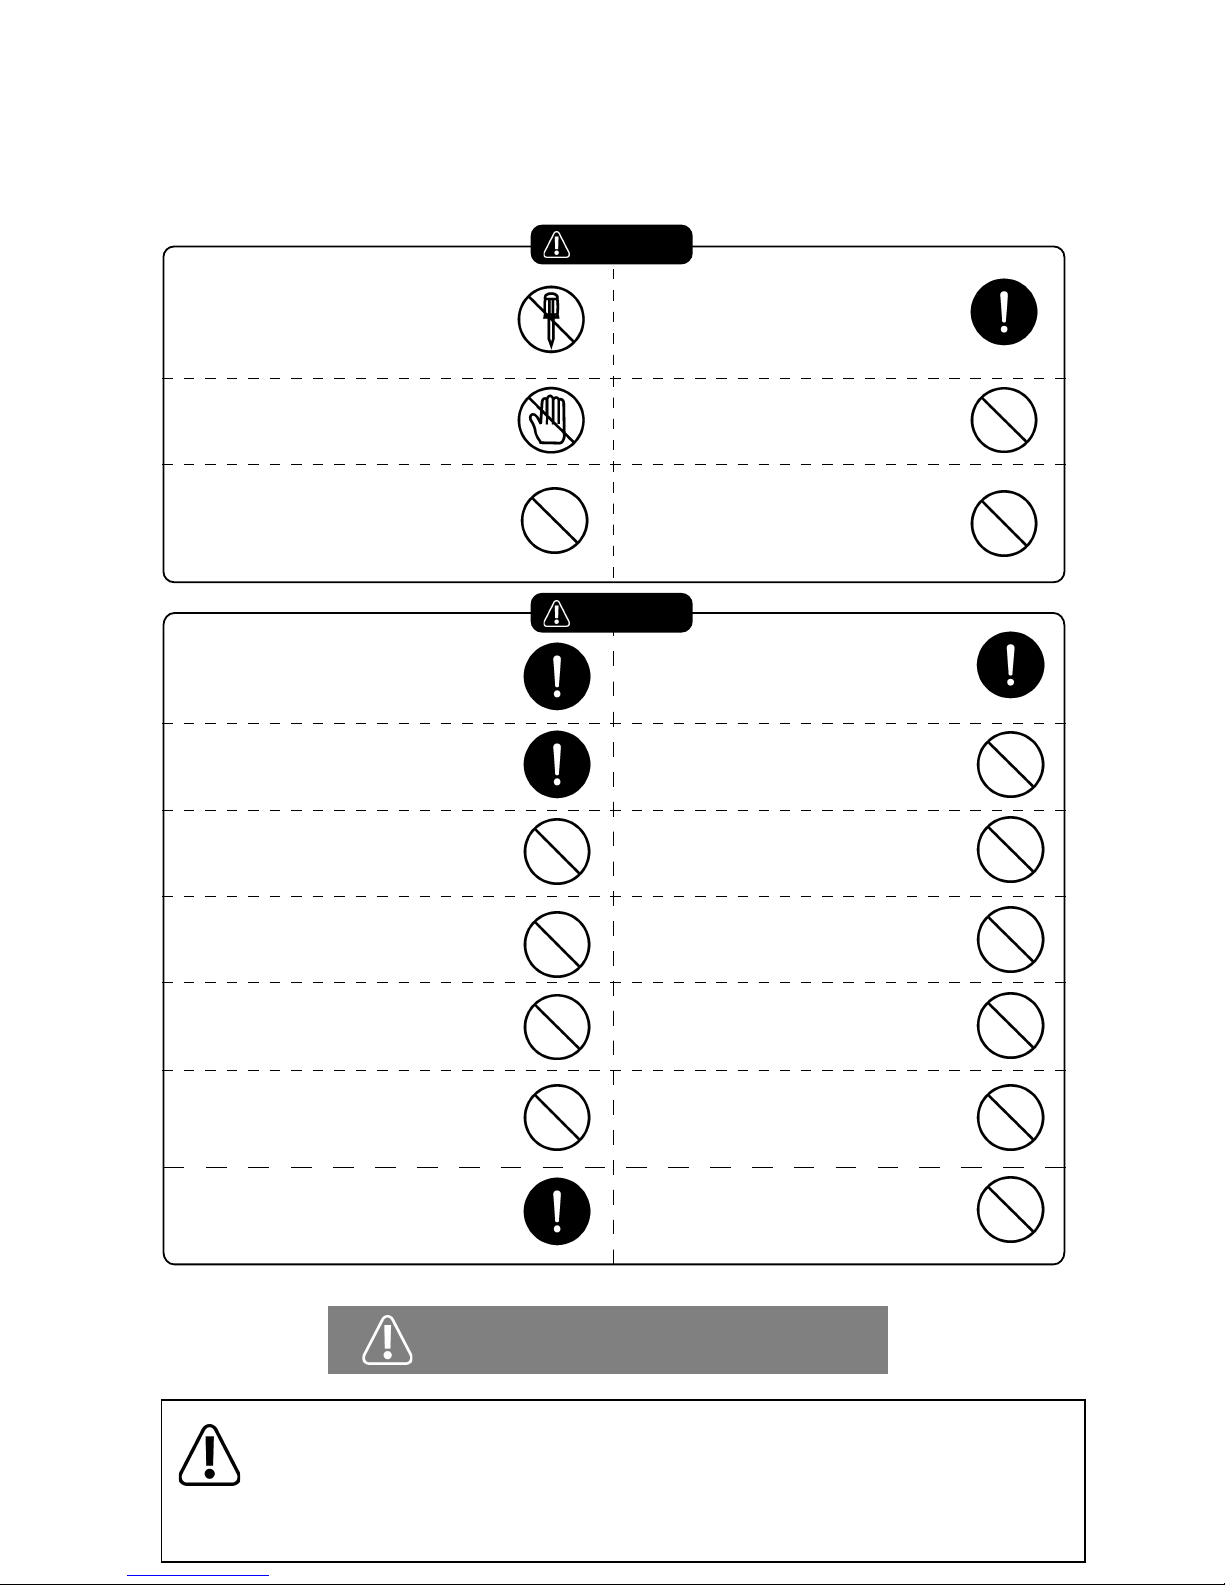
No one other than ocial Robomaid
Australia service personnel may
disassemble, repair, or alter this product,
otherwise, re, electric shock or personal
injury may be caused.
Never touch the Robomaid with wet
hands or it may cause an electric shock.
Avoid putting your clothes or any part
of your body into the brush or wheels
of the Robomaid, otherwise personal
injury may be caused.
Do not use any charger other than that
enclosed with the Robomaid, otherwise
damage may be caused to the product
and may result in re or electric shock.
Do not bend the power cord exces-
sively or place any weight on it,
otherwise the cable may be damaged
and may cause re or electric shock.
Keep the Robomaid away from naked
ame or any other heat source and
away from ammable material.
The power should be turned o when
transporting or storing the Robomaid for
a long time, otherwise the battery may
be damaged.
Always check the charger and the socket
for proper connection.
Please use the Robomaid cautiously in the
presence of children to prevent injury
or harm.
Prevent the Robomaid from absorbing
water or any other liquid, otherwise
the product may be damaged.
Do not use the Robomaid outdoors,
otherwise the product may be
damaged.
Please ensure to remove any threads,
cords, cables, fringes, or long items such
as shoelaces that the Robomaid may get
tangled with.
The plug of the electric wire of the
charger must be inserted tightly,
otherwise, electric shock, short circuit,
smoke or re may be caused.
Remove all objects that are easily damaged
before using, otherwise the Robomaid
may be damaged or damage the objects.
Do not sit or stand on the Robomaid as it
may cause damage of the Robomaid or
cause personal injury.
Never use the Robomaid in an extremely
small space otherwise, the product
may be damaged.
Do not use the Robomaid for commercial
cleaning, otherwise it may be
damaged due to excessive usage.
Warning!
Caution!
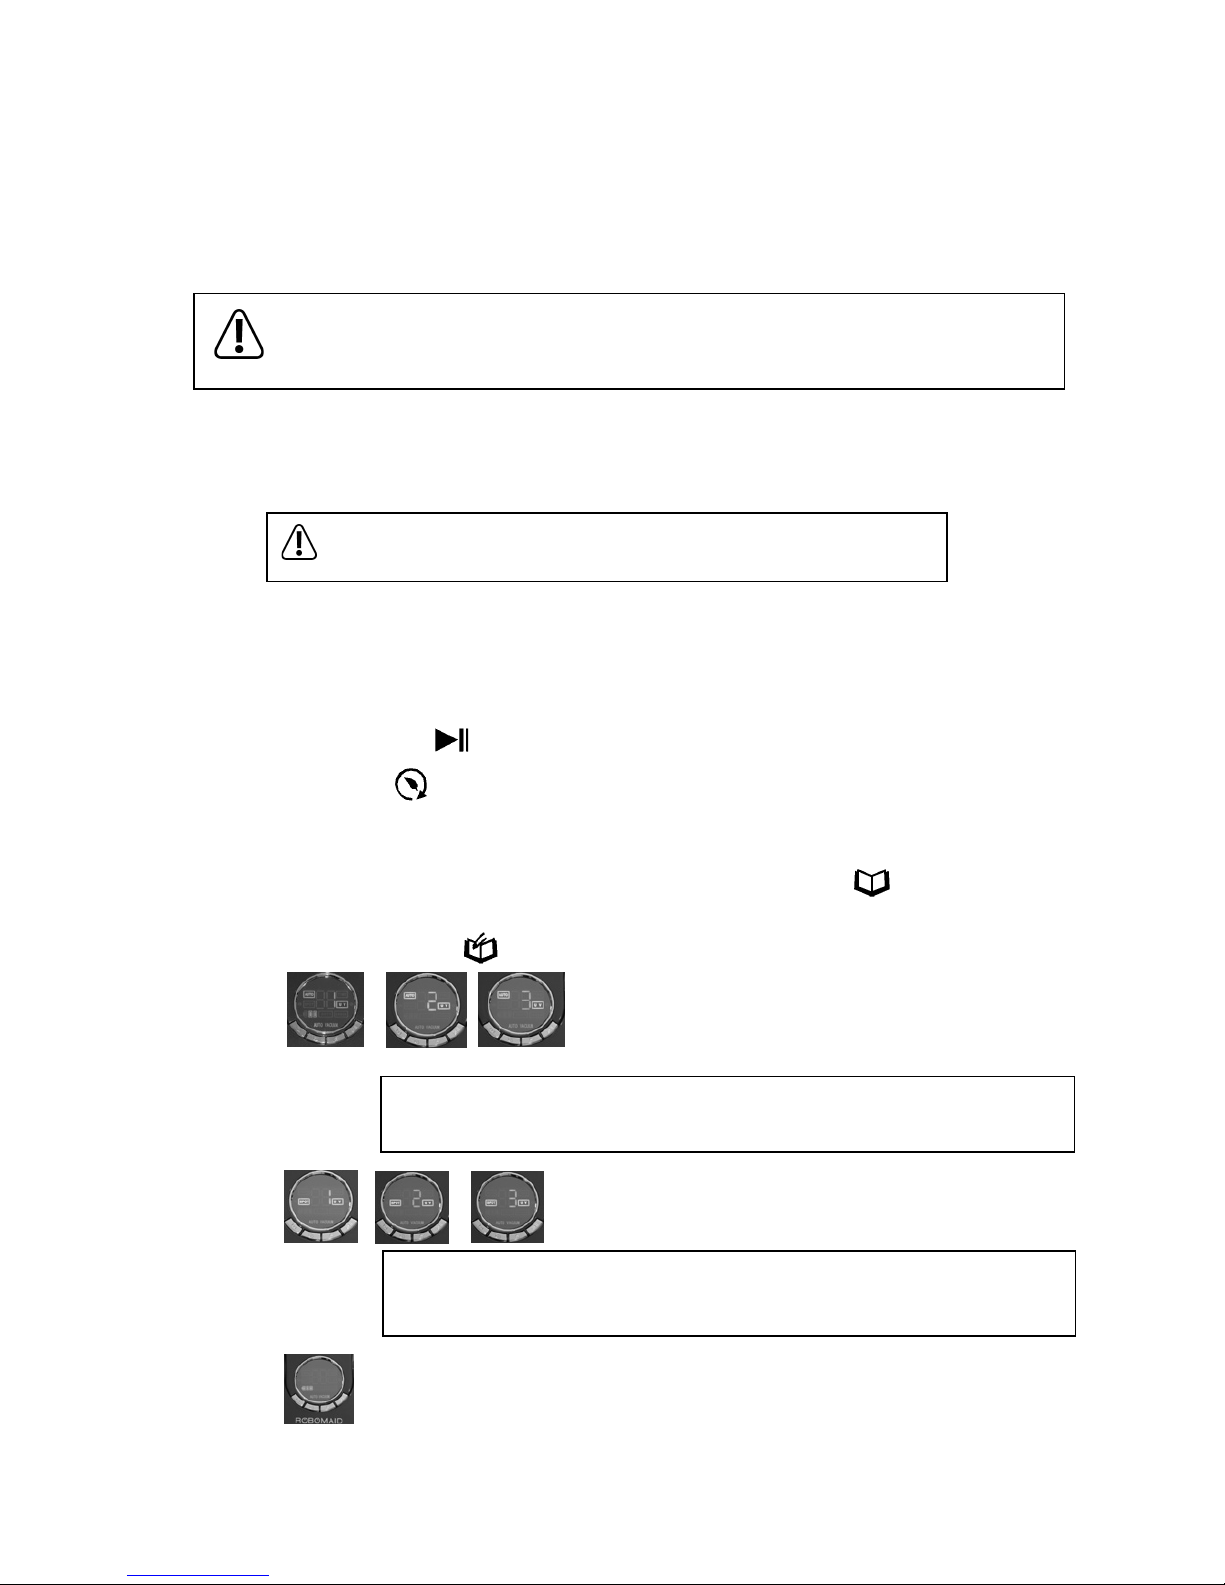
PLEASE NOTE that although the Robomaid RM-770 Robot Vacuum Cleaner is designed for automated
use and convenience, it does require regular cleaning and maintenance. Damage due to lack of cleaning
or maintenance will not be covered under warranty.
Please remember to regularly clean the main brush after each use for the rst three uses and ensure
the brush is cleaned regularly.
Do not look directly into the built-in UV lamp.
Failure to observe any of the above safety precautions will void warranty.
The Robomaid only has stair detectors
at its front. Never place the Docking Station
or any object near the top of stairs or ledges
that the Robomaid will reverse away from.
The Robomaid does not detect a lack of
traction from its drive wheels. Avoid using
it in areas that result in the drive wheels
slipping.
Ensure the Robomaid is operating on a clear
surface, free from moisture, spills, moist food
or waste, or any object or substance that
may cause marking if moved or dragged.

Components
Power Adaptor
RM-770 Robot Vacuum CleanerDocking Station Remote Control
Mopping Attachment
(2 x cloth and holder)
User Manual
Spare Filters 2 x Side Brushes Cleaning Brush
Names of Parts
UV Button
Infrared Receiver
LED Display / Control Panel
Mode Button
Select Button
Run / Pause Button
Front Bumper
Dustbin
Direct Charging Socket
Battery Cover
Sensor
UV Lamp
Front wheel
Left/Right wheels
Auxiliary wheels
Sensors
Charging Contact Points
Side Brush
Main Brush
Sensor
Rubber Seal
Power Switch
Bottom View:
Top View:
Mopping Attachment
Virtual Wall
Furniture Protection
Adhesives

Names of Parts
Docking Station
On/O Button
Infrared Transmitter
Power Adaptor SocketCharging Terminals
Skidproof Floor Pads
Full Go Button
Clock Button
Adjust Button
Timer Button
Remote Control LED Display / Control Panel
Indicator
Speed Adjuster
Auto Indicator
Dirt indicator
Digital display
Time Indicator
UV Indicator
Error indicator
Battery Power / Docking
Spot Indicator
Pause
Left
Wall-Following Button
Auto Button
On/O Button
Docking Button
Spot Clean Button
Forward
Right
Backward
UV button
Setting Up The Docking Station
- Place the Docking Station on level ground with the back against a wall.
- Make sure that there are no obstacles or uneven ground in the area within 3 meters in front of
the Docking Station and 0.5m toward the left and right of it. (See gure 1)
- Ensure that Infrared Transmitter on the Docking Station is clean, free from dust and uncovered,
otherwise, the Robomaid RM-770 may not automatically recharge correctly.
- Connect the Power Adaptor to the Power Socket of the Docking Station. (See gure 2)
- Tidy up any electric wires along the wall to avoid obstructing the operation of the Robomaid.
- Avoid placing the docking station near year TV or other wireless-based device.
- Never place the docking station near the top of a stair case or ledge, as the Robomaid RM-770 will
reverse away from the docking station.
Please take care when plugging in
Power Adaptor!
2erugiF1erugiF
Indicator
Furniture Protection Adhesives
- If the Robomaid does not detect an object in front of it, it will use the
bumper to recognise the object and change direction. To further protect
your furniture and other obstacles, you can stick the furniture protection
adhesives on the bumper of the Robomaid where appropriate.
- Please ensure the adhesives do not cover the red sensor strip on the
front bumper as shown to the right.
- Please note that once stuck on, the adhesives are very dicult to remove.

Standby Mode
- Switching the power switch to ON (see the gure below) switches the Robomaid ON and into Standby Mode.
- In Standby Mode, the current mode will be displayed (the default is “AUTO 1” ).
- To turn the RM-770 o, just switch the power switch to the OFF position.
- While the RM-770 is switched OFF, the remote control, timer, or control panel will not work.
Docking Mode
- If the Robomaid is left in Standby Mode for more than 3-5 minutes, it will start chirping every 30 seconds until the
Robomaid is activated, switched OFF, or recharging.
- In Docking Mode, the Robomaid RM-770 will automatically begin to search for the Docking Station to recharge
when the battery level is lower than 15%.
- Pressing the DOCKING button on the Control Panel of the Robomaid RM-770 or on the Remote Control, will
manually activate the search for the Docking Station to recharge.
- While the Robomaid RM-770 searches for the Docking Station, pressing any other button on Control Panel or
Remote Control will stop the RM-770 searching and enter Standby Mode. The directional buttons
on the Remote Control can also be used to manually assist the searching function.
- The Robomaid will search for the Docking Station and once within range of the Docking Station signal will attempt to
line up and dock. The Robomaid may turn away from the Docking Station and move about 2-3 meters away from the
Docking Station before turning back in line and docking.
- If the docking is not successful and the recharging does not begin, the Robomaid will reverse o the Docking Station and
attempt to dock again. The Robomaid can also be picked up and placed on the Docking Station physically if needed.
- When the Robomaid is in Docking Mode, the display will show the three red battery bars (see Figure 1) and
the sound of the Robomaid will be almost silent as the brushes and vacuum do not work in Docking Mode.
- Once the Robomaid docks successfully, it will go into Charging Mode.
- If the Robomaid cannot nd the Docking Station and the battery power becomes lower than 8% of the capacity,
it will stop searching and stop in a clear and bright place, and will chirp every 30 seconds until the battery is completely at.
It will then need to be charged by plugging in the Power Adaptor directly in the Robomaid.
If the Robomaid runs completely empty, it may not charge from the Docking Station and must be charged by
the Power Adaptor connected directly to the Robomaid.
Figure 1 - Docking Mode

Charging Mode
- You can directly charge the cleaner with the Power Adapter or with the Docking Station. (See Figure 2)
- To charge directly via the power adaptor, connect the power adaptor to the charging socket on the RM-770. (See Figure 1)
- When charging with the Docking Station, the Robomaid must be switched ON.
- During the charging process, the TIME icon will show on the display and the battery level bars will
ash to indicate charging. (See Figure 3)
- Upon completion of the charging, the display will show 3 full red bars and the TIME icon will disappear. (See Figure 4)
Please take care when plugging in
Power Adaptor!
2erugiF1erugiF
4erugiF3erugiF
1. Take out the battery before disposing of the product.
2. Always remember to cut o the power before removing the battery.
3. Recycle or dispose of the battery properly.
4. Do not throw battery into re!
5. If the battery is leaking, do not touch any leakage. Use a dry cloth
and dispose of the battery.
6. Do not impact battery or drop from a high place.
Please take care when plugging in
Power Adaptor!
- When charging with the Power Adaptor, the Robomaid can be switched ON or OFF, however it can not be activated until
the power adaptor has been disconnected.
- During the charging, the display will show the amount of charging time
where the number shown times 10 equals the actual number of charging in minutes.
A full charge takes about 3-5 hours, for the rst 3 times after purchasing the RM-770, please ensure
it is charged for at least 12 hours each time to build battery capacity.
Please try to fully use the battery power before charging for the rst 3 times.
- The Robomaid will enter Standby Mode if the power supply is cut o during the charging process and
the Robomaid is switched ON.
- When the Robomaid is not being used, it is best to keep it in Charging Mode, either on the Docking Station or connected
to the Power Adaptor.
- Open the battery cover with a phillips head screwdriver and disconnect the battery as shown below.
- When connecting a new battery, ensure the red and black connectors match up, otherwise damage may be caused.
- The battery model number is: YX-Li-022148
Removing / Replacing the Battery

- In standby mode with the Robomaid switched ON, press the mode button “ ” to select betwen
AUTO, SPOT, and DOCKING as shown by the corresponding indicator.
- Press the select button “ ” to select between 1, 2 and 3 secondary modes.
How to use the Robomaid RM-770 Control Panel:
AUTO Modes:1 – The Robomaid will run until the battery is fully used and then enter Docking Mode.
2 – The Robomaid will run for 30 minutes and then stop.
3– The Robomaid will run for 15 minutes and then stop.
SPOT Modes:1 – Robomaid RM-770 will clean in a spiral (working for 1-4 minutes).
2 – Robomaid RM-770 will clean in a zig-zag pattern (working for 1-4 minutes).
3 – Robomaid RM-770 will follow the walls (working for approx. 10 minutes).
DOCKING: This will start the Robomaid in Docking Mode. (See page 5)
The UV icon will light up if the UV light is on. Press once to turn on and press again to turn o.
- The UV button “ ” allows you to turn the UV lamp on or o during the cleaning. (The UV lamp is on by default)
- The Activate button “ ” will start the selected mode (the default mode is AUTO 1).
- The Robomaid must be switched ON to be activated.
- Once activated, the Robomaid will start cleaning int he selected cleaning mode (AUTO 1 is the default mode)
- The number of minutes the Robomaid is cleaning for will be shown during the cleaning process on the display.
Operating the Robomaid
- If the Robomaid detects a place with a lot of dirt or debris, the DIRTY icon on the display will
light up and the Robomaid RM-770 will increase the cleaning intensity in that area.
Please ensure all wires and other loose objects are removed from the Robomaid’s path as
loose cables, carpet fringes that are longer than 3-4cm, and other long, exible objects may get
tangled in the main brush.
- There are several ways to activate the Robomaid to start cleaning:
Remote Control (See page 8)
Timer (See page 9)
Control Panel on the Robomaid (See below)
- The Robomaid may be activated from Standby Mode or Charging Mode from the Docking Station.
- The Control Panel can be used to select the Mode or Secondary Mode of the Robomaid and activate the
Robomaid.
The running time of the Robomaid will vary based on several things including
ooring surface, initial charging time, frequency of use, furniture and room layout.

Press this button again to enter Standby Mode.
How to use the Remote Control:
The Power Button “ ”
When the Robomaid RM-770 is switched on, press the Power Button for the cleaner enter Sleep
Mode, which will save power and all indicators will be o.
When the cleaner enters Sleep Mode, it can not be started by pressing any button on either
the cover or the remote control.
AUTO Button:
Press this button and the Robomaid RM-770 will work in an automatic cleaning mode until the battery
power is used and then will automatically search for the Docking Station for recharging.
SPOTButton
DOCKING Button
Wall-Following Button “ ”
Speed Adjuster “”
Pause button “ ”
UV Button “ ”
Directional Buttons (Forward, Backward, Left, Right):
Press the arrow buttons to control the Robomaid RM-770 to move in the designated direction.
Right
Forward
Left
Backward
Do not press more than one button on the remote control at any one time as the Robomaid
needs clear, slow commands.
The eective distance of the Remote Control is 5-7 meters.
Press this button for the Robomaid RM-770 to start cleaning in the
indicated mode and once nished will not go into Docking Mode. (See Page 7)
Press this button for the Robomaid RM-770 to start searching for the
Docking Station.
Activates cleaning in the wall-hugging mode and once nished will not
go into Docking Mode. (See Page 7).
Switches the UV lamp on and o.
Changes between 3 dierent speeds of operation. The default speed
is the fastest.
Stops the Robomaid and enters Standby Mode.
This makes the RM-770 clean forwards and it will automatically
stop when it meets an obstacle.
This makes the RM-770 move backwards for approx. 30cm.
This makes the RM-770 turn Left 10 degrees and then clean forward.
Holding the button down increases the angle of the turn.
This makes the RM-770 turn Right 10 degrees and then clean forward.
Holding the button down increases the angle of the turn.
Installing or Replacing Batteries for the Remote Control
- Please note batteries for the Remote Control are not included and need to be purchased separately.
It requires 2 x AAA size batteries.
- Slide open the battery cover on the Remote Control and remove batteries if needed.
- Insert two batteries. Please ensure the batteries are in the correct direction as shown below, otherwise
damage may be caused.
- If the Remote Control will not be used for a long amount of time, it is best to remove the batteries.

How to use the Docking Station:
Connect the Power Adaptor to the Docking Station. The display will show the time and day as being Monday 8:00 am.
There are 5 buttons as shown in the gure below, including: ON/OFF Button “ ”, Full Go Button “ ”,
Clock Button “ ”, Timer Button “ ” Adjust Button “ ”.
Please note the buttons will only work if the Robomaid is NOT charging on the Docking Station.
While programming the Timer, the ON/OFF Button is ‘Cancel’ and the Full Go Button is
‘Save’.
Setting The Time
- Press the Clock Button “ ” to begin setting the time.
- Press it again to switch between setting minutes, hours and days. The selected item will ash.
- Press the Adjust Button “+” to adjust minutes, hours and day of the week.
- Once desired time is reached, press the Full-Go button “ ” to save.
- To Cancel setting the time, press the ON/OFF Button “ ” or Timer Button “ ”.
Full Go Mode
- Press the Full Go button “ ” to enable the Full Go Mode - when the battery has been fully
recharged, cleaning will automatically begin.
Setting The Cleaning Timer
- Press it again to switch between setting minutes, hours and days. The selected item will ash.
- Press the Adjust Button “+” to adjust minutes, hours, and days.
- Press the Timer button “ ” to begin setting the Cleaning Timer.
- To NOT select a day, press the the Adjust Button “+” while that day is ashing, and that day will be skipped
and the next day will ash.
Setting the Cleaning Days
- The selected day will ash for 5 seconds then stop. This indicates this day has been selected
- Once desired setting is reached, press the Full-Go button “ ” to save.
- If the timer has been set and Full Go Mode has been enabled, the timer will take priority.
- To Cancel setting the timer, press the ON/OFF Button “ ” or Clock Button “ ” .
- To disable Full Go Mode, press the Full Go button again and make sure the Full Go icon is not
showing on the bottom right of the LCD display.
as a cleaning day. Press the Adjust Button “+” to move to the next day, which will start ashing.
Switching The Cleaning Timer O
- Press it again twice to adjust the days. The selected day will ash.
- Press the Adjust Button “+” to clear o that day while the day is ashing. Press the Adjust Button “+” repeatedly
until all the days are cleared, then quickly press the Full-Go button “ ” to save
- Press the Timer button “ ” to begin setting the Cleaning Timer.

How to Use The Virtual Wall
Before using the Virtual Wall, install the batteries as shown in Figure 3, open the bottom cover of the
Virtual Wall, install 2 x D batteries. After the installation, close the bottom cover and tighten the screws.
Make sure you put the batteries in the correct way.
Select the distance selector of the Virtual Wall according to the actual requirements. Slide the
switch to the top position to select the lowest level (0-4m), to the middle to select the middle level (4-7m)
and tothe bottom to select the highest level (above 7m) See gure 2. The lowest level uses the least
amount of power.
Press and hold the power button on the Virtual Wall and the indicator will start ashing. If the batteries
are low in power, the indicator will ash faster and the batteries should be replaced.
The Virtual Wall sends an infrared signal with a 15° degree range.
The Virtual Wall uses 2x D (1.5V) batteries. When the batteriesare running low, it is recommended
to replace them as continued use with low power may damage the Virtual Wall.
The Virtual Wall sends a special infrared signal to prevent the Robomaid RM-770 from entering
unnecessary or unwanted areas or to reduce the cleaning area.
01.
01.
02.
03.
04.
05.
Distance selector
Infrared signal emitter
Wall signal emitter
Indicator
Power switch
Rubber pad
Bottom cover
0-4m
4-7m
Over 7m
Figure 1 Figure 2 Figure 3
Figure 4
You need to use a screwdriver to open
the bottom cover of the Virtual Wall. (see Figure 3)
See Figure 4 for the installation of batteries. Make
sure to insert the batteries in the correct way.
Ensure no obstacle is placed in front of the
Virtual Wall when in use.
Installing and Replacing the Batteries

Using the Mopping Attachment
- The mopping cloths can be used dry or damp.
- Attach the specially designed Robomaid mopping cloth to the mopping holder. (See Figure 1)
- Align the clips at end of the mopping holder (See gure 2) to the sunken positions on the inner
sides of the 2 wheels (See Figure 3) and clipped them in place.
- When using the mopping attachment (See gure 4), The Robomaid will mop the oors while vacuuming,
resulting in a more thorough clean.
- To stop using the mopping attachment, just unclip the mopping holder.
- It’s recommended to wash and wring dry the mopping cloth before using the mopping function.
Figure 1
Attach the mopping cloth to the holder
4erugiF3erugiF2erugiF
Removing the Dustbin
- Press the button on the dustbin and it will be ejected. (See Figure 1)
- The dustbin will slide out easily. (See Figure 2)
- Slide the dustbin in and push rmly to lock in place.
3erugiF2erugiF1erugiF
How to Clean the Dustbin
- First, open the dustproof guard and dump the dust and debris collected. (See Figure 1)
- Then clean it with cleaning brush (See Figure 2)
- Be sure to empty the dustbin after the rst use.
Figure 1 Figure 2
Do Not Rinse in water!
Please note that mopping attachment is not designed for use on carpets or rugs. The specially
designed Robomaid mopping cloths are machine washable.
The dustbin does t tight in the cleaner to create a better seal for the vacuuming. If the dustbin is dicult to open,
use one hand and push the top of the silver button with your thumb and at the same time, use your ngers underneath
the dustbin to slide it out if needed. Pushing down on the front of the Robomaid while pressing the button also helps.

Cleaning Sensors
- The sensors should be cleaned by cotton swab or soft cloth.
- There are wall-following sensors installed in the front of bumper of the Robomaid RM-770, and ground
detection sensors installed under the RM-770 (see the gure below)
To ensure a more eective cleaning of the Robomaid RM-770, please
clean the sensors regularly.
How to Replace and Clean the Filters
Removal and Cleaning of Filters:
- Hold the middle part of the lter tray located on the inside of the dustbin (See gure 1) and then
slide out (See gure 2).
- The lters will easily lift out (See gure 3)
- Unclip the rear iter grill (See gure 4).
- Take out the lter inside (See gure 5).
- The lters can be cleaned in water and then reused after drying. It’s recommended to clean and
replace them regularly.
- Install the 2 large lters onto the lter tray then slide it into the dustbin. Install the softer lter rst. (Figure 1)
- First install the lter in the lter grill (Figure 5), and then insert the top end into the dustbin, and then clip
the lower end in place.
Figure 1 Figure 2 Figure 3
Figure 4 Figure 5
Side Brush
- To remove, nip the two fasteners of the side brush with one hand (see Figure 1) and pull the side
brush upward with the other hand to take it out.
- To Install, align the side brush with the 2 fasteners and press it down to clip in the side brush (See
Figure 2)
Figure 1 Figure 2
Installation of Filters:

Main Brush
How to Install the Main Brush
- Hold the brush (the end with the pin must be inserted in the cleaner rst ) See Figure 1.
- Insert the pin shown in Figure 1 into the matching hole in cleaner and push it inward, the other
end of the brush can then be inserted into the gear end. (See Figure 2)
How to Clean the Main Brush
For a better cleaning eect, you must regularly clean out the hair, yarn and large debris wound on or
adhered to the main brush and the dust on the suction inlet .
- Use the cleaning brush to clean paper scraps or minute particles.
- Wound hair, yarn or similar objects should be cut by scissors or pulled out by hand while
carefully rotating the main brush.
How to Remove the Main Brush
- Hold the brush and push it to the left. (See Figure 1)
- The brush will lift out easily. (See Figure 2)
Figure 1 Figure 2
2erugiF1erugiF
- Both ends of the main brush be regularly cleaned as lack of maintenance may cause damage.
To ensure a more eective cleaning of the RM-770, please regularly remove and
clean the ends of the main brush thoroughly.
Please clean the main brush after the rst 3 times to judge how often the brush should be cleaned.
Any damage caused by lack of cleaning and maintenance may not be covered under warranty.
Storing the Robomaid RM-770
The Robomaid RM-770 should be stored in ventilated and dry places. Avoid damp areas and direct sunlight.
Remove and Clean the ends
of the Main Brush after each
run for the rst 3 times!

If the above errors cannot be resolved, please contact Robomaid Customer Care.
Trouble shooting
If you experience some issues while using your Robomaid RM-770, please use the following guide and please feel free
to contact our Customer Care team.
- Check if the selected cleaning time is over.
- Check if there’s any error information on the LED display and refer to the following table of error codes.
The Robomaid Stops while Working
- Check the battery status and ensure the Robomaid is not in Docking Mode.
- Check whether the dustbin, the lter and the inlet of suction are cleaned; whether the side brush is working.
- Check whether the cleaner is turned on.
- Remove and Check the main brush, including both ends, and see if a build up of excess hair has
caused damage or a malfunction.
- Check the battery status of the Remote Control.
- Check the battery status of the Robomaid RM-770.
- Clean the infrared sensor or the beam sensor of the Remote Control with a clean and dry cloth.
- Keep a distance of 2-3 meters between the cleaner and the Remote Control, and then operate the remote
directly pointing toward the cover of RM-770.
- Ensure you are pressing the buttons slowly and giving clear commands to the Robomaid.
The Robomaid is not working as well as it did.
The Remote Control does not work
The RM-770 Fails to Return to the Docking Station
- Check whether the power supply is properly connected between the adaptor and Docking Station.
- Check the battery power, if it’s too low, it must be charged directly with the power adaptor.
The noise level is increased dramatically
- Clean the main brush from any obstacles and hair. Clean the dustbin and the lters.
- Check whether the brushes are excessively dirty and ensure both ends of main brush are free from hair.
Error CodeIndicatedProblem Solution
0
1
2
3
4
5
6
7
8
9Internal Software Problem. Contact Robomaid Customer Care
Left Wheel is jammed or has no traction.
Right Wheel is jammed or has no traction.
Main brush is jammed and cannot spin.
Front Wheel is jammed or has no traction.
Floor Sensors not detecting.
Wall Sensors not detecting.
Front bumper is jammed.
Main Brush is not spinning.
Dustbin is not installed properly.
Check the wheels for any obstacles jamming them.
Clean out the front wheel of any hair or obstacles.
Clean the oor sensors. Ensure the Robomaid is not
operating in direct sunlight or on black or very dark surfaces.
Clean out the main brush of any hair or obstacles.
Clean the wall sensors on the bumper. Ensure the
Robomaid is not operating in direct sunlight. This error can occur
in Docking Mode if there is no clear path to the Docking Station.
Clean out the front bumper of obstacles.
Reinstall and clean out the main brush of
any hair or obstacles.
Reinstall and clean out the dustbin and clean the
dustbin contact points if needed.
- Try a dierent location of the Docking Station as the signals can have interference by wireless devices, such as TV,
Stereo/Hi-Fi, or PC accessories.
- Ensure there is adequate space around and in front of the Docking Station.
- Ensure the Docking Station is on a at oor and not slightly raised by plush carpet.
Robomaid won’t charge on the Docking Station
- If the Robomaid goes completely at, it will need to be charged directly with the Power Adaptor.

Technical Specications Model
Dimensions
Weight
Speed
Charging Time
Operation Time
Noise Grade
Input
Rated Power
Made in China
Robomaid RM-770
Diameter: 35cm Height: 11cm
3.5kg
24cm/Sec (fastest) 15 cm/sec (slowest speed)
3 - 5hrs
45 - 60 mins vacuuming plus up to 60 mins docking
~65dB
24V — 1A
45W
Country of Origin
Capacity of dustbin 1000CC
Length of Main Brush 25cm
Battery 14.4v Lithium-ion
Trouble shooting (cont.)
Robomaid keeps getting stuck
- Check the error code and refer to the table on the previous page.
- The Robomaid is about 11cm high, but can get stuck on furniture that has a gap of between 10-11cm. If this is the case,
try sectioning the area o with a Virtual Wall or if possible, increase the height of the furniture by 1cm.
- If the Robomaid is getting stuck on carpet, check that the mopping attachment is removed.
- The Robomaid can get stuck on any long strands of carpet, fringes of rugs, cables, shoelaces etc, so ensure the area
is tidy and free from any obstacles that it may get stuck on.
- If there is a situation that the Robomaid gets wedged, the sensors may not detect this. Use a Virtual Wall to avoid these areas.
Docking Station display goes out
- The docking station display can cut out if moved frequently.
- Reset the display by unplugging the Docking Station and leaving it oine for about 48 hours. In the meantime, charge
the Robomaid directly with the Power Adaptor. The display of the Docking Station should come back and remain xed.
The Dustbin won’t come out
- The dustbin does t tight in the cleaner to create a better seal for the vacuuming. If the dustbin is dicult to open,
use one hand and push the top of the silver button with your thumb and at the same time, use your ngers underneath
the dustbin to slide it out if needed. Pushing down on the front of the Robomaid while pressing the button also helps.
Virtual Wall won’t switch on
- Ensure the batteries are installed correctly. See page 10 for a diagram.
- When switching the Virtual Wall on, hold the ON/OFF button down for a few seconds until the green light starts ashing.
General Hints
- Remember to keep the Robomaid clean and be sure to regularly clean the main brush
to keep it free of excessive hair.
- Keep the Docking Station in a clear area away from wireless devices with plenty of room
on either side and in front of it to allow the Robomaid to dock correctly.
- Be sure to charge the Robomaid for at least 12 hours for the rst few times of use.
- Be sure to keep the area tidy from objects and obstacles that the Robomaid can get stuck on.
The Dustbin keeps coming out
- Check that the lters in the dustbin are installed correctly. Check the latch on the top of the dustbin is operating correctly.
Robomaid suddenly became extremely noisy.
- URGENT! The main brush must be revomed and cleaned thoroughly - especially the ends of the brush - to prevent damage.
The Robomaid Doesn’t Detect Stairs or Ledges
- The Robomaid will detect stairs that are 10cm or higher.
- If the top step or ledge is rounded, the Robomaid may have trouble reversing away from it. Use a Virtual Wall.
- If the oors are especially shiny, the oors may reect the sensors and the Robomaid may not detect the step.
- Always supervise the Robomaid when using it near a stair case. Never put the docking station or any object that will cause
the Robomaid to reverse near the top of the stairs or near a ledge.
- Use the Virtual Wall across the top of the stairs if needed.

Copyright 2012 Robomaid Australia Pty Ltd
AUSTRALIA
Robomaid Australia Pty Ltd PO Box 7293 Alexandria, New South Wales, Australia 2015
Customer Service Line (free call) 1800 794 191
Website: www.robomaid.com.au
Due to continual product improvement in design or otherwise, the product you purchase may dier slightly from the illustrations in this book.
Table of contents