manuals.online logo
Brands
  1. Home
  2. •
  3. Brands
  4. •
  5. Rock Island Equipment
  6. •
  7. Network Hardware
  8. •
  9. Rock Island Equipment 6500 User manual

Rock Island Equipment 6500 User manual

!
!
!
!
1!
LTE Fixed Wireless
Quick Start Guide
6500
!
Welcome!
!
Rock Island‘s LTE Fixed Wireless Internet service is designed to serve San Juan County for years to
come. Rock Island has built this network using nation-leading wireless technology and is
broadcasting signal in private spectrum to protect the quality and longevity of this network.
It’s a new era in San Juan County, and you are about to join the movement toward better
connectivity, better productivity and a more thriving community. Thank you for playing a part.
Enjoy your connection!
Enjoy your first month FREE!
We want you to feel good about your new wireless Internet service, and to know that it’s the right
fit before committing to our terms of service (available at www.rockisland.com/legal).
Therefore, we offer your first month of service on us*. This means that we will set up your billing
account the day you take home an LTE modem but you won’t see any charges until 30 days after
your service start date. The first month is completely free! When you receive your first invoice, it
will include the one-time setup fee of $50 and first month’s service at $75. No data caps. No added
taxes. Easy!
!
!
!
!
!
!
!
!
!
!
*Credit!card,!debit!card,!or!ACH!billing!information!required!at!service!start!date.!Auto!pay!not!required.!!
Cancellation!within!30!days!of!activation!waives!all!charges,!including!activation!fee.!!
If!service!is!cancelled!after!30!days,!customer!will!be!billed!for!one!month’s!service,!including!activation!fee.!!
One!Month!Free!offer!is!for!new!customers!only.!!
!
!
!
!
2!
Package Contents
• BEC 6500AEL 4G/LTE Wireless
Broadband Router
• A Quick Start Guide!!
• One RJ-45 Ethernet cable
• Two 4G/LTE antennas
• Two WiFi antennas
• One power adapter
Hardware Installation
1. Connecting the 4G LTE and WiFi antennas
a. The 4G LTE antennas are the larger, paddle-shaped antennas. Attach
these to the connectors on the side of the router, closer to the front
panel lights.
b. The WiFi antennas are round. Attach these to the connectors closer
to the back of the router.
2. Connecting the Supplied DC Power Adaptor
!
!
!
!
3!
Connecting to the Internet
About five minutes after turning the router on, the Internet light (located furthest to
the right on the front LED panel) will turn green, indicating that you are ready to
connect to the internet!
1. Connecting wirelessly
• On your computer, phone, or tablet, access the WiFi settings and look
for a new available network with a name that starts with “BEC”. This is
your new wireless network’s default name.
• Select the BEC___ network, and enter the 8 digit default password when
prompted.
• Please note that the password is case sensitive (all caps).
2. Using a LAN (Ethernet) Connection
• Connect the supplied Ethernet cable to one of the Ethernet ports, and
the other side to the PC’s Ethernet interface.
!
!
!
!
4!
Modifying Your Router Settings
You can change your WiFi name and password, along with other connection settings
by visiting the router admin page.
To do this, open a web browser and type this URL into your address bar:
http://192.168.1.254
User name: user
Password: user
Once you’re logged in, look for a series of drop-down menus on the left of the
screen. First, select Configuration. Then, Interface Setup. Finally, choose Wireless.
This will bring you to this page:
Find the box labelled” SSID”
and enter the WiFi name of
your choosing.
“Pre-Shared Key” is your WiFi
password. This has to be at
least 8 characters long.
Once you’ve changed your
network name and password,
click the Save button at the
bottom of the screen.
!
!
!
!
5!
Front Panel LEDs
!
!
!
!
6!
Rear Panel Connectors
!
!
!
!
7!
Troubleshooting
1. None of the LEDs are on when you turn on the router:
Check the connection between the power adapter and the router. Also confirm
that you’re using a functional power outlet. If the error persists, you may have
a hardware problem. In this case you should contact our technical support.
2. You have forgotten your WiFi password:
Connect computer to router via ethernet and follow directions on page 5 of
this guide to access your wifi settings.
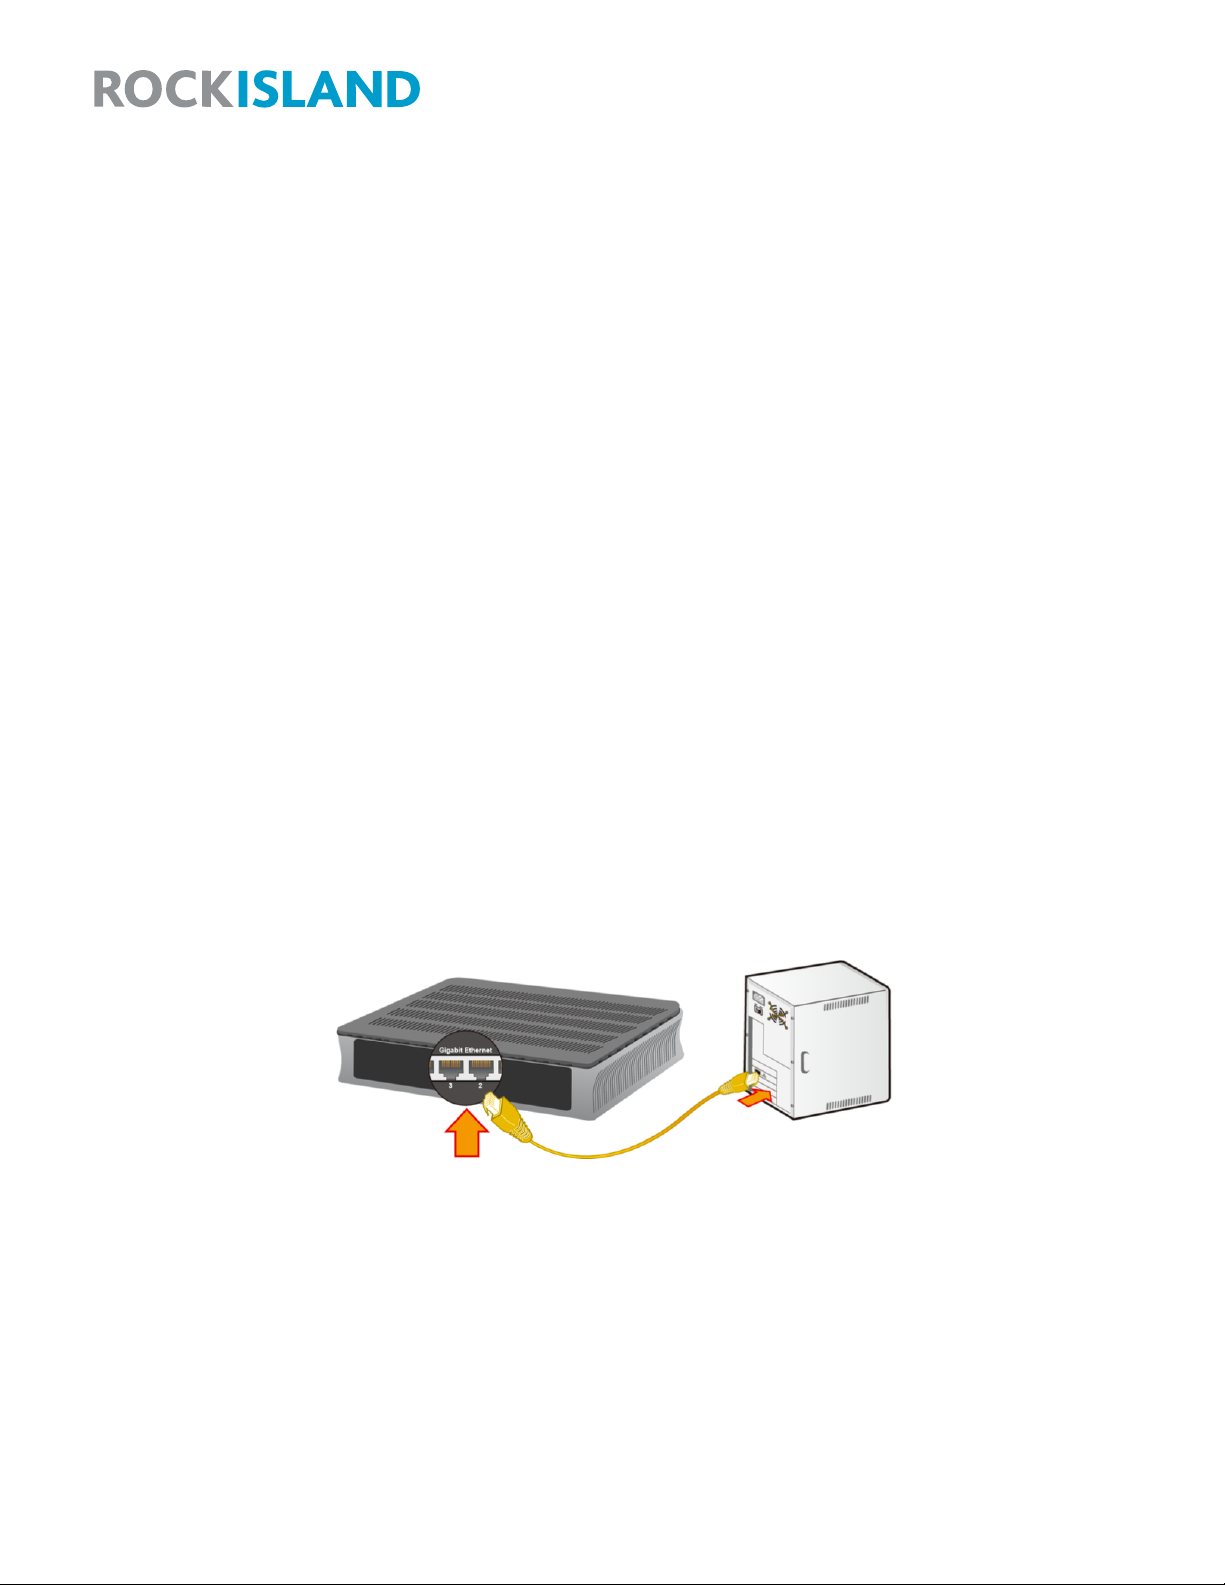
3. Computer connected via ethernet but not able to connect to internet:
Check the Ethernet LEDs on the front panel. The LED should be on for a port
that has a PC connected. If it is off, check the cables between your router and
the PC.
4. Slow speed or network drops:
Check to see if any devices are doing big updates or downloads. If so, test
speed again once that activity is complete (speedtest.net or on our website at
rockisland.speedtestcustom.com).
Try rebooting your router.
If the problem persists, please give us a call during business hours for
troubleshooting.
Free Customer Support
Don’t forget we have a free customer support line if you need any assistance after
you begin service. Our support staff is available 24/7 to assist you. Simply dial 360-
378-5884 and press option 1.
General Warnings
• Do not use the router in high humidity or high temperatures (or outside)
• Do not use the same power source for the router as other equipment
• Do not open or repair the case yourself. If the router is too hot, turn off !the
power immediately and have it repaired at a qualified service center
• Only use the power adapter that comes with the package. Using a different
voltage rating power adaptor may damage the router
• Place the router on a stable surface.

Popular Network Hardware manuals by other brands

Bay Networks CLAM quick start guide

Bay Networks

Bay Networks CLAM quick start guide

WirelessCCTV ALINK-5801A user manual

WirelessCCTV

WirelessCCTV ALINK-5801A user manual

Metrodata FM4800 user manual

Metrodata

Metrodata FM4800 user manual

ADC Double Pair/Line Power G.SHDSL WorldDSL G.S Specification sheet

ADC

ADC Double Pair/Line Power G.SHDSL WorldDSL G.S Specification sheet

Smartenit ZBRE quick start guide

Smartenit

Smartenit ZBRE quick start guide

ACTiSYS BT5711U Specifications

ACTiSYS

ACTiSYS BT5711U Specifications

Cisco Firepower 1010 FPR1010-NGFW-K9 Hardware installation guide

Cisco

Cisco Firepower 1010 FPR1010-NGFW-K9 Hardware installation guide

ADTRAN BR1/10 PAU Installation and Maintenance

ADTRAN

ADTRAN BR1/10 PAU Installation and Maintenance

eks IOL3400 manual

eks

eks IOL3400 manual

Meinberg GEN170TGP Information sheet

Meinberg

Meinberg GEN170TGP Information sheet

QNAP VioStor-2008 user manual

QNAP

QNAP VioStor-2008 user manual

ClearView PhoenixPlus-08-M user manual

ClearView

ClearView PhoenixPlus-08-M user manual

Sony ODS-D55U Operation manual

Sony

Sony ODS-D55U Operation manual

Bogen MAX1R manual

Bogen

Bogen MAX1R manual

Cambium Networks PTP 820G Technical description

Cambium Networks

Cambium Networks PTP 820G Technical description

ADTRAN Total Access 372E manual

ADTRAN

ADTRAN Total Access 372E manual

Kindermann HDMI/USB-HDBT3 Extender 4K60 Set Commissioning and operating instructions

Kindermann

Kindermann HDMI/USB-HDBT3 Extender 4K60 Set Commissioning and operating instructions

Axis S2108 user manual

Axis

Axis S2108 user manual

manuals.online logo
manuals.online logoBrands
  • About & Mission
  • Contact us
  • Privacy Policy
  • Terms and Conditions

Copyright 2025 Manuals.Online. All Rights Reserved.