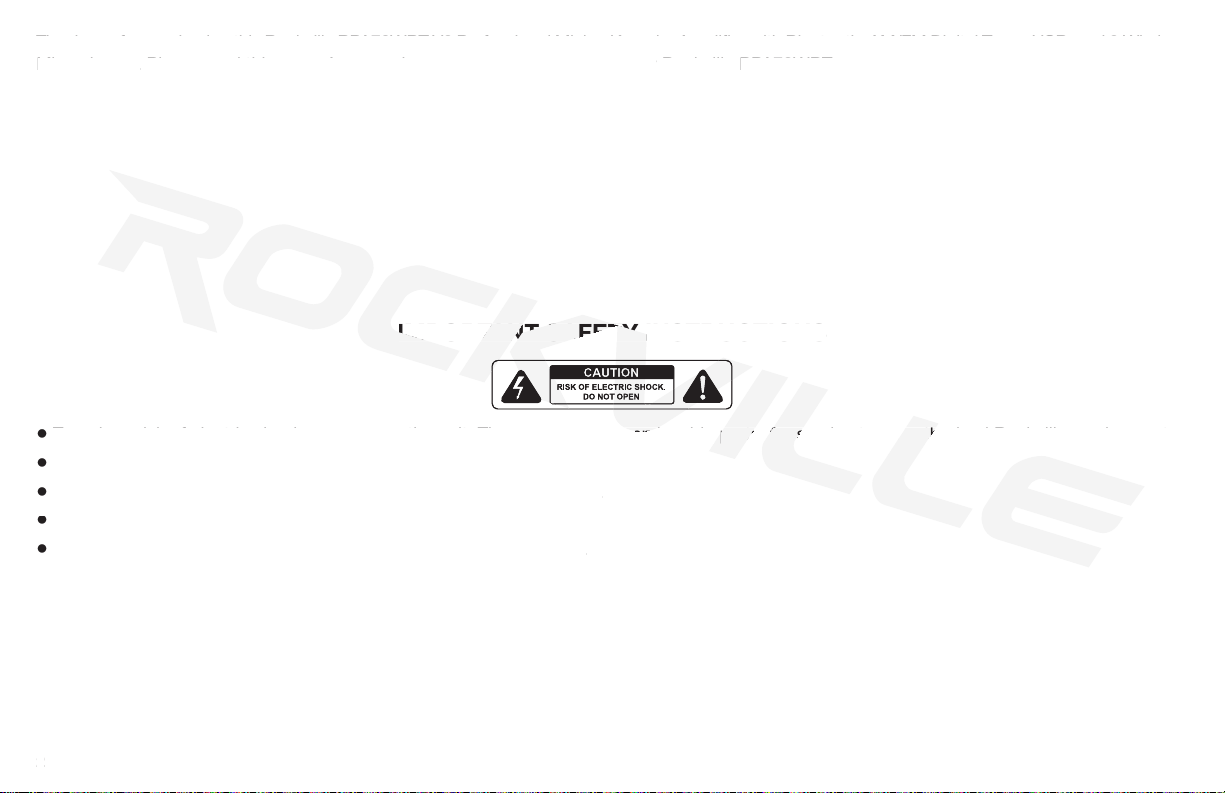
3
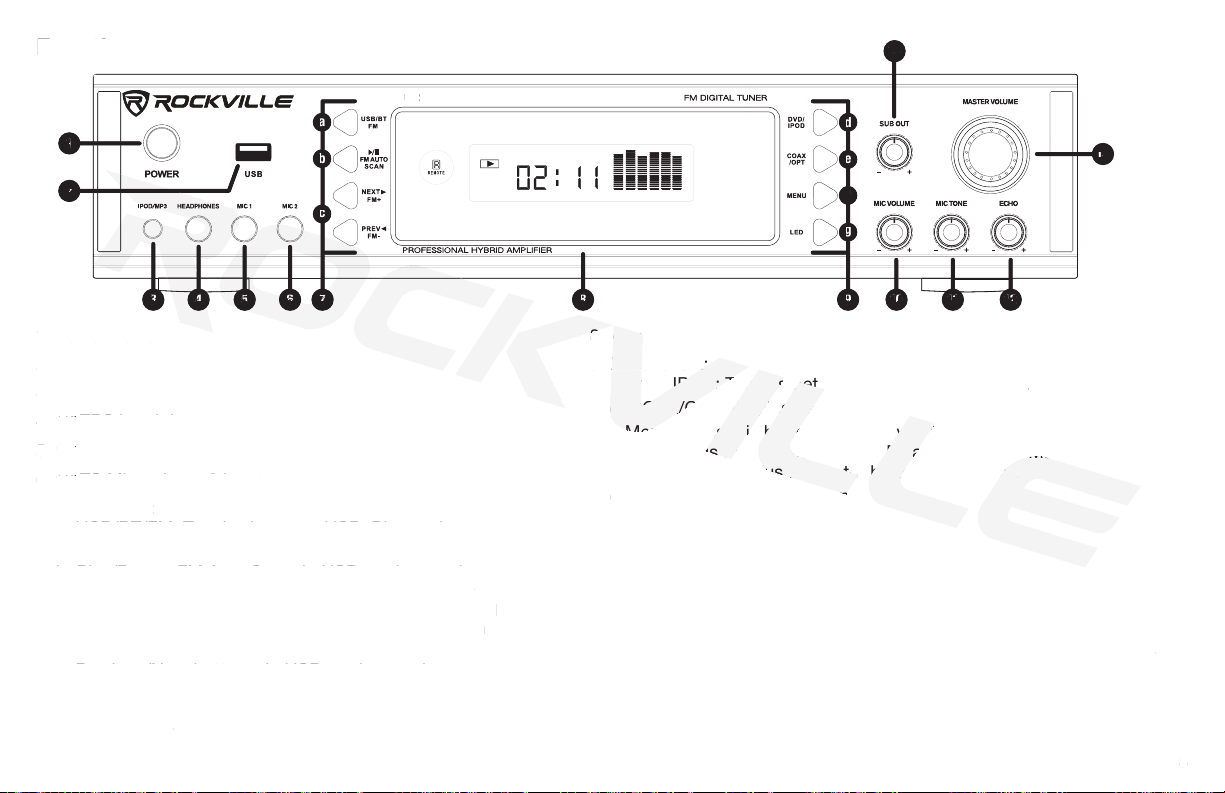
8. Vacuum Fluorescent Display
9. Functions 2:
d. DVD/IPOD: Toggles between DVD and iPod input.
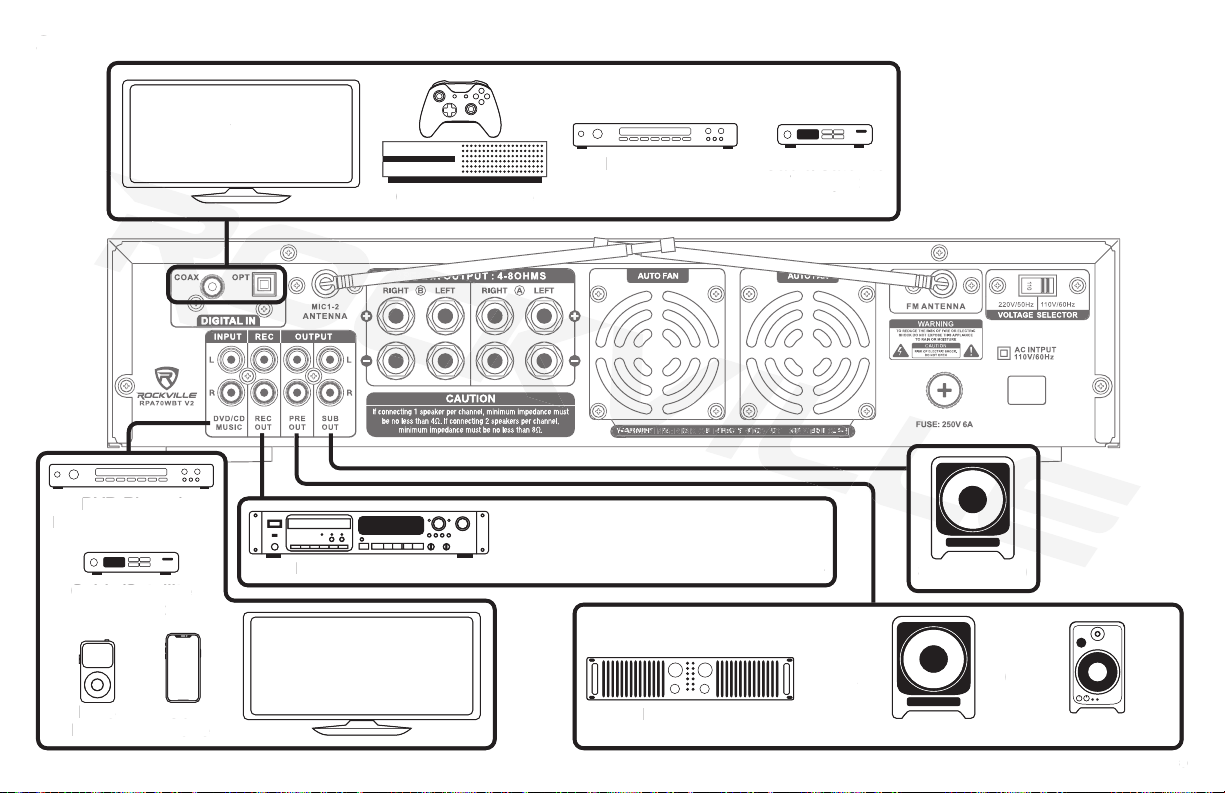
e. COAX/OPT: Toggles between Coaxial and Optical input.
f. Menu: Press this button repeatedly to toggle between options in
the settings menu (Bass, Treble, Balance. Use the Master Volume
knob to make adjustments to the desired setting.
g. LED: Dims LED illumination.
10. Microphone Volume
11. Microphone Tone
12. Microphone Echo
13. Master Volume: Controls overall output volume. If you are in the
settings menu mode, this knob can be used to adjust Bass, Treble, and
Balance. In FM mode, it can be used to move navigate preset stations.
14. Sub woofer Output Volume control.
RPA70WBT V2
Functions
10 12
13
14
118 96 7543
ad
f
g
e
b
c
1. Power Button
2. USB input
3. 3.5mm TRS iPod/MP3 input
4. ¼˝ TRS headphone output
5. ¼˝ TS Microphone 1 input
6. ¼˝ TS Microphone 2 input
7. Functions 1:
a. USB/BT/FM: Toggles between USB, Bluetooth,
and FM input.
b. Play/Pause, FM Auto Scan: In USB mode, use the
button to play or pause the current track. In Tuner
mode, use to scan between stations. Press and hold
for several seconds to store a station. This unit can
store up to 50 stations.
c. Previous/Next buttons: In USB mode, use these
buttons to go to the previous or next track. In Tuner
mode, use these buttons to go to the previous or
next station.
2
1
8. Vacuum Fluorescent Display
d. DVD/IPOD: Toggles between DVD and iPod input.
e. COAX/OPT: Toggles between Coaxial and Optical input.
f. Menu: Press this button repeatedly to toggle between options in
the settings menu (Bass, Treble, Balance. Use the Master Volume
knob to make adjustments to the desired setting.
g. LED: Dims LED illumination.
13. Master Volume: Controls overall output volume. If you are in the
settings menu mode, this knob can be used to adjust Bass, Treble, and
Balance. In FM mode, it can be used to move navigate preset stations.
14. Sub woofer Output Volume control.
3. 3.5mm TRS iPod/MP3 input
¼˝ TRS headphone output
¼˝
¼˝ TS Microphone 1 input
¼˝
¼˝ TS Microphone 2 input
¼˝
a. USB/BT/FM: Toggles between USB, Bluetooth,
b. Play/Pause, FM Auto Scan: In USB mode, use the
button to play or pause the current track. In Tuner
mode, use to scan between stations. Press and hold
for several seconds to store a station. This unit can
c. Previous/Next buttons: In USB mode, use these
buttons to go to the previous or next track. In Tuner
mode, use these buttons to go to the previous or
8. Vacuum Fluorescent Display
8. Vacuum Fluorescent Display
d. DVD/IPOD: Toggles between DVD and iPod input.
e. COAX/OPT: Toggles between Coaxial and Optical input.
f. Menu: Press this button repeatedly to toggle between options in
d. DVD/IPOD: Toggles between DVD and iPod input.
e. COAX/OPT: Toggles between Coaxial and Optical input.
f. Menu: Press this button repeatedly to toggle between options in
the settings menu (Bass, Treble, Balance. Use the Master Volume
d. DVD/IPOD: Toggles between DVD and iPod input.
e. COAX/OPT: Toggles between Coaxial and Optical input.
f. Menu: Press this button repeatedly to toggle between options in
the settings menu (Bass, Treble, Balance. Use the Master Volume
knob to make adjustments to the desired setting.
g. LED: Dims LED illumination.
e. COAX/OPT: Toggles between Coaxial and Optical input.
f. Menu: Press this button repeatedly to toggle between options in
the settings menu (Bass, Treble, Balance. Use the Master Volume
knob to make adjustments to the desired setting.
the settings menu (Bass, Treble, Balance. Use the Master Volume
knob to make adjustments to the desired setting.