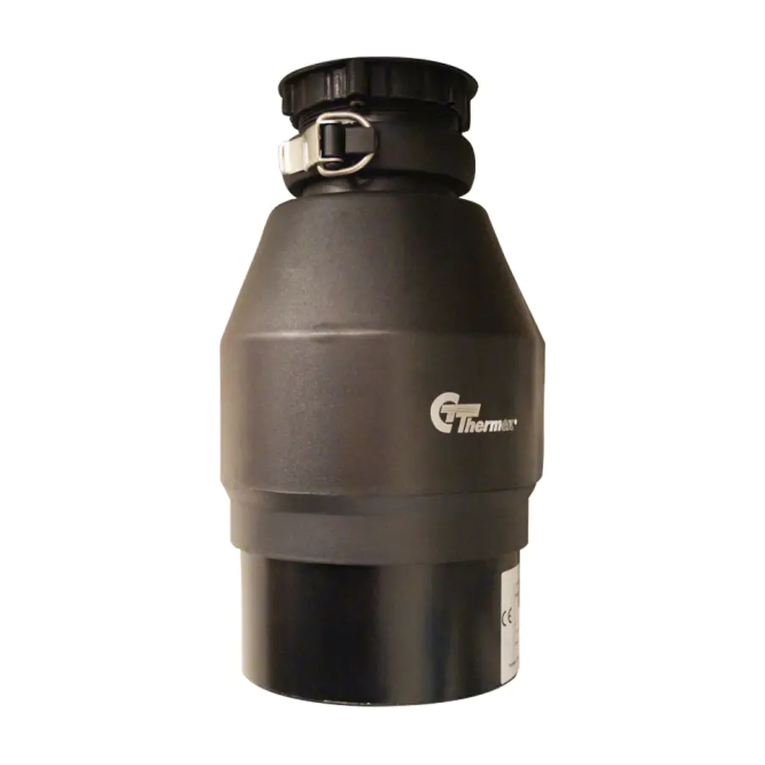
RODI R300 Parts list manual

Model number:
Serie number:
Visit us
sinks.rodi.pt


Português
Informação de segurança relevante
Conjunto de Montagem
Instalação dos elementos
Instruções de operação
Falhas e reparações
Limpeza e manuntenção
Garantia
Declaração de conformidade UE
Desenho Técnico
English
Relevant security information
Mounting Set
Installing the elements
Operating instructions
Faults and repairs
Cleaning and maintenance
Warranty
EU Declaration of Conformity
Technical Drawing
Français
Informations de sécurité importante
Kit de montage
Installation des éléments
Mode d’emploi
Pannes et réparations
Nettoyage et entretien
Garantie
Déclaration de conformité UE
Dessin Technique
Español
Información de seguridad relevante
Conjunto de Montaje
Instalación de los elementos
Instrucciones de uso
Fallas y reparaciones
Limpieza y cuidados
Garantía
Declaración de conformidad EU
Diseño Técnico
4
4
5
6
9
10
11
11
11
12
12
13
14
17
18
19
19
19
20
20
21
22
25
26
27
27
27
28
28
29
30
33
34
35
35
35
44
44
44
44
Hrvatski
Relevantne sigurnosne informacije
Sastavni dijelovi
Instalacija
Upute za uporabu
Kvarovi i popravke
Čišćenje i održavanje
Garancija
EU izjava o sukladnosti
Skica
36
36
37
38
41
42
43
43
43
44

4RODI INDUSTRIES, S.A. |
Guia de utilização do
triturador RODI
O triturador R300 da RODI é um equipamento doméstico de alta abilidade.
Ajuda a lidar facilmente com os resíduos alimentares antes e depois das refeições e é de fá-
cil utilização. No uso deste equipamento comece por abrir a misturadora, deixando a água a
correr. Em seguida ligue o triturador, despeje os resíduos alimentares orgânicos no interior do
triturador. Este irá triturar os alimentos até estes se transformarem em pequenos grãos que
serão depois esmagados e evacuados pela canalização.
Informação de segurança relevante
Leia e guarde, o Guia de utilização antes de instalar o equipamento. Determine quais as
ferramentas e materiais que necessitará antes de começar. Caso surja alguma dúvida, con-
tacte os serviços da RODI.
Ao utilizar o triturador RODI, devem ser sempre seguidos os cuidados básicos, incluindo:
A partir do momento em que ligar o equipamento, não coloque as suas mãos ou dedos
dentro da câmara de trituração;
Antes de proceder à limpeza, tentar desimpedir um entupimento ou retirar objetos do
interior do triturador, certique-se que este se encontra desligado da corrente elétrica;
Para remover ou desobstruir resíduos acumulados dentro da câmara use um instru-
mento comprido ou uma pinça;
Este equipamento foi concebido para eliminar resíduos alimentares orgânicos domésticos.
A introdução de materiais para além de resíduos alimentares orgânicos no triturador
poderá provocar ferimentos pessoais e/ou danos materiais;
Não coloque os seguintes componentes dentro do triturador:
Cascas de marisco e bivalves;
Soda cáustica ou produtos de limpeza similares;
Vidro, porcelana, plástico ou metal (tais como caricas, latas, utensílios);
Ossos grandes (inteiros), maçarocas inteiras;
Gorduras ou outros líquidos quentes;
Não elimine os seguintes materiais no triturador:
Tintas, solventes, produtos de limpeza doméstica e substâncias químicas, líquidos
para automóveis, pelicula aderente, folha/papel de alumínio.
Se não tiver conhecimentos na área da eletricidade, por favor, contacte um técnico qua-
licado para o efeito.
Perigo de Fuga: Inspecione regularmente o equipamento e as canalizações quanto a
fugas de água, que podem originar danos materiais e ferimentos pessoais;
Perigo de Incêndio: Não guarde objetos inamáveis, tais como trapos, papel ou latas
de aerossóis perto do equipamento.
PT
EN
FR
ES
5RODI INDUSTRIES, S.A. |
Conjunto de Montagem
Tampa
Proteção de salpicos
Dedal
Junta de borracha
Junta de bra
Anel de aperto
Anel metálico de montagem
Vedação elastomérica
Entrada da máquina de lavar louça
Saída de descarga
Tubo de descarga em cotovelo
Flange metálica do sifão
Parafusos
Botão vermelho de reset
Número de série
Tampa de proteção do triturador
Utensílio multifunção
Conjunto de interruptor de ar
Tubo (1420mm)
1
1
2
2
3
4
5
6
7
8
9
10
11
12
13
14
15
16
17
18
19
3
4
5
6
7
8
9
11
12
13
10
17 18
14
15 16
19
PT
EN
FR
ES

6RODI INDUSTRIES, S.A. |
Instalação dos elementos
Atenção: Este equipamento já vem montado de fábrica. Observe cuidadosamente todas as
partes do processo de instalação dos dispositivos de xação antes de instalar.
Instale a junta de borracha de acordo com o seguinte método:
Rode o anel metálico de montagem na dire-
ção dos ponteiros do relógio, separando-o do
corpo do equipamento.
Retire o anel de aperto e a junta de bra do
dedal. O dedal e a junta de borracha devem
car juntos.
Eleve o anel metálico de montagem até ao
dedal (B1). Retire primeiro a vedação elasto-
mérica (B2) e só depois o anel metálico de
montagem (B3).
Insira a junta de bra e o anel de aperto , desde a
zona inferior do lava-louça até ao dedal. Aperte-
-o no sentido das setas até que o dedal deixe
de oscilar (D1). Depois coloque o tampão de
vedação e cubra de água até este car sub-
merso. Inspecione se está tudo bem vedado
para evitar perdas de água (D2).
AB
DC
D1
D2
B1
B2
B3
3
3
4
4
1
5
5
6
6
PT
EN
FR
ES

7RODI INDUSTRIES, S.A. |
Coloque o anel metálico de montagem
quando instalar a vedação elastomérica.
Prenda o anel do dissipador da vedação
elastomérica (esta deve ser colocada com
a parte mais larga para baixo). Suba o anel
metálico de montagem para permitir colo-
car a vedação elastomérica. Use os dedos
para premir, suavemente, ao longo de toda
a margem da vedação elastomérica. Deixe o
anel metálico de montagem cair sobre a ve-
dação elastomérica e verique que está devi-
damente xada.
Conectar o tubo de descarga em cotovelo
ao corpo do triturador. Certique-se que
o o-ring de vedação ca bem colocado e
aperte os parafusos. Verique que não há
fugas de água.
Aponte o corpo do triturador à parte de
baixo dos dispositivos de xação e prenda
o trinco do equipamento no anel metálico
de montagem (G1). Rode o anel metálico
de montagem para a direita cerca de 6mm
(G2). Deixe o equipamento temporariamen-
te fechado.
Fixação do tudo de escoamento Conexão do corpo do triturador com os
elementos
ADVERTÊNCIA: A conexão elétrica
deste equipamento deve ser feita
por um prossional qualicado. Não
ligue o equipamento antes da sua
completa instalação.
E
F G
G1
G2
PT
EN
FR
ES

8RODI INDUSTRIES, S.A. |
Rode o anel metálico de montagem e o cor-
po de equipamento até que o tubo de esco-
amento do triturador esteja alinhado pelo
tubo da canalização.
Rode o anel metálico de montagem para a
direita até que esteja totalmente enroscado.
Coloque o trinco do equipamento na posi-
ção mais à esquerda do anel de montagem.
NOTA: Coloque algum lubricante no trinco e no anel
metálico de montagem se não estiverem a deslizar
corretamente. Abra a misturadora e verique se há fugas
de água.
Remova a anilha de xação no sentido das
setas (J1). Conecte o tubo de ar comprimido
ao interruptor (J2). Insira o interruptor já liga-
do ao tubo de ar comprimido no furo desti-
nado à sua instalação (J3). Volte a colocar a
anilha de xação no sentido das setas (J4).
Verique que ca devidamente xado.
Conecte o tubo de ar comprimido ao tritura-
dor (J5).
H I
J
J1
J3
J4
J5
J2
35 mm
Conexão do interruptor de ar ao triturador
PT
EN
FR
ES

9RODI INDUSTRIES, S.A. |
Proceda de acordo com o seguinte método para conetar o anti-inundação ao triturador,
caso necessário:
1. Retire o botão que fecha a entrada para o
lava-louça situado no triturador.
2. Este botão sai facilmente com a ajuda de
um martelo e uma chave de fendas (não uti-
lizar ferramentas de corte).
3. Uma vez caído dentro do triturador, retire
o botão antes de instalar o equipamento (se
não o retirar este será triturado quando ligar
o triturador, mas este processo demorará al-
guns segundos).
Opção de conexão ao anti-inundação
O equipamento usa um impulsor circundante anti encravamento, pelo que é normal que
faça algum barulho quando o iniciamos.
Retire a tampa de vedação, abra a misturadora e ajuste para uma quantidade modera-
da de água.
Ligue o equipamento no interruptor. A partir deste momento, o triturador está a traba-
lhar e disponível para utilizar.
Insira os desperdícios de comida lentamente. Para que o triturador funcione de for-
ma eciente, os desperdícios deveram estar em bocados pequenos. É normal que o
equipamento reduza a velocidade quando começa a desfazer os desperdícios, pois o
triturador ajusta a potência do movimento de torção (velocidade de esmagamento) de
acordo com a necessidade.
No nal da operação, mantenha a água a correr por mais 30 segundos. Esta operação
garante que todo o lixo é descarregado.
Não use água quente na utilização deste equipamento. A água fria é suciente para
assegurar que os desperdícios de comida e gordura, no estado sólido, são lavados.
Se o botão “reset” se desligar enquanto a máquina estiver a trabalhar, espere um minu-
to e volte a clicar no botão “reset”.
O cabo de alimentação da máquina preenche os requisitos nacionais e não precisa de
ser substituído. No entanto, se tal se vericar necessário, por favor, contacte um pros-
sional.
Instruções de operação
Ligação anti-inundação
Ligação máquina
de lavar louça
PT
EN
FR
ES

10RODI INDUSTRIES, S.A. |
Falha ao ligar
Desligue o equipamento e retire a vedação
contra salpicos. Use uma colher para rodar o
disco e vericar se está a rodar suavemente.
Se o disco estiver a rodar suavemente, volte a
colocar a vedação contra salpicos e verique:
- Se a tomada elétrica está com corrente;
- Volte a conectar o cabo de alimentação
elétrica à tomada;
- Verique se o tubo de ar que conecta o in-
terruptor ao corpo do triturador está bem
ligado e/ou se existe água no seu interior. Se
houver água, proceda à sua remoção e volte
a fazer a sua conexão.
- Ligue o equipamento normalmente no in-
terruptor de ar, pressione o botão reset (14)e
verique se funciona.
Se cumprindo estes passos o equipamento
não funcionar, talvez o problema esteja den-
tro do equipamento. Pode precisar de ser
reparado ou mesmo trocado.
Fugas
Se o equipamento estiver com fugas:
1. Verique se a junta/vedação estão bem aplicadas;
2. A instalação do anel de aperto não está correta;
3. Há algo de errado com a vedação elastomérica. Se a fuga é na zona lateral do tubo curvo
de escoamento, provavelmente os parafusos não estão bem apertados ou estão fora da sua
posição.
Muito ruído
Caso caia algo no triturador como, por
exemplo, uma colher, desligue o triturador
incluindo corrente elétrica e feche a mistu-
radora imediatamente. Após o equipamen-
to parar de funcionar completamente, retire
a proteção contra salpicos. Depois, use uma
ferramenta comprida ou uma pinça para re-
tirar o objeto e volte a colocar a vedação para
salpicos. Ligue o equipamento e teste-o.
O disco não roda suavemente
Verique se há alguma impureza no impul-
sor ou na zona de trituração. Use uma co-
lher, por exemplo, para rodar o disco e retirar
a impureza. Se não houver nada dentro do
equipamento, então o problema poderá es-
tar dentro do equipamento.
Falhas e Reparações
14
PT
EN
FR
ES

11RODI INDUSTRIES, S.A. |
O motor do triturador já tem lubricação própria. Não use mais nenhum lubricante!
O equipamento tem um sistema de auto limpeza. Este equipamento tem incluída uma
vedação contra salpicos amovível. Esta é fácil de remover e limpar. Só necessita de a retirar
do lava-louça e, após limpar, voltar a coloca-la no sítio.
Não despeje detergentes, lixívia ou produtos químicos no equipamento, para evitar a cor-
rosão do metal que se encontra no interior do triturador.
Não seremos responsáveis por qualquer problema relacionado com qualquer dos assuntos
mencionados acima. O contínuo uso da água vai originar o assentamento de substância
minerais e o aparecimento de marcas de água. Mas, não se preocupe, porque o material a
partir do qual é feita a parte interior do triturador R300 da RODI, é 100 % aço inoxidável.
Limpeza e manutenção
RODI INDUSTRIES, S.A. declara que o presente equipamento encontra-se em conformida-
de com a diretiva baixa tensão 2014/35/EU.
O texto integral da declaração de conformidade está disponível no nosso site na internet:
https://sinks.rodi.pt/en/product/accessories/waste-disposer/
Garantia
Declaração de conformidade EU
O Triturador R300 tem garantia contra qualquer defeito de fabrico no período de dois anos
após a sua aquisição.
Duração da garantia: a partir da data de compra junto do nosso distribuidor onde adquiriu
o equipamento.
Triturador defeituoso: durante o período de garantia, um triturador com defeito ou que não
funcione corretamente será alvo de análise e diagnóstico.
Mudança de proprietário do triturador: a garantia é considerada válida a partir da data em
que foi comprado pelo primeiro proprietário.
Uso indevido do triturador: a garantia não se aplica a trituradores usados indevidamente,
que tenham sido modicados, instalados incorretamente ou com um uso diferente do
doméstico para o qual se destina.
Número do modelo e série: encontrará esses números na placa de série do triturador.
Estes devem ser fornecidos sempre que contactar o distribuidor onde adquiriu
o equipamento.
A garantia só é válida com comprovativo de compra do triturador.
PT
EN
FR
ES

12RODI INDUSTRIES, S.A. |
RODI waste disposal
usage guide
The R300 waste disposal from RODI is a highly reliable domestic equipment.
It helps to deal with food waste easily before and after meals and is easy to use. When using
this equipment, start by opening the water mixer, allowing the water to ow. Then turn
on the waste disposal, pour organic food waste into the waste disposal. This will crush the
food until it becomes small grains which will then be crushed and evacuated through the
pipeline.
Relevant security information
Read and save the User Guide before installing the equipment. Determine what tools and
materials you will need before you begin. If you have any questions, contact RODI services.
When using the RODI shredder, basic rules must always be followed, including:
From the moment you turn on the equipment, do not put your hands or ngers inside
the crushing chamber;
Before cleaning, trying to clear a clog or removing objects from inside the shredder,
make sure that it is disconnected from the electric system;
To remove or unclog accumulated residues inside the chamber, use a long instrument
or a clamp;
This equipment is designed to eliminate domestic organic food waste. The introduction
of materials other than organic food residues in the waste disposal may cause personal
injury and/or material damage;
Do not place the following components inside the shredder:
Shellsh shells and shellsh;
Lye or similar cleaning products;
Glass, porcelain, plastic or metal (such as caps, cans or other metal utensils);
Large bones (whole), whole cobs;
Fat, oil or any other hot liquids;
Do not dispose of the following materials in the waste disposal:
Paints, solvents, household cleaning products and chemicals, automotive liquids,
cling lm, aluminum foil/paper;
If you are not familiar with electricity, please contact a qualied technician for any ins-
tallation or maintenance operation.
Leakage Hazard: Regularly inspect the equipment and plumbing for leaks, which can
lead to property damage and personal injury;
Fire Hazard: Do not store ammable objects, such as rags, paper, or aerosol cans, near
the equipment.
PT
EN
FR
ES

13RODI INDUSTRIES, S.A. |
Mounting Set
Cover
Splash protection
Thimble
Rubber gasket
Fiber joint
Clamping ring
Metal mounting ring
Elastomeric seal
Dishwasher entry
Discharge outlet
Elbow discharge tube
Siphon metal ange
Screws
Red reset button
Serial number
Waste disposal protection cover
Multifunction tool
Air switch assembly
Tube (1420mm)
1
1
2
2
3
4
5
6
7
8
9
10
11
12
13
14
15
16
17
18
19
3
4
5
6
7
8
9
11
12
13
10
17 18
14
15 16
19
PT
EN
FR
ES

14RODI INDUSTRIES, S.A. |
Installing the elements
Attention: This equipment is already assembled at the factory. Carefully observe all parts of
the xture installation process before installing.
Install the rubber gasket according to the following method:
Rotate the metal mounting ring clockwise, se-
parating it from the equipment body.
Remove the clamping ring and ber joint
from the thimble. The thimble and the rub-
ber gasket should be together.
Raise the metal mounting ring to the thim-
ble (B1). First remove the elastomeric seal
(B2) and then the metal mounting ring (B3).
Insert the ber gasket and the clamping ring
from the bottom of the dishwasher to the thim-
ble. Tighten it in the direction of the arrows until
the thimble stops oscillating (D1). Then place the
sealing plug and cover with water until it is sub-
merged. Check that everything is well sealed to
avoid water loss (D2).
AB
DC
D1
D2
B1
B2
B3
3
3
4
4
1
5
5
6
6
PT
EN
FR
ES

15RODI INDUSTRIES, S.A. |
Place the metal mounting ring when ins-
talling the elastomeric seal. Attach the heat-
sink ring to the elastomeric seal (this should
be placed with the widest part facing down).
Raise the metal mounting ring to allow pla-
cing the elastomeric seal. Use your ngers
to gently press along the entire edge of the
elastomeric seal. Let the metal mounting
ring fall on the elastomeric seal and check
that it is properly xed.
Connect the elbow discharge pipe to the
waste disposal body. Make sure that the sea-
ling o-ring is in place and tighten the screws.
Check that there are no water leaks.
Aim the waste disposal body at the bottom
of the xing devices and secure the equip-
ment latch to the metal mounting ring (G1).
Rotate the metal mounting ring to the right
about 6mm (G2). Leave the equipment tem-
porarily closed.
Fixing the drain hose Connection of the waste disposal body
with the elements
WARNING: The electrical connection
of this equipment must be made by
a qualied professional. Do not turn
on the equipment before its complete
installation.
E
F G
G1
G2
PT
EN
FR
ES

16RODI INDUSTRIES, S.A. |
Rotate the metal mounting ring and the
equipment body until the drain pipe of the
waste disposal is aligned with the pipe of the
plumbing.
Rotate the metal mounting ring to the ri-
ght until it is fully threaded. Place the equi-
pment latch in the leftmost position of the
mounting ring.
NOTE: Put some lubricant on the latch and on the metal
mounting ring if they are not sliding correctly. Open the
mixer and check for water leaks.
Remove the xing washer in the direction of
the arrows (J1). Connect the compressed air
tube to the switch (J2). Insert the switch al-
ready connected to the compressed air tube
into the hole for your installation (J3). Replace
the xing washer in the direction of the arro-
ws (J4). Check that it is properly xed.
Connect the compressed air tube to the wa-
ste disposal (J5).
H I
J
J1
J3
J4
J5
J2
35 mm
Connecting the air switch to the crusher
PT
EN
FR
ES

17RODI INDUSTRIES, S.A. |
Proceed according to the following method to connect the overow to the crusher, if ne-
cessary:
1. Remove the button that closes the
entrance to the dishwasher located in the
disposer.
2. This button comes out easily with the help
of a hammer and screwdriver (do not use
cutting tools).
3. Once dropped into the shredder, remove
the button before installing the equipment
(if you do not remove it, it will be shredded
when you turn on the shredder, but this pro-
cess will take a few seconds).
Connection option to overow
The equipment uses a surrounding anti-jamming impeller, so it is normal for it to make
some noise when we start it.
Remove the sealing cap, open the water mixer and adjust to a moderate amount of
water.
Turn the equipment on at the switch. From now on, the waste disposal is working and
available for use.
Insert food waste slowly. For the shredder to work efciently, the waste must be in small
pieces. It is normal for the equipment to reduce the speed when it starts to crush the
waste, as the waste disposal adjusts the power of the twisting movement (crushing
speed) according to the need.
At the end of the operation, keep the water running for another 30 seconds. This opera-
tion ensures that all waste is discharged.
Do not use hot water when using this equipment. Cold water is sufcient to ensure that
waste food and fat, in the solid state, is washed away.
If the “reset” button turns off while the machine is working, wait a minute and click the
“reset” button again.
The machine’s power cable meets national requirements and does not need to be re-
placed. However, if necessary, please contact a professional.
Operating instructions
Overow connection
Dishwasher connection
PT
EN
FR
ES

18RODI INDUSTRIES, S.A. |
Failure to start
Turn the equipment off and remove the
splash seal. Use a spoon to rotate the disc and
check that it is turning smoothly. If the disc is
turning smoothly, replace the splash seal and
check:
- If the electrical outlet is connected;
- Reconnect the power cord to the outlet;
- Check that the air tube that connects the
switch to the shredder body is properly con-
nected and / or that there is water inside. If
there is water, remove it and reconnect it.
- Turn the equipment on normally at the air
switch, press the reset button (14) and check
that it works.
If following these steps, the equipment does
not work, perhaps the problem is within the
equipment. It may need to be repaired or
even replaced.
Leaks
If the equipment is leaking:
1. Check that the gasket/seal is properly applied;
2. The installation of the clamping ring is not correct;
3. There is something wrong with the elastomeric seal. If the leak is in the side of the curved
drainpipe, the screws are probably not tightened or are out of position.
Too much noise
If something falls into the shredder, such
as a spoon, turn off the shredder including
electric current and close the waste mixer
immediately. After the equipment comple-
tely stops working, remove the splash guard.
Then use a long tool or clamp to remove the
object and replace the splash seal. Turn on
the equipment and test it.
The disc does not rotate smoothly
Check for garbage or debris in the impeller
or crushing zone. Use a spoon, for example,
to rotate the disc and remove the debris. If
there is nothing inside the equipment, then
the problem may be inside the equipment.
Faults and repairs
14
PT
EN
FR
ES

19RODI INDUSTRIES, S.A. |
The waste disposal motor already has its own lubrication. Do not use any more lubricant!
The equipment has a self-cleaning system. This equipment has a removable splash guard.
This is easy to remove and clean. You just need to remove it from the dishwasher and, after
cleaning, put it back in place.
Do not pour detergents, bleach or chemicals into the equipment to avoid corrosion of the
metal inside the shredder.
RODI cannot be held responsible for any problems related to any of the matters mentio-
ned above. Continued use of water will cause mineral substances to settle and water marks
to appear. But don’t worry, because the material from which the interior part of the RODI
R300 waste disposal is made is 100% stainless steel.
Cleaning and maintenance
RODI INDUSTRIES, S.A. declares that this equipment is in compliance with the European
Directive for low voltage products EU/2014/35.
The full text of the declaration of conformity is available on our website: https://sinks.rodi.
pt/en/product/accessories/waste-disposer/
Warranty
EU Declaration of Conformity
The R300 Waste disposal is guaranteed against any manufacturing defect within two years
from the purchase date.
Warranty duration: 2 year from the date of purchase of the equipment.
Defective crusher: during the warranty period, a defective or malfunctioning waste disposal
will be subject to analysis and diagnosis.
Change of owner of the shredder: the warranty is considered valid from the date it was
purchased by the rst owner.
Misuse of the product: the warranty does not apply to waste disposals used improperly, that
have been modied, installed incorrectly or with a different use than the domestic one for
which it is intended.
Model and serial number: you will nd these numbers on the waste disposal serial plate.
These elements must be provided whenever you contact the distributor where you
purchased the equipment.
The warranty is only valid with proof of purchase of the waste disposal.
PT
EN
FR
ES

20RODI INDUSTRIES, S.A. |
Guide d’utilisation du
broyeur RODI
Le broyeur R300 de RODI est un équipement domestique de haute abilité.
Il aide à gérer facilement les déchets alimentaires avant et après les repas et il est facile
à utiliser. Lors de l’utilisation de cet équipement, commencez par ouvrir le mitigeur pour
permettre à l’eau de s’écouler. Allumez ensuite le broyeur, versez les déchets alimentaires
organiques dans le broyeur. Cela écrasera la nourriture jusqu’à ce qu’elle devienne de petits
grains qui seront ensuite écrasés et évacués par la tuyauterie.
Information de sécurité importante
Lisez et conservez le guide de l’utilisateur avant d’installer l’équipement. Déterminez de
quels outils et de quel matériel vous aurez besoin avant de commencer. Si vous avez des
questions, contactez les services RODI.
Lors de l’utilisation du broyeur RODI, des soins de base doivent toujours être suivis, no-
tamment:
À partir du moment où vous allumez l’équipement, ne mettez pas vos mains ou vos
doigts dans la chambre de broyage;
Avant de nettoyer le broyeur, essayer de dégager une obstruction ou de retirer des ob-
jets de l’intérieur du broyeur, assurez-vous qu’il est déconnecté du courant électrique;
Pour enlever ou déboucher les déchets accumulés à l’intérieur de la chambre, utilisez
un instrument long ou une pince à épiler;
Cet équipement est conçu pour éliminer les déchets alimentaires organiques domesti-
ques. L’introduction de matériaux autres que des résidus d’aliments biologiques dans le
broyeur peut provoquer des blessures et/ou des dommages matériels;
Ne placez pas les composants suivants à l’intérieur du broyeur:
Coquillages et crustacés;
Soude caustique ou produits de nettoyage similaires;
Verre, porcelaine, plastique ou métal (comme les bouchons, les canettes, les usten-
siles);
Gros os (entiers), épis entiers;
Les graisses ou autres liquides chauds;
Ne jetez pas les matériaux suivants dans le broyeur:
Peintures, solvants, produits de nettoyage ménagers et produits chimiques,
liquides automobiles, pellicule plastique, papier aluminium/papier;
Si vous n’êtes pas familiarisé avec le domaine de l’électricité, veuillez contacter un tech-
nicien qualié.
Risque de fuite: inspectez régulièrement l’équipement et la plomberie pour détecter
les fuites, ce qui peut entraîner des dommages matériels et des blessures corporelles ;
Risque d’incendie: ne stockez pas d’objets inammables, tels que des chiffons, du pa-
pier ou des bombes aérosol à proximité de l’équipement.
PT
EN
FR
ES
Table of contents
Languages: