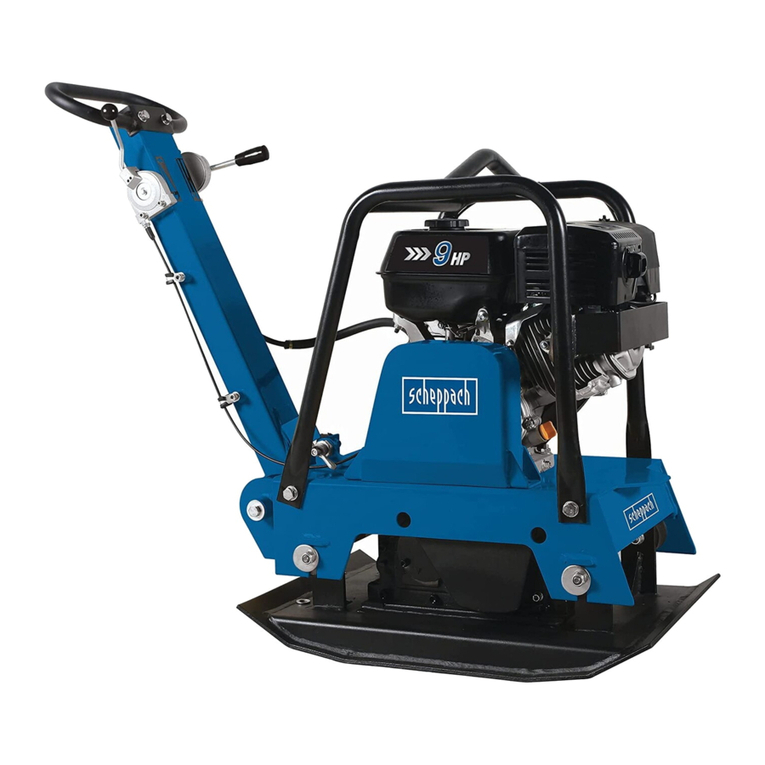
Crommelins CC40HP Administrator Guide

1
CROMMELINS™ COMPACTORS
Thank you for your selection of a CROMMELINS™ Compactor.
This Operation Manual explains its use, installation, checking and maintenance.
We highly recommend that you retain this manual for ready reference.
Spare Parts & Service
Phone: 1300 554 524
Freecall Fax: 1800 636 281
spareparts@crommelins.com.au
www.crommelins.com.au
OPERATION & INSTRUCTION MANUAL

2
Thank you very much for purchasing a CROMMELINS™ COMPACTOR.
This manual covers the operation and maintenance of the your compactor. These models
are built to industry best standards, for use in mining, construction, hire industries and
general use.
Please take a moment to familiarise yourself with the proper operation and maintenance
procedures in order to maximise the safe and efficient use of this product.
Keep this owner’s manual at hand, so that you can refer to it at any time.
Due to constant efforts to improve our products, certain procedures and specifications
are subject to change without notice.
When ordering spare parts please have handy your products model number and serial
number. Record these numbers in the boxes below for future reference.
Please fill in the following blanks after checking the production number and serial
number on your product. (The location of these numbers may vary).
CONTENTS
Introduction & contents ...................................................................................... 2
Warranty ............................................................................................................... 3
Safety .................................................................................................................... 4
Pre-operation checkup ......................................................................................... 5
Starting your compactor …..………………………………………......................................... 5
Hints of operation ................................................................................................. 6
Stopping your compactor ……................................................................................. 6
Maintenance, belt setting & storage .................................................................. 7
Specifications charts .......................................................................................... 8
Trouble shooting ................................................................................................. 9
CC40HP Exploded drawing & parts list .................................................................. 10
CC60 Exploded drawing & parts list ....................................................................... 11
CC70 Exploded drawing & parts list ....................................................................... 12
CC70 Folding handle exploded drawing & parts list .............................................. 13
CC90 Exploded drawing & parts list ...................................................................... 14
SERIAL NO.
MODEL NO.

3
WARRANTY
CROMMELINS™ and CROMTECH™ are a registered trademark of Crommelins Machinery.
Crommelins warrants their goods against defects in materials and workmanship under
normal use and service. Crommelins Machinery warranty does not cover fair wear
commensurate with the age of the product, any damage caused by accident, abuse,
misuse, neglect or failure to observe proper operating instructions or proper machinery
maintenance as described in the instruction manual.
It is the owner’s responsibility to regularly maintain a product in accordance with the
owner’s manual and only use the equipment for its designed purpose.
Our goods come with guarantees that cannot be excluded under the Australian Consumer
Law. You are entitled to a replacement or refund for a major failure and for compensation
for any other reasonably foreseeable loss or damage. You are also entitled to have goods
repaired or replaced if the goods fail to be of acceptable quality and the failure does not
amount to a major failure.
CONSUMER ADVICE
Any claim under these warranties must be made in the warranty period from the date of
purchase of the product.
To make a claim under the warranty, you must return the product (with proof of purchase)
to the closest warranty agent or to the place of purchase.
There are over 185 national authorised service/repair agents available, visit
www.crommelins.com.au for their details and locations.
Where a failure does not amount to a major failure, Crommelins Machinery is entitled to
choose between providing you with a repair, replacement or refund. To obtain
compensation, you would need to provide documentary evidence of the loss or damage
suffered, and documentary evidence that such loss or damage was a reasonably
foreseeable consequence of a failure by Crommelins Machinery to comply with a consumer
guarantee under the Australian Consumer Law.
Crommelins Operations Pty Ltd trading as Crommelins Machinery and Crommelins
Australia.
CROMMELINS MACHINERY:
Ph: (08) 9350 5588 Fax: (08) 9451 6381
reception@crommelins.com.au
www.crommelins.com.au
PO Box 352, BENTLEY WA 6982
ABN 11 008 889 656

4
SAFETY
This manual contains important information on how to use the Crommelins compactor
models properly and safely. Please read through this manual before you attempt to
operate this product.
Ensure safe operation, this compactor is designed to give safe and dependable service if
operated according to the instructions.
•Always make a pre-operation inspection before starting the engine. (For more
information read engine operational manual)
•Stay AWAY from base plate during operation.
•Do not place flammable objects near the unit.
•Children and pets must always keep away from the area of operation.
•Never allow anyone to operate the unit without proper instructions.
•Must know how to stop the engine quickly and understand the operation of all controls.
•Be careful with the operating place and ventilation, avoid operating the machine in a
closed room, tunnel or other badly ventilated places, as its exhaust fumes contain
deadly poisonous carbon monoxide. If the machine is unavoidably operated in such a
place, discharge the exhaust fumes outside the room by a suitable means.
•Mufflers and other hot parts are dangerous. Do not touch them with hands or any other
body parts.
•Observe the following cautions when transporting. Close fuel tank cap securely and
close fuel tap tightly during transportation. Drain petrol or diesel from fuel tank before
transporting over a long distance or on rough roads.
•Stop engine without fail before replenishing fuel tank. Never replenish fuel while the
engine is running or remains hot otherwise spilled or evaporated fuel is liable to catch
fire from the engine spark or muffler heat. Wipe off spilled fuel before starting engine.
To prevent injury, wear the following protective clothing: Gloves, hard hat, work boots, ear
plugs, safety goggles and any other protective items required by job conditions.

5
PRE-OPERATION
•Consult engine manual for detailed starting information.
•Check all bolts and screws for tightness. Loose bolts and screws may cause damage to
the unit.
•Make sure that all dirt, mud, etc., are thoroughly removed from areas such as cooling air
inlet of engine, carburettor, and air cleaner.
•Check V-belt tightness. The normal slack should be approximately 10-15mm (1/2”) when
the belts are forcibly depressed in the middle position between two pulleys. To set belt
tightness; refer to Belt Setting at page 3.
•Check fuel level and refill as required.
•Check engine oil level. If engine oil level is low, refill it with the correct engine oil as
stated in the engine manual.
CAUTION! – Make sure nobody is in the vicinity of the compactor when starting the engine;
it might move suddenly with force.
STARTING PETROL COMPACTOR
STEP 1 – Turn fuel tap to ON position.
STEP 2 – Set throttle lever to LOW (starting position).
STEP 3 – For cold engine starting, close choke lever.
STEP 4– Set engine switch to ON.
STEP 5 – Pull recoil start handle to point of resistance, carefully return handle, then pull
smoothly and swiftly to START.
DO NOT pull recoil starter rope to the end as it may cause damage. When the rope is pulled
out, carefully return the rope slowly. Do not let the rope snap back.
STEP 6 – As the engine warms up return the choke to the open position. The warmup
procedure should particularly be followed during cold weather.
STARTING DIESEL COMPACTOR (REFER TO ENGINE MANUAL)
STEP 1 – Turn fuel tap to ON position.
STEP 2 – Set throttle lever to LOW (starting position).
STEP 3 – Engine is fitted with automatic decompression.
STEP 4– Set engine switch to ON.
STEP 5- Pull recoil start handle to point of resistance, carefully return handle, then pull
smoothly and swiftly to START.
DO NOT pull recoil starter rope to the end as it may cause damage. When the rope is pulled
out, carefully return the rope slowly. Do not let the rope snap back.

6
HINTS OF OPERATION
•During uphill compaction, it may be necessary to swing the handle over and pull the
machine slightly.
•When compacting on a sloping terrain, the machine may tend to slide sideways. The
operator must steer toward the rise causing the machine to travel at an angle. DO
NOT operate on inclines of more than 20 degrees.
•When operating the machine in wet or damp soil, it may occasionally be required to
clean the bottom of the base plate. Mud accumulation on the base plate will slow the
machine down and prevent efficient soil compaction.
•When operating this compactor on asphalt surface, it is recommended that light oil or
kerosene be applied to the bottom of the base plate to prevent asphalt sticking and/or
accumulation.
•Operating the machine on a fully compacted, hard, or non-yielding surface will cause it
to bounce and damage exciter bearings and will greatly reduce the life of the machine.
Reduce engine speed to eliminate bounce.
•When transporting the unit ensure the fuel tap is turned OFF to prevent flooding.
STOPPING PETROL COMPACTOR
STEP 1 – Set throttle lever to LOW (starting position). Allow engine to run for 2-3
minutes.
STEP 2 – Set engine switch to OFF position. Ensure the engine stops completely.
STEP 3 – Turn fuel tap to OFF position.
STEP 4– Cover the machine after the muffler has cooled off and keep the
compactor in a dry place.
EMERGENCY SHUTDOWN: Move throttle lever to LOW and set engine switch to
OFF position.
STOPPING DIESEL COMPACTOR
STEP 1 – Set throttle lever to LOW (starting position). Allow engine to run for 2-3
minutes.
STEP 2 – Set engine switch to OFF position. Ensure the engine stops completely.
STEP 3 – Turn fuel tap to OFF position.
STEP 4– Cover the machine after the muffler has cooled off and keep the
compactor in a dry place.

7
MAINTENANCE
CAUTION - FLAMMABLE LIQUID. When performing maintenance, stop engine and do not
smoke in adjacent area.
CAUTION - HIGH TEMPERATURE. Allow machine and engine to cool down before
performing maintenance. Contact with hot components can cause serious injury.
CAUTION - MOVING PARTS. Make sure engine is shut down before maintenance. Contact
with moving parts can cause serious injury.
DAILY SERVICE
•Check air cleaner element and clean as necessary.
•Check engine oil levels.
•Check for any loose fasteners.
•Check belt tension.
WEEKLY SERVICE (every 50 hours of operation)
•Refer to engine service manual.
•Check engine mounts and all bolts and screws for tightness. Loose bolts and
screws may cause damage to the unit.
BELT SETTING
STEP 1 – Loosen engine base bolt (underneath engine) to allow engine-base movement.
STEP 2 – Insert V-belt into clutch pulley and reducer pulley one at a time.
STEP 3 – Adjust the engine position by moving engine-base to ensure v-belts are tight
enough.
IMPORTANT: Normal slack should be approximately 10-15mm (1/2”) when the belts are
forcibly depressed in the middle position between rotor pulley and clutch pulley.
Tighten all engine bolts and cover V-belt and pulley with belt cover, tighten cover bolts.
STORAGE
•Ensure fuel tap is turned OFF position.
•Make sure that the engine is completely cool before storage.
•Clean up oil and dust accumulation on rubber parts.
•Clean the base plate and wipe on a light coat of oil to prevent rust formation.
•Cover the machine and store it in a dry place.
LONG TERM STORAGE
Remove fuel from the fuel tank. Also remove fuel remaining in the fuel line and chamber of
the carburettor. To drain fuel from the chamber of the carburettor, remove the drain plug
provided at the chamber and remove fuel.

8
PLATE COMPACTOR SPECIFICATION CHART
MODEL CC40HP CC60RP CC70RP CC70RD CC70YD CC90RP
Weight (kg) 48kg 68kg 82kg 98kg 95kg 84kg
Frequency(vpm) 5400 5800 6500 6500 6500 6000
Centrifugal Force
(kn) - 12kn 18kn 18kn 18kn 16.5kn
Plate/Shoe Size
(LxW mm)
480x280
mm
520x
360mm
610x
460mm
610 x
460mm
610x
460mm
540x
500mm
Features
Folding
handle &
wheels
Folding
handle &
wheels
Central
exciter Diesel Diesel
Front
clamps
for
isolation
mat.
Engine Make Honda Robin Robin Robin Yanmar Robin
Engine GX100
6.0hp
EX17
6.0hp
EX17
4.8hp
DY23
4.7hp
L48N
6.0hp
EX17
Engine Features
Side
Valve,
Recoil
Start
OHC
Side
Valve,
Recoil
Start
Fuel Type Petrol Petrol Petrol Diesel Diesel Petrol
Fuel Tank 0.77L 3.6L 3.6L 3.2L 2.4L 3.6L
Noise Level
db@7m - 67db 66db 74db
94db at
1m 69db
Manufacturer’s
Warranty 2 years 2 years 2 years 2 years 2 years 2 years
Engine Warranty
See
manual 3 years 3 years 3 years
See
manual 3 years

9
TROUBLE SHOOTING GUIDE
If the compactor malfunctions immediately shut the machine down. Following are some
simple trouble shooting tips:
PROBLEM
CAUSE
SOLUTION
Engine won’t start, or
stops suddenly
1. No fuel in engine
2. Engine switch being
set to “OFF”
3. Spark plug carbonised
4. Fuel strainer clogged
5. Carburettor blocked
1. Refill Fuel
2. Turn the engine switch to
“ON”
3. Clean spark plug or replace it
with a new one
4. Clean fuel strainer
5. Dismantle and clean
carburettor
Engine runs but the
machine does not
produce any vibration
1. Air cleaner element
clogged
2. Lake of engine power
3. Centrifugal clutch is
slipping
4. Improper v-belt
tension, or excessive
wear of v-belt
1. Dismantle the cleaner
element and clean the
element with proper solvent
(see engine manual)
2. Refer to engine manual
3. Dismantle the clutch
assembly and clean the shoe
and drum with proper solvent
4. Adjust the tension or replace
the belt with new one
Slow or irregular
vibration
1. Centrifugal clutch is
slipping
2. Improper v-belt
tension, or excessive
wear of v-belt.
1. Dismantle the clutch
assembly, and clean the
shoe and drum with proper
solvent
2. Adjust the v-belt tension or
replace the belt with a new
one.
IF THE FAULT PERSISTS, CONTACT YOUR LOCAL DEALER.

10
CC40HP EXPLODED DRAWING & SPARE PARTS LIST

11
CC60 EXPLODED DRAWING & SPARE PARTS LIST

12
CC70 EXPLODED DRAWING & SPARE PARTS LIST

13
CC70 - FOLDING HANDLE - EXPLODED DRAWING & SPARE PARTS LIST

14
CC90 EXPLODED DRAWING & SPARE PARTS LIST

15
This manual suits for next models
5
Table of contents
Popular Garbage Disposal manuals by other brands

Teral
Teral DSP-100H-AWV User manual and warranty
Whirlpool
Whirlpool GC1000XE Installation care and use guide
Weber Maschinentechnik GmbH
Weber Maschinentechnik GmbH CR 4 Operating and maintenance instructions
Electrolux
Electrolux COMPACT Series Installation, Operating and Maintenance Instruction

Meiko
Meiko Green BioMaster Slim Standard Operating instruction
Step 2
Step 2 Lakewood owner's manual


